Wednesday, September 30, 2015

How to Paint Over Rubber Floor Tile

Rubber floor tile can become dull over time from wear. You can freshen your rubber tiles with a coat of paint. Be sure to use a paint designed for covering rubber. Visit your local hardware store and speak with a professional about painting rubber tile flooring.

What You'll Need
  • Vacuum machine
  • Primer
  • Paint
  • A paint brush
  • Polyurethane finish

Step 1 – Cleaning the Floor

Use your vacuum to remove any surface dirt and dust from the floor. Fill a bucket with warm water. Add some liquid detergent to the water. Mix the soap into the water. Immerse a sponge into the warm, soapy water. Squeeze out any excess liquid. Use the sponge to wash the floors. Allow the floors enough time to dry.

Step 2 – Applying the Primer

Use your paint brush to apply the primer to the floor. Begin in one corner of the room and work your way back to an exit. Be sure to use long, even strokes. Apply the primer in one direction. Allow the primer to dry thoroughly.

Step 3 – Applying the Paint

Use your paint brush to apply the paint over the primer. Begin in the same corner you used to start applying the primer. Apply the paint in long, even strokes, always working in the same direction. Allow the paint to dry completely. Apply a second coat of paint and allow it to dry. Apply a polyurethane finish over the paint.

Sunday, September 27, 2015

Remove Paint from Rubber Floor Tiles

Rubber floor tiles offer a level of floor protection for your home. Their waterproof and sturdy construction protects high foot traffic areas and carpets. Rubber floor tiles are still prone to being stained by things like paint.

What You'll Need
  • Cream Cleaner
  • Scrubbing Brush
  • Lint Free Cloth
  • Warm Water
  • Turpentine

Step 1 – Turpentine

Dampen the area with some turpentine to thin the paint. If the paint is dried in and oil based, the turpentine will thin the stain so you may use the scrubbing brush and cleaner to remove it later on.

Step 2 – Oil Based Stains

Dab the area with the turpentine and leave it to settle for a few moments. Paint and other oil stains only have a chance of being removed completely if you use a paint thinner and not water.

Step 3 – Scrubbing

Scrub the area with warm soapy water and the scrubbing brush until the stain has all but disappeared. Be cautious not to scrub too hard on the rubber pattern or surface, as you might damage the tiles.

Step 4 – Rinsing

Rinse the tiles with clean, warm water and dab dry with a cloth. Depending on the color of the paint stain you might find some residue. If this happens, just repeat with more turpentine until the stain has gone.

Friday, September 25, 2015

Restoring a 300 year old Flagstone floor

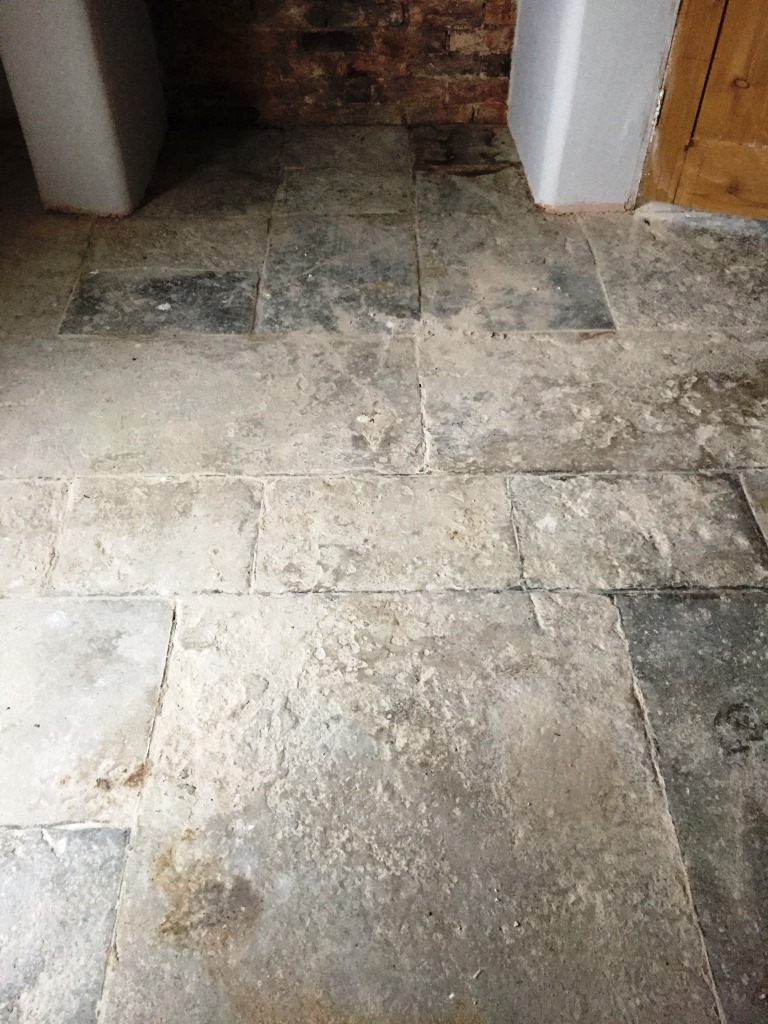
Here's another interesting job I was privileged to work on in the town of Bicester, Oxfordshire. Bicester has a long, rich history - dating back to the Saxon age - but it is also one of the fastest growing in Oxfordshire. In fact, I had an opportunity to experience part of this history when I was called to a house to work on a old Flagstone floor which is believed to be 300-years old. The use of flagstones for both interior and exterior flooring is believed to have been popularised in Europe around the 13th century AD, and flagstone is still commonly used for these purposes today. As one of the few surviving of its kind, this Old-Flagstone-floor- has a preservation order on it - this means that it can't be covered by wood or other tiles.

Old Flagstone floor Bicester Before Cleaning Old Flagstone floor Bicester Before Cleaning

Unfortunately, the rooms in this building were previously used as a sort of 'dumping ground' for builders working on the property, covering the floor with cement, plaster, sealant and glue, while also inflicting significant surface damage. As a result, it would take me three days to restore the Flagstone tiles back to their best possible condition.

Old Flagstone floor Bicester Before Cleaning

Day one: Cleaning Old Flagstones

My first task was removing the medley of muck and dirt left over from the building works from the Flagstone tiles. I did this using a weak solution of Tile Doctor Pro-Clean and clean water (the concentration is adjusted according to the level of soil build-up). Pro Clean mixed with water is my go-to cleaning solution for most natural stone floors as it works well to lift out ingrained dirt and stains. I spread the solution evenly onto the floor and worked it into the stone using a scrubbing brush attached to a floor machine. I then rinsed off the excess cleaner, before sucking up the residue with a wet-vac machine. The second stage of the cleaning process was to strip the floor of any old sealers. This was achieved, working in sections, using Tile Doctor Remove & Go, which can be used on unpolished natural stone floors, along with ceramic tiles, grout, and more. After leaving it to dwell for a short period, I scrubbed a layer of Remove & Go into the tiles using my floor machine and carbon brush. Following this, the floor was once again rinsed and any remaining moisture was removed with the wet-vac machine.
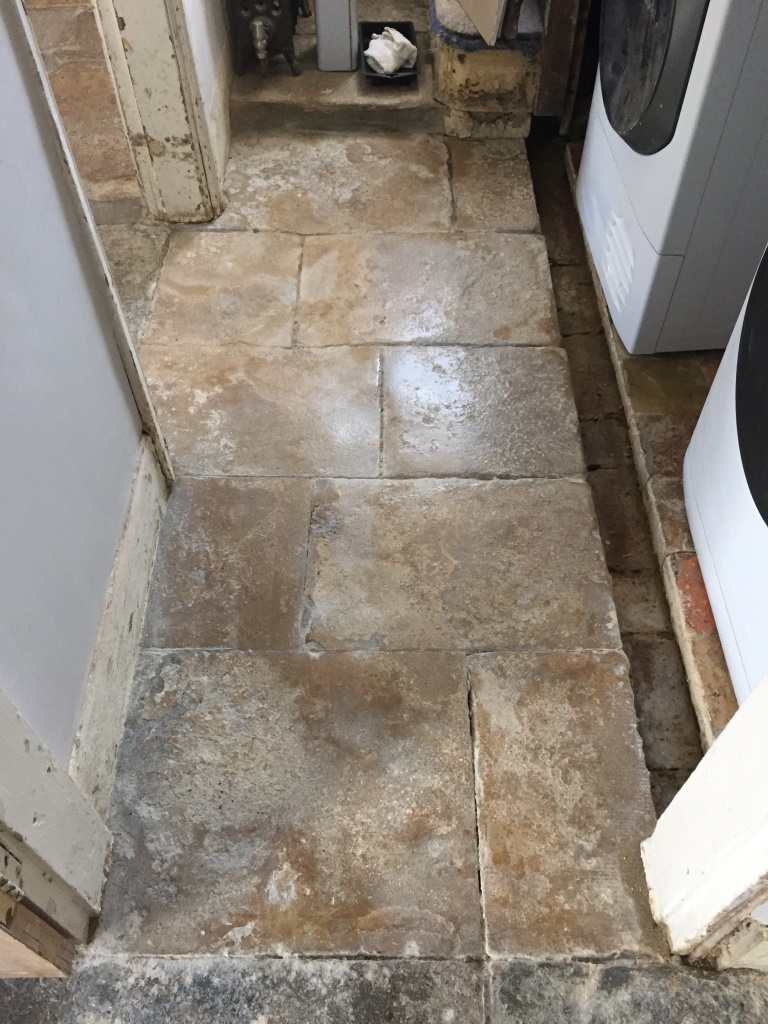
Old Flagstone floor Bicester Before Burnishing

Day two: Burnishing Old Flagstones

After completing the cleaning, I moved on to the burnishing process. To give unpolished surfaces a nice polished look, the best method is to use a series of four diamond encrusted burnishing pads. This is exactly what I did, first using a coarse pad, before gradually moving up through medium and fine, to eventually using a very fine pad to achieve the desired polished effect. This is done without causing any further damage to the surface of the Flagstone tiles.
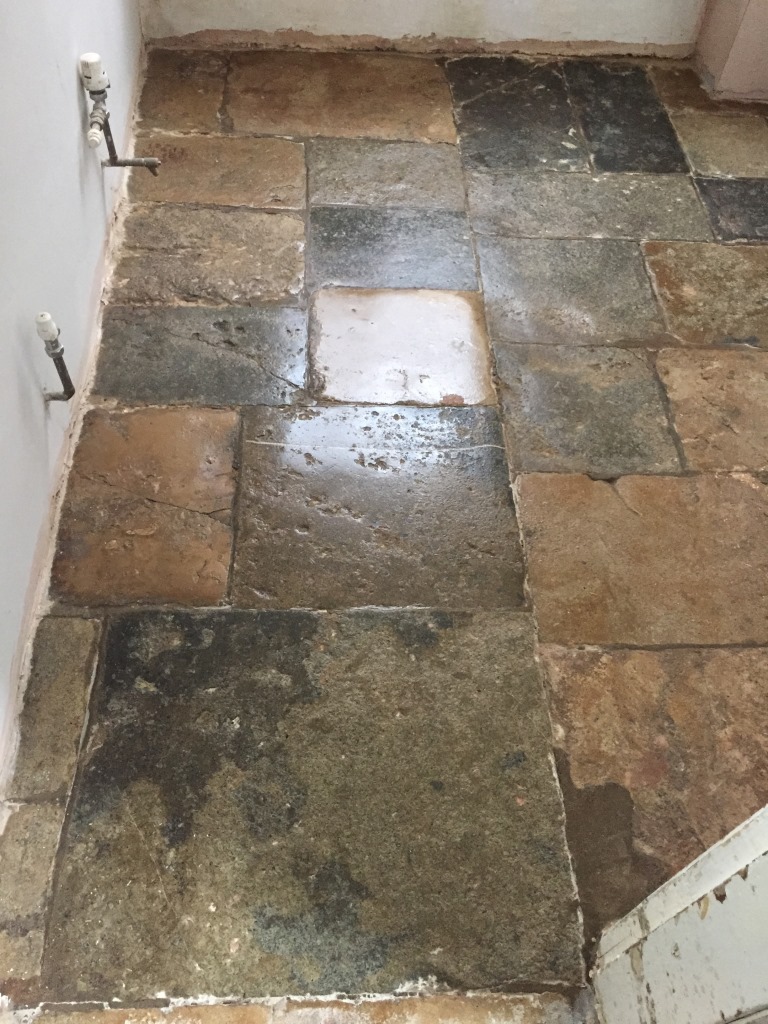
Old Flagstone floor Bicester After Burnishing

Day three: Sealing Old Flagstones

On the final day, I completed the job by sealing the floor. I applied two coats of Tile Doctor Colour Grow, an impregnating sealer which works to provide durable surface protection from within. At the same time, Colour Grow is specially formulated to intensify the natural colours in a majority of different stones including Flagstone, Limestone, Marble, Quarry and Slate, bringing character and life back to otherwise dull surfaces.
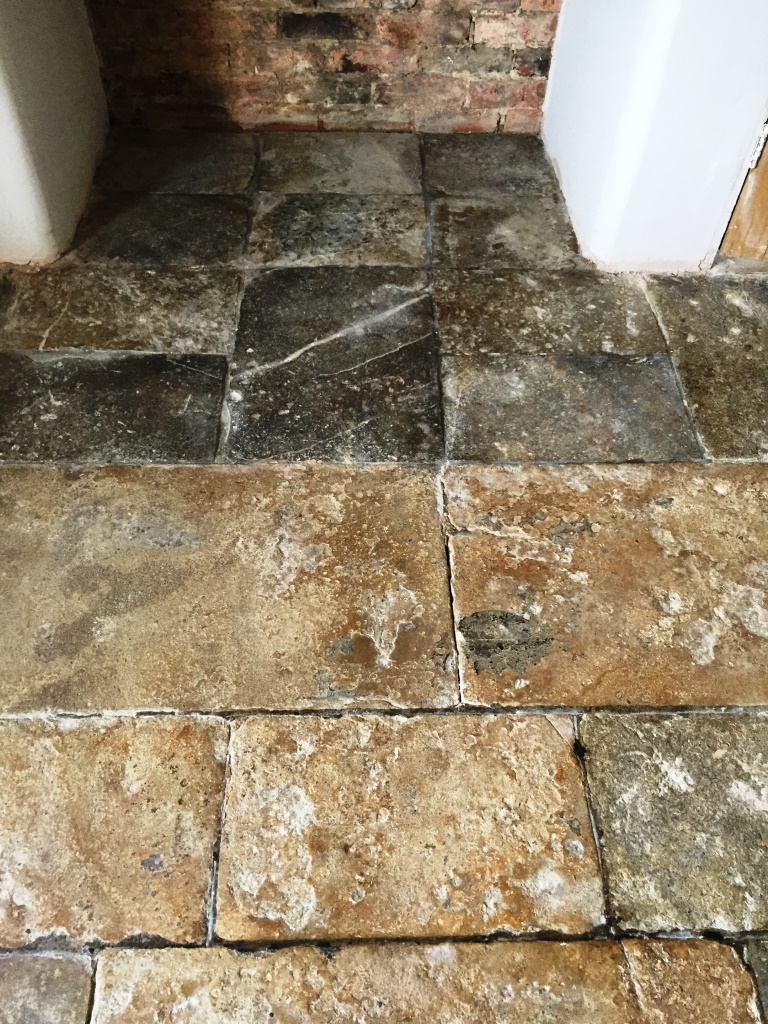
Old Flagstone floor Bicester After Sealing

I'm pleased to say that the finished result exceeded my client's expectations, especially considering the extent of surface damage and neglect the floor had suffered during construction work. It is highly rewarding to work on unique, historic floors like this and to contribute to its preservation for many more years to come.


Source: Commerical Floor Cleaning Services
Monday, September 21, 2015

How to Restore Outdoor Rubber Flooring

Outdoor rubber flooring is prone to various temperature changes, snow and rain, and may easily deteriorate due to accumulation of mud, tar, salt and other debris. To restore your outdoor rubber flooring, you will need only a few ingredients.

What You'll Need
  • Detergent
  • Vinegar
  • Degreaser
  • Bucket of water
  • Scrub brush
  • Pieces of cloth
  • Rubber finishing solution

Step 1 –Clean with Detergent

Use 2 tbsp of detergent in a bucket of warm water. Dip the scrub brush into the solution and remove dirt and debris. Rinse the rubber flooring with a hose.

Step 2 – Apply Degreaser

A degreaser can remove remaining dirt and debris. Spray on the degreaser and leave it on for up to 30 minutes. Rinse using a hose.

Step 3 – Remove Salt

Salt may be more difficult to remove with detergent or degreaser, so you can use a solution of diluted vinegar to eliminate salt. Rub the flooring until you see that the salt stains are gone. You may need to apply vinegar several times, scrub and rinse.

Step 4 – Apply Rubber Finishing

To protect your rubber flooring, you should get a rubber finishing solution. Rub the solution into the rubber surface, soak for 5 to 10 minutes and then wipe with a piece of clean cloth. 

Sunday, September 20, 2015

How to Mend Frayed Rubber Floor Tile

rubber floor tile is exposed to rubbing and may become worn at the edges or other areas. Frayed floor tiles may be restored using some materials that you can get in a hardware store. You don’t necessarily need replacement tiles, unless the tiles are badly damaged.

What You'll Need
  • Aluminum foil
  • Iron
  • Vinegar or detergent
  • Clean cloths/ towels
  • Epoxy
  • Artists acrylic paint
  • Rolling pin
  • Putty knife

Step 1 – Prepare the Tile
Identify the frayed rubber tiles, clean them with a mop and vinegar or detergent. Dry the tiles with a towel or allow to air dry.

Step 2 – Prepare the Epoxy

Prepare epoxy mixed with artist's acrylic paint that matches the color of your rubber floor.

Step 3 – Warm the Frayed Tiles

Place aluminum foil on the frayed tiles and then warm them using an iron. This will prepare the area and the epoxy will adhere better.

Step 4 – Repair Frayed Tiles

Using a putty knife, insert the prepared epoxy into the holes and cover the damaged areas. Level the rubber floor tile with the putty knife. Allow the epoxy to dry before you step on the repaired tile.

Saturday, September 19, 2015

Cleaning and Resealing a Limestone Patio

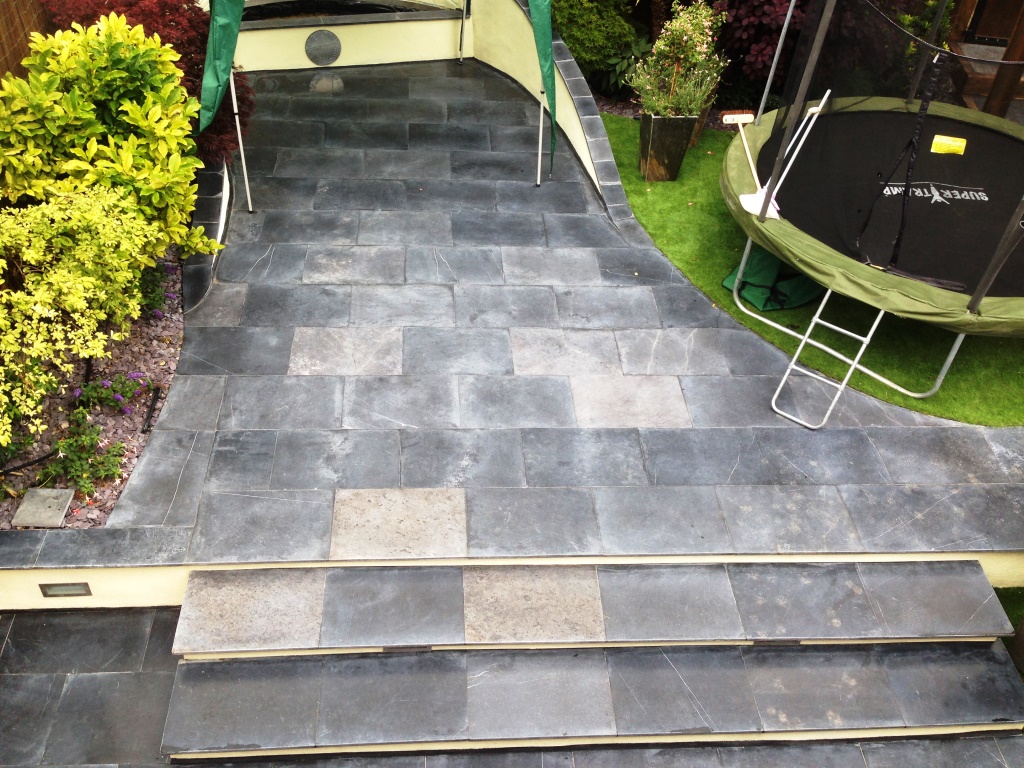
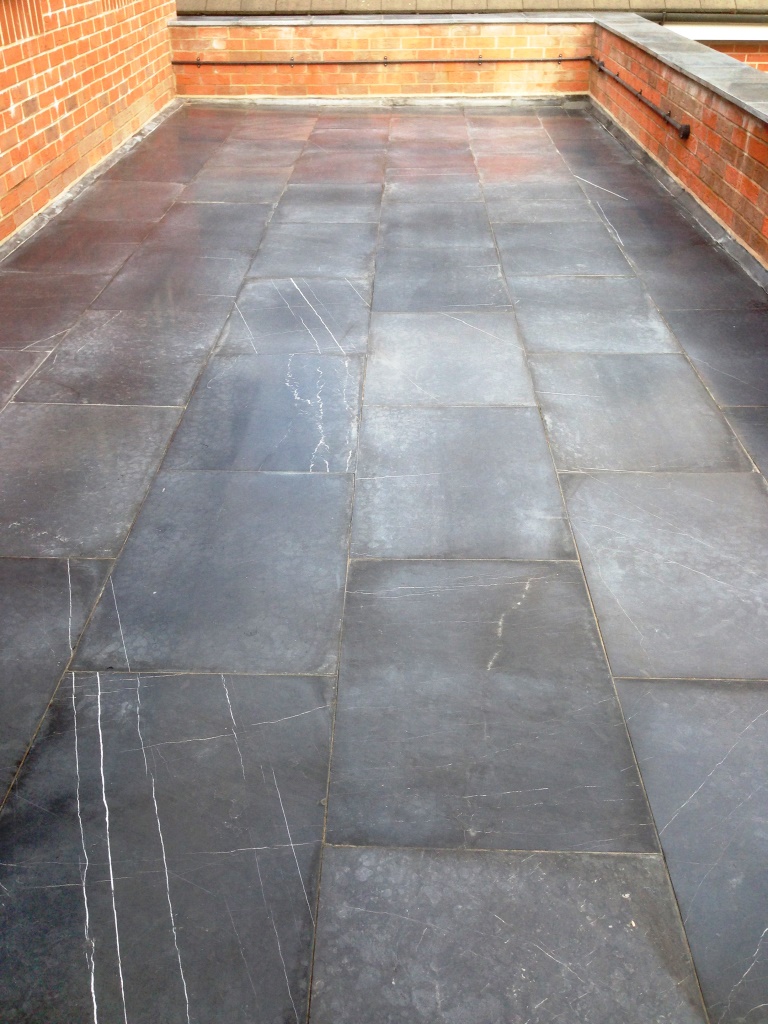
Details below of a Limestone patio I was asked to clean at a property in the affluent neighbourhood of Alderly Edge, Cheshire, famous for being the home of choice for several Premier League footballers. In fact Alderly Edge, which lies not too far south of Manchester and is one of the most sought after places to live in the UK. My client was unhappy with the look of the patio had previously been sealed using a topical sealer, and this had left the tiles looking dull and lifeless.

Limestone Patio Before Cleaning Alderly Edge Limestone Patio Before Cleaning Alderly Edge

Limestone is a fantastic natural stone, popularly used for internal floors as well as patios, it comes in a variety of fantastic colours and shades. What my client really wanted for the patio was a wet look to bring out the character of the Limestone. So, my job was to strip the old sealer off and replace it will one that would achieve the desired finish.

Stripping off the old sealer

To strip the old sealer from the patio, I used a series of fine diamond encrusted burnishing pads which are applied in order from Coarse, Medium, Fine and then Super Fine. The coarse pad is effective at stripping off sealer without damaging the tile, and without the need to use a liquid product. The finer burnishing pads then rebuild the appearance of the Limestone to provide a nice deep shine.

Applying Sealer to a Limestone Patio

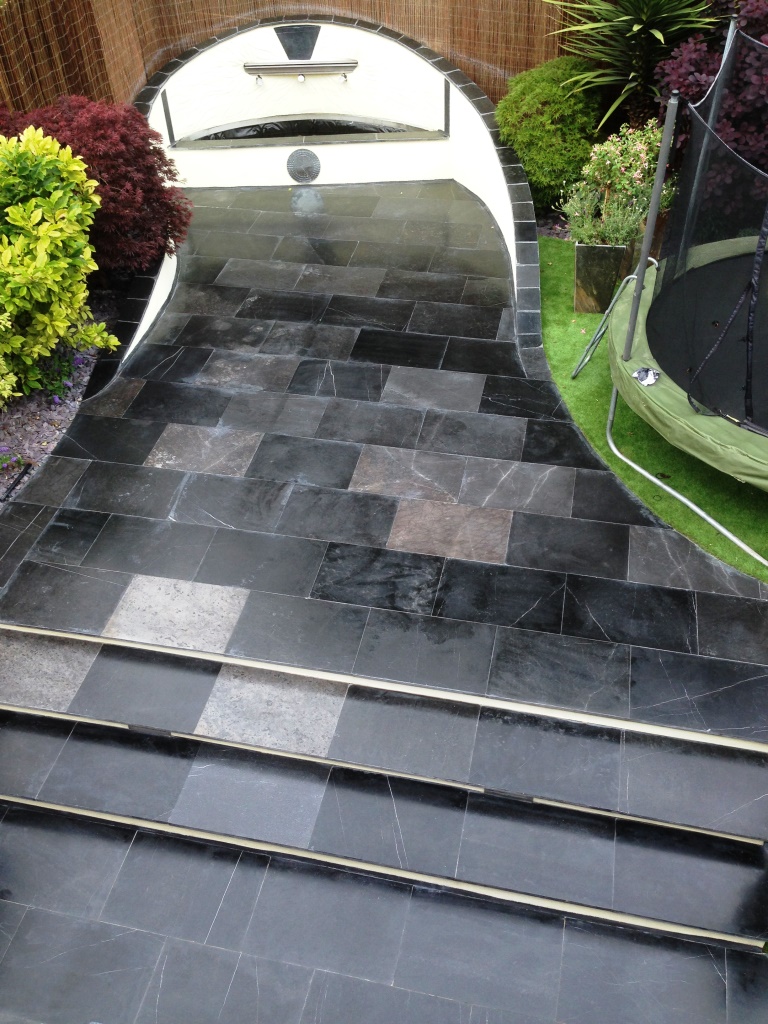
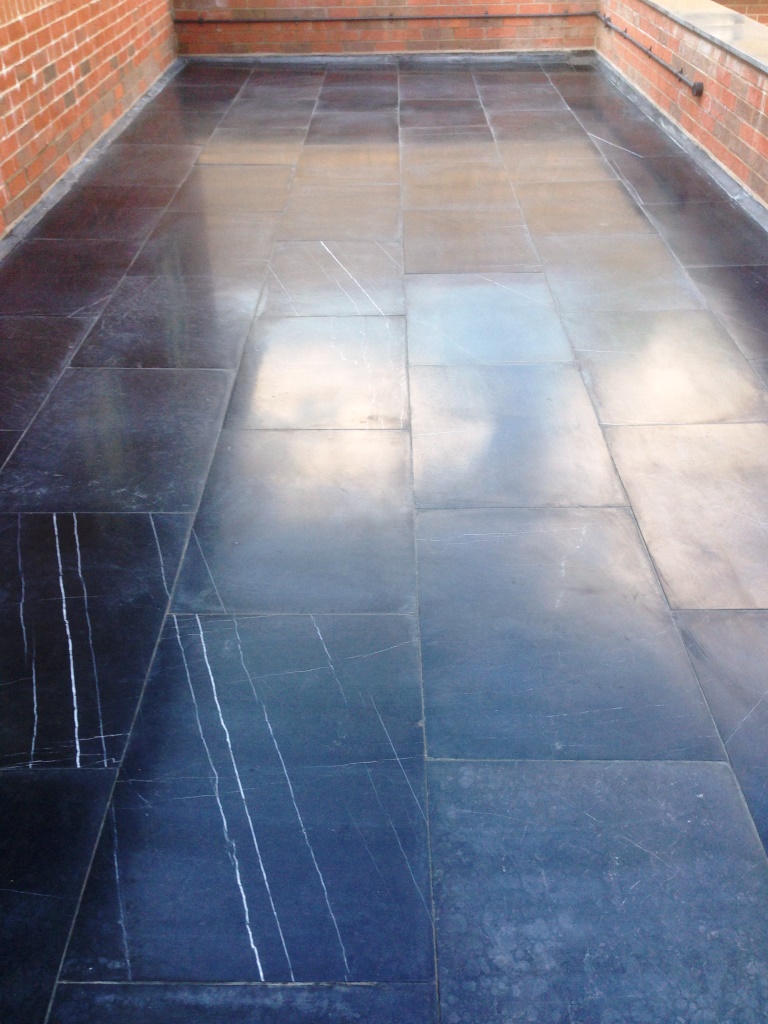
The new sealer of choice was Tile Doctor Colour Grow, which can be used on both internal and external natural stone surfaces. Colour Grow is an impregnating sealer which penetrates deep into the pores of the stone, providing both long-lasting resistance and durable protection against ingrained dirt and stains. As you can see from the photos, Colour Grow is also specially formulated to intensify the natural colours in the stone, and it really helped to bring the Limestone back to life again.

Limestone Patio After Cleaning Alderly Edge Limestone Patio After Cleaning Alderly Edge

The finished job left this patio with the wet, polished look my client had requested. She was very pleased with the result and amazed by just how quickly such a marked difference could be made. Another happy client!


Source: Expert Patio Cleaning Web Site

Friday, September 18, 2015

Remove Paint from Rubber Floor Tiles

Rubber floor tiles offer a level of floor protection for your home. Their waterproof and sturdy construction protects high foot traffic areas and carpets. Rubber floor tiles are still prone to being stained by things like paint.

What You'll Need
  • Cream Cleaner
  • Scrubbing Brush
  • Lint Free Cloth
  • Warm Water
  • Turpentine

Step 1 – Turpentine

Dampen the area with some turpentine to thin the paint. If the paint is dried in and oil based, the turpentine will thin the stain so you may use the scrubbing brush and cleaner to remove it later on.

Step 2 – Oil Based Stains

Dab the area with the turpentine and leave it to settle for a few moments. Paint and other oil stains only have a chance of being removed completely if you use a paint thinner and not water.

Step 3 – Scrubbing

Scrub the area with warm soapy water and the scrubbing brush until the stain has all but disappeared. Be cautious not to scrub too hard on the rubber pattern or surface, as you might damage the tiles.

Step 4 – Rinsing

Rinse the tiles with clean, warm water and dab dry with a cloth. Depending on the color of the paint stain you might find some residue. If this happens, just repeat with more turpentine until the stain has gone.

Wednesday, September 16, 2015

Laying an Outdoor Rubber Floor

Installing an outdoor rubber floor is a simple home improvement project. Rubber flooring is a durable and flexible floor covering option. The soft materials makes it an excellent choice for play yards. The are available in a variety of colors, sizes and designs. Consider different colors or sizes to create your own unique pattern. Rubber floor tiles can be easily installed in an afternoon. Be sure to check the forecast so that you have a day of good weather to install your outdoor rubber floor.

What You'll Need
  • Utility knife
  • Tape measure
  • Pencil
  • Paper
  • Spray chalk
  • Lawn mower
  • Rubber tiles
  • Spray lubricant
  • Roller

Step 1 – Measuring the Area

Use your tape measure to determine the measurements of the area where you will be laying the rubber floor. Multiply the length measurement by the width measurement. This calculation will give you the total square feet of rubber flooring you will need for your installation. Write the measurements and calculations down on a piece of paper. Take the notes with you to your local hardware or home improvement store. Speak with a professional about your plans to lay an outdoor rubber floor. Use interlocking rubber tiles for the best results.

Step 2 – Preparing the Installation Area

Use your spray chalk to mark off the boundaries for your new outdoor rubber floor. Check the installation area for any large stones and pieces of wood debris. Remove the stones and debris from the area. Use your lawn mower to even out any grass in that area of your yard. Set the blade to the lowest setting to be able to cut as much of the grass as possible.

Step 3 – Laying the First Tiles

Begin laying your first rubber tiles along the longest edge of your yard. You can lay the tiles directly onto the ground without any support or adhesive underneath them. The tiles will settle naturally into place. Position the first tile. Secure the second tile to the first one. Be sure the continue installing the first row of tiles along the edge of the yard. Once the first row is complete, begin laying the next row of tiles. Continue laying the tiles until you complete the entire area.

Step 4 – Cutting the Rubber Tiles

Use your utility knife to make any necessary cuts in your rubber tiles. Mark the tile with a pencil. Place the marked portion of the tile over a piece of scrap lumber. Apply a lubricant spray to your utility knife so that it will move more easily through the rubber. Use your utility knife to cut along the marking.

Step 5 – Rolling the Tiles

Use a roller to press the tiles together and firmly into the ground. Move the roller in long, even strokes. Use an even amount of pressure on the roller.

Friday, September 11, 2015

Changing the appearance of kitchen wall tiles

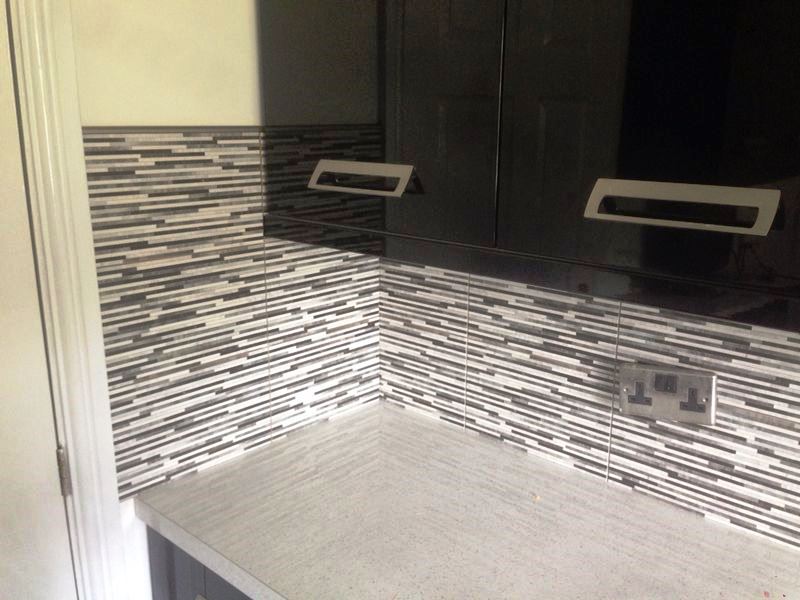
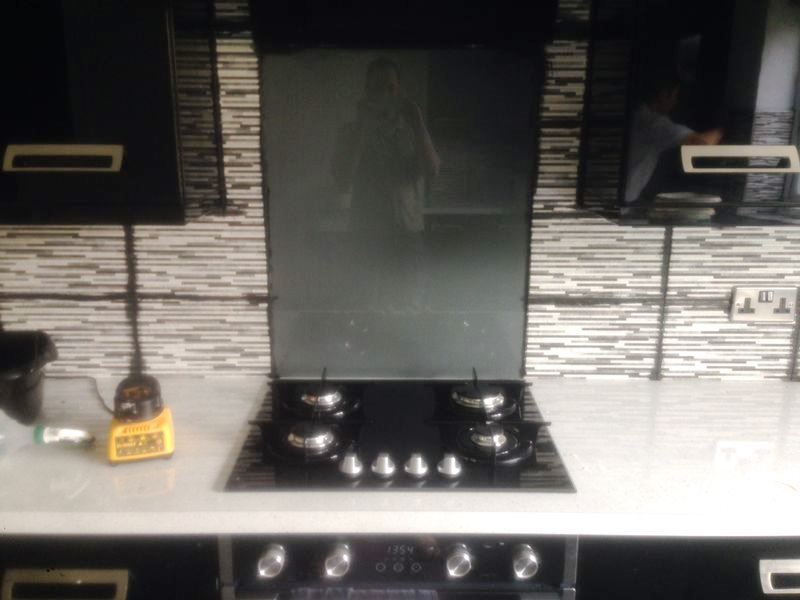
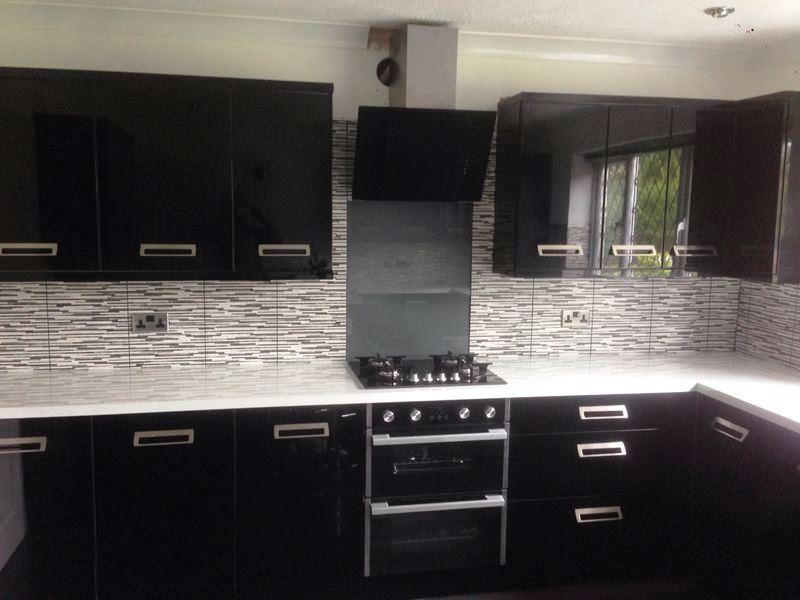
This was a request from lady in the market town of Beverley, East Yorkshire which, interestingly, is actually the influence for the name of the famous Beverley Hills area in California. She was unhappy with the colour of grout that had been used on kitchen wall tiles installed as part of her new kitchen and had called Tile Doctor to see if anything could be done. She had spent a lot of time deciding on what tiles she wanted, and unfortunately the tiling company that installed them used the wrong colour grout. She thought that the job was completely ruined, and that, in the worst case, the grout would need to be removed. However, after a short consultation with the client, she decided on her a deep clean for her grout, along with a change of colour - from grey to black.

Grout Clean and colour in Beverly Before

Cleaning the grout

The Tile Doctor grout colour change kit includes a pre-treater cleaner which is used to clean the grout joint and prime it ready for the colourant. The pre-treatment cleaner is applied and left so soak in for a short period before being scrubbed into the grout with a brush. This helps to penetrate below the surface, lifting any dirt and stains before being rinsed off with water.

Changing the grout colour

After cleaning the grout, I applied the black colourant which is simply applied in thin even coats using a small brush. You need to take care not to get any on the tile and to wipe it off immediately if you do. The colourant sets quite quickly in around two hours but needs to be kept dry for twenty four hours.

Grout Clean and colour in Beverly During Grout Clean and colour in Beverly After

After the job was done, the change in colour left the wall tile with a whole new look - the one my client had hoped for to begin with. It’s probably difficult to appreciate this from the photographs but I was very pleased to have helped to remedy this problem quickly and with relative ease. Another happy client!

Grout Clean and colour in Beverly After


Source: Professional Tile, Stone and Grout Cleaning service in Sussex

Wednesday, September 9, 2015

Pros and Cons of Cork Flooring In Your Bathroom

When looking at cork as a flooring option for your bathroom, it is important to consider the pros and cons of cork flooring. Cork flooring is both beautiful and durable, but its natural qualities can be causes for concern in a bathroom.

Pros

Cork flooring is naturally warm and feels delightful on a bare foot. Its flexible nature provides cushioning to that tile and hardwood do not. If the edges and surface are properly sealed with a water resistant sealant, the cork will be protected from any moisture absorption. Cork flooring is hypoallergenic and resistant to mold and mildew. It repels dust and is very easy to clean. This flooring option is available in a variety of natural and man-made colors.

Cons

Cork flooring is more expensive than linoleum. It can suffer indentation and cracking damage if an object is accidentally dropped on it. It can potentially absorb any water that is left on it, causing the cork to become warped and swollen. You should clean up any spills as soon as possible to prevent permanent damage to the floor. Over time, sunlight can discolor cork flooring. Windows in a bathroom with cork flooring will require proper covering to reduce the possibility of discoloration.

Sunday, September 6, 2015

Pros and Cons of Cork Flooring

The pros and cons of cork flooring are fairly even. There are strong benefits to using this material, as well as several sizable drawbacks.

Pros

Cork flooring is made out of the bark from cork oak trees, which are renowned for being resistant to mold and bacteria. This makes cork a perfect option if you have children or family members with allergies. Cork is also great as insulation to keep heat in and to muffle noise, so you can use it as the flooring or as a subfloor underneath another type of flooring too. Cork comes in a variety of natural and dyed colors, so you are sure to find a hue to complement your interior design plans.

Cons

The biggest drawback to cork flooring is maintenance. Excessive water can damage and discolor cork, so spills and stains have to be cleaned using minimal water. Cork is also very springy, so any heavy furniture will sink deep into the cork and could eventually cause holes or, at the very least, an uneven floor. When weighing the pros and cons of cork flooring, consider your lifestyle. Ask yourself questions like, "Who will be inhabiting the room with cork flooring and what activities will take place there?" Then, you can look at all the factors and make an informed decision about cork flooring.

Saturday, September 5, 2015

Putting the shine back on a Marble bathroom countertop

My client asked me to take a look at a very dirty Marble Onyx countertop in her home in Hampstead which is located within the London Borough of Camden. Interestingly, Hampstead is home to more millionaires than any other area of the UK so if you’re going to find bathrooms of this standard this is the place.

Marble Onyx Countertop London Before and After Cleaning

This particular worktop had been heavily soiled by roughly fifteen years of soap scum and old sealer. It would take a thorough clean as well as a fresh seal to get this countertop back to looking its best. Marble is a fantastic type of stone which has, throughout history, been used to forge beautiful, yet resilient surfaces.

Cleaning a dirty Marble Onyx countertop

I immediately set to work cleaning the countertop using a strong solution of Tile Doctor Pro-Clean. Pro-Clean is an alkaline product and therefore suitable for use on natural stone, meaning that, along with Marble, it is also suitable for use on Limestone, Granite, Slate, Travertine, and others. After leaving it to dwell on the surface for a short period of time, I began scrubbing the solution of cleaner into the Marble, and gradually the years of soap scum, old sealer and ingrained dirt began to come off. It was amazing just how quickly I was able to remove many years of muck with a bit of elbow grease. Following this, I rinsed off any excess cleaning product with clean water and then left the surface to dry, before I began the process of burnishing the Marble countertop using small six inch burnishing pads starting with a coarse pad and then moving up to super fine. After the burnishing process was complete, I gave the surface a rinse followed by an additional polish with a buffing pad until the shine was fully restored to the worktop.

Marble Onyx Countertop London Before and After Cleaning

Sealing a Marble Onyx countertop

After ensuring the countertop was fully dry following the cleaning and burnishing processes, I set about providing the surface with a fresh seal. My choice of sealer was Tile Doctor Colour Grow, an impregnating sealer which is designed to both provide durable surface protection, whilst also intensifying the natural colours within the stone. I applied a layer of Colour Grow carefully to the countertop, and the Onyx shades within the Marble really came to life once again.

Marble Onyx Countertop London Before and After Cleaning

I was very happy with the results overall, as was my client. It is very rewarding to think that hard work can go a long way to quickly restoring a surface which had been hidden for so long by many layers of muck.


Source: Professional Tile, Stone and Grout Cleaning service in Central London

Friday, September 4, 2015

Cork Flooring Underlayment Replacement

Cork flooring underlayment is placed under the main flooring as a way to cushion it. Over time, the cork flooring underlayment will need to be replaced. The following article will explain how to replace cork flooring underlayment.

What You'll Need
  • Drill
  • Screw bit
  • Hammer
  • Flay pry bar
  • Wide spackle blade
  • Thin chisel
  • Measuring tape
  • Circular saw
  • Screws

Step 1 – Preparation

Pry off the baseboards, and remove vent covers. You will also need to remove the original flooring. Wood, tile and linoleum can be removed with a pry bar. Carpet can be cut and pulled off.

Step 2 – Remove the Underlayment

Place the pry bar between the underlayment and the main floor. Tap it with the hammer while moving it around the perimeter. If the underlayment was screwed in place, remove the screws. Then, pry the underlayment off.

Step 3 – Cleanup

Remove any nails and screws from the floor. Sand away the glue, bumps and ridges.

Step 4 – Install the Cork Flooring underlayment

Put the sheets of the underlayment in place. Trim them as needed to fit. Make sure you have at least a ½-inch gap between the underlayment and the wall for expansion. Screw the cork flooring underlayment down, sinking the screws below the surface. Apply spackle over the screws to fill in the holes.

Thursday, September 3, 2015

Caring for Cork Flooring Planks

Cork flooring planks are the flooring of choice for many households, with its durability and easy installation. However, in order to keep it looking fresh, using the right caring techniques will help keep them looking as good as new.

Keep Clean                               

A daily sweep or vacuuming will help remove any dirt that can collect on a daily basis. Because of its softness, walking on cork can result in tiny bits of dirt being embedded into the surface of the floor, which can damage the finish. A slightly damp mop can also be used to remove any dirt and stains from your floor. If using a cleaner, it must be applied to the mop and not the floor itself, but remember to use the cleaner sparingly.

Avoid Direct Sunlight

Cork can fade over time, so use blinds or curtains to reduce the amount of time the cork is in direct sunlight.

Protect Areas

If your cork flooring is in a busy area, such as by countertops or in hallways, try placing rugs or mats on the surface to reduce wear and tear. Also, use floor protectors underneath furniture legs to prevent any dents.

Act Quick with Spills

Cork soaks up liquid very quickly, which can lead to staining, swelling and water damage. If spills happen, clean them up as soon as they are made using a dry, clean cloth.


How to Replace Cracked Cork Flooring Planks

Cracked cork flooring planks can not only be unsightly but, if left unchecked, can lead to more extensive damage and even tripping accidents. You'll want to know how to replace the planks in the event that damage occurs.

What You'll Need
  • Pallet knife
  • Stanley knife
  • Replacement planks
  • Dustpan and brush

Step 1 – Prepare

Check the cork flooring planks surrounding that one which is visibly damaged to determine whether any others also need to be removed. Note each one that needs to be replaced. Clear the area to allow you to pry away any baseboard that may be in place. Carefully slide the tip of a pallet knife into the join, after running a Stanley knife along the edge, if necessary.  

Step 2 – Replace Planks

Firmly grip each cracked cork flooring plank to remove it, manipulating each one so that the lip withdraws from the groove in which it is fitted. Sweep up any loose particles of the cork that has come away from the damaged section. Slide the new plank into place, clicking it into the space created.

Step 3 – Reassemble

Check that the new cork flooring planks are level with the rest of the floor before returning the baseboard to its previous position.