Tuesday, March 31, 2015

Rubber Floor Tiles: Pros and Cons

Environmentally conscious builders and DIY enthusiasts are using rubber floor tiles in home and commercial gyms, kitchens and other applications where non-slip, durable performance are motivating factors. In determining whether your next project might include rubber interlocking tiles, consider the following pros and cons.

Benefits of Rubber Tiles

  • Installation is easy. You'll be able to place the interlocking tiles in a number of positions, by hand or with use of a rubber mallet and very little force.
  • Manufacturers fabricate tiles that are almost seamless for a stunning visual effect.
  • Rubber tiles can be installed over most flat surfaces with very little sub-floor preparation, are very easy to keep clean and work well inside or outdoors.
  • Noise suppression is inherent with rubber flooring, so you won't have to add the expense of sound dampening materials.
  • Thick rubber will also provide shock absorption and anti-fatigue properties.

Drawbacks of Rubber Tiles

  • When new, rubber can have a distinct odor. However, the smell will dissipate with time.
  • Color matching can be tough with re-orders. Order extra tiles with your initial purchase to accommodate for damaged pieces or repairs.
  • Water seeping under tiles can sometimes cause mildew and odors. Ensure your flooring will have appropriate drainage, especially if outside.
Many rubber floor tiles are made from 100 percent recycled materials. Using them is a great way to build amazing floors with an eye on being environmentally aware.


Thursday, March 26, 2015

Stripping and re-sealing a Slate tiled floor

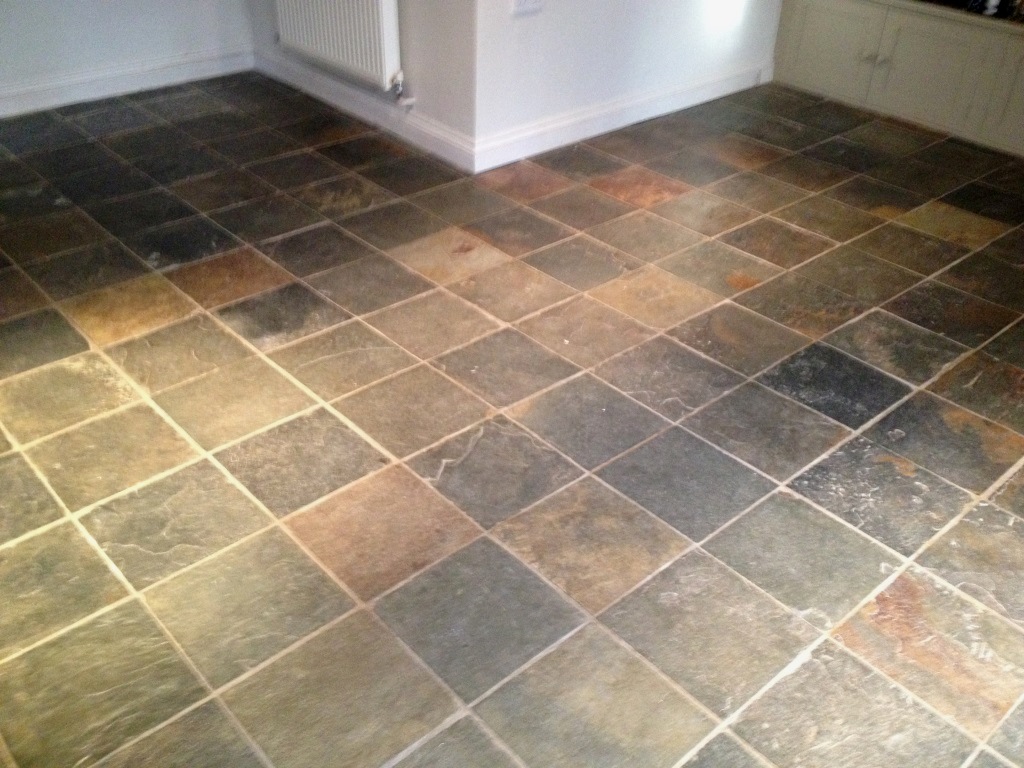
This Multi-Coloured Slate tiled floor in the kitchen of a property in Barnard Gate near Witney was in good solid condition with no damage but had been poorly maintained with layers of sealer applied to un-clean tiled; the new home owners were keen to make this floor into a talking point as you entered the property and asked us to address the problem.

Coloured Slate Tiled Floor Barnard Gate Before Cleaning

Deep Cleaning a Slate Tiled Floor

The first task was to remove the layers of sealer from the tile so on day one the floor was covered with Tile Doctor Remove and Go which was left this to dwell for a while so it could soak into the pores of the slate and penetrate the remaining sealer. The product was then scrubbed into the tile with a Rocky rotary floor scrubber and then rinsed off with clean water and dried with a wet vacuum. The next process was to clean the floor with a strong mix of Tile Doctor Pro Clean to remove the remaining dirt in the floor and to scrub the grout clean, again the rotary floor machine came in useful for this task and again the floor was thoroughly rinsed with clean water a few times and dried with the wet vacuum. I then left the floor for a couple of days to allow enough for it to completely dry before sealing.

Sealing Slate Kitchen Tiles

To seal the slate I first applied a coat of Tile Doctor Colour Grow which is an impregnating sealer the gets into the pores of the stone and also enhances the natural colours. I then applied a few coats of Tile Doctor Seal and Go which is a topical sealer that added a nice sheen finish that the customer wanted.

Coloured Slate Tiled Floor Barnard Gate After Cleaning

The end result was fantastic and the combination of the two sealers really got the best from the slate which is now very much appreciated and loved by the customer.


Source: Deep Cleaning Slate Tiles