Thursday, May 14, 2015

Maintaining Slate Floor Tiles

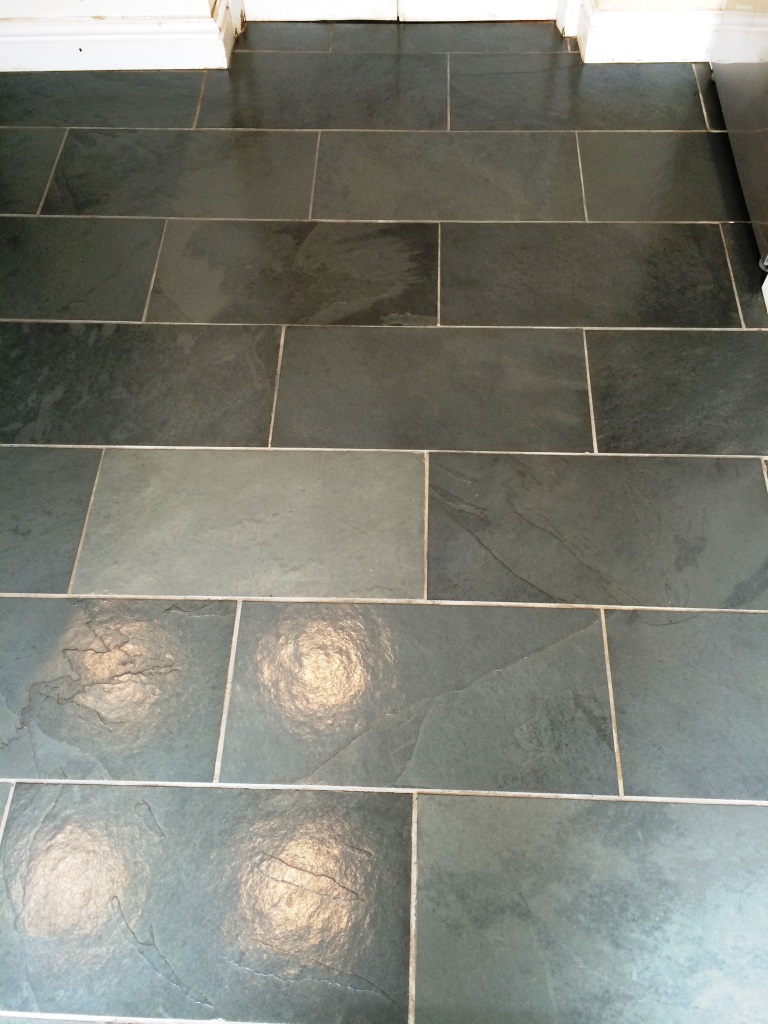
This was a straight forward refresh of a Slate Tiled floor that had been installed in the kitchen of a house the village of Malmesbury. You can see from the photo below how the Slate had become dull with wear and how the grout had become discoloured; it was clear that the previous sealer was starting to fail and the tile and grout was now in need of a deep clean and seal to bring it back to life.
Slate Floor Malmesbury Before Cleaning

Cleaning a Slate Tiled Floor

To get the floor clean and remove and remaining sealer a strong dilution of Tile Doctor Pro-clean was brushed over the floor and left it to soak in for around twenty minutes. A grout brush was then used to scrub out all grout lines and get them clean. A black scrubbing pad was then attached to a rotary machine and the entire kitchen floor was scrubbed. This process generated a fair amount of slurry as the remaining sealer, dirt and grime came out of the pores of the tile. This was then removed using a wet vacuum and the floor rinsed thoroughly with clean water. At this point it became evident that the tiler who installed the floor previously had left grout smears on the surface in some places (aka grout haze) and this was removed using a solution of Tile Doctor Grout Clean-Up applied with a black pad and thoroughly rinsed again to remove any trace of cleaning product. The floor was then dried as much as possible using a wet vacuum and left overnight.
Slate Floor Malmesbury After Cleaning

Sealing a Slate Floor

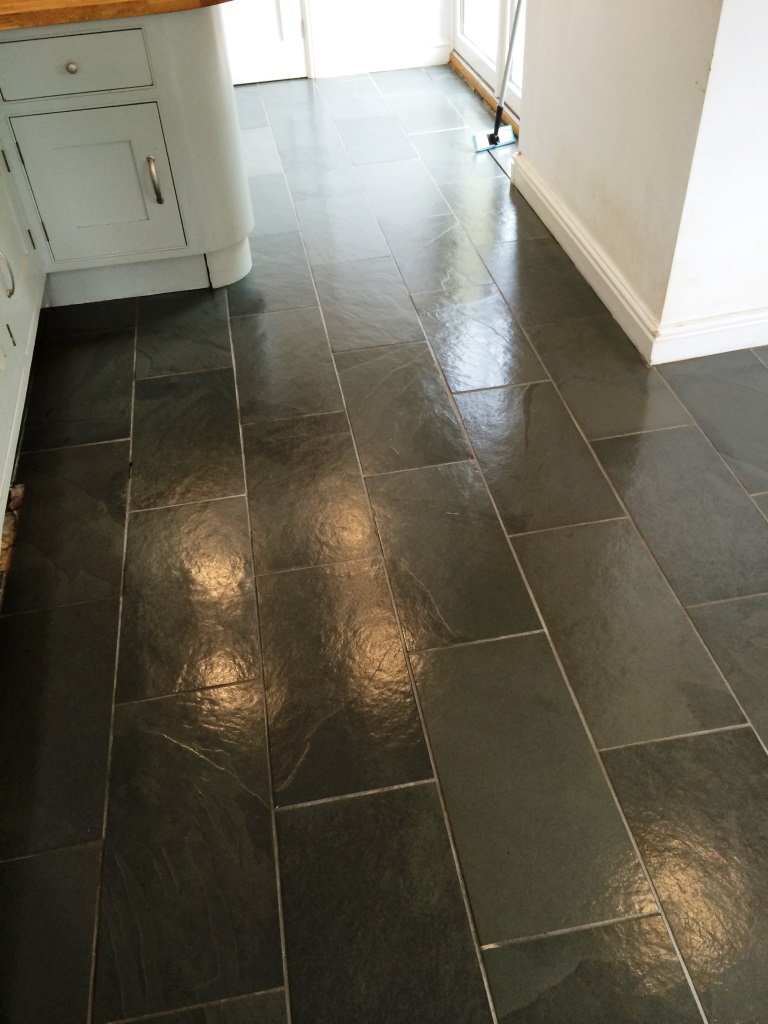
We returned the next day and tested the floor for damp by using a damp meter to ensure it was dry enough to seal; the test came back OK so we proceeded to seal by applying five coats of Tile Doctor Seal & Go which adds a nice subtle sheen to the tile and will protect it from staining for some years to come.
Slate Floor Malmesbury After Sealing Slate Floor Malmesbury After Sealing
    Source: UK wide Tile, Stone and Grout Cleaning service

Monday, May 11, 2015

Deep Cleaning an Indian Sandstone floor at a Cottage in Cleestanton

This consumer had bought a cottage in Cleestanton (Ludlow) six months agowhich has a beautiful Indian Sandstone flagstone floor installed across the ground floor. The Sandstone slabs were however in an unfortunate state and had not been deep cleaned for some time, in fact it was very easy to see where the most foot traffic had been because of the dark lanes visible on the stone.

Cleaning Riven Sandstone Tiles

I cleaned the floor with a dilution of Tile Doctor Remove and Go which was left to seep into the Sandstone before being worked in with a rotary machine fitted with a scrubbing brush attachment. I used a brush rather than a pad since the floor had a riven texture and a flat pad may not have had the desired effect. Tile Doctor is an effective coatings remover ideal for removing sealers for tile, it’s also a good cleaning product having said that there were areas where the old sealer was really stubborn so and I had to retreat those and use steam in the really difficult areas.


Once the floor was stripped back I gave it a thorough rinse with water using a wet vacuum to remove the liquids from the floor and get it as dry as possible.

Sealing Riven Sandstone Tiles

For four days, the floor was left to completely dry out and then I returned to seal it first checking with a damp meter that it was dry. All was as expected so proceeded to seal the stone using four coats of Tile Doctor Seal and Go which is a water based sealer (no smell) and ideal for these types of floor as it offers good protection whilst adding a nice sheen to the surface.

The client was really happy with the result and can now see all the amazing detail and character in this natural stone floor including evidence of fossilised plants.

Ghastly Terracotta Tiled Floor Restored in North Chailey

This customer in North Chailey, near Haywards Heath and Uckfield, called me up asking for her Terracotta tiled kitchen floor to be cleaned and sealed. To quote the customer she said the tiles were “horrendous” and upon inspection it was indeed true.

Nevertheless, I thought that most of the floor could be greatly improved but several areas around the washing machine and dishwasher were particularly soiled. Once I spoke of my concerns, the client admitted that both the washing machine and dishwasher had flooded the floor twice and leaked on a regular basis. Washing powder is very caustic and causes permanent damage that cannot be fixed.


Terracotta Tile Cleaning

I stripped off what was left of the previous sealer using a strong dilution of Tile Doctor Pro-Clean which is a heavy duty alkaline cleaner/coatings stripper ideal for tiled surfaces. We let the solution dwell on the floor for 10 to 20 minutes before working it into the tiles by hand and deck brush, usually I’d use a rotary buffing machine with a scrubbing pad but it was quite a narrow kitchen. Once I’d washed it down and sucked up any excess water with the wet-vax I left it for two days to dry.

Terracotta Tile Sealing

After 48 hours, I went back and sealed the Terracotta tiles using four coats of Tile Doctor Pro-Seal which is a water based (no smell) penetrating sealer recommended for food preparation areas such as kitchens. Sealers can take some time to apply as you have to wait for the first coat to dry before applying the next, luckily however we were blessed by a warm windy day which blew through the kitchen and increased the drying time. You can notice from the images on this page the amazing conversion that was achieved. Whilst I was waiting for the sealer to dry I noticed their patio was in need of attention so I gave that a blast from my industrial pressure washer.

Reviving a New Laid Black Limestone Floor in Pillerton Hersey

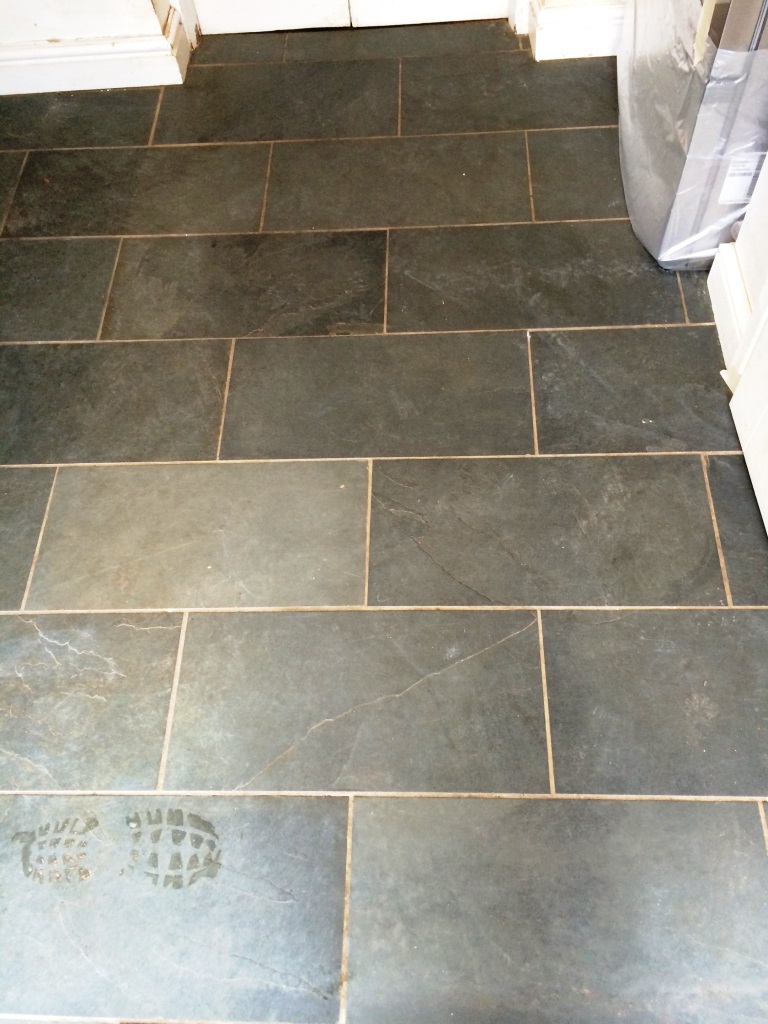
For this year, this is the second black limestone tiled floor wherein the tiler struggled to get the right finish. In this case the floor tiles were newly fitted but unfortunately the tiler had decided not to seal the tiles prior to grouting which resulted in grout becoming trapped on the tile surface (aka Grout Haze). In order to rectify this problem, brick acid was used which will remove the grout but this stripped off the black finish turning the tiles grey then in a further attempt to improve the appearance the tiles were covered in boiled linseed oil which just sat on top locking in the grout haze. Linseed oil is a traditional method of sealing stone tiles and is normally used with Terracotta tiles but it’s not ideal and does not have the performance of a modern sealer, certainly in this case it didn't help at all.

Eliminating Oil and Grout from Limestone Tiles

To address the issues with the floor it had to be fully stripped back to remove the linseed oil so the grout haze problem could be tackled. This was done by applying a solution of Tile Doctor Remove and Go which was mopped on to the floor and left to soak in for a while before being scrubbed using a rotary machine fitted with a black pad. This process lifted the linseed oil off the tiles and was removed using a wet vacuum.


Once the Linseed oil was gone I could get to work on the grout haze and for that we have a special product called Grout Clean-Up, it’s a very strong acid based product and normally you would need to be very careful using it on stone as it can damage the stone, in this case however the surface of the Limestone had already been damaged by the brick acid. Once the floor was free of coatings and the grout haze problem had been treated I gave the floor a thorough rinse down to make sure all trace of products had been removed from the floor before the next step.

Sealing Limestone Floor Tiles

There was a lot of Limestone to cover so on the first day I focused on the kitchen and on day two the lounge, hallway and toilet. On the third day I went over the whole area applying Tile Doctor Stone Oil to restore the black colour of the Limestone that had been damaged by the brick acid.

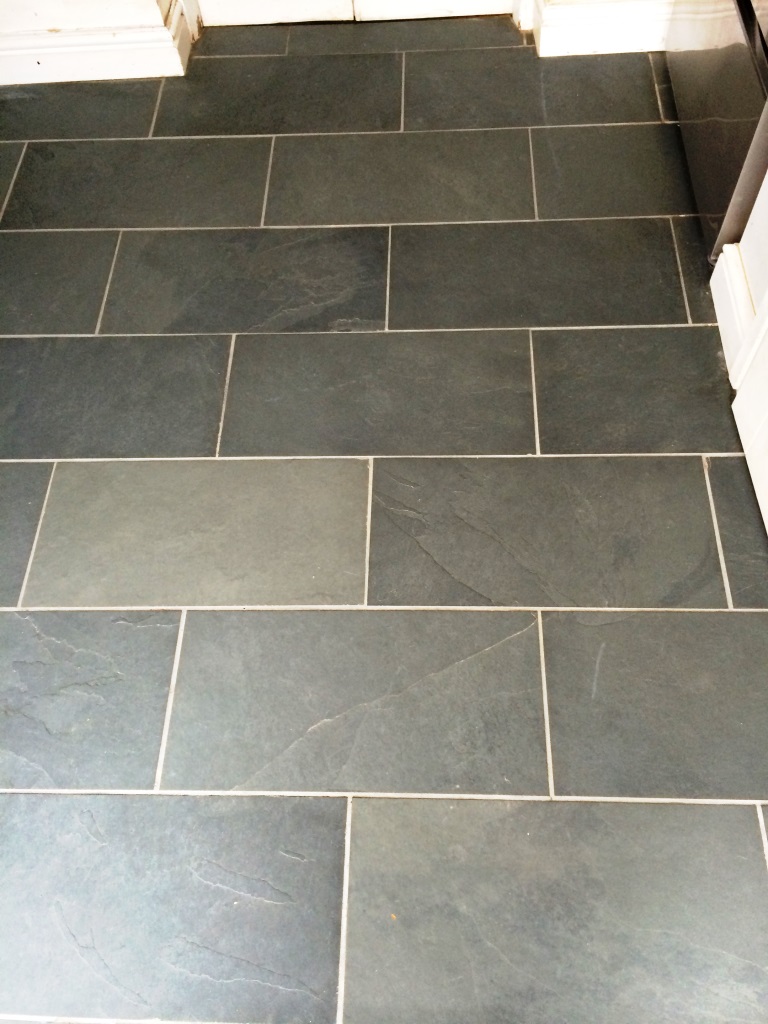
By the third day the Grout Haze was gone but was still looking washed out. To bring back the colour into the black limestone, it was treated with stone oil which as you can see turned the tiles back to their original colour. Stone Oil is an interesting product, if you check the tin it will tell you it’s “an easy to apply pre-polish impregnating sealer, ideal for low porosity stone and terracotta designed to enhance the colour and texture of floors and improve mechanical strength once cured”. Certainly from the customer’s point of view the floor now looks how it was intended and they were much relieved.
Sandstone Flagstone Upgrade In Grange Over Sands

We got a request to take a look at these Sandstone flagstones at a house in Grange over Sands, the request stated that all it required was a usual clean and Re-seal however once we took a look at the floor it was clear a lot more was involved and the floor was in need of a facelift including Sandstone floor restoration, grout replacement and paint stripping.


Cleaning Sandstone

In order to have the floor clean, I decided to apply a strong dilution of Tile Doctor Remove and Go combined 50/50 with NanoTech UltraClean to give it more cleaning power. We normally use Remove and Go to remove old sealers but it works just as well softening up paint splashes so they can be removed. It was left to seep into on the flagstones for twenty minutes before we begun scrubbing into the tiles with a rotary machine fitted with a scrubbing pad. The resultant muck was removed using a wet vacuum and the floor was washed down so we could get a glimpse on what was the improvement on the floor. There were quite a few stubborn areas so the whole process has to be re-done until I was happy the floor was as good as I could get it and at that point rinsed the whole floor down again with clean water to neutralise the floor before dealing with the missing and loose grout which was replaced with a close a colour match as possible before leaving for the evening so the floor could dry overnight.

Sealing a Sandstone Tiled Floor

We left and came back the following day and tested the floor with a damp meter in a few different locations to make sure no dampness remained in the stone. The sandstone was dry so we proceeded to seal the floor with Tile Doctor Colour Grow which is an impregnating sealer that occupies the pores in the stone preventing contaminates becoming ingrained there and also as its name suggests brings out the colours in the natural stone.

Rejuvinating a Slate and Flag Stone Floor in Cookham

Below are the details of a tired Slate and Flag Stone floor installed in a house in Cookham, Berkshire; the consumer was actually the son of an existing customer whose floor we had also recently cleaned. The existing sealer had been wearing away over time and the floor had becoming progessively ingrained with grime making it hard to clean, the solution was to strip the floor back and re-seal it.

Stone Floor Cleaning

To tidy and strip the tiles of the remaining sealer the floor was soaked in a solution of Tile Doctor Pro-Clean and was buffed using a weighted rotating machine to help loosen the soils and break down the sealers. The soiled solution was taken away and it was clear some areas of the floor needed thorough attention to remove the sealer so an application of Tile Doctor Remove and Go was applied which was left to seep in for a while to assist in breaking down the sealer before being scrubbed again. Once the floor was clean and the sealer was gone the floor was rinsed using our hot truck mounted extraction system and was then left to dry for 36 hours.

Stone Floor Sealing

When we came back, I checked to make sure the floor was completely dry and ready for sealing, all was well so I then sealed both the Slate and Flagstone floors with six coats of Tile Doctor Seal and Go using a paint pad applicator.

The floor looked much enhanced when finished. I took time to explain how to maintain the cleanliness of the floor using a Neutral Cleaner that will extend the life of the sealer, the consumer was glad with the service and left the following comment on the Tile Doctor feedback system.

“We are very pleased with the results.”
Peter Young, Cookham”

Beckley Village Slate Tile Barn Improvement

This Slate tiled floor is in a barn located at Beckley, near Rye, Hawkhurst, Tenterden and Robertsbridge. For years it had been used to store furniture, gardening equipment and varyingly, a leaky motorbike which had stained the slate.

You can see from the images below that the Slate tiles were very deteriorated, dirty, faded, dull and far from looking their best.

Deep Cleaning Slate Tiled Floor

Essentially I swept out the whole area then applied Tile Doctor Remove and Go to various areas where engine oil had drip. After leaving it to soak in for fifteen minutes I then began to strip and refurbish the floor with Tile Doctor Pro-clean worked in with a buffer machine fitted with a black scrubbing pad. Nonetheless it became clear that some of the ridges on the slate were damaging the black pad so the remainder had to be done by hand with a deck brush. Once the stone was stripped and cleaned the emergence was greyer than before. I assured the client that once the sealer has been applied it would be transformed to a much darker shade.


Sealing Black Slate Floor Tiles

After two days drying I returned to seal the floor checking first to ensure it was dry and no further work was required which is just as well as I had to wipe away what appeared to be stray dog paw prints. I got to work applying Tile Doctor Ultra Seal having previously estimated that four coats would sufficient to give it a dark finish; I should mention that Ultra Seal was chosen due to the fact that it’s provides a no-sheen natural look appearance.

Unfortunately, it was quite a cold barn with little ventilation despite it being an unseasonably warm autumn day outside and this increased drying times. Nonetheless by about four o’clock in the afternoon the job was finished and looking remarkably transformed. The client was satisfied with the development and is now moving forward with to fit out the barn as a yoga studio.