Showing posts with label Neutral Tile Cleaner. Show all posts

Thursday, April 23, 2026

How to Restore Colour and Structure to Tired Flagstone Flooring

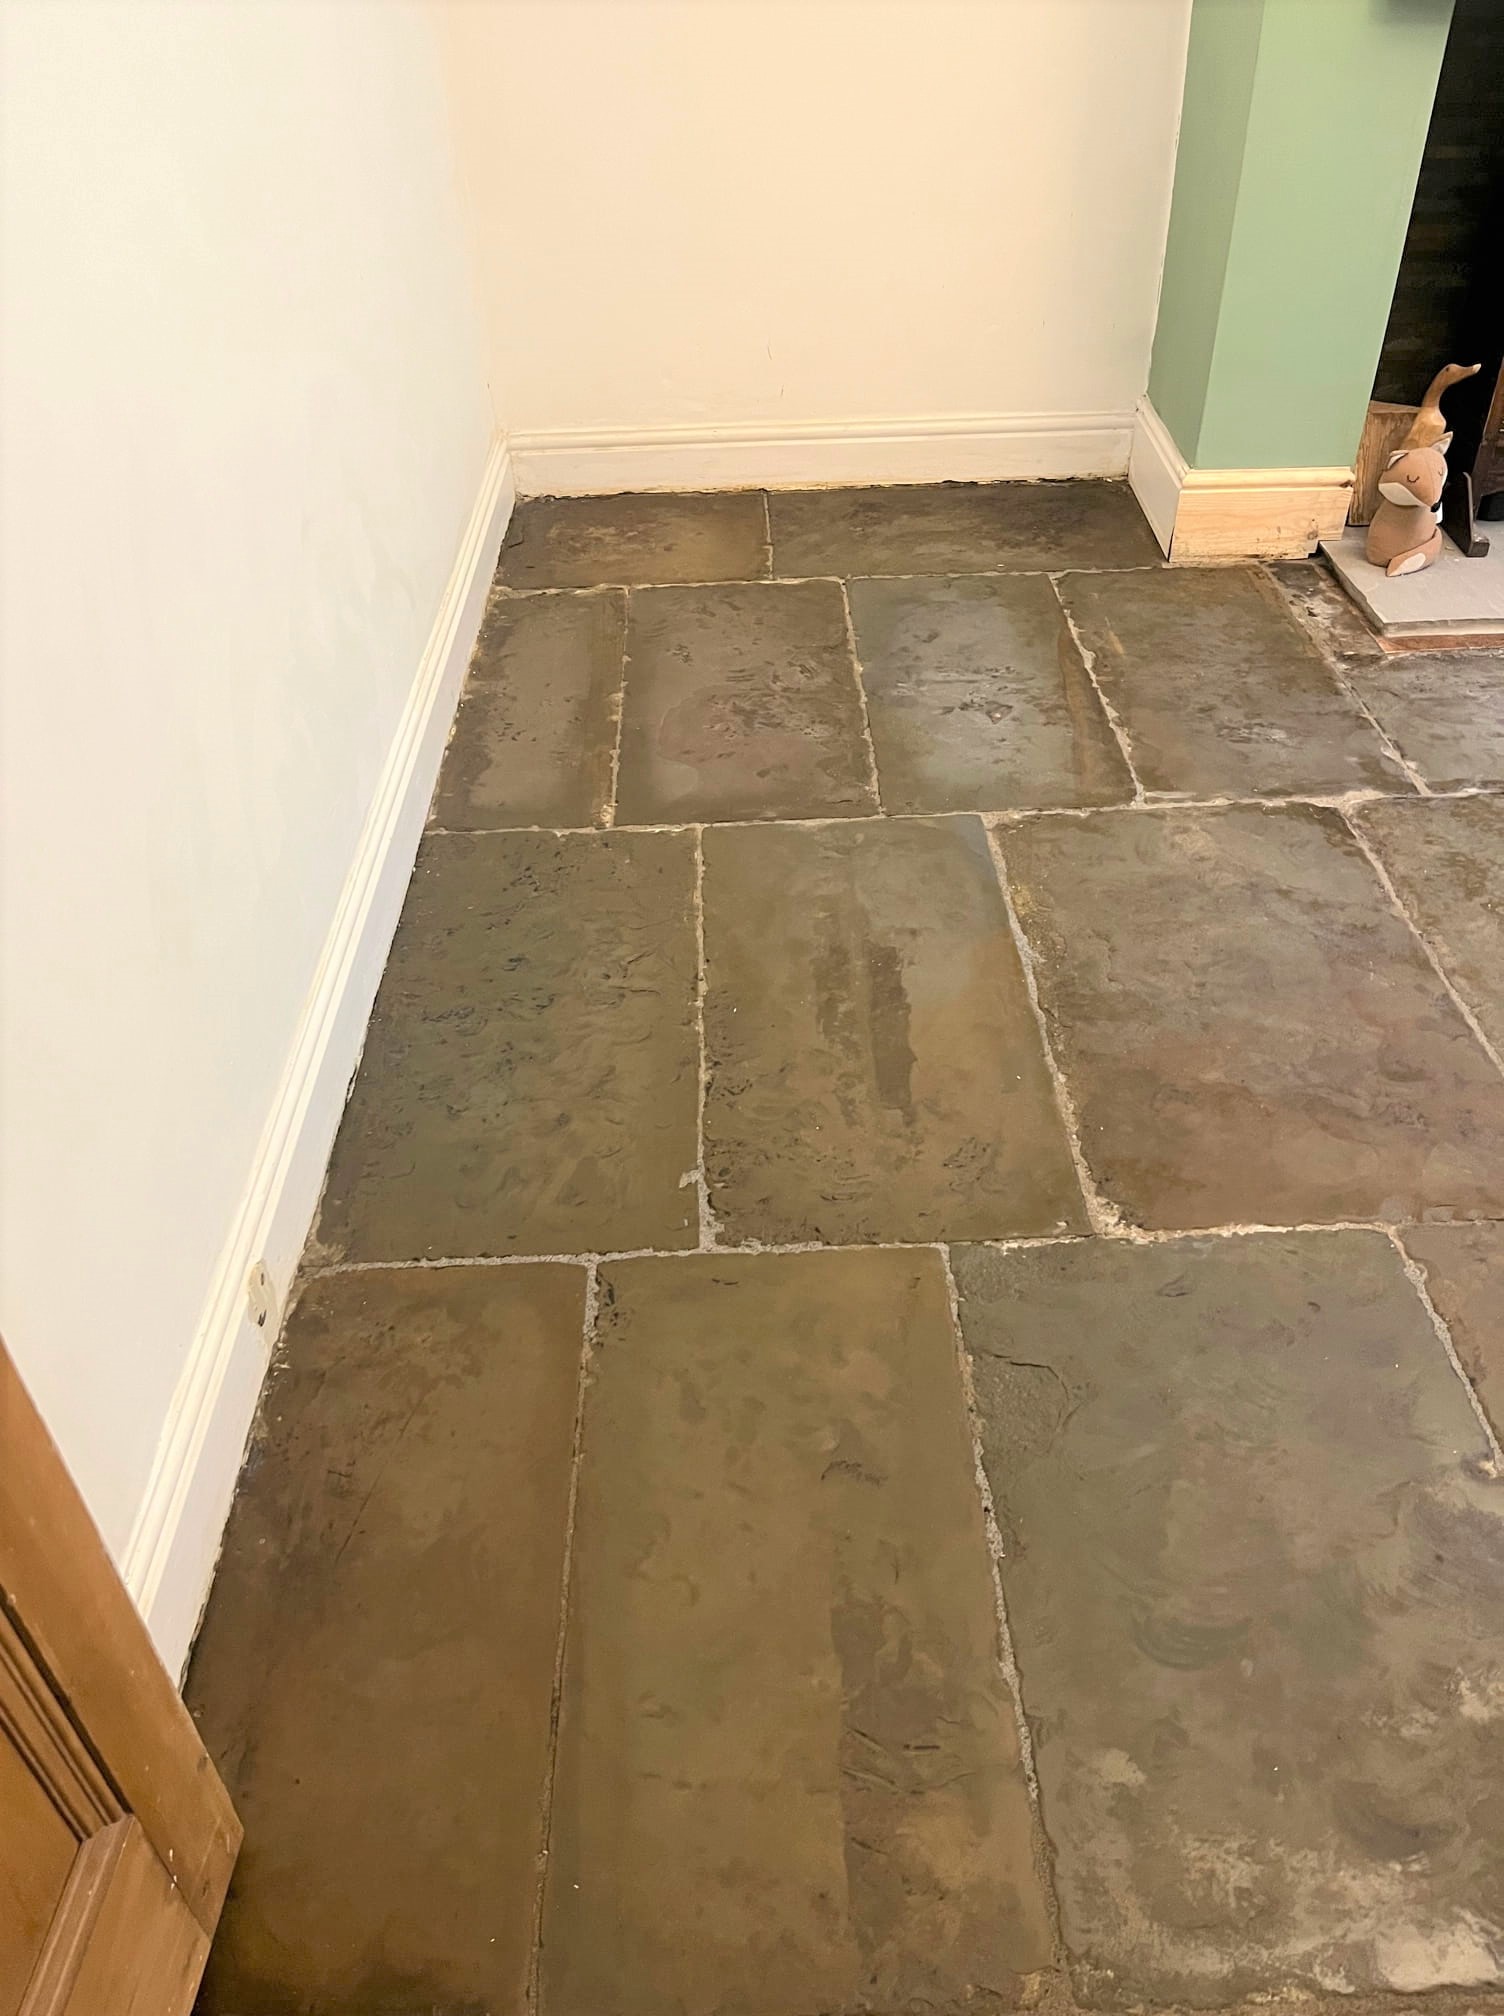
A customer from Ulverston was nearing the end of a house refurbishment and got in touch regarding the renovation of a Flagstone floor. A lot of contractors had been through the property and the stone was not looking its best. Happy to assist I arranged to visit the property and provide advice on its restoration.

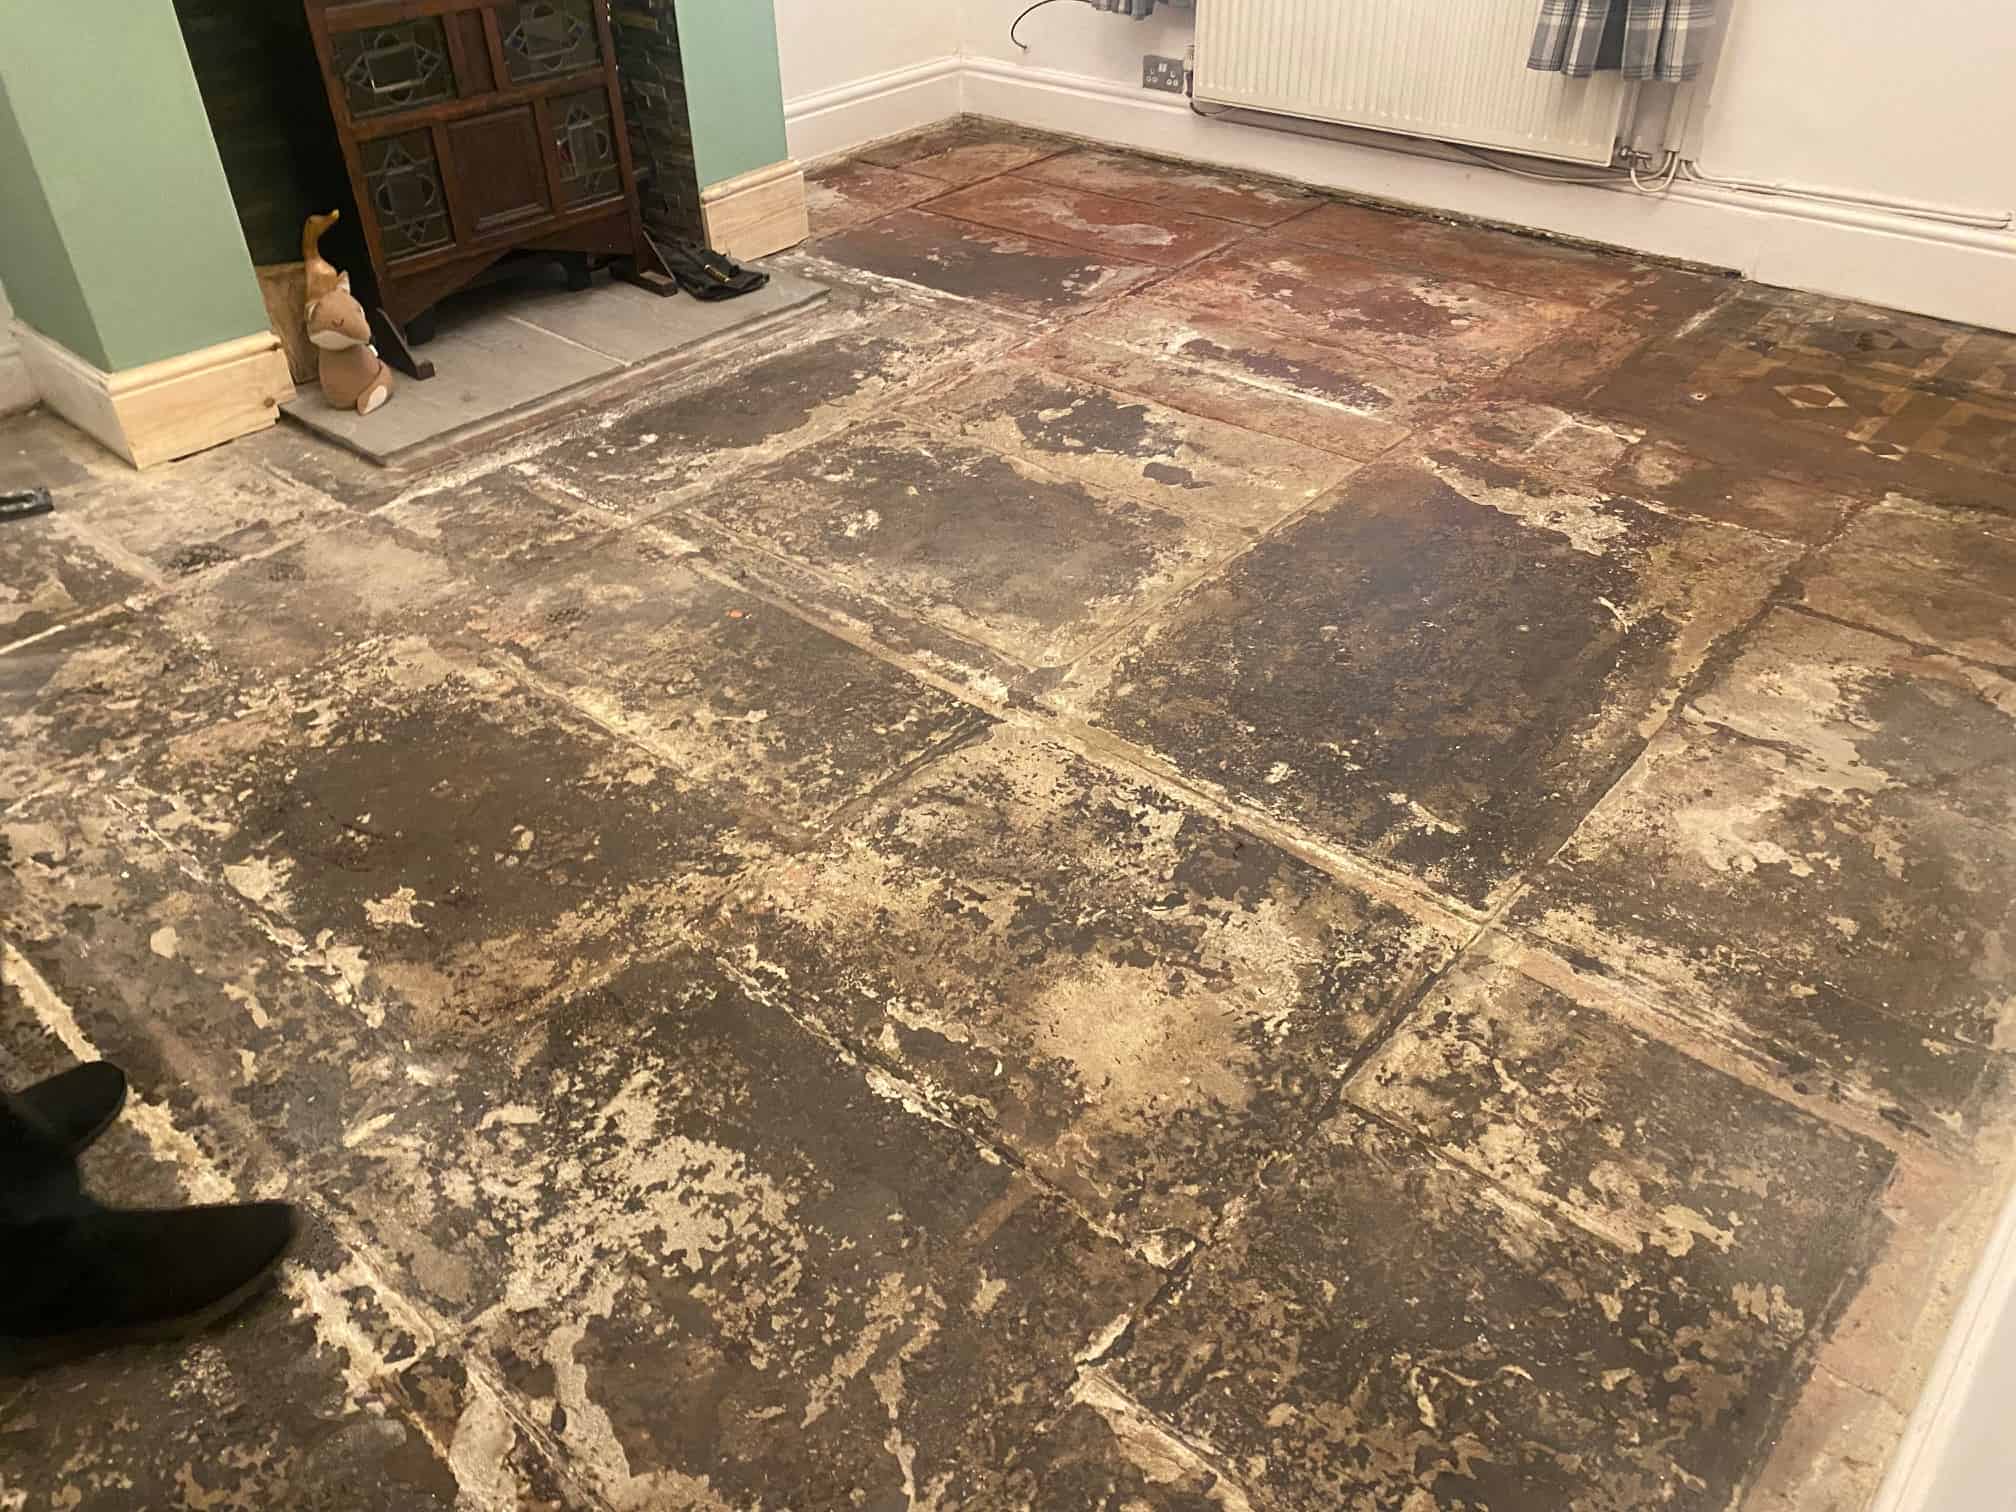
I went over to survey the floor and could see it was suffering from heavy ground-in soiling. The stone had lost its colour and now looked dull and lifeless; the grout was also heavily soiled with ingrained dirt. We discussed the floor in detail and I recommended a deep clean to remove all the dirt and then applying a sealer to restore colour to the stone and prevent ingrained dirt.

Flagstone Floor Before Renovation Ulverston Barn Conversion

After measuring up I worked out a detailed quote and emailed it across to the customer for their review. Happy with quote I got the go ahead to restore the floor and agreed a date.

Deep Cleaning a Tired Flagstone Floor

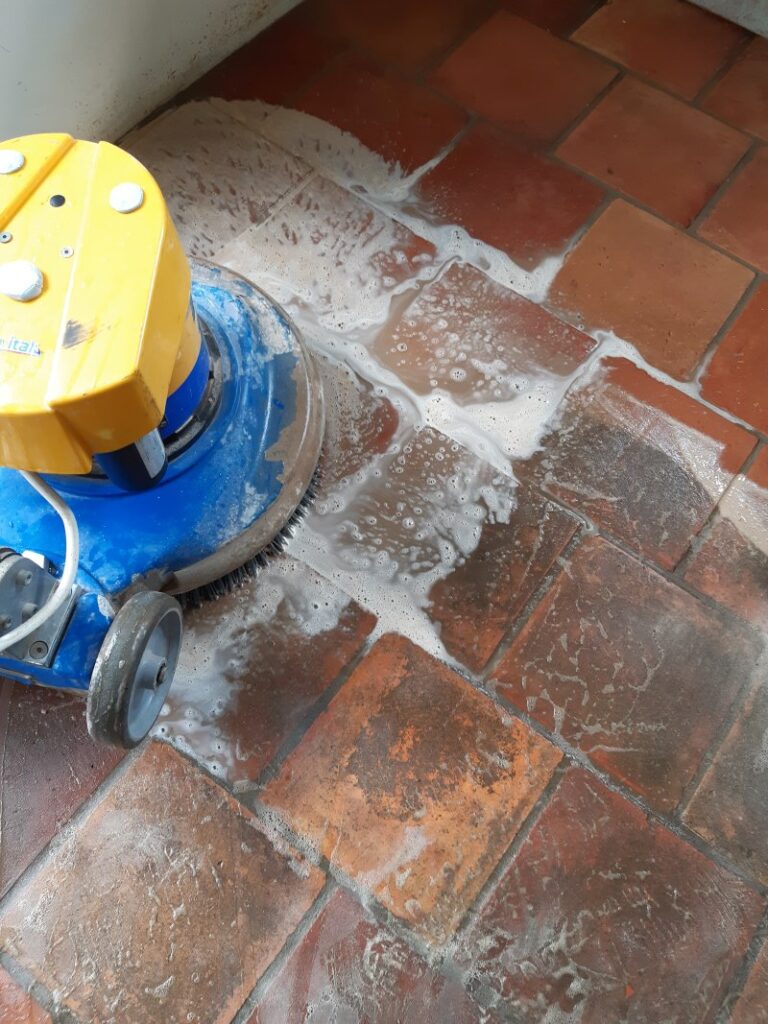
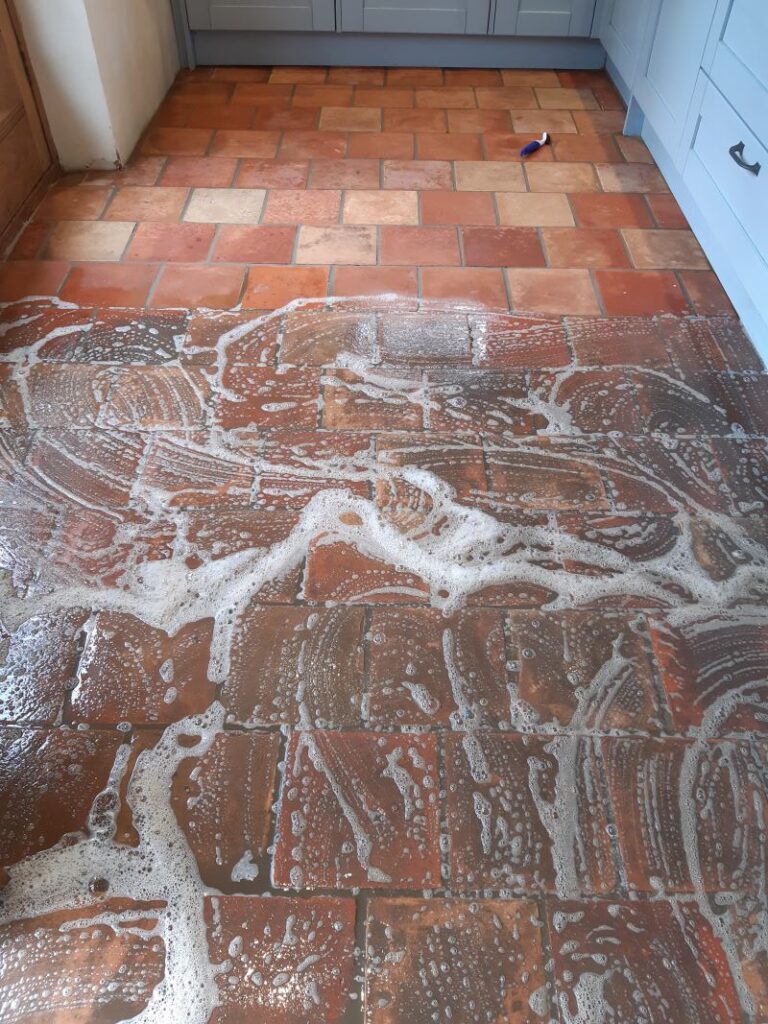
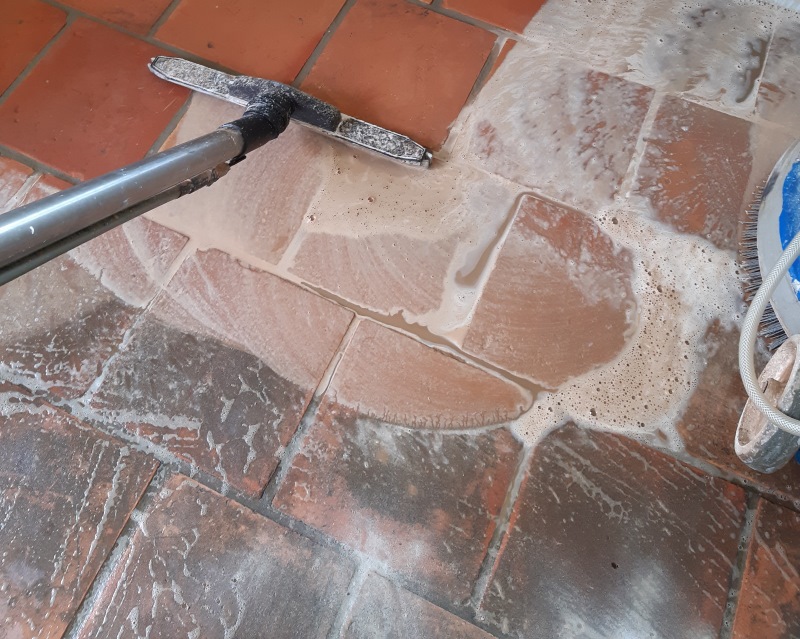
To get the stone clean it was sprayed with a strong dilution of Tile Doctor Pro-Clean and this was left to soak in for a good fifteen minutes to give it time to start breaking down the ingrained dirt. The floor was then scrubbed with a rotary machine fitted with a coarse carborundum brush which lifts the dirt out of the stone and grout. The soiling was then rinsed off the floor and extracted with a wet vacuum.

Flagstone Floor During Renovation Ulverston Barn Conversion Flagstone Floor During Renovation Ulverston Barn Conversion

To further clean the Flagstones and strip off old sealers and remaining surface residues the floor was further treated with a strong dilution of Tile Doctor Remove and Go. This time the solution was scrubbed into the stone using a coarse 200-grit diamond burnishing pad to refine the appearance of the stone.

After rinsing and extracting again the stone was given an acid rinse using Tile Doctor Acid Gel. This neutralises the stone after the use of alkaline cleaners and further cleans the stone to remove grout smears and old mineral deposits to further refine the surface, improving clarity and tone within the stone.

After a final review of the stone to spot clean any stubborn areas, it was given another rinse and dried as much as possible using the wet vacuum.

Sealing a Flagstone Floor

The floor was left to dry out overnight and work resumed the next day to finish the stone with the application of a sealer. First however the floor was checked for moisture, applying sealer to damp stone can result in a patchy appearance so best avoided.

The results were fine so work started to apply the first of what would be two coats of Tile Doctor Colour Grow. This sealer is an impregnator that soaks in the stone adding protection from within, this ensures dirt remains on the surface where it can be easily cleaned away. Another feature of Colour Grow, as its name suggests, is to enhance and deepen the colour and features in the stone.

  Flagstone Floor During Sealing Ulverston Barn Conversion

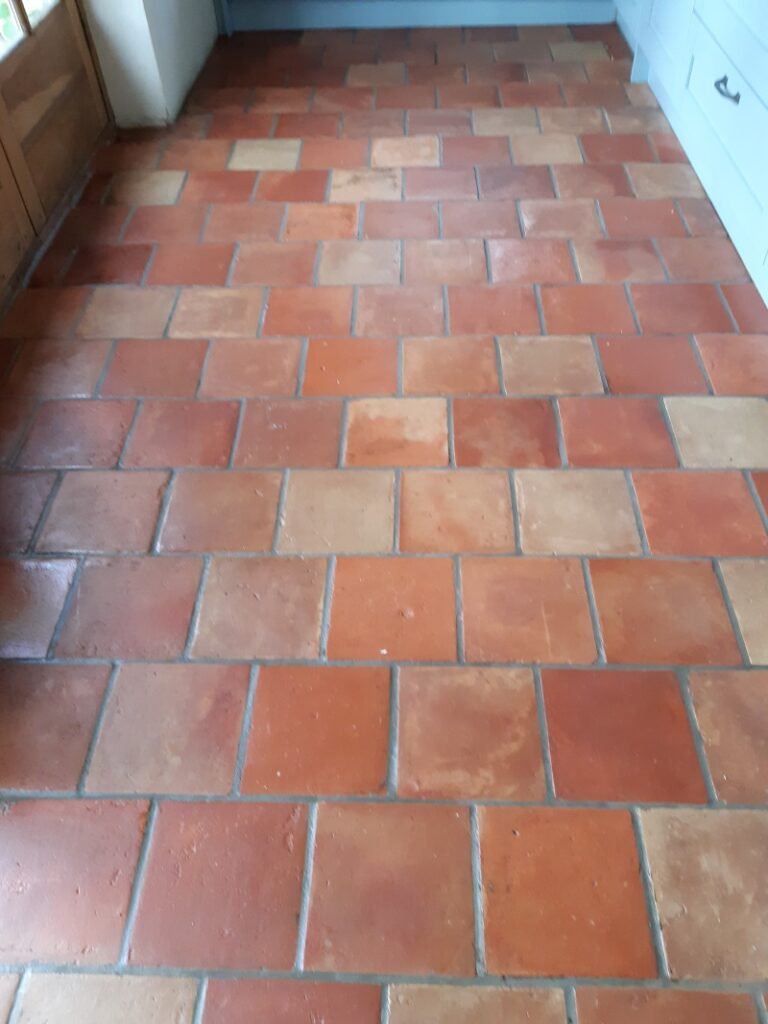
Once complete the flagstones were restored to a rich, natural finish with improved colour depth and a far more uniform appearance. The surface is now protected and significantly easier to maintain.

  Flagstone Floor After Renovation Ulverston Barn Conversion

For aftercare I recommended Tile Doctor Neutral Tile Cleaner which will clean the floor without impacting the sealer which can be a problem with many of the stronger products you find in supermarkets.

Source: Flagstone Floor Cleaning and Renovation Services in Ulverston Cumbria

Thursday, November 13, 2025

How to Remove Staining and Renovate Black Slate Flooring

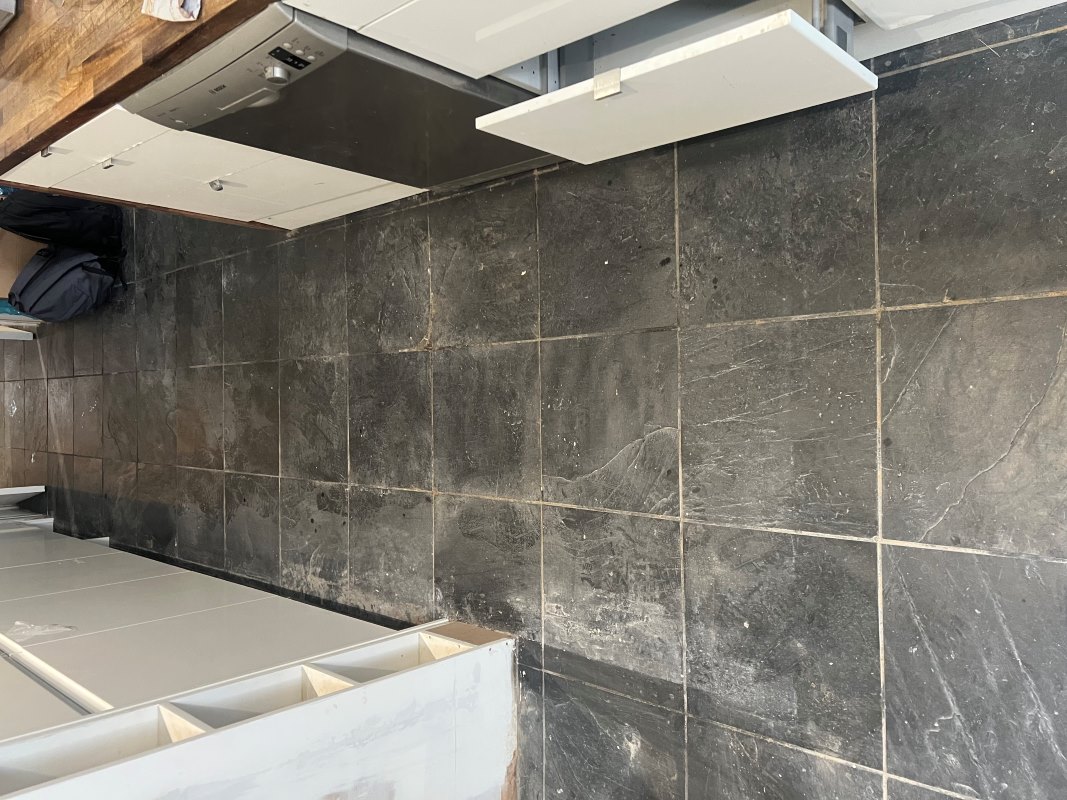
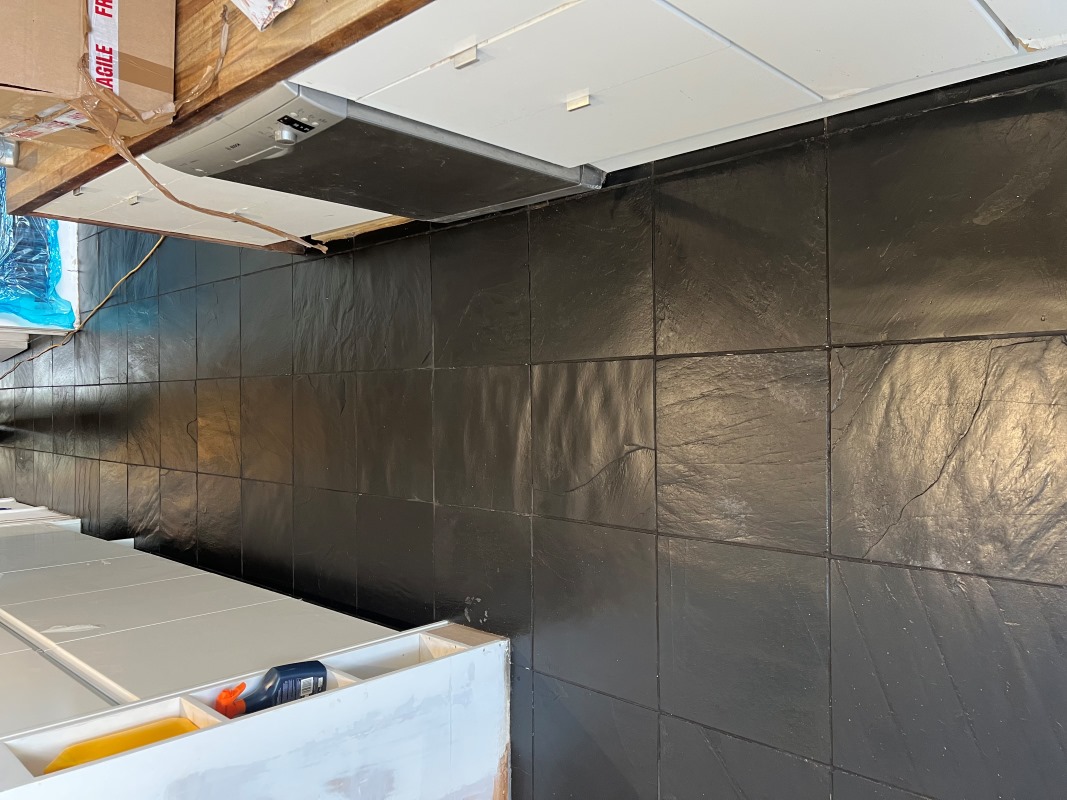
We received an enquiry from a property developer who had been renovating a property in Acton and needed our help to renovate the Black Slate tiles that had been installed throughout the ground floor. The slate floor had been down over 20 years and ran throughout the downstairs living space. Due to all the work being carried out the black slate had become very dirty with building material and had turned white with staining in many areas. They were uncertain if the floor could be restored but were reluctant to consider relaying it due to the expense.

Slate Floor Before Renovation Acton

As usual I went over to the property to understand the nature of the staining and work out the best products and processes for the renovation. There were multiple floors that needed attention so I measured up and worked out a detailed quote that included all the materials that would be needed. After reviewing the quote, I was given the go ahead and a date agreed for the work to start.

Cleaning a Slate Tiled Kitchen

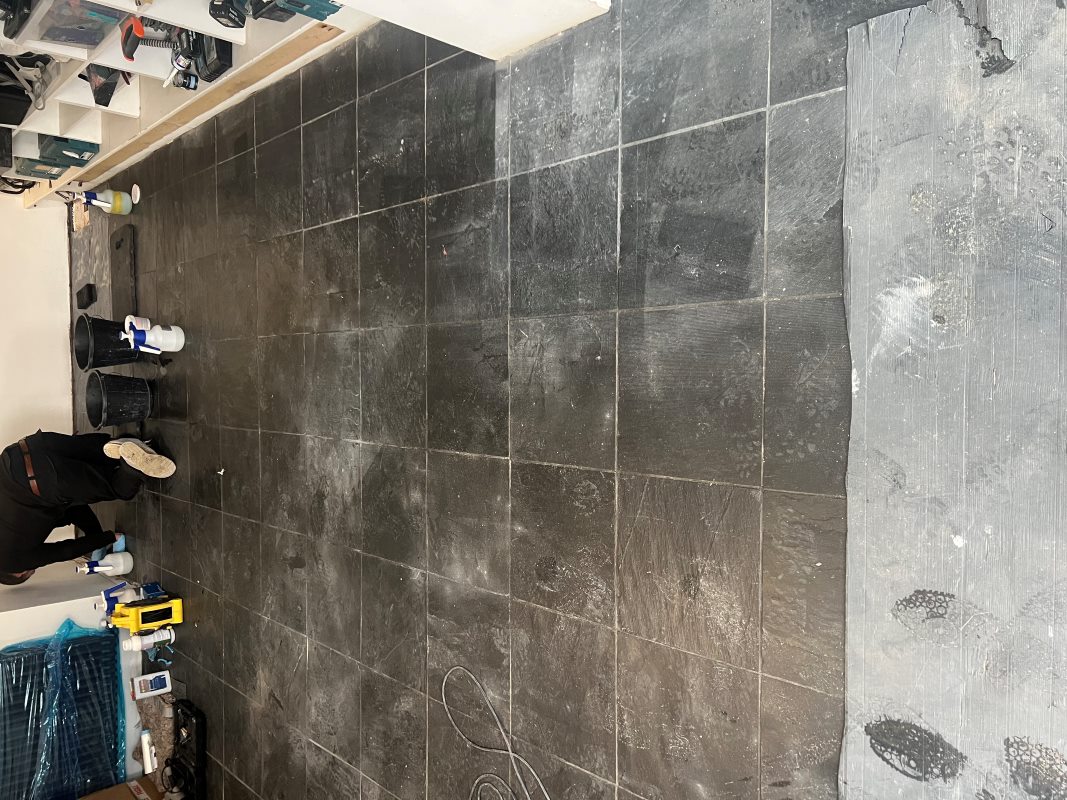
To clean the floor, a strong solution of Tile Doctor Pro-Clean was applied to the floor and then scrubbed in with a black buffing pad fitted to a rotary machine. These pads can struggle to reach into the grout lines so they were given an extra clean using handheld scrubbing brushes. This combination brought the dirt out of the floor to the surface where it could be extracted with a wet vacuum.

Slate Floor During Renovation Acton

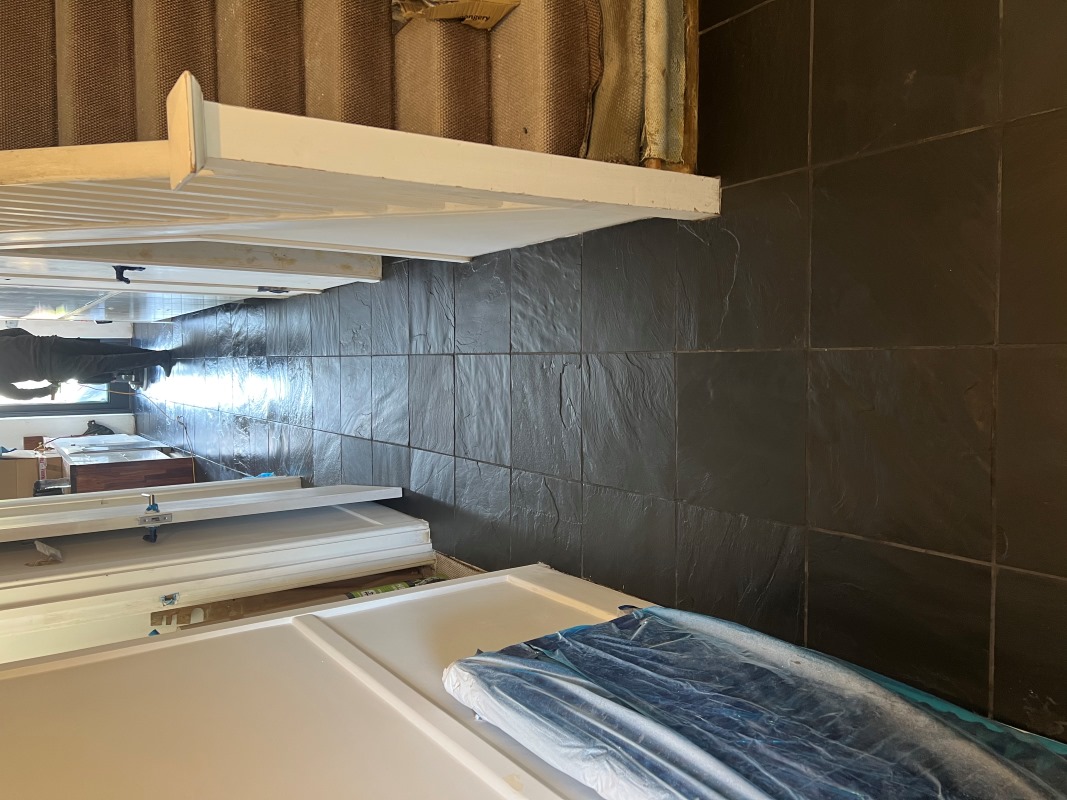
Tougher stains on the tiles were spot treated using more Pro-Clean and some of the grouting had to be scrubbed harder with wire brushes until the whole floor was consistently clean throughout.

Slate Floor During Renovation Acton

Once done the floor was rinsed with a very weak dilution of Tile Doctor Grout Clean-Up to further clean the floor and neutralise it following the use of Pro-Clean which is a strong alkaline. The solution was then extracted with a wet vacuum and floor left to dry.

Sealing a Slate Tiled Kitchen

Once dry it was time to seal the floor which will protect it from ingrained dirt and enhance the finish. For this Tile Doctor Stone Oil was applied which being oil-based really improves the texture and dark colour of the stone.

The sealer is applied using a microfibre cloth and any excess product is wiped off before buffing with a white buffing pad on the rotary machine. This left a nice sheen to the tile and a consistent look throughout.

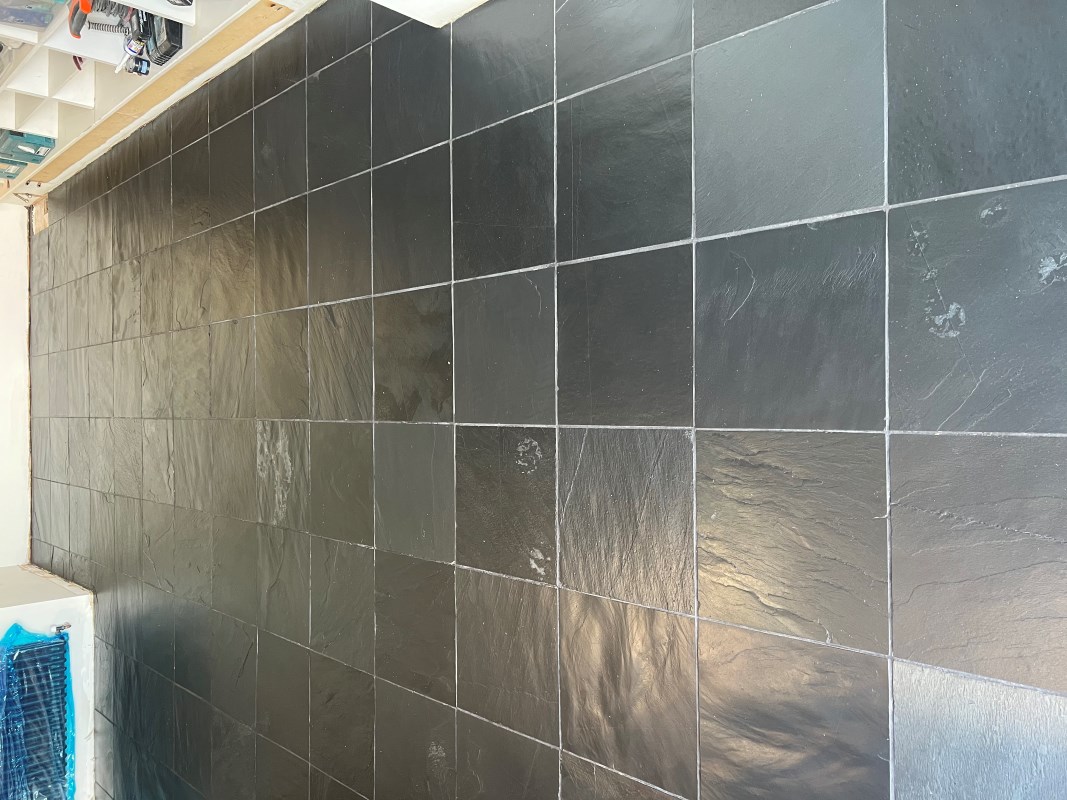
Slate Floor After Renovation Acton

Our client was very happy with the finish, the Slate and Grout had been transformed and the sealer had really enhanced the look of the slate. For aftercare we recommended using Tile Doctor Neutral Cleaner which will provide effective cleaning whilst not impacting the seal.

Slate Floor After Renovation Acton


Source: Black Slate Floor Cleaning and Sealing Service near Acton London

Tuesday, January 21, 2025

How to Remove Self Levelling Cement from Quarry Tiles

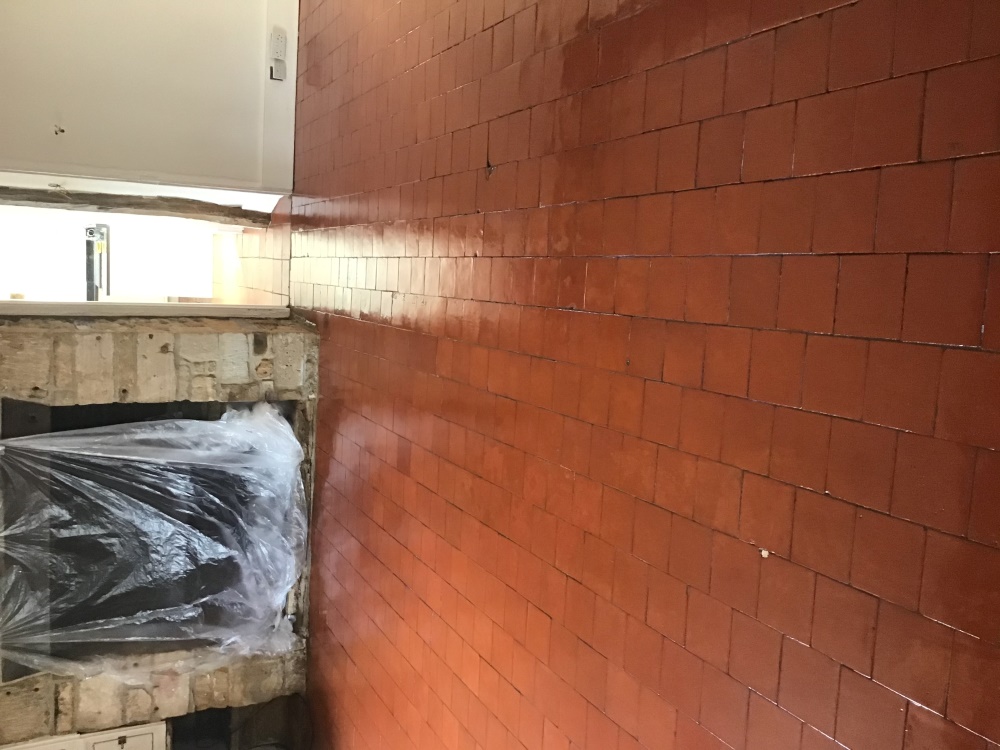
This Quarry tiled floor was discovered in an old cottage in the Surrey village of Cranleigh. The new owners had found the quarry tiled floor under an old carpet and wanted to have it restored as an original feature. Unfortunately, it also had a covering of concrete screed over a large percentage of it. This is a fairly common practice when laying vinyl or carpet over tiles as it ensures a completely flat surface.
Quarry Tiled Floor Before Restoration Cranleigh Quarry Tiled Floor Before Restoration Cranleigh
From experience, I knew returning the tiles to a decent state would be possible but it’s difficult and unpleasant work. None the less I was happy to do the restoration and having visited the property to survey the floor I came up with a restoration plan that I was happy with. This evolved into a quote which the owners were happy to accept, and a date set for the work to commence.


Cleaning a Quarry Tiled Living Room

To remove the screed, I started with a power chisel fitted with a serrated attachment and started to carefully chip away at the screed. This is noisy and messy work, so I shut myself off from the world wearing eye protection goggles and ear defenders. Slowly the cement screed came away and was bagged up for removal.

Once I’d cleared the area of screed, a heavyweight buffing machine was introduced to the floor. Heavy iron bars were attached to the front to increase traction with the tiles and make cleaning and burnishing more effective. With the machine ready the quarry tiles were covered in a strong dilution of Tile Doctor Pro-Clean, and this was left to soak in for ten minutes.

A coarse 200-grit diamond pad was fitted to the machine and then run over the floor to work in the cleaning solution. This abrasive pad cuts into the surface of the tile to remove the years of dirt and grime. This is an aggressive, wet process but the cleaning solution captures the dirt and dust minimising the mess. Once done the floor was rinsed with water and the soiling extracted with a wet vacuum.

Attention was then directed at the grout which had to be hand scrubbed for the best results using more Pro-Clean. The whole floor was then inspected and any stubborn areas of staining were spot treated using the same process. Once I was happy with the condition of the tiles the floor was left to dry out overnight ready for sealing the next day.


Sealing a Quarry Tiled Living Room

Quarry tiles don’t particularly like aggressive cleaning processes and it can cause their colour to fade, however there is little alternative when they are this bad. With this in mind, I had decided to seal them with a colour enhancing sealer called Tile Doctor Colour Grow. This product is an impregnator which works by soaking into the pores of the tile, protecting it from within and ensuring any dirt remains on the surface, it also leaves the matt finish the client had requested.
Quarry Tiled Floor After Restoration Cranleigh Quarry Tiled Floor After Restoration Cranleigh

Other sealers are available that offer a sheen or shiny finish however this client had a couple of dogs whose claws can damage a topical sealer, so an impregnator was the best option.

Quarry Tiled Floor After Restoration Cranleigh

I returned a month later with some reclaimed tiles to fit around the front of the fireplace For aftercare cleaning I recommended the use of Tile Doctor Neutral Tile Cleaner which is ideal for the regular cleaning of sealed tiles and won't impact the integrity of the sealer.

Friday, October 4, 2024

Essex Tile Doctor Reveals how to Remove Years of Dirt from Terracotta Floor Tiles

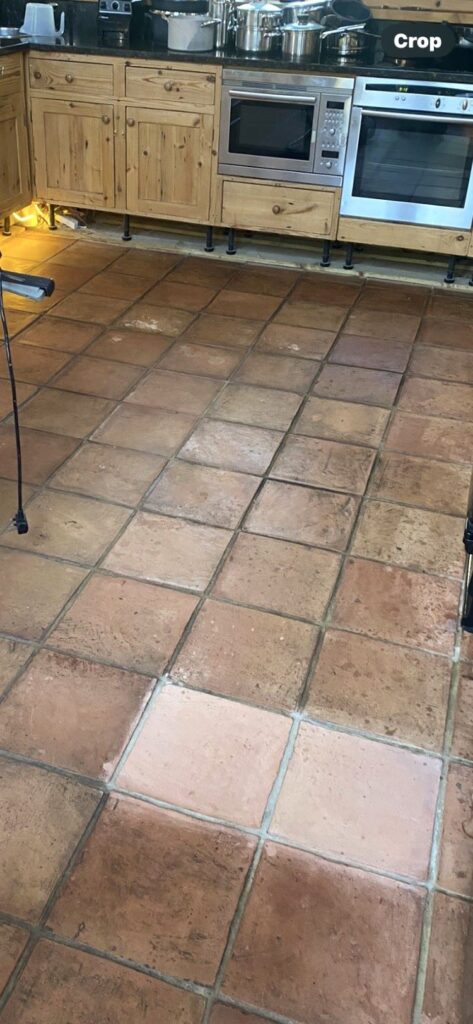
The Terracotta tiles in the kitchen of this property in Danbury near Chelmsford were installed by the owners only five years prior. At the time they didn't like the light colour of the terracotta, so they were sealed with a black pigment added to the sealer in an attempt to darken the floor. Five years later and the sealer had clearly failed, and the tiles and grout were now seriously filthy and impossible to clean.

I wanted to be certain I could remove the dirt and old sealer so whilst at the property surveying the floor I did a cleaning test with Tile Doctor Remove and Go scrubbed into a couple of tiles by hand. The product worked really well and easily cleaned the tiles and grout with excellent results (see picture).

Terracotta Tiled Kitchen Floor Before Cleaning Danbury Chelmsford

The difference was quite striking and equally impressive so after I worked out a quote, they were more than happy to get me booked in to complete the floor.

Deep Cleaning a Terracotta Tiled Kitchen Floor

I returned on the agreed date and immediately set about applying the same process to get the Terracotta tile and grout clean. I used a strong dilution of Tile Doctor Remove and Go working it into the tiles using a black scrubbing pad fitted to a rotary machine which also cleaned the grout lines.

The Terracotta was rinsed, and the soiling extracted with a wet vacuum. Once done the tiles and grout were inspected and any stubborn areas re-treated using the same process until I was satisfied the Terracotta, and grout was as clean as possible.

The underfloor heating was switched on and used to dry the floor overnight so it would be dry and ready for sealing the next day. This was a helpful addition and avoided the need for me to get the fan dryers out overnight.

Sealing a Terracotta Tiled Kitchen

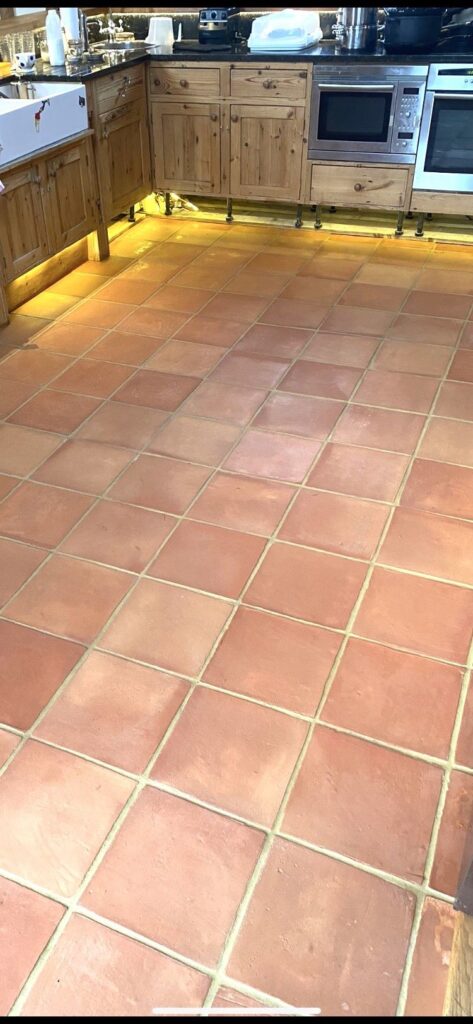
Terracotta is made from clay and as a result is a very porous material, because of this it took eight coats sealer before it was fully sealed. I applied Tile Doctor Colour Grow sealer for this, it contains a colour enhancing formula which really brought out the orange and red colours in the tile.

This sealer is an impregnator that works by soaking into the tile, occupying the pores and ensuring dirt remains on the surface where it is easily cleaned away. It will provide long term protection moving forward and it improves the appearance of the floor without the tiles becoming too shiny.

Terracotta Tiled Kitchen Floor After Cleaning Sealing Danbury Chelmsford

I think you will agree from the photographs that the floor was completely transformed, and I’m pleased to say the owner was really happy and shocked to see it so different from before.

For aftercare cleaning I recommended Tile Doctor Neutral Tile Cleaner, this is a pH neutral product which will ensure the newly applied sealer retains its integrity. Many household cleaning products are simply too strong and will strip away the sealer with use.

Wednesday, August 28, 2024

Newport Tile Doctor Details the Restoration of Victorian Floor Tiling

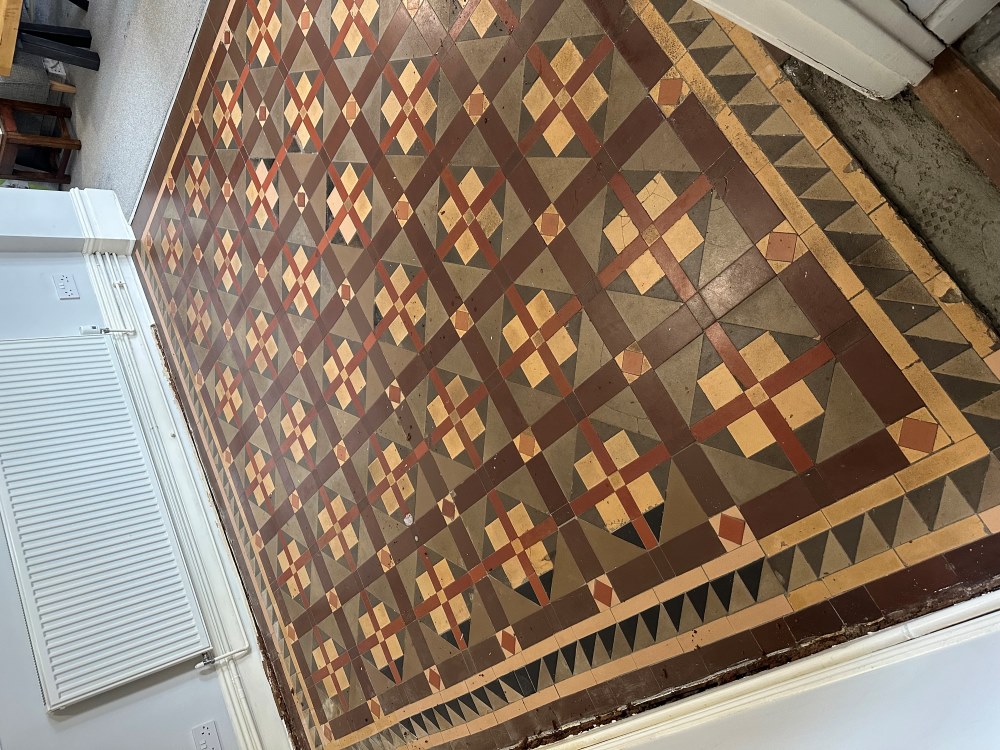
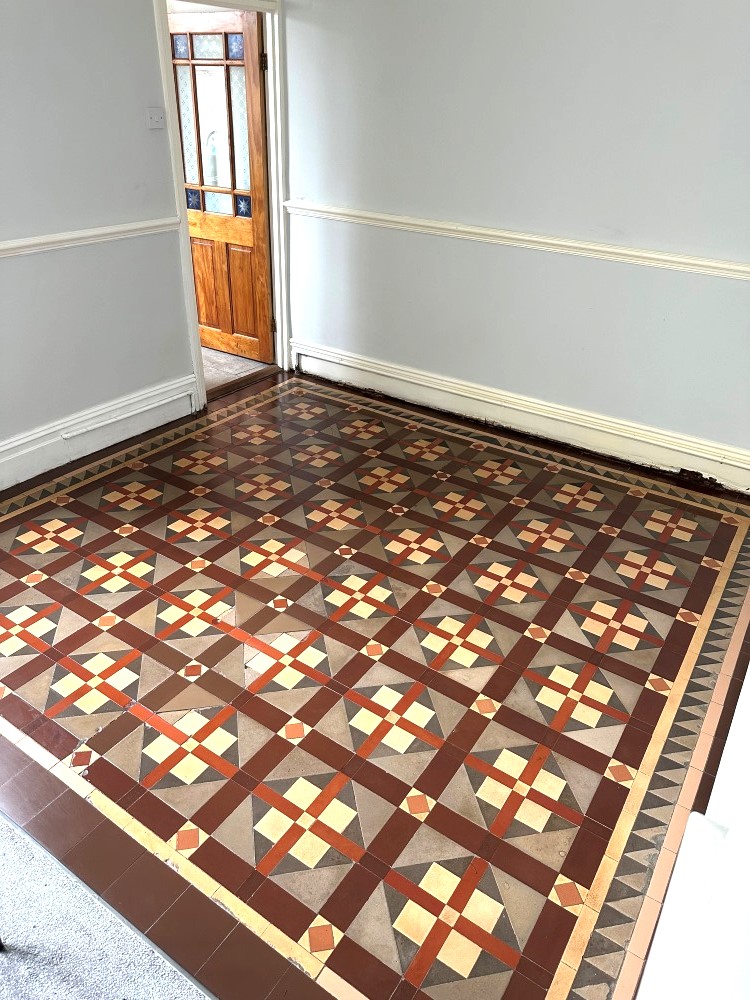
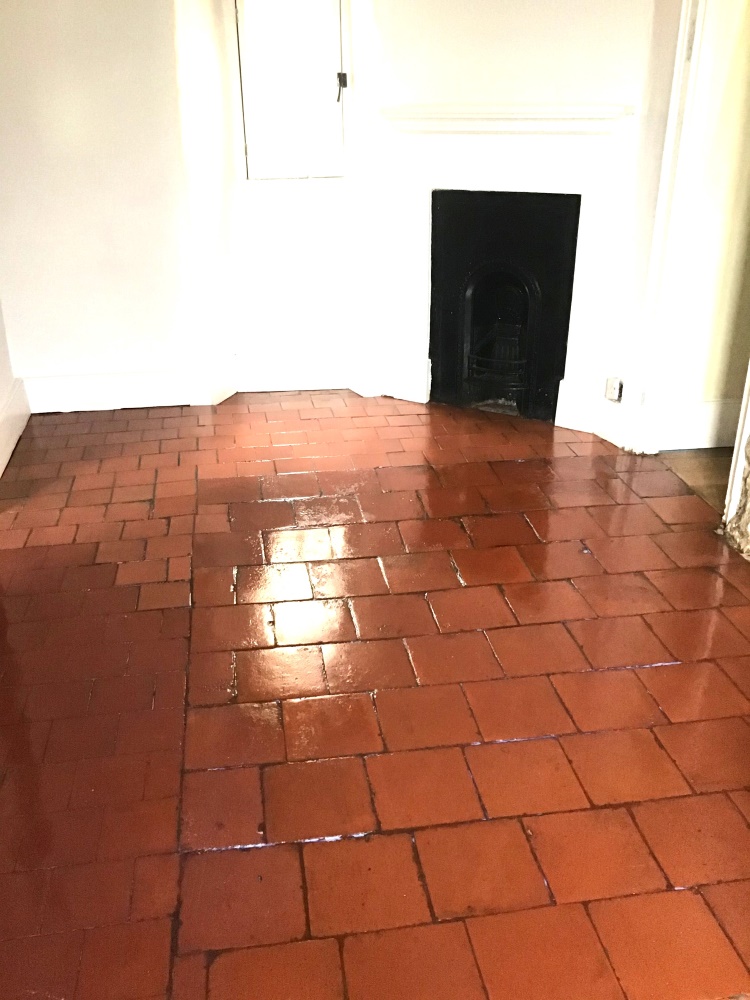
The client had lived at this property in Newport for a few years and decided that it was finally time to sort out the Victorian tiled floor in the dining room. Some repairs were needed in a few areas and the sealer was fading and due for replacement.

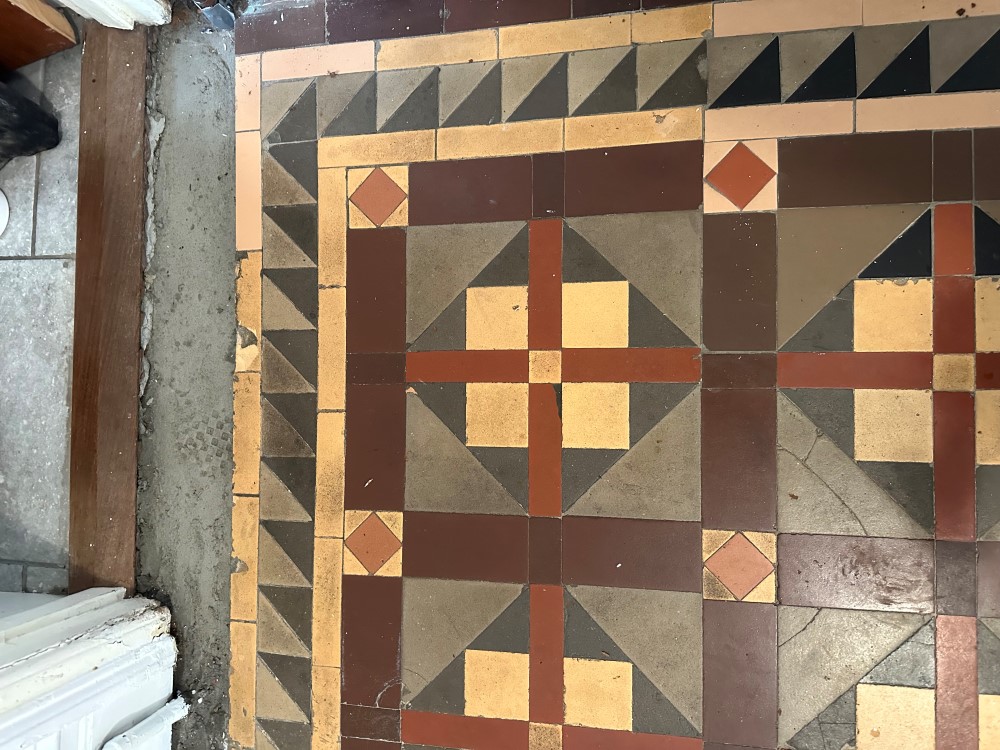
Victorian Tiled Dining Room Floor Before Renovation Newport

I went over to the property to survey the floor and advised that with repairs, cleaning and sealing the process would take two and a half days. Having worked on many many floors like these before I was very confident that we could repair the floor where needed and restore its appearance.

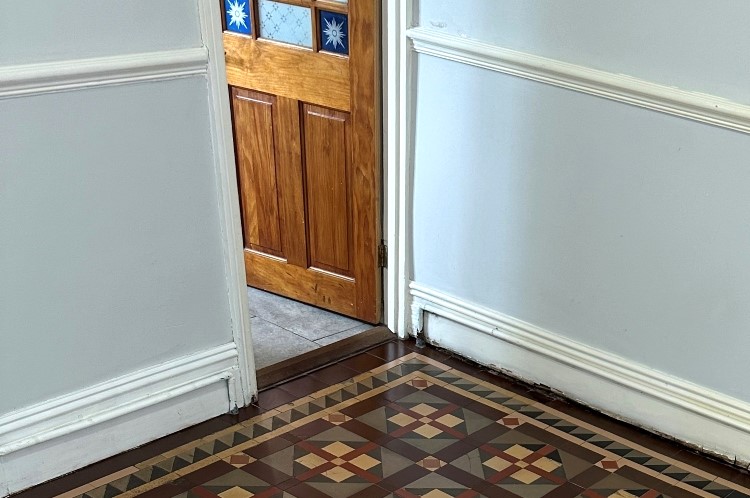
During the visit I noticed that at the door threshold leading into the kitchen, some of the tiles had been taken up for a gas pipe repair and back filled with cement, I suggested I could repair this section using matching tiles, so I included it in the quote. The quote to renovate and repair the floor was accepted and the job was booked in.

Victorian Tiled Dining Room Floor Before Renovation Newport


Cleaning and Repairing a Victorian Tiled Dining Room Floor

I began by addressing the tiling issues so my first course of action was to set matching tiles along the doorway border leading to the kitchen, as the previous tiles had already been removed by the gas company it was fairly straight forward job of carefully knocking out the cement. The tiles I had sourced were from a nearby reclamation yard and needed to be carefully cut to size to ensure a good fit with the original. After setting the tiles and grouting I left them to dry overnight.

The following day I began cleaning, using a combination of Tile Doctor Remove and Go and Pro-Clean, leaving the solution to dwell after being brushed into the floor. After around ten minutes the floor was scrubbed by hand with a stiff brush to release the dirt from the tiles. The resultant slurry was then vacuum away and with the floor cleaner I was able to get a better idea of which areas needed more attention.

I restored the perimeter of the floor with a 200-grit diamond block and this was followed up with a 200-grit diamond pad fitted to a rotary machine. These coarse pads cut into the tile surface removing years of grime and giving them a new lease of life. After another rinse and extraction with the wet vacuum the whole floor had a much brighter appearance. The process was then repeated with a 400-grit diamond pad to close the pores of the tiles.

The floor was then washed by hand with water and a sponge to make sure there wasn’t any areas missed, also to ensure there was no residue from the cleaning products left on the floor which could potentially disrupt the sealing process. The floor was then left to dry overnight ready for sealing the following day.


Sealing a Victorian Tiled Dining Room

To assist with drying I asked the client to leave a couple of air movers running during the evening and to put them back on in the morning. This worked well and by the next day I was able to confirm the floor was dry and ready for sealing with a moisture meter.

The client had requested a satin finish and so the sealer chosen was Tile Doctor Seal and Go, four coats were applied to the tiles a permanent wet look and gorgeous lustre. Another advantage of Seal and Go is that it’s a water-based sealer so it doesn’t give off a smell as it dries.

Victorian Tiled Dining Room Floor After Renovation Newport

For aftercare I left the client a bottle of Tile Doctor pH Neutral Tile Cleaner to help maintain the appearance of the floor. This is a gentle tile cleaning product that won’t harm the sealer, many of the products you find in supermarkets are simply too strong for a sealed floor.

Victorian Tiled Dining Room Floor After Renovation Newport 


Wednesday, July 10, 2024

Northants Tile Doctor Details the Renovation of a Quarry Tiled Floor in Wollaston

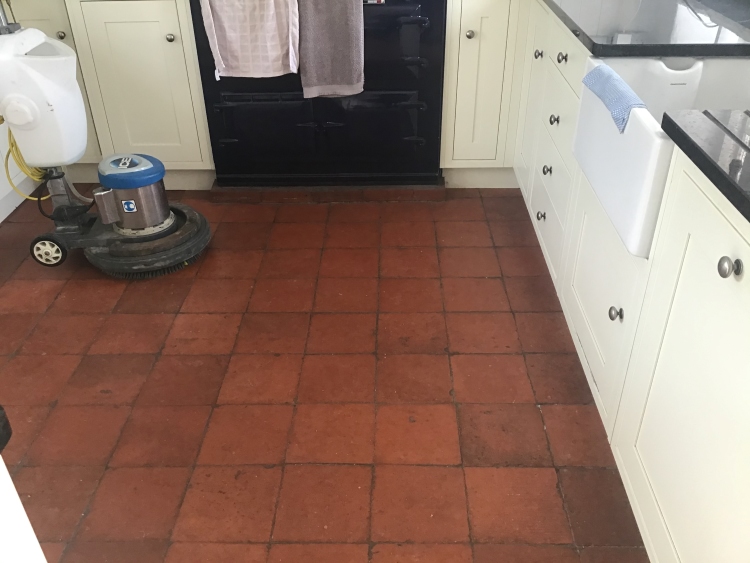
This client from the village of Wollaston contacted Tile Doctor about cleaning and sealing their Quarry tiled floor. They were refurbishing the house and wanted to keep the original floor tiles as part of the renovation.

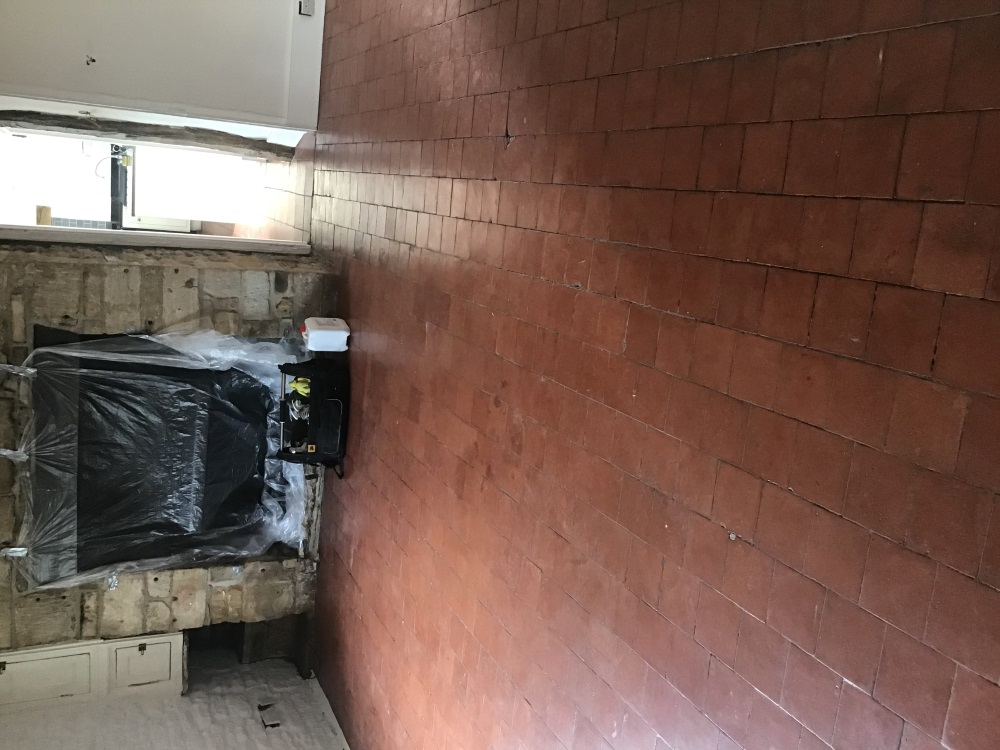
The tiles were installed throughout the ground floor, including the kitchen, lounge and hallway. However, as I was to discover myself, they were covered in years of grime, and they were not sure if they could be restored.

Quarry Tiled Kitchen Floor Before Renovation Wollaston

I went over to survey the floor and could see that any sealer that may have protected the tiles from ingrained dirt had long since worn off and as a result dirt had become ingrained into the pores of the quarry tiles. Once this happens its very difficult to keep clean.

 Quarry Tiled Kitchen Floor Before Renovation Wollaston

I had to agree the floor was overdue a deep clean and re-seal and so took some measurements in order to work out a quote for doing the work. The quote was accepted, and a date set for starting the work which would take two days, one to clean and one to seal.


Cleaning a Quarry Tiled Ground Floor

To deep clean the quarry tiles, a strong dilution of Tile Doctor Remove and Go was applied to the floor and left to dwell for a short while. The solution was then scrubbed into the tile using a black scrubbing pad fitted to a rotary machine.

The solution soon turned black with the dirt that was pulled out of the tiles and was rinsed away with water and extracted using a wet vacuum. I inspected the tiles afterwards and could see some paint splashes from years of decorating were still evident, so I re-applied the product and repeated the process to get rid of them.

The grout was then cleaned by hand using Tile Doctor Pro-Clean and a scrubbing brush, again extracting the waste once complete. I find this is the most effective way to clean grout as the pads struggle to reach into the recess of the grout line.

To complete the cleaning process, I then gave the floor an acid rinse with Tile Doctor Grout Clean-up, this was applied to remove old grout smears and further clean up the tiles. All soiling was rinsed off with water and extracted with a wet vacuum. The floor was left to dry off overnight.


Sealing a Quarry Tiled Ground Floor

Returning the following day, the first job was to test the floor with the damp meter to check it was dry. The tiles needed to be dry enough to accept the seal and applying sealer to damp tiles can result in a patchy appearance. This is always worthy checking when cleaning Quarry tiles as that are naturally quite porous so can take some time to dry.

Once satisfied the readings were within the correct range, I was ready to seal. I selected to use Tile Doctor Seal and Go Extra for this, it’s a breathable sealer which is useful for older floors such as this where there is no evidence of a damp proof membrane being installed. Breathable sealers allow for moisture to rise through the tile and evaporate at the surface, without this moisture can build-up under the floor causing it to reach out to the walls where it could cause rising damp.

I applied two coats of Seal and Go Extra waiting for the first to dry before applying the next. The sealer lifts the deep red colours in the Quarry tiles and adds a nice appealing shine. The sealer works by ensuring dirt remains on the surface where it can easily be cleaned away.

Quarry Tiled Kitchen Floor After Renovation Wollaston

My client was very happy with their now clean quarry tiled floor and left the following feedback for me:
"I was looking forward to the results before it was even booked in, and I was not disappointed. A professional approach and very helpful throughout."

Before leaving I took time to explain how to maintain the floor using Tile Doctor Neutral Tile Cleaner. Its important to use a product like this on a sealed floor as many tile cleaning products are simply too strong and will strip the sealer off the floor with regular use.

Quarry Tiled Kitchen Floor After Renovation Wollaston

Monday, May 13, 2024

How to Deep Clean Norfolk Pamment Tiles

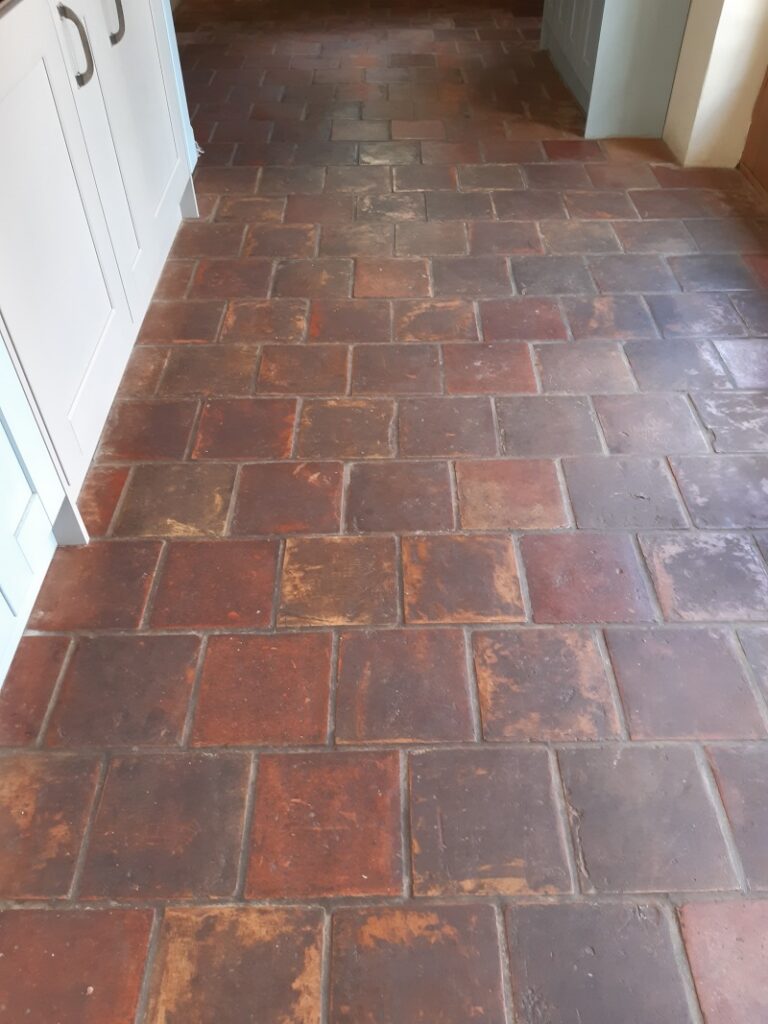
I was contacted by clients with a Pamment Tiled Flooring who were living in Gissing, a small village in the centre of South Norfolk which has a long history dating back to Saxon times. The Pamments were reclaimed suffering from heavy soiling and in need of considerable expert attention. All the old protective coatings had pretty much worn completely off the surface of the tiles which had then allowed many years of dirt to become ingrained in the pores of the clay, making it almost impossible to clean for the homeowner using ordinary methods.

  Reclaimed Pamment Floor Before Cleaning Gissing 

 Pamment tiles were very popular in older Norfolk homes; they are made from locally sourced clay and, like terracotta, are extremely porous and therefore need to be thoroughly sealed against fluids and general soiling. When correctly cleaned and sealed, they are quite versatile and can be used for internal floors as well as external areas such as patios and pathways.


Cleaning a Pamment tiled floor

To remove all traces of the old sealers and clean the tiles I decided to apply Tile Doctor Remove & Go, which was diluted with water to form a medium strength solution. I applied a generous coat of this solution to the floor, leaving it to soak into the pores of the tiles for approximately ten minutes. The solution was then worked into the Pamments using a Black nylon scrubbing pad fitted to a 17" rotary machine. Remove & Go is a powerful and versatile cleaner which is safe to use on natural stone floors, kiln-fired tiles and all types of grout.
Reclaimed Pamment Floor During Cleaning Gissing Reclaimed Pamment Floor During Cleaning Gissing
I rinsed the solution off the floor with clean water once it had worked its magic and extracted the resulting dirty residue with a wet-vacuum machine. In order to tackle some particularly stubborn stains, I repeated this process until I was satisfied that the floor had been cleaned to the highest standard possible.

Reclaimed Pamment Floor During Cleaning Gissing
  
  The whole area was then given an acid wash using a dilution of Tile Doctor Grout Clean-Up. This further cleans the tiles to remove old grout stains and neutralises the pH level of the floor following the use of alkaline cleaning products, lastly it also ensures optimal adhesion of the new sealer.

The floor was then left to dry overnight before returning the next day to complete the seal. I left a dehumidifier running overnight to assist the drying process and ensure that the floor would be completely dry on the following day. It’s imperative that a tiled floor is completely dry before sealing as any excess moisture left in the floor can potentially adversely affect the overall performance of the sealer as it evaporates.


Sealing a Pamment tiled floor

To seal and protect the Pamment tiles I applied a total of five coats of Tile Doctor Seal & Go, which provided a robust, durable surface seal along with an aesthetically pleasing, mid-sheen finish (as you can see from the photos). Seal & Go is the go-to sealer for internal, unsealed porous surfaces such as Terracotta, Sandstone or Slate.

  Reclaimed Pamment Floor During Sealing Gissing

The clients had left us to work our magic over the two days, returning at the end of the sealing day and were absolutely staggered at the results we had achieved with a floor they had thought beyond help.

  Reclaimed Pamment Floor After Renovation Gissing

For aftercare cleaning I recommended the use of Tile Doctor Neutral Tile Cleaner, it’s a gentle yet effective product that won’t upset the sealer which can be the problem with many of the stronger products you find in supermarkets.

Wednesday, November 8, 2023

Tile and Stone Cleaning in Beziers South of France

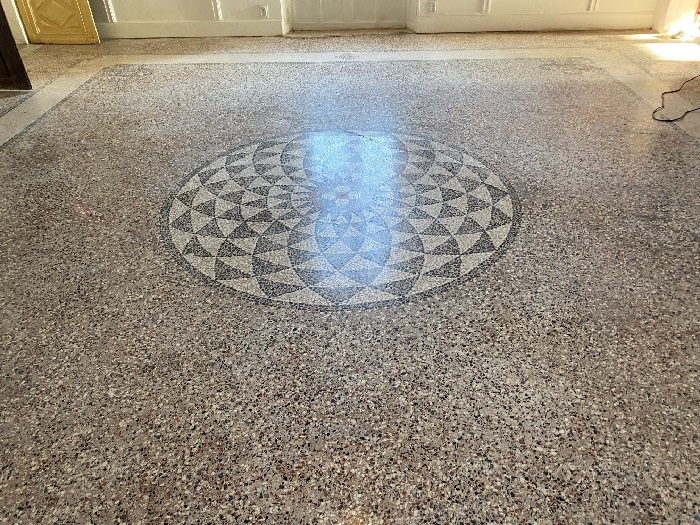
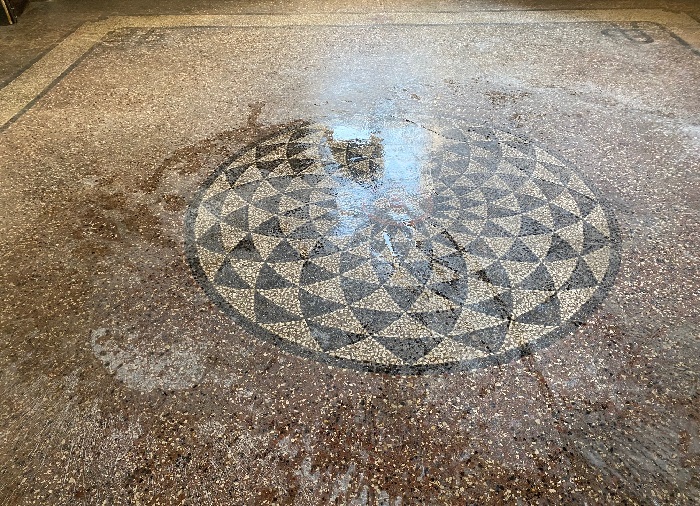
The English owner of a French Chateau contacted Tile Doctor about the hard floors at their property in Béziers in the South of France. There were several floors at the property including Terrazzo, Limestone and Black and White Encaustic tiles all around a hundred years old and in a bad state of repair. There was a lot to cover so for this post we will focus on the Terrazzo flooring.

Terrazzo Floor Before Renovation Beziers France 

We have been known to carry out tile renovation work in other counties so we were more than happy to consider a visit to the South of France and help bring the floors back to life. Previous overseas projects have included a hotel restaurant in Addis Ababa, holiday cottages in Ireland and a villa in France. 

Luckily for us the customer had invested in some machinery that he had found on eBay but he didn’t have the technical knowledge to do the work and so had decided to seek help. Having discussed each of the floors in detail over the phone and with photographs sent via email I worked out a restoration plan for each floor.
We supplied the products he needed and we were flown down from Manchester to Béziers Cap d'Agde Airport where we were picked up by the client, (very Hollywood). If you have never been to Béziers before it’s well worth a visit, it's a beautiful area, well laid out, with parks and rivers, an old 12th Century Monastery and the property had great views all around.

Tile Doctor Floor Renovation Bezier


Deep Cleaning and Filling Terrazzo Flooring in Béziers France

On arrival at the property work started with setting up the machinery and conducting some preliminary cleaning tests to work out the best approach. After that however our host insisted on showing us round Béziers, it was a Saturday afternoon and we were in the South of France so why not, they certainly know how to live properly down there.
   
Terrazzo Floor Before Renovation Beziers France Terrazzo Floor Before Renovation Beziers France

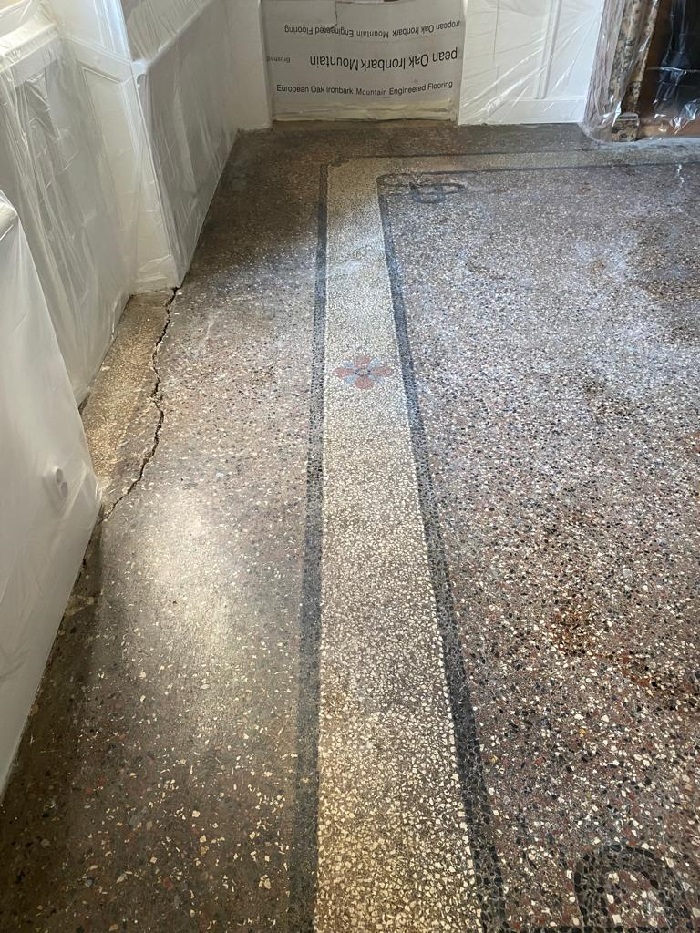
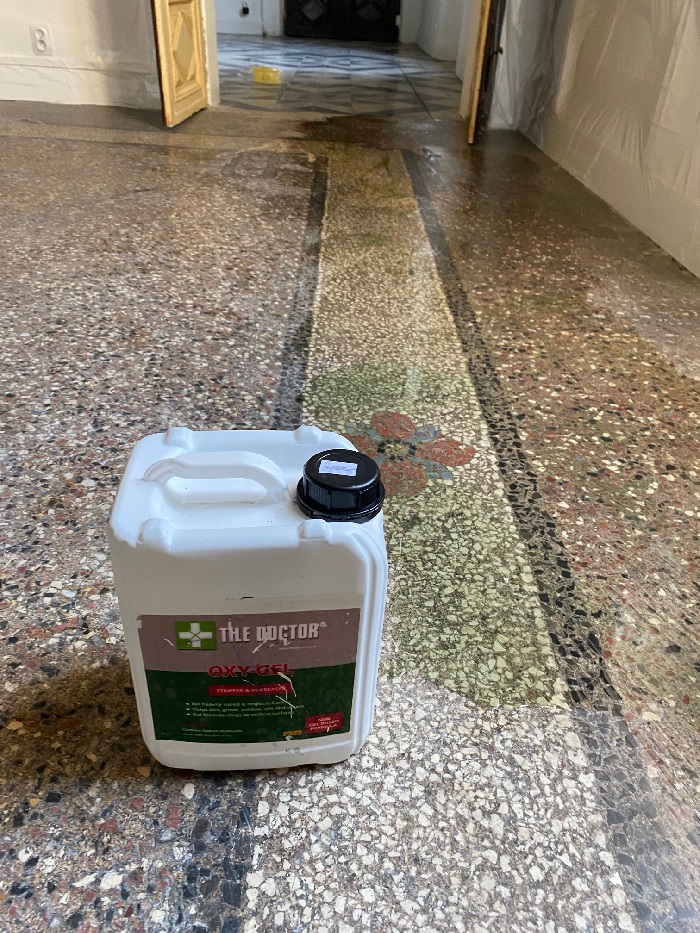
So, work started on the Sunday with the application of a 200-grit Milling pad and Oxy-Gel cleaning solution. I was concerned (due to some hairline cracks in the Terrazzo) that water would seep through into the rooms below (this was a big old townhouse set on four levels) so by using a gel-based product it would be easier to control and the moisture would be kept to a minimum.

Terrazzo Floor During Cleaning Oxy-Gel Beziers France 

The resultant soiling was then extracted with a wet vacuum and attention moved to filling the cracks in the Terrazzo with a resin filler. Once the resin had cured the floor was cleaned again, this time with a 200-grit DRB Milling pad which contains diamond segments. The process was lubricated with water and progress was checked underneath several times to ensure the pad was working as expected.

Terrazzo Floor During Renovation Beziers France


Polishing a Terrazzo Floor in Béziers France

This work continued with increasingly finer diamond encrusted burnishing pads starting with a 400-grit Diamond burnishing pad and moving up to an 800-grit and finishing with a 1500-grit pad. Only water was used for lubrication and the soiling was extracted with a wet vacuum after each pad was applied. This method slowly improves the surface of the Terrazzo adding a long-lasting polished appearance. 

The floor was left to dry overnight and the following day treated to a spray burnish using a very fine 3000 grit burnishing pad; the pad is applied dry to the floor with only a little amount of water which is sprayed onto the surface.


Sealing Terrazzo Flooring in Béziers France

This final 3000-grit pad leaves the floor dry and allows the floor to be sealed shortly afterwards. The sealer chosen for the Terrazzo was Tile Doctor Colour Grow which is a colour enhancing impregnator which works by soaking into the pores preventing dirt from residing there. Sealing the floors keeps the dirt and other contaminates on the surface where it can be easily removed.

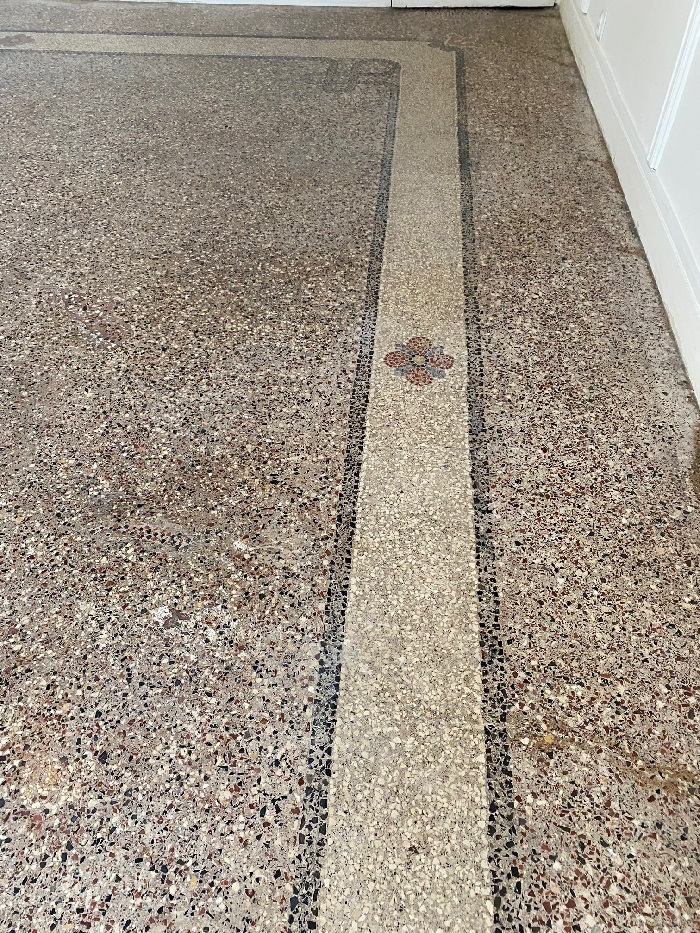
Two coats of Colour Grow were applied and this brought out the lovely pink tones in the Terrazzo which together with the polished appearance really transformed the appearance of the floor.

Terrazzo Floor After Cleaning Beziers France 

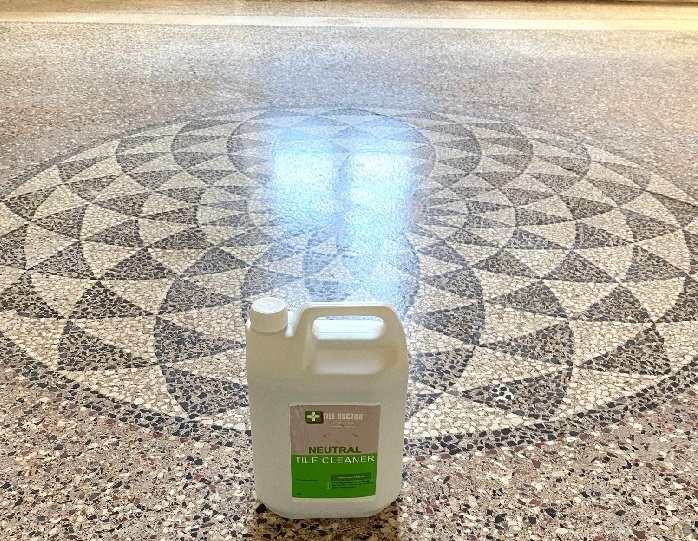
For aftercare cleaning I got the customer to purchase a five-litre bottle of Tile Doctor Neutral Cleaner along with the other products. You must be careful what you clean sealed floors with as many products contain bleach and are simply too strong resulting in the premature degradation of the sealer.

We spent the whole week at the property and as well as working on the other floors did find time to do some more sightseeing before flying back the following weekend.


Thursday, November 2, 2023

Buckinghamshire Tiling Expert Reveals How to Remove Stains from Encaustic Floor Tiles

The pictures below were taken at a property in the old town of Marlow which had modern Encaustic tiles installed in the downstairs WC. Although they may appear on first appearance to be perfectly fine the owner had called us in to deal with the staining around sink area around toilet.

The tiles had only been installed six months earlier and after surveying the floor it was clear to me that the tiler hadn’t applied enough protective sealant following installation. I quoted for deep cleaning the floor with diamond burnishing pads and then re-sealing with a stronger sealer which given the small size of the floor should be completed in a day.
  Modern Encaustic WC Floor Tiles Before Renovation Marlow

Deep Cleaning an Encaustic Tiled WC Floor

To remove the original sealer and deep clean the encaustic tiles I started with a 200-grit burnishing pad lubricated with water. The floor was too small for a buffer machine so I used 6-inch pads fitted to a hand buffer. This action cuts back the tiles removing the stains in the process.

After rinsing and extracting the soiling that was generated, I checked the floor to confirm the staining was gone. I could see that the 200-grit pad had done the job and there was no need to apply a coarser 100-grit so I followed up with finer 400 and 800 grit pads. Again, water was used to lubricate the process and the floor was rinsed and extracted after each pad. I went over the floor slowly to ensure each tile had a deep clean and to avoid creating any swirl marks.

Once the 400 & 800 grit pads had been applied, I buffed the tiles with a White rag to remove any excess water and get it ready for the next pad which would enhance the deep blue colours in the floor. Once the floor was dry a very fine 1500-grit pad was applied to compete the burnishing and add a slight shine to the tiles, this also leaves the floor nice and dry and ready for sealing.

Sealing an Encaustic Tiled WC Floor

To seal the floor, I used an oil-based sealer called Tile Doctor X-Tra Seal, which is rated for internal and external use. I allowed it to soak into the encaustic tiles which would allow the colours to really darken after the use of the burnishing pads.

After about thirty minutes I rubbed off the excess with a White cloth and then proceeded to apply a 3000-grit buffing pad to leave a smooth surface and an even shine all over the floor. I finished off with a further coat of X-Tra Seal and left for 30 minutes and repeated the same process giving a deep colour finish and leaving the floor well protected.
  Modern Encaustic WC Floor Tiles After Renovation Marlow 
The customer where very happy with the result and recommended us to friends of theirs who had the same tiled floor. Before leaving I spent a few minutes to discuss aftercare cleaning, which for this floor I recommend Neutral Tile Cleaner.

Sunday, August 13, 2023

How to Remove Excess Grout from Brick Slip Bathroom Flooring in Saxilby Lincoln

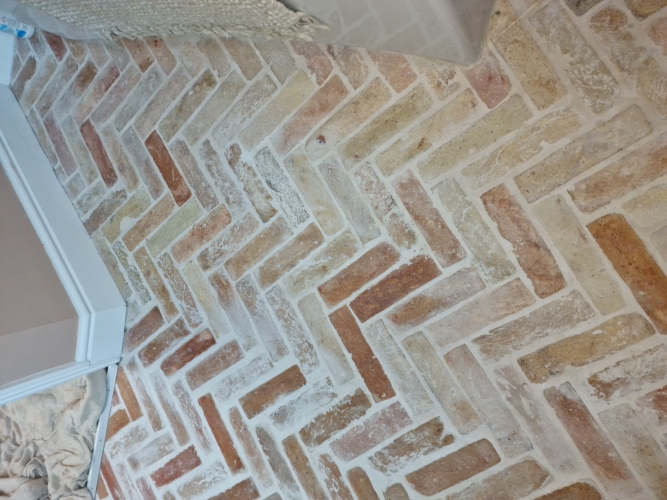
I was asked if I could improve the look of this new bathroom floor that had been laid with brick slips in a herringbone pattern at a property in Saxilby near Lincoln. The builder had done a solid job of laying the bricks but had been overzealous on the grouting and was unable to remove all of it resulting in a whitening of the red bricks due to grout haze. Unhappy with the appearance of their new bathroom floor and with little chance of resolution with the builder they contacted Tile Doctor to see what could be done to improve their appearance.
 
Brick Slip Tiled Bathroom Floor Before Cleaning Saxilby

Brick Slip tiles are basically a very thin brick which allows it to be laid like a tile, normally they are cut from an actual clay brick although there are other types. Thin like a tile and light weight they can be used to quickly create authentic looking brick walls and floors.

I visited the property to understand the problems and whilst I was there, I carried out a test clean to show the client what could be achieved. They were happy with what I showed them and booked me in to have the work done.
 
Brick Slip Tiled Bathroom Floor Before Cleaning Saxilby Brick Slip Tiled Bathroom Floor Before Cleaning Saxilby


Removing Grout Haze from Brick Slip Flooring

To remove the grout haze, I started off with an application of Grout Clean-up which contains phosphoric acid and is designed exactly for this purpose. It was a small space to work in so the product was scrubbed into the tile by hand until I got them as clean as possible. This was followed by a quick rinse and extraction with a wet vacuum.

I then inspected the floor and could see more work was required so this time I laid down Acid Gel which is a blend of Phosphoric and Hydrochloric acids and left it to dwell for ten minutes. After another scrub I was pleased to see I had managed to remove all the grout haze and the red brick was really starting to come through. I then gave the floor a thorough rinse with water and then removed the soiling and as much moisture as possible with the wet vacuum. I left the floor to dry off whilst I went to lunch leaving an air mover in place to assist with the drying.


Sealing Brick Slip Flooring

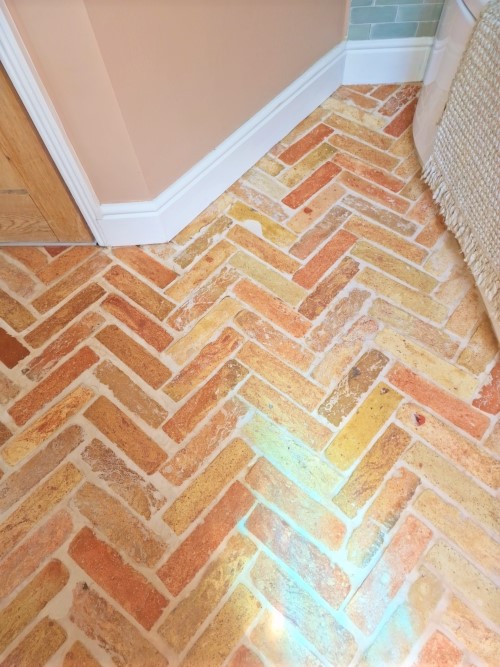
Once it had dried the floor was then sealed using Tile Doctor Colour Grow which is a colour enhancing product that as the name suggests improves colour in the tile, it’s also an impregnator which works by occupying the pores in the brick protecting it from within.
 
Brick Slip Tiled Bathroom Floor After Cleaning Saxilby Brick Slip Tiled Bathroom Floor After Cleaning Saxilby

The client was over the moon and said that is how they wanted it to look originally. For cleaning I made the client aware of the problem of using harsh cleaning products on sealed tiles and advised them to use Neutral Tile Cleaner which is a mild but effective cleaner that won’t erode the sealer with regular use.

Sunday, May 21, 2023

Putting the Shine Back on Encaustic Floor Tiles in Hemswell Cliff Lincolnshire

The photographs below are of an Encaustic Tiled Floor which had been installed some years prior in the kitchen of at a property in the village of Hemswell Cliff which is between Gainsborough and Market Rasen.

I paid a visit to the property initially to survey the floor and discuss the problem with the client. The main issue was the tiles had become dull and she couldn't keep them clean. I explained that Encaustic tiles are porous and need to be kept sealed to prevent the dirt from becoming ingrained in its pores; over the years since installation the sealer had simply worn down and now dirt was getting into the pores of the tile and once that happens it can be difficult to get it out. 

To prove my point, I carried out a demonstration on how I would clean them and explained the different sealer options available and how each sealer can have a different effect. She was pleased with the demonstration and was happy to accept my quote to deep clean the whole floor and then re-seal it.

Deep Cleaning Encaustic Kitchen Floor Tiles

I set about scrubbing the floor using a hot water dilution of Tile Doctor Pro-Clean Tile and Grout cleaner combined 50:50 with NanoTech HBU Remover which adds tiny abrasive particles to the solution to make a more effective cleaning product. The solution was worked into the tiles by scrubbing with a rotary machine fitted with a Black scrubbing pad.

The pads struggle to reach into the recesses between the tiles so to get the grout clean I scrubbed them by hand using a stiff brush. Once done the soiled solution was removed using a wet vacuum and floor inspected to ensure it was as clean as possible. Any stubborn areas were spot treated by hand and then the whole area thoroughly rinsed down with clean water to remove any trace of cleaning product.

Finally, the wet vacuum was used to dry the floor as much as possible with assistance from a Turbo Air blower to help reduce the drying time.


Sealing Encaustic Floor Tiles

It wasn’t a particularly large floor and a warm day so I was able to complete the cleaning process by lunch time and after a few hours later with the assistance of the air blower the floor was dry and ready to be sealed.

Having discussed sealer choice with the client earlier a decision had been made to seal the encaustic tiles with Tile Doctor Seal and Go which adds a nice subtle sheen to the tile. Five coats of Tile Doctor Seal and Go were needed before the tiles were fully sealed, it’s a water based protective sealer so it doesn’t give off any odour whilst it dries and it provided the finish the customer was looking for.

Once completed the colours in the tiles were really vivid and resulted in one happy customer with a clean easy to maintain floor. On the subject of cleaning, I recommended the use of Tile Doctor Neutral Tile Cleaner which is a mild but effective tile cleaner. The problem with many of the tile cleaning products you find in supermarkets is they contain bleach which is simply too strong for use on a sealed tile as it will strip off the sealer.

Wednesday, May 10, 2023

Lancashire Stone Expert Details how to Resurface Old Flagstones using Coarse Milling Pads

 The client said when he moved into this house in Lytham St Annes late last year that this room had a really bad smell of damp. The Flagstone floor was covered in carpet and he had the impression that the previous owner’s cat had been known to use it as place to pee!

  Flagstone Floor Before Restoration Lytham St Annes 

The smell was rank and probably bad for your health so he decided to remove the carpet and the thick underlay underneath. Under that there was some old Vinyl flooring which all came out to reveal the original flagstone floor. As you can see from the pictures it was in a poor state covered in red and white paint, bits of bitumen here and there and the pointing had been lost in several areas of the floor. Additionally, all those layers over the stone would have prevented any moisture from naturally evaporating at the surface thereby resulting in damp.
 
Flagstone Floor Before Restoration Lytham St AnnesFlagstone Floor Before Restoration Lytham St Annes

The client had seen what we could do on our website and sent us some pictures of his floor which covered approximately 16m2. I priced for milling the flagstone as a deep clean would not resolve the shaling issues on its own and only a good mill of the stone would do that. Also, it needed all the pointing that was still in place knocking out and new flexible breathable pointing put back in place.
 

Cleaning and Repairing a Flagstone Tiled Hallway Floor

Milling stone is not a low-cost option, but it is a lot more cost effective than pulling up the whole floor and putting in a modern subfloor. Milling involves using a weighted buffing machine fitted with different grits and grades of coarse Diamond encrusted pads which cut into the surface of the stone to reveal new stone underneath, you then apply finer pads to hone and refine the surface.

In this case I used a set of Tile Doctor Milling Pads applied in sequence starting with 50-grit, 100-grit and then 200-grit. Water is used to lubricate the process and keep the dust down, it’s also important to rinse the stone off after each pad and extract the slurry that is generated with a wet vacuum.

The floor was then cleaned with Tile Doctor Remove and Go allowing the product to soak in for ten minutes to loosen deep seated paint staining. The Tile Doctor Remove and Go was then worked in with another 200-grit pad before another rinse and extract again with the wet vacuum.

Older floors like this were installed before the invention of the damp proof membrane so moisture is always a concern. To counter any issues that might develop later such as Efflorescence the last step in the cleaning process was to give the floor an acid rinse using Tile Doctor Grout Clean-up, this neutralises any latent salts trapped in the subfloor.
 

Sealing a Flagstone Tiled Hallway Floor

The milling, re-pointing and cleaning work took two days and we returned for a third day to apply a breathable sealer called Tile Doctor X-Tra Seal. This product is fully breathable and a great choice for any floors where damp can be a problem as it will allow for moisture to rise through the stone and evaporate at the surface. Being oil-based it also adds character to natural stone and adds an appealing low satin finish.
 
Flagstone Floor After Restoration Lytham St AnnesFlagstone Floor After Restoration Lytham St Annes

The whole process completely transformed the appearance of the flagstone floor and really suits the property which was a late Victorian four-story house with a basement. Original features like this are very sought after so it makes sense to restore them as it will add value.
 
Flagstone Floor After Restoration Lytham St Annes

An additional advantage of the milling process is it also reduces the roughness of the stone surface makes it smoother and easier to clean. On the topic of cleaning its worth mentioning that you should never use a strong bleach-based tile cleaning product on a sealed floor as it will erode the sealer prematurely. For a floor like this you need to use a product like Tile Doctor Neutral Cleaner which is a mild but effective cleaning product designed for use on sealed tile and stone.