Showing posts with label Diamond Pads. Show all posts

Wednesday, August 28, 2024

Newport Tile Doctor Details the Restoration of Victorian Floor Tiling

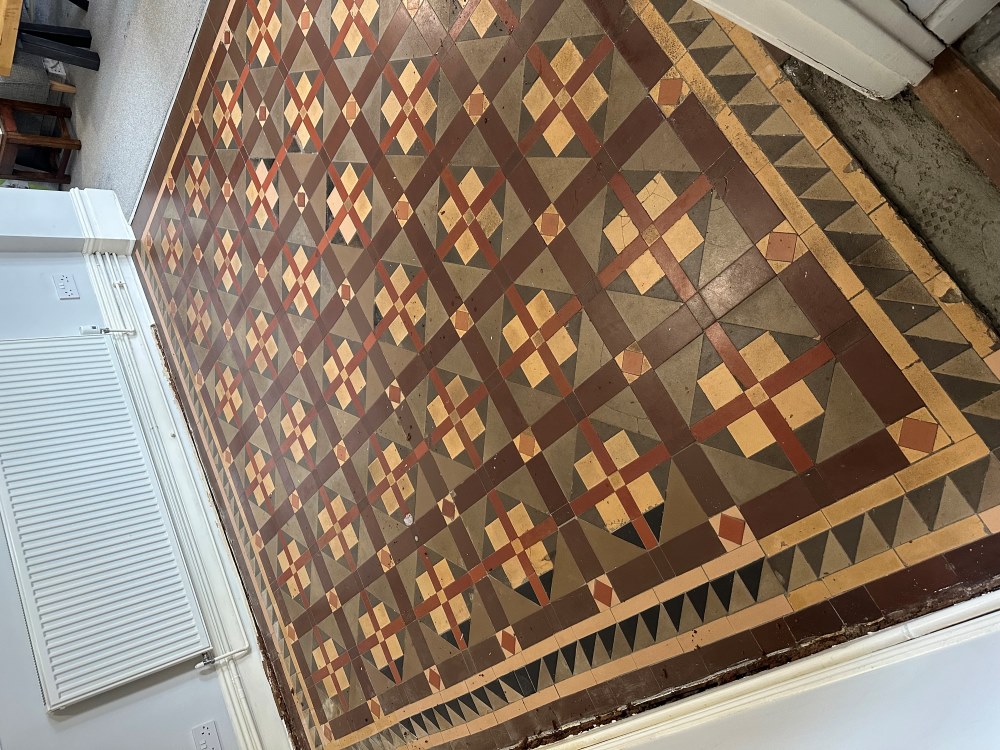
The client had lived at this property in Newport for a few years and decided that it was finally time to sort out the Victorian tiled floor in the dining room. Some repairs were needed in a few areas and the sealer was fading and due for replacement.

Victorian Tiled Dining Room Floor Before Renovation Newport

I went over to the property to survey the floor and advised that with repairs, cleaning and sealing the process would take two and a half days. Having worked on many many floors like these before I was very confident that we could repair the floor where needed and restore its appearance.

During the visit I noticed that at the door threshold leading into the kitchen, some of the tiles had been taken up for a gas pipe repair and back filled with cement, I suggested I could repair this section using matching tiles, so I included it in the quote. The quote to renovate and repair the floor was accepted and the job was booked in.
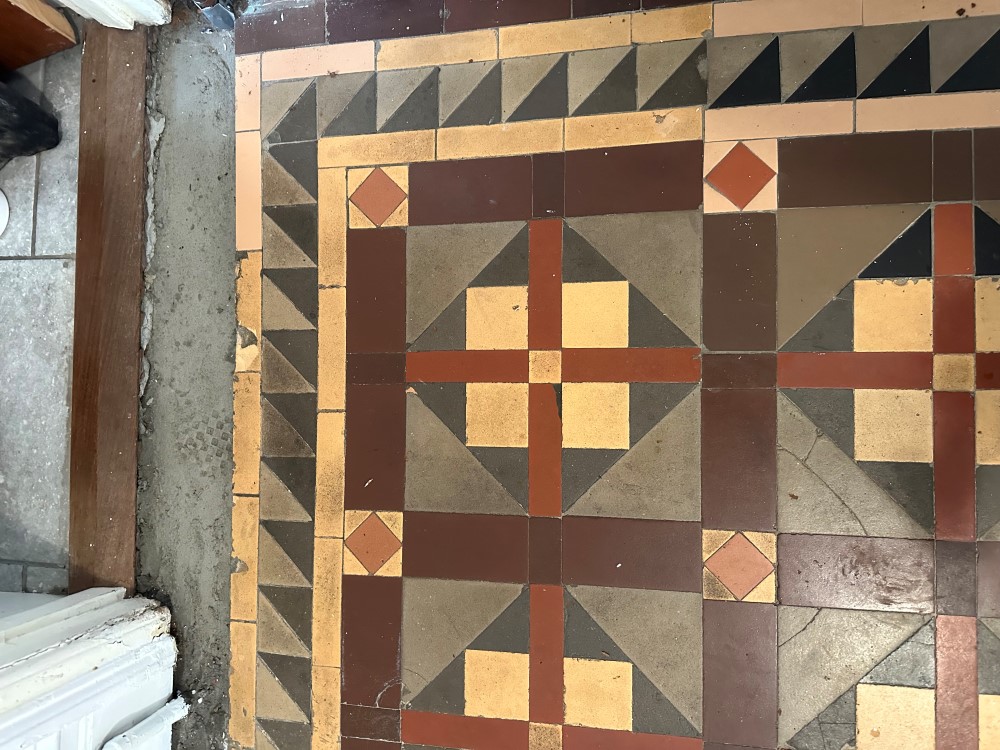
Victorian Tiled Dining Room Floor Before Renovation Newport


Cleaning and Repairing a Victorian Tiled Dining Room Floor

I began by addressing the tiling issues so my first course of action was to set matching tiles along the doorway border leading to the kitchen, as the previous tiles had already been removed by the gas company it was fairly straight forward job of carefully knocking out the cement. The tiles I had sourced were from a nearby reclamation yard and needed to be carefully cut to size to ensure a good fit with the original. After setting the tiles and grouting I left them to dry overnight.

The following day I began cleaning, using a combination of Tile Doctor Remove and Go and Pro-Clean, leaving the solution to dwell after being brushed into the floor. After around ten minutes the floor was scrubbed by hand with a stiff brush to release the dirt from the tiles. The resultant slurry was then vacuum away and with the floor cleaner I was able to get a better idea of which areas needed more attention.

I restored the perimeter of the floor with a 200-grit diamond block and this was followed up with a 200-grit diamond pad fitted to a rotary machine. These coarse pads cut into the tile surface removing years of grime and giving them a new lease of life. After another rinse and extraction with the wet vacuum the whole floor had a much brighter appearance. The process was then repeated with a 400-grit diamond pad to close the pores of the tiles.

The floor was then washed by hand with water and a sponge to make sure there wasn’t any areas missed, also to ensure there was no residue from the cleaning products left on the floor which could potentially disrupt the sealing process. The floor was then left to dry overnight ready for sealing the following day.


Sealing a Victorian Tiled Dining Room

To assist with drying I asked the client to leave a couple of air movers running during the evening and to put them back on in the morning. This worked well and by the next day I was able to confirm the floor was dry and ready for sealing with a moisture meter.

The client had requested a satin finish and so the sealer chosen was Tile Doctor Seal and Go, four coats were applied to the tiles a permanent wet look and gorgeous lustre. Another advantage of Seal and Go is that it’s a water-based sealer so it doesn’t give off a smell as it dries.
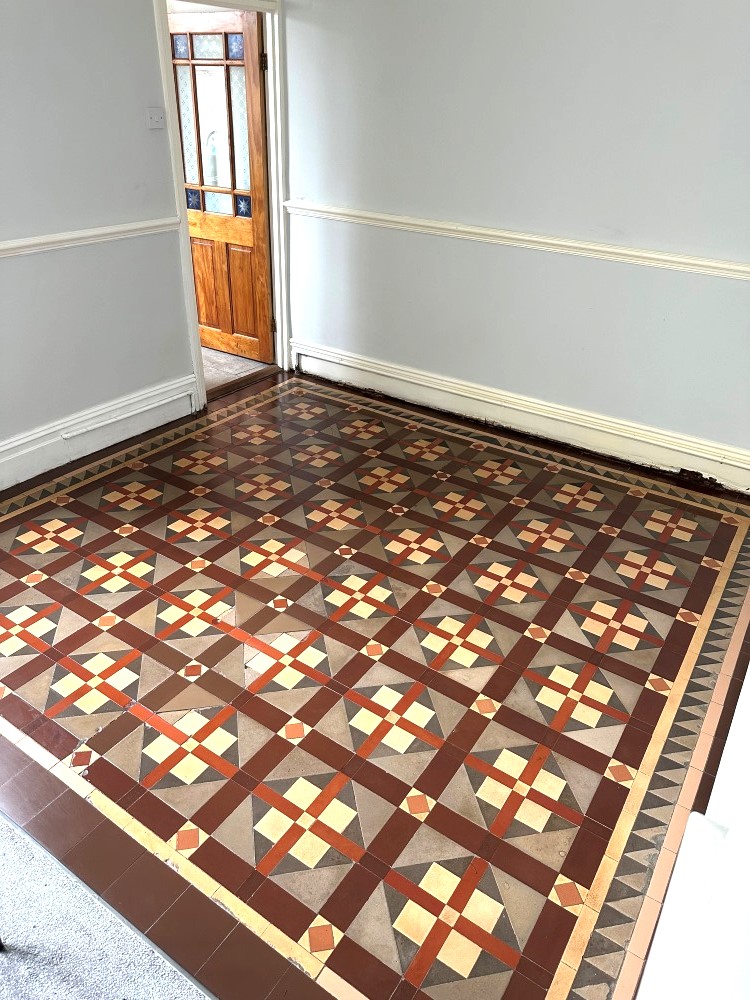
Victorian Tiled Dining Room Floor After Renovation Newport

For aftercare I left the client a bottle of Tile Doctor pH Neutral Tile Cleaner to help maintain the appearance of the floor. This is a gentle tile cleaning product that won’t harm the sealer, many of the products you find in supermarkets are simply too strong for a sealed floor.
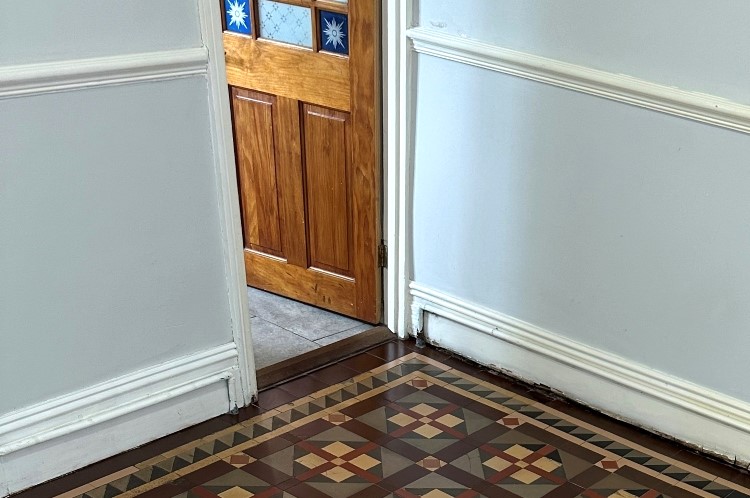
Victorian Tiled Dining Room Floor After Renovation Newport 


Tuesday, March 1, 2022

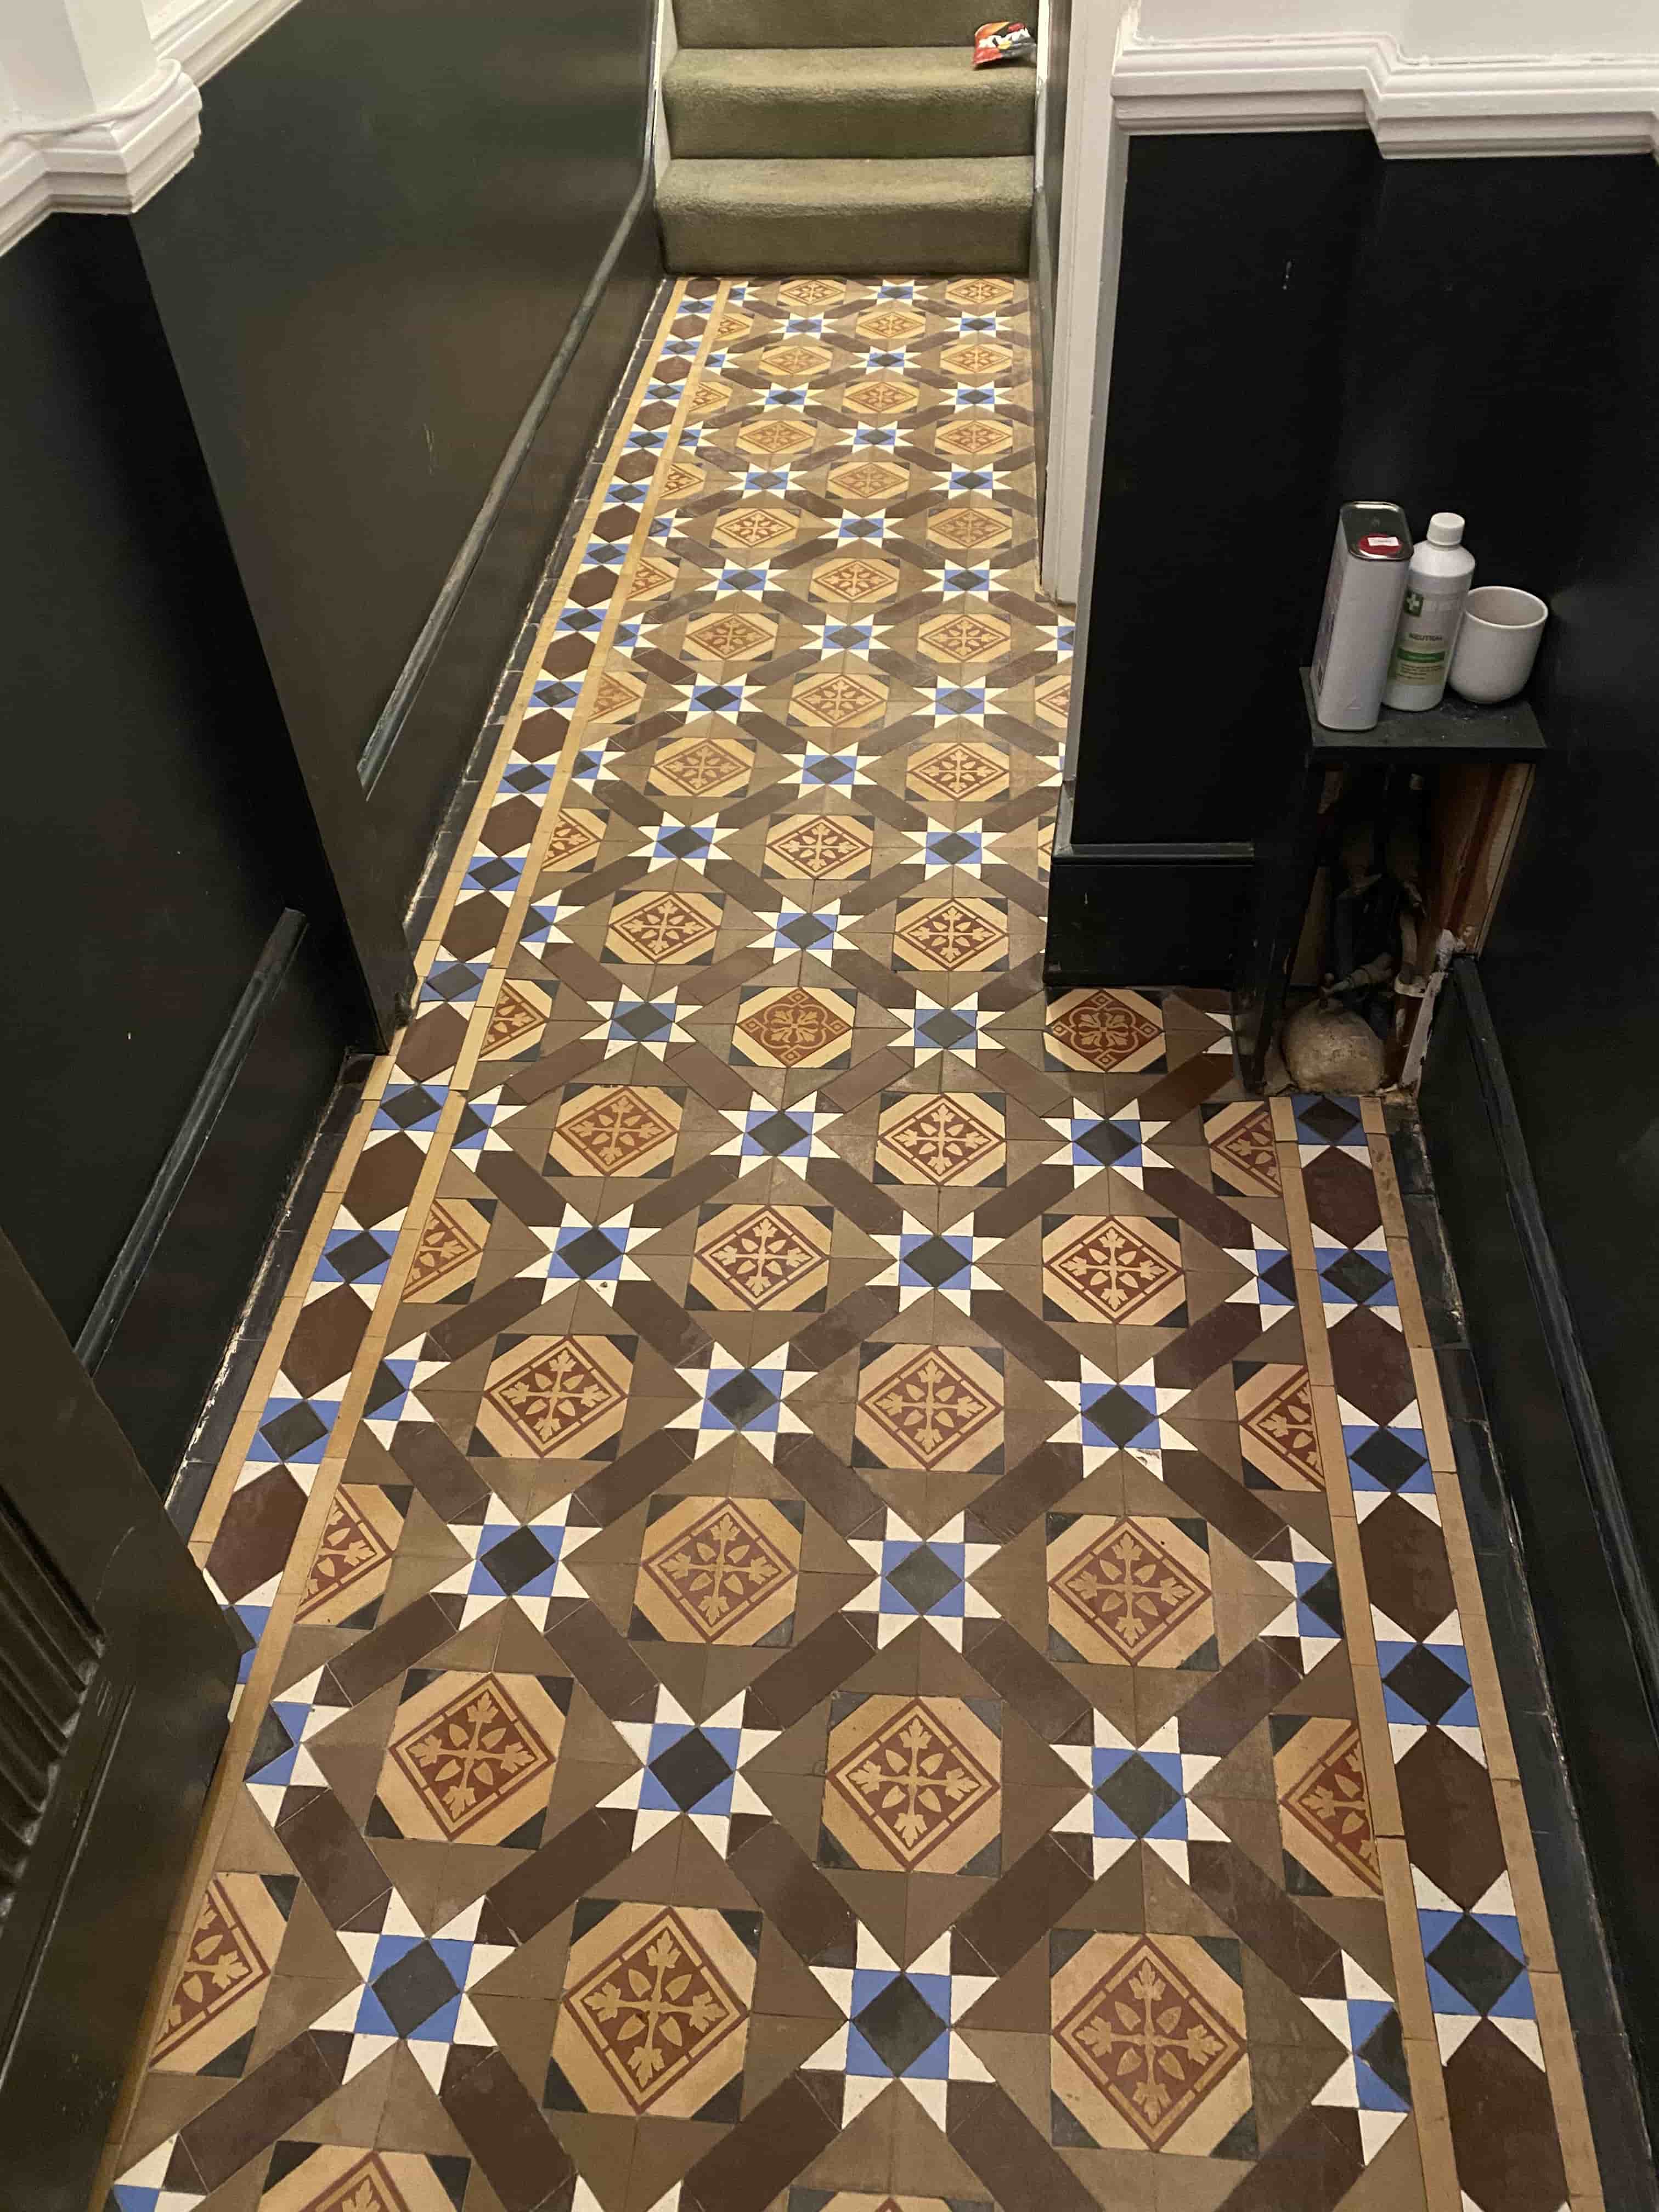
Victorian Tiled Hallway Floor Restoration Detailed by North London Expert

My client discovered found this Victorian tiled floor under the carpet of a communal hallway in a large Victorian house in Bounds Green. The property had previously been converted into three flats and it seems the developers of the property dodged the cost of having the floor renovated and opted to glue down a carpet instead. The floor was in quite a state and there was a section of tiles missing where a pipe had been laid under the floor.

 
Victorian Tiled Floor Before Restoration Bounds Green

I visited the property to survey the floor and prepare a quote for renovating the floor. With the floor in such a state I could see I would need to source replacement tiles. Whilst there I also carried out a small test clean to understand what it would take to ensure a good result could be achieved. Impressed with results from the test clean and happy with the quote my client agreed to have us back to do the work.


Cleaning and Repairing a Victorian Tiled Hallway Floor

Day one started by deep cleaning the floor using a strong dilution of Tile Doctor Remove and Go which was scrubbed in with a black pad fitted to a rotary machine. This product weakens the glue and allows it to be removed with handheld scrapers, a steamer also comes in handy during this process.

Next step was to tackle the thin layer of cement screed which had been applied in some areas to level the floor ready for carpet. To do this a 200-grit diamond pad was fitted to the rotary floor buffer and run over the tiles along with Tile Doctor Acid Gel both to lubricate and help clean away the cement residues. This process generates a lot of soil with is rinsed off with water and extracted using a wet vacuum.

The 200-grit pad was followed up with a finer 400-grit pad to improve the condition of the tile, again using Acid Gel. After another round of rinsing and extracting the cleaning process was complete. As well as removing the cement the Acid Gel will neutralise any potential efflorescent salt issues that are a common problem with floors of this age. The floor was then rinsed with water and the soiling removed with a wet vacuum.

The next step was to tackle the damaged section of tiling where the pipe had been laid. To do this the backfilled cement was carefully chiselled out and the rubble removed. The subfloor was then rebuilt to with fast drying cement ready for tiling the next day.

For this project we were unable find existing replacement tiles that fitted exactly so instead large square tiles in the colours required were obtained from Original Features (just down the road in Crouch End N8) and then cut down to size on site.

Victorian Tiled Floor During Restoration Bounds Green Victorian Tiled Floor During Restoration Bounds Green

After cutting all the tiles to match the existing pattern I laid them into the floor using a fast-drying flexible adhesive. The floor set over lunch and were grouted later that afternoon.

Sealing a Victorian Tiled Hallway Floor

The following day I returned and sealed the tiles with three coats of Tile Doctor Colour Grow which is a breathable impregnating sealer that will soak into the tile adding protection. This takes a while to apply as you have to wait at least half an hour between coats to dry before applying the next. 

Additionally, Colour Grow is a colour enhancing sealer and so was a perfect choice for this colourful floor. Being breathable it will also cope well with any moisture rising through the floor which is important for old floors like this which don’t have a damp proof membrane installed.

 
Victorian Tiled Floor After Restoration Bounds Green

My client was very happy with the newly restored Victorian tiled hallway which looked so much better than the previous carpet and had added so much more value to the property. For aftercare I recommended the use of Tile Doctor Neutral Tile Cleaner, which is pH balanced cleaner that will clean the tiles without being so strong that it impacts the sealer.