Showing posts with label Nanotech HBU. Show all posts

Wednesday, November 13, 2024

Cardiff Tile Doctor Details the Restoration of a Quarry Tiled Floor in Penarth

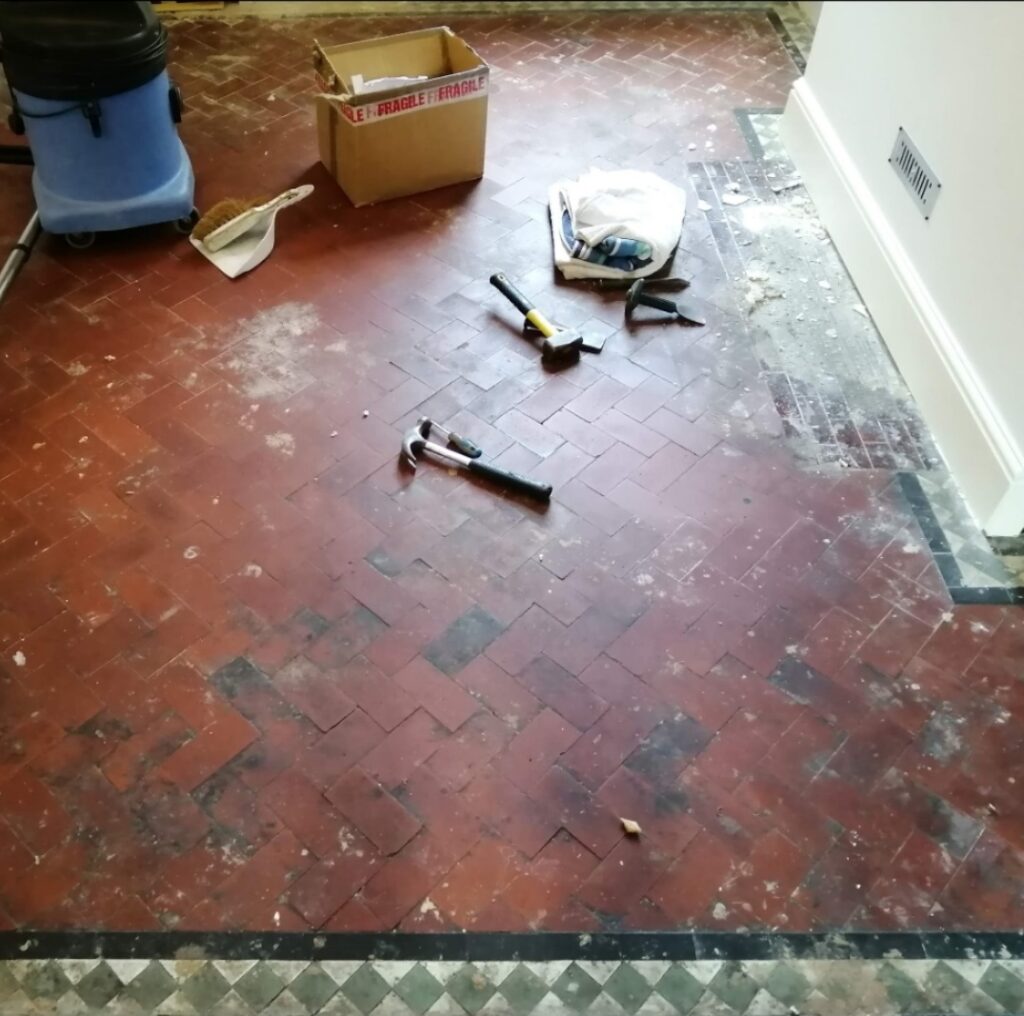
This client from Penarth contacted Tile Doctor to see if their 100-year-old Quarry tiled floor which had broken and missing tiles could be salvaged. The property dated back to 1890 and had experienced many years of wear and tear and it certainly showed. One of the biggest problems however would be to renovate the area in front of the old fireplace where a hearth was once situated.

Quarry Tiled Floor During Restoration Penarth

It was clear the area in front of the fireplace would need to be rebuilt using matching replacement quarry tiles more of which would be needed for the other repairs that needed doing. Once that was done the floor would then need a deep clean and a fresh sealer applied to give the whole floor a consistent appearance.

I worked out a comprehensive quote which included the repairs and renovation work. This was accepted by the client and a date set for the work to start.
   

Cleaning and Repairing a Quarry Tiled Room

Work started with the tile repairs which involved breaking out the damaged tiles and those in front of the old fireplace and then cleaning up the floor ready for the replacement tiles to be installed.
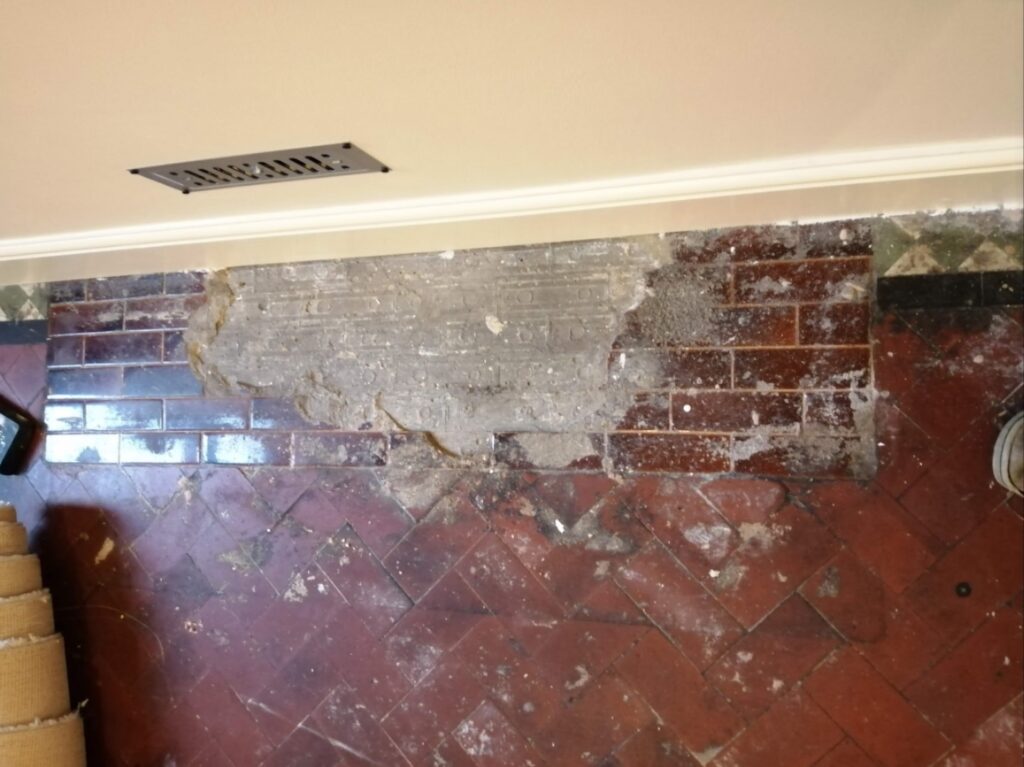
Quarry Tiled Floor During Restoration Penarth 

Quarry tiles are still very popular, so it wasn't a problem finding matching replacements which I had manage to source before work commenced. The replacements were then laid in-line with the existing tiles using rapid set adhesive and grouted in.

Once the tiles had set, I was able to start the cleaning process which started with scraping off as much cement, paint, and plaster residue off the floor as possible. This was then followed up with a deep clean of the tile and grout using a mixture of Tile Doctor Pro-Clean combined 50:50 with with Tile Doctor Nanotech HBU Cleaner.

After leaving these products to soak in for ten minutes I worked by hand scrubbing in 1m2 sections at a time, cleaning and rinsing with water and vacuuming up the waste with a wet vacuum as I progressed. Doing it this way ensures maximum attention to detail and ensures the floor is as clean as possible. 

Once done, the floor was given an acid rinse using Tile Doctor Grout Clean-up which was brushed onto the floor and extracted with the wet vacuum as before. Old floors like this don't have a damp proof membrane and are susceptible to efflorescence, giving the floor an acid rinse like this counters salts and helps further clean the tiles.

After another rinse and extraction with the wet vacuum the floor was left overnight to dry.
   

Sealing a Quarry Tiled Floor in Penarth

The next morning the floor was tested for moisture with a damp meter and the readings confirmed it had dried sufficiently to accept a sealer. I don’t recommend sealing a damp floor as it impacts the sealers’ ability to cure and leads to a patchy finish.

Sealing started with the application of a single coat of Tile Doctor Colour Grow which is a very durable and breathable sealer which being an impregnator provides an excellent base. The customer wanted a shiny finish so this was followed up with a couple of coats of Tile Doctor Seal and Go. This product further protects the floor and adds a subtle shine which together with the Colour Grow really brought out the colours in the Quarry tiles. As you can see the red colour of the floor looks vibrant and stunning after the two different sealers were applied.

Quarry Tiled Floor After Restoration Penarth

My client was delighted with the result and offered to recommended Tile Doctor to their family and friends which was nice. For aftercare I recommended the use of Tile Doctor Neutral Tile Cleaner which is a gentle but effective tile cleaner that's ideal for cleaning sealed floors.
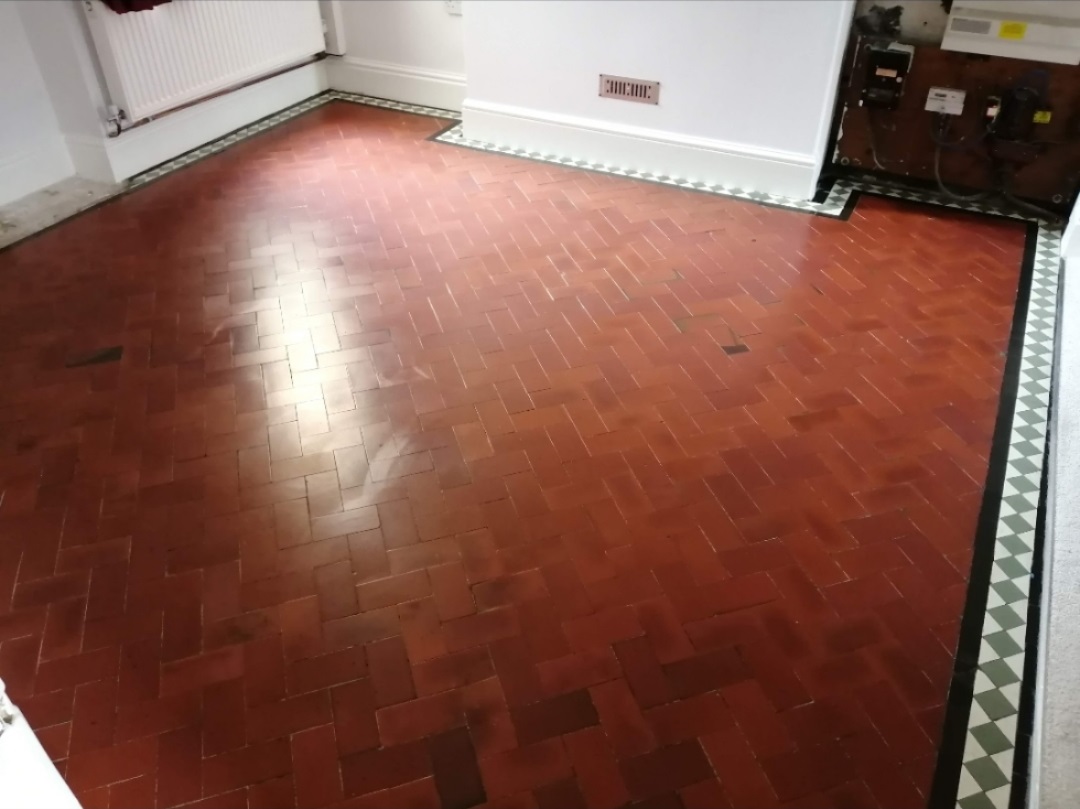
Quarry Tiled Floor After Restoration Penarth

Sunday, May 21, 2023

Putting the Shine Back on Encaustic Floor Tiles in Hemswell Cliff Lincolnshire

The photographs below are of an Encaustic Tiled Floor which had been installed some years prior in the kitchen of at a property in the village of Hemswell Cliff which is between Gainsborough and Market Rasen.

I paid a visit to the property initially to survey the floor and discuss the problem with the client. The main issue was the tiles had become dull and she couldn't keep them clean. I explained that Encaustic tiles are porous and need to be kept sealed to prevent the dirt from becoming ingrained in its pores; over the years since installation the sealer had simply worn down and now dirt was getting into the pores of the tile and once that happens it can be difficult to get it out. 

To prove my point, I carried out a demonstration on how I would clean them and explained the different sealer options available and how each sealer can have a different effect. She was pleased with the demonstration and was happy to accept my quote to deep clean the whole floor and then re-seal it.

Deep Cleaning Encaustic Kitchen Floor Tiles

I set about scrubbing the floor using a hot water dilution of Tile Doctor Pro-Clean Tile and Grout cleaner combined 50:50 with NanoTech HBU Remover which adds tiny abrasive particles to the solution to make a more effective cleaning product. The solution was worked into the tiles by scrubbing with a rotary machine fitted with a Black scrubbing pad.

The pads struggle to reach into the recesses between the tiles so to get the grout clean I scrubbed them by hand using a stiff brush. Once done the soiled solution was removed using a wet vacuum and floor inspected to ensure it was as clean as possible. Any stubborn areas were spot treated by hand and then the whole area thoroughly rinsed down with clean water to remove any trace of cleaning product.

Finally, the wet vacuum was used to dry the floor as much as possible with assistance from a Turbo Air blower to help reduce the drying time.


Sealing Encaustic Floor Tiles

It wasn’t a particularly large floor and a warm day so I was able to complete the cleaning process by lunch time and after a few hours later with the assistance of the air blower the floor was dry and ready to be sealed.

Having discussed sealer choice with the client earlier a decision had been made to seal the encaustic tiles with Tile Doctor Seal and Go which adds a nice subtle sheen to the tile. Five coats of Tile Doctor Seal and Go were needed before the tiles were fully sealed, it’s a water based protective sealer so it doesn’t give off any odour whilst it dries and it provided the finish the customer was looking for.

Once completed the colours in the tiles were really vivid and resulted in one happy customer with a clean easy to maintain floor. On the subject of cleaning, I recommended the use of Tile Doctor Neutral Tile Cleaner which is a mild but effective tile cleaner. The problem with many of the tile cleaning products you find in supermarkets is they contain bleach which is simply too strong for use on a sealed tile as it will strip off the sealer.