Showing posts with label kitchen floor cleaning. Show all posts

Friday, August 2, 2019

How to Clean and Seal Mexican Terracotta Flooring

I have lost count of how many Terracotta tiled floors we have cleaned and sealed over the years and the one thing it has taught me is to wary of Mexican Terracotta. This type of Terracotta is extremely hard to work with, its porous and made of soft clay which has usually been badly fired. Even if you do have all the equipment, experience and the right products it can be a challenge.

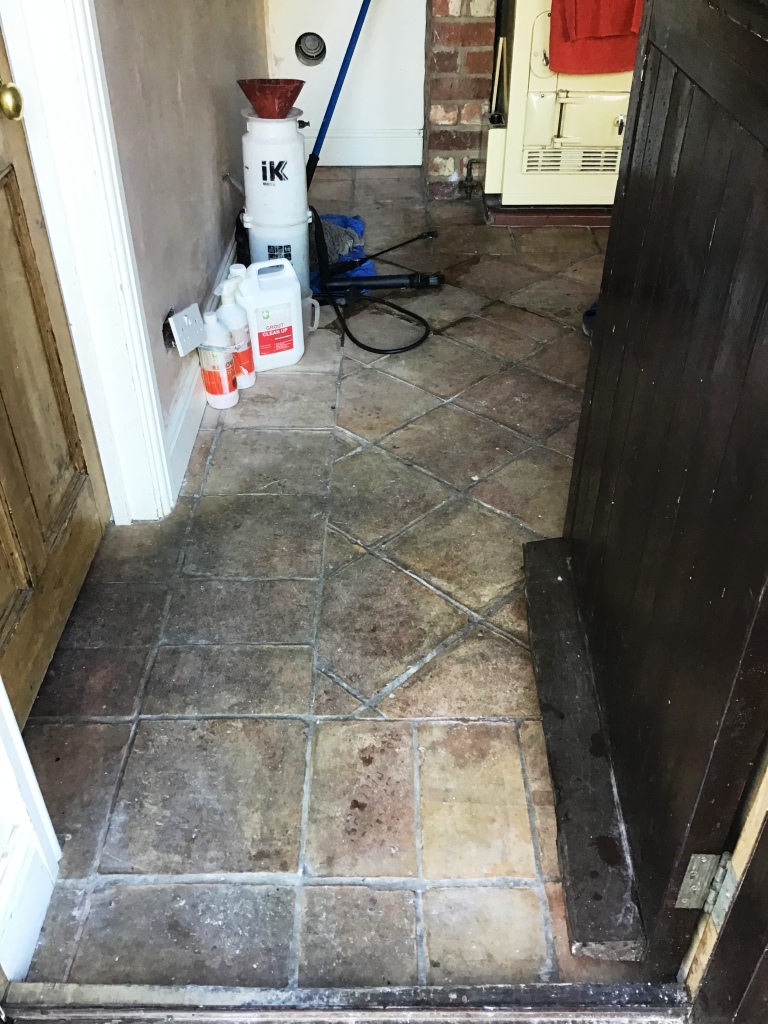
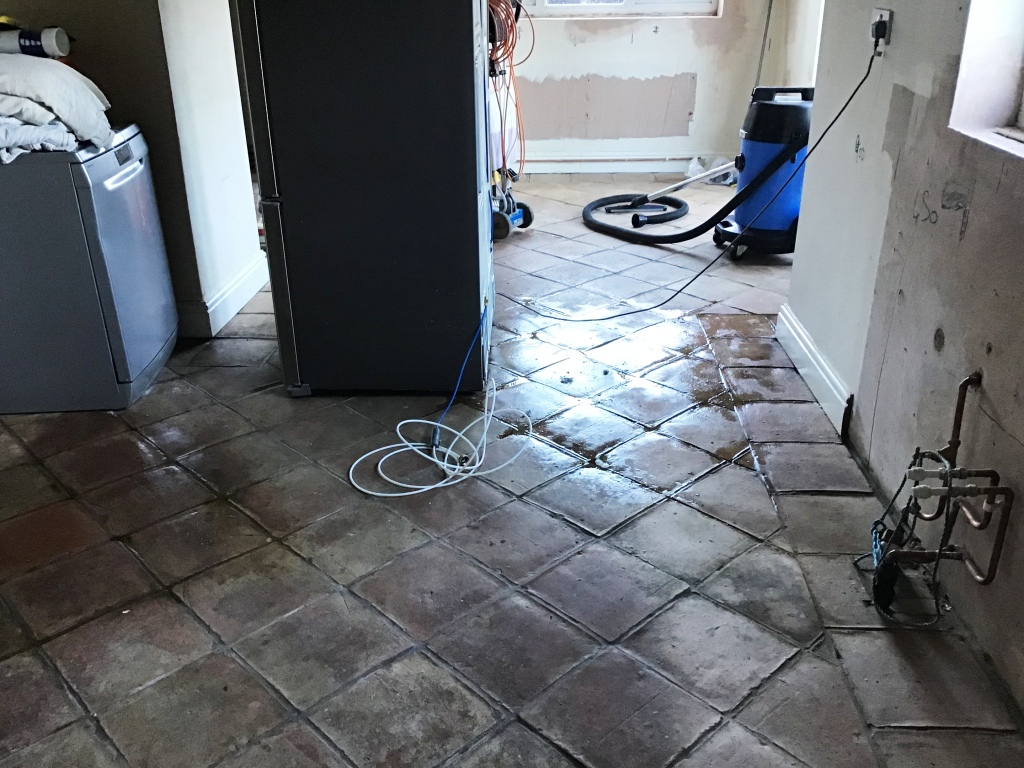
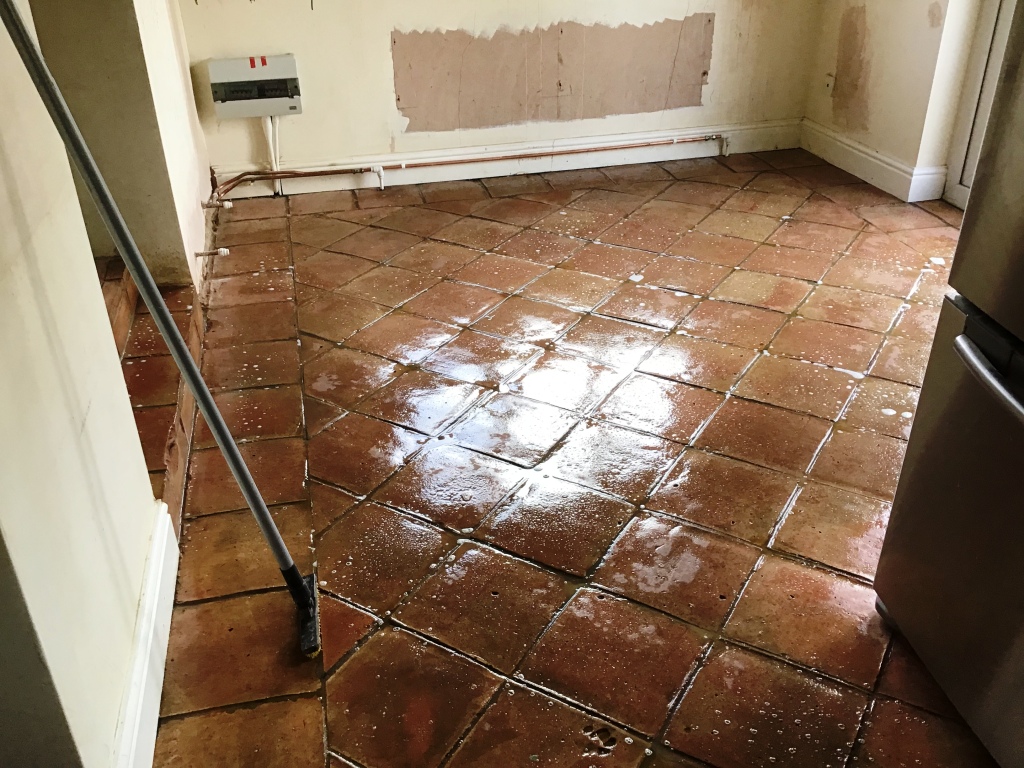
Mexican Terracotta Kitchen Floor Before Cleaning Penrith

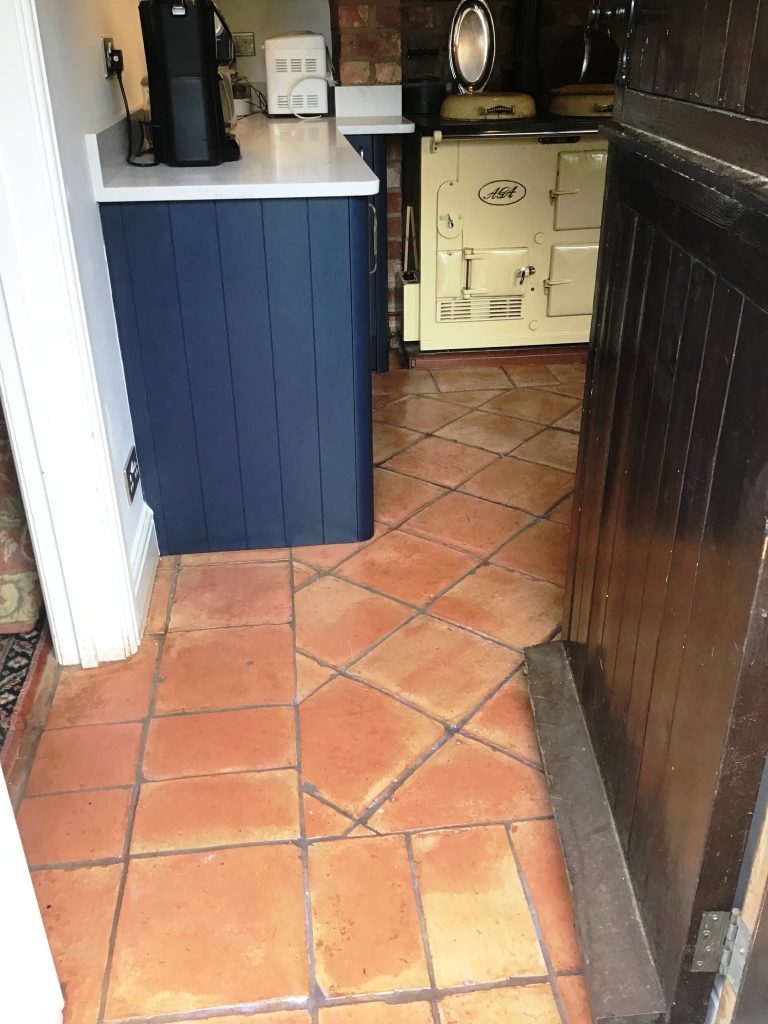
If you look at these pictures of this Mexican Terracotta floor, we recently worked on in Penrith you will see the tiles looked very dull before we cleaned them. Testing indicated there was still a sealer present however we didn’t know what type it was. Knowing what your dealing with really helps narrow down the best cleaning products to use which for Terracotta tiles tends to fall into one of three different categories.
If you have the misfortune of having had Varnish laid on top of these tiles, then the job becomes significantly harder. Because of this we have to be flexible when pricing for the work, naturally if we give a quote and we use the wrong system then not only will we be out of product but also the extra labour time to get the job right for the customer.

Mexican Terracotta Kitchen Floor Before Cleaning Penrith


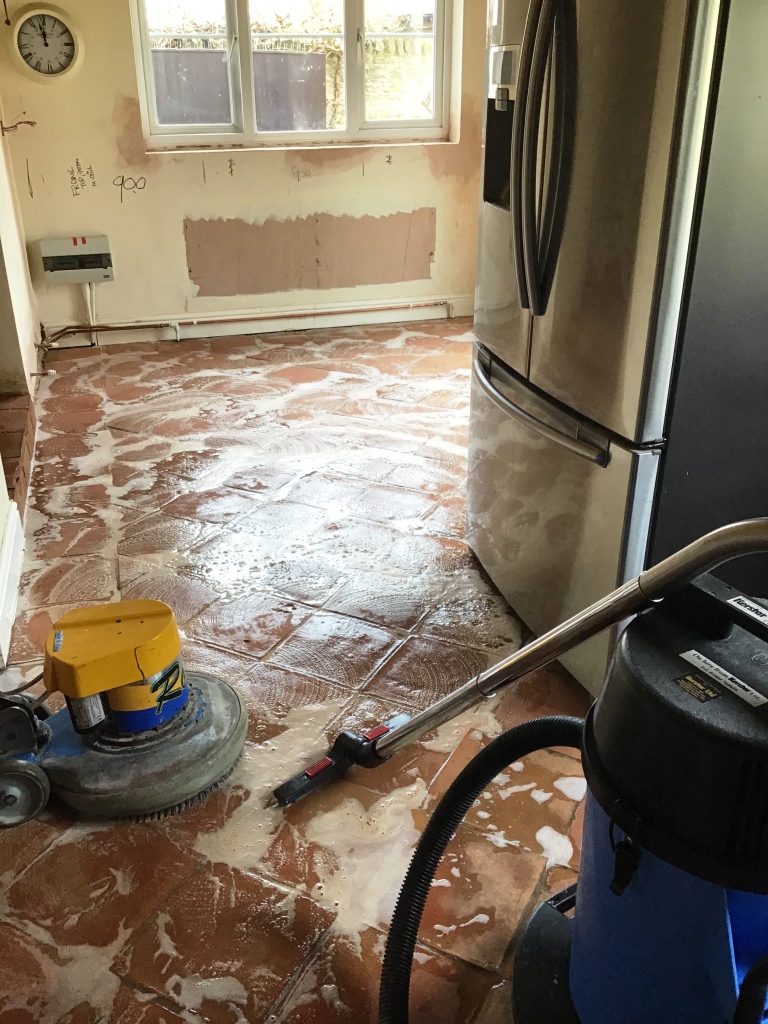
Cleaning a Mexican Terracotta Tiled Kitchen Floor

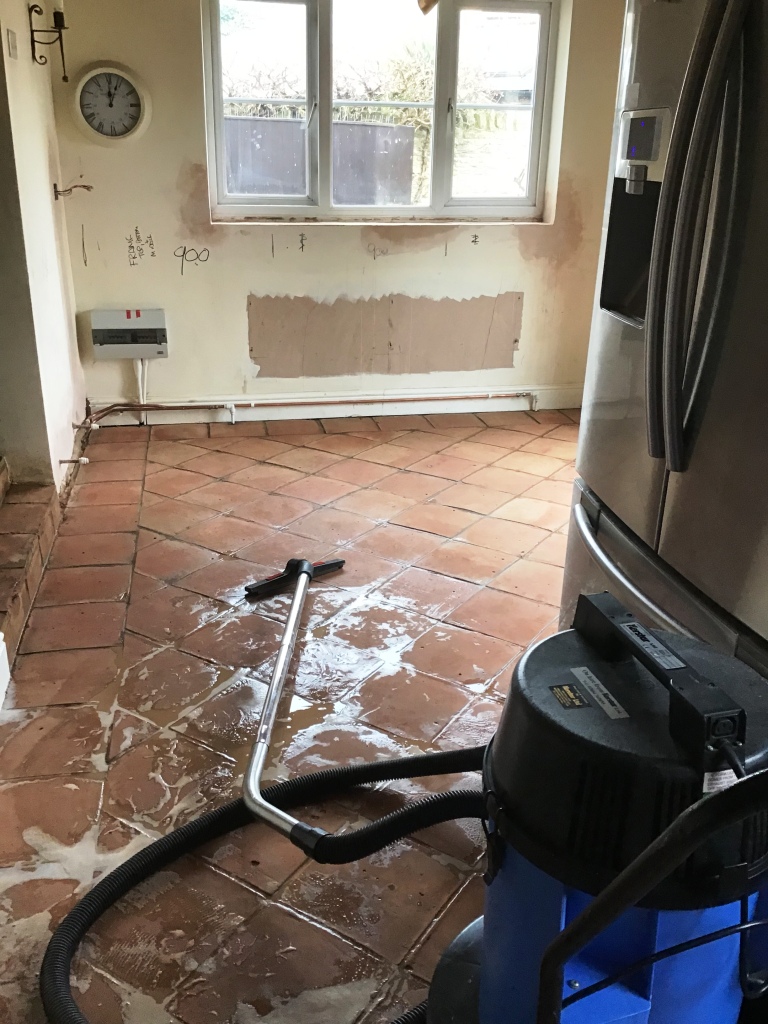
On this occasion the sealer at this property in Penrith was of the more common acrylic type, so we used a combination of Tile Doctor Pro-Clean and some Tile Doctor Oxy-Gel for the stubborn areas. The products are applied to the floor and then scrubbed in using a black pad fitted to a rotary buffing machine. This releases the old sealer and dirt from the tile resulting in a slurry that is then extracted off the floor using a wet vacuum. The floor is then rinsed with water and extracted again to make sure all the soil has been removed.

Last step the cleaning is to treat the tiles to an Acid Rinse to further clean the tiles and equalise the floors pH level after the use of alkaline cleaners. We used Tile Doctor Acid Gel for this which was first scrubbed in, then rinsed with water and finally extracted as before. The floor is then rinsed down again with water to remove any trace of product and the wet vacuum used to extract as much moisture from the floor as possible so it can have a better chance of drying out overnight.


Sealing a Mexican Terracotta Tiled Kitchen Floor

We called back the next day to seal the Terracotta first checking in several areas with a damp meter that the floor was nice and dry. All was well so several coats of a Tile Doctor Seal and Go were applied to the floor for a nice mid satin finish.

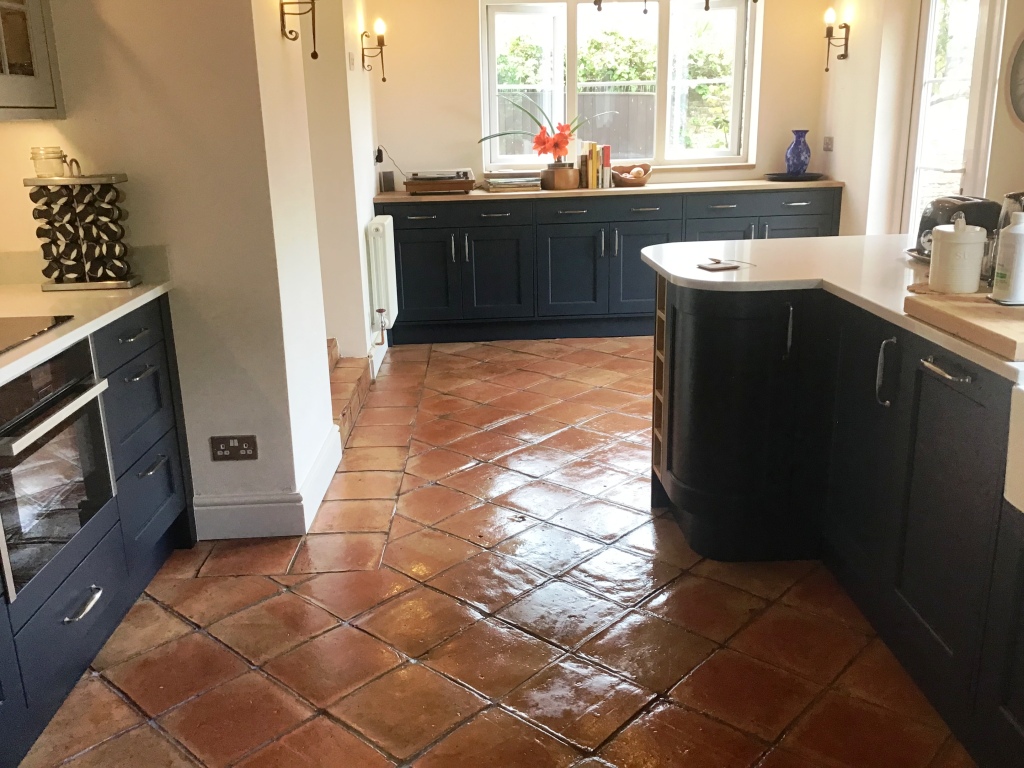
Mexican Terracotta Kitchen Floor After Cleaning Penrith

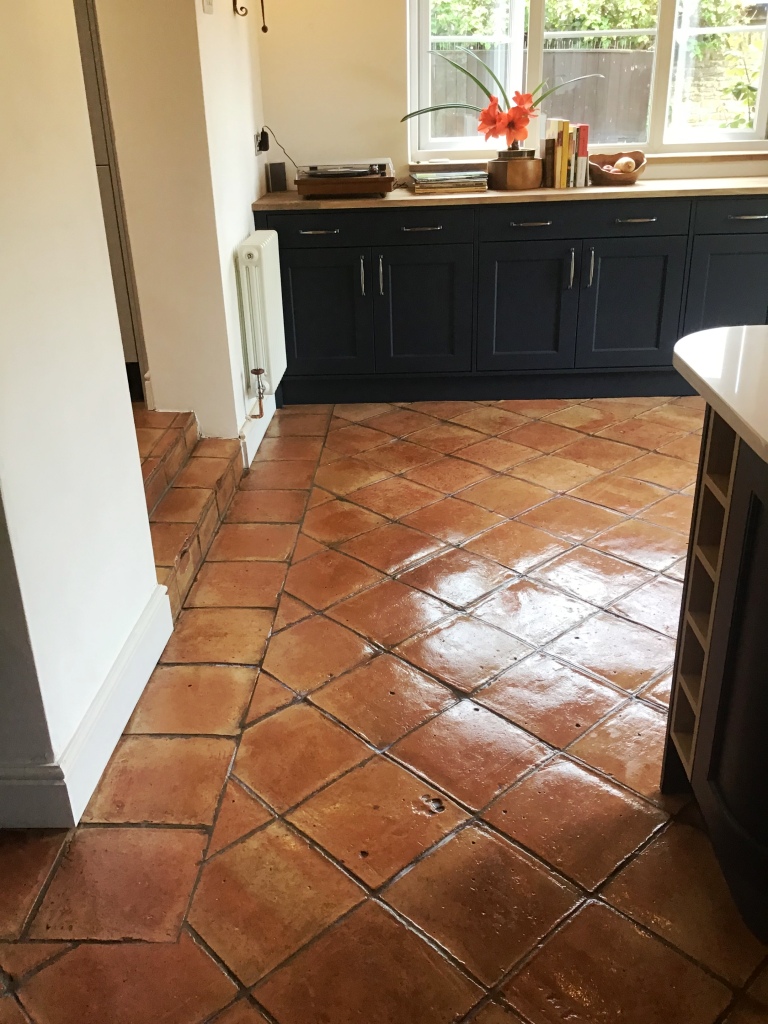
The finished floor looked fantastic and was doubly improved by the grout cleaning which had responded well to the Pro-Clean. The customer was over the moon with the transformation in their floor which now looked clean and bright.

Before leaving we left the customer with a bottle of Tile Doctor Neutral cleaner for aftercare. To get the best from their Terracotta tiles it’s important that customers use the correct product for regular maintenance cleaning from the start.

Mexican Terracotta Kitchen Floor After Cleaning Penrith


Source: Terracotta Tile and Grout Cleaning and Sealing Service in Cumbria

Tuesday, July 30, 2019

How to Renovate Dirty Terracotta Tiling

We were contacted by the owner of a property in Moulton with a problematic Terracotta tiled kitchen floor. She was seriously considering ripping up the entire area of tiling and replacing it as she was having a new kitchen installed. Both her and her husband were concerned that unless I could restore this floor to somewhere near to its original condition, they would need to replace it.

Terracotta Tiled Kitchen Floor Before Restoration Moulton

I went over to inspect the Terracotta tiles and could see the entire surface was deeply ingrained with soiling and the grout lines were filthy. After carrying out a test it became obvious that the previous sealer had been applied very sparingly and had mostly worn away, leaving the stone prone to staining. Terracotta is a very porous tile and dirt had become ingrained in the pores leaving it looking very dull and difficult to clean.

Terracotta Tiled Kitchen Floor Before Restoration Moulton

I completed the test on a small part of the floor and the customer could see the results which could be achieved. Happy with the result they agreed my quote and we set a date for my return to complete the floor.


Cleaning a Terracotta Tiled Kitchen Floor

The tiles turned out to be made of a fairly soft Terracotta which meant that we were able to deep clean them extremely effectively using a strong dilution of Tile Doctor Pro-Clean. We used Tile Doctor Remove and Go in particularly stubborn areas.

The process I use is to spray the Pro-Clean onto the floor and leave it to soak in for about ten minutes before being worked in using a heavy rotary machine fitted with a black scrubbing pad. The resulting slurry is removed using a wet pick up vacuum. All the dirt and virtually all of the old sealer was removed at this stage; the remaining patches around the edges of the area being finished by hand with a 200-grit burnishing block. The grout lines were then cleaned by hand with an angled grout brush.

Terracotta Tiled Kitchen Floor During Restoration Moulton Terracotta Tiled Kitchen Floor During Restoration Moulton

Finally, the deep-seated oil stains in front of the cooker were brought out using Tile Doctor Oxy-Gel which was left to dwell on the marks for an hour before being agitated with a diamond burnishing pad and rinsed away with a wet pick up machine. The floor was rinsed with water and allowed to dry off overnight.

Terracotta Tiled Kitchen Floor During Restoration Moulton


Sealing a Terracotta Tiled Kitchen Floor

The following day I inspected the floor and checked it was ready to be sealed. All was well so I applied an initial coat of Tile Doctor Colour Grow which is an impregnating sealer that occupies the pores in the tile enhancing the natural colours of the Terracotta and provide a base layer of protection from staining.

Terracotta Tiled Kitchen Floor After Restoration Moulton

I returned at a convenient time once the kitchen was completely installed to finish the job. This involves carrying out a light maintenance clean with Tile Doctor Neutral Cleaner and once the floor was dry, I applied 5 further coats of Tile Doctor Seal and Go which provides a pleasing satin finish which is really suited to this type of floor.

Terracotta Tiled Kitchen Floor After Restoration Moulton

The customer was very happy with the results and has left the following feedback. "We were really pleased with the results, thank you!"


Terracotta Tiled Kitchen Floor After Restoration Moulton


Source: Terracotta Tile Cleaning and Sealing Service in Northamptonshire

Sunday, May 5, 2019

Choosing the Best Sealer for Rough Slate Flooring

This is a Semi Riven Black Slate floor which had been installed throughout much of the downstairs floor at a property in Bentham which is right on the Eastern edge of Lancashire. The Black slate and Grout had seen some wear and was now more Grey than black and having recently installed a new Kitchen the owner wanted the floor to look its best.

Rough stone can be especially hard to maintain if the wrong sealer has been applied. With rough or textured stone, it’s always best to use an Acrylic Sealer (aka " Topical sealer”) where possible. Unlike a Matt finish impregnating sealer a Topical Sealer is designed to sit on the surface of the Stone preventing dirt from getting caught in the nooks and crevices making it much easier to clean.

Rough Black Slate Floor Before Cleaning Bentham

After surveying the floor, I recommend burnishing the stone with a coarse pad to deep clean the stone and remove any remaining sealer, then seal with Tile Doctor Seal and Go which is a Topical sealer which we find always has provides good results on this type of floors. Happy with the price and keen to get the floor renovated we were given the go ahead and scheduled a date to return to do the work.

Rough Black Slate Floor Before Cleaning Bentham


Deep Cleaning a Semi Riven Black Slate floor in Bentham

The last thing we want to do is cause any damage to their beautiful new wooden kitchen. So before starting the cleaning process I applied clear silicone to the base of the new Kitchen units, this prevents water from the cleaning process seeping into the woodwork through capillary action.

Rough Black Slate Floor Applying Silicone Bentham

To get the tiles clean we burnished the stone floor with a coarse 200-grit Diamond pad fitted to a buffing machine running at slow speed and using water for lubrication. This gives a really deep clean and was followed up with the application of a black scrubbing pad to remove any excess resin released from the Slate which is quite common with Black stones due to the oil content. Once the Slate was clean, we turned our attention to the grout which was scrubbed with Tile Doctor Pro-clean. The floor was then rinsed with water and the soil extracted with a wet vacuum, once done the floor was left dry out.

Whilst at the property we managed to resolve a problem with a poorly laid slate tile in the hallway which the customer had often tripped over, so much so they had covered it with a rug, which was fine, but you couldn't see the Slate. Rather than lift and relay the tile I managed to cut back the surface of the stone with a hand held flex machine using several different diamond grits. You can see from the pictures how this looks before, during and after the seal. A further advantage of treating the stone in this way is that the slate takes on a more polished finish as the rough texture is cut back. The results speak for themselves and the customer certainly won’t be tripping over the tile from now. With no further need for the rug they can get the full benefit of the slate floor.

Rough Black Slate Tile Before During After Surface Correction Bentham


Sealing a Riven Black Slate Tiled Floor

The floor was left to dry off overnight and we returned the following day to apply a sealer first checking the floor was dry using a moisture meter. All was well, so we started to apply the first of several coats of Tile Doctor Seal and Go. It was a large area across multiple rooms, so it took some time before the job was complete.

Rough Black Slate Floor After Cleaning Bentham

The sealer added a lovely subtle sheen to the floor and restored the black colour in the Slate, the grout was also much cleaner and floor look transformed from the grey dull appearance we first experienced. As usual before leaving we talked about aftercare, using warm water (not hot or cold) with a mop and bucket and half a cap of Tile Doctor concentrated Neutral Tile Cleaner. Using the correct cleaning product will ensure they get maximum life out of the sealer.

Rough Black Slate Floor After Cleaning Bentham


Source: Slate Floor Cleaning and Sealing Service in Bentham, Lancashire

Sunday, February 17, 2019

Black Limestone Floor Ruined when Descaling a Coffee Machine

I really felt for this customer who was mortified after accidentally spilling limescale descaling solution on their beautiful Black Limestone floor in Stratford upon Avon. The problem started when attempting to descale a coffee making machine in the kitchen, unfortunately the bottle fell out of his hands and onto the Black Limestone floor, the subsequent attempt to mop it up spread the problem across the floor.

Acid Damaged Limestone Kitchen Floor Tile Before Restoration Stratford Upon Avon Acid Damaged Limestone Kitchen Floor Tile Before Restoration Stratford Upon Avon

Descaling solutions contain strong acids that dissolve the minerals in limescale so they can be easily removed. Limestone being of a similar structure is equally effected however in this case the product was removed quickly and didn’t have time to etch the stone. Unfortunately, the descaler did have time to upset the factory polish leaving a right mess and ruining the appearance of the stone.

I went over to survey the floor and reassured my customer the floor could be restored. There are several products and methods that can be applied to resurface and polish stone floors, so I knew the problem was repairable, it was just a question of finding the best solution for the customer.


Stripping Sealer from Black Limestone Flooring

I reasoned that the underlying stone was not etched by the acid, it was the wax-based factory finish that had been upset so the best course of action would be to strip back the entire floor to the bare stone and then reapply a new sealer that would provide a similar appearance.

To do this I started with the application of Tile Doctor Remove and Go across the whole floor. This product is a coatings remover that is specially designed for use on Tile and Stone, it was sprayed onto the floor and after ten minutes scrubbed in using a rotary machine fitted with a scrubbing pad. The resultant slurry was then rinsed off with water and extracted using a wet vacuum. This process was repeated until I was confident that the factory polish had been removed.

Next step was to strip the stone of the black dry added by the factory by giving it an acid wash using Tile Doctor Acid Gel. This was necessary to re-balance the appearance of the stone across the entire floor and would result in a consistent appearance one resealed. The Acid Gel was scrubbed into the Limestone, then rinsed off and extracted using the same procedure as before.

After a final rinse the floor was left to dry off overnight.


Sealing Black Limestone Floor Tiles

The next day I first checked the floor was dry using a damp meter, there were no excess moisture issues so I able to go ahead and seal the stone using a product that would bring back the colour and add protection against dirt and staining.

The best product for this was Tile Doctor Colour Grow which is an impregnating sealer that seeps into the pores of the stone protecting it from within and enhancing natural colour at the same time. The only disadvantage of this product is it leaves a matt finish whereas my customer wanted the shiny, easy to clean appearance of the original tile. To resolve I recommended we leave the floor to settle for a while and if no issues develop, I would add a couple of coats of Tile Doctor Seal and Go which is compatible with Colour Grow and would give the desired finish.

Acid Damaged Limestone Kitchen Floor Tile After Restoration Stratford Upon Avon Acid Damaged Limestone Kitchen Floor Tile After Restoration Stratford Upon Avon

Due to various commitments on both our parts it was six weeks until I was able to return and top up the sealer with Seal and Go. It was worth waiting for and much to the relief of the owner his Black Limestone floor has been transformed to new again.

Acid Damaged Limestone Kitchen Floor Tile After Restoration Stratford Upon Avon


Source: Limestone Tile Cleaning and Restoration Service in Stratford upon Avon, Warwickshire

Thursday, January 24, 2019

Resurfacing a Flagstone Kitchen Floor in Broadbottom, Greater Manchester

The new owners of this lovely terraced house in the village of Broadbottom that was built circa 1900, inherited with it a lovely old flagstone floor in the Kitchen which was now in a rather bad state with ingrained dirt and stains.

Old Flagstone Floor Before Cleaning Broadbottom

I suspected that the White staining was due to alkaline salts, a problem more commonly known as efflorescence. However, I took a moisture reading of the floor with a damp meter and the readings were normal, so it may have been a historic damp problem that cause it. We are always wary of efflorescence issues when it comes to older properties as damp proof membranes which resolve this problem are a relatively modern invention.

Old Flagstone Floor Before Cleaning Broadbottom

After explaining the process, I worked out a quote which was accepted and booked a date in the diary for the work to commence, which would take place over two days.


Cleaning and Grouting a Flagstone Kitchen Floor

First the floor was in a terrible state and needed to be resurfaced if it was going to live up to its potential. To do this I used a 100 followed by a 200-grit coarse Diamond milling pads to grind off the top layer of ground in dirt, resurface the stone and reveal the beautiful stone beneath. These abrasive pads are run over the floor with a weighted floor buffer running on a nice slow speed and lubricated with water. The floor is rinsed with more water after each pad and then the soil extracted using a wet vacuum.

As the floor had quite a few areas where the grout had cracked and crumbled, I decided to rake this out and replaced it with a flexible grout using a colour sympathetic to the original. This and the milling made an immediate improvement to the overall appearance of the floor. The floor was then left to dry off overnight and I came back the next day to apply a sealer.


Sealing a Flagstone Tiled Kitchen Floor

The next day I checked the floors moisture level before sealing, all was well, so I applied a couple of coats of Tile Doctor Colour Grow. This is an impregnating sealer that has a matt finish. Tile Doctor Colour Grow is also fully breathable so should cope well with any damp issues and allow moisture to rise through the stone and evaporate. This is important as otherwise moisture could become trapped under the floor where it could eventually cause problems in the walls.

Old Flagstone Floor After Sealing Broadbottom Old Flagstone Floor After Sealing Broadbottom

The customers were delighted with the outcome, the colour of the stone had really improved also Milling the surface of the floor makes it smoother so it would now be much easier for them to keep clean in future.

Old Flagstone Floor After Sealing Broadbottom

For aftercare I left them with a bottle of concentrated Tile Doctor Neutral Tile Cleaner which once diluted is a pH neutral product that will not erode the newly applied sealer. Many household cleaners are too strong for sealed floor and will prematurely erode the sealer over time.


Source: Flagstone Floor Cleaning and Sealing Service in Broadbottom, Greater Manchester

Thursday, January 17, 2019

Stained Ceramic Tile and Grout Renovated in Leicestershire

The pictures below are of a Ceramic tiled floor covered in carpet glue at a house in the old Leicestershire village of Measham. The owner of the property had contacted us for a solution after deciding to remove the carpet in the kitchen which had been down for around 15 years. Ideally, he wanted to have the ceramic tiles restored to new, but this would depend on how well the glaze on the tiles had stood the test of time.

Ceramic Tiles with Carpet Adhesive Contamination Before Cleaning Measham Ceramic Tiles with Carpet Adhesive Contamination Before Cleaning Measham

We called round to the property and could clearly see residue from the carpet adhesive used to secure the carpet had stained the tiles and contaminated the grouting.


Cleaning Adhesive Contaminated Ceramic Tiles

Before starting we removed the kitchen unit kickboards to protect them during cleaning. Next, we turned our attention to the floor and after fully removing the carpet could see that some of the adhesive had turned to powder, so our first step was to remove it by thoroughly vacuum the floor. We then reviewed the range of Tile Doctor cleaning products and problem solvers to determine which product would be the most effective at breaking down the residue. Our first thought was to use Remove & Go as it was developed as coatings remover and we have used it before to remove old worn sealers, paint as well as adhesive contamination.

A strong application would be needed to remove the glue to it was applied neat to the tile and grout. I left it to dwell for about 20 minutes, so it could get to work breaking down the adhesive contaminates. This was followed by mechanical agitation with a rotary floor machine fitted with a poly scrub brush. This quickly broke up the adhesive from the tile allowing it to be removed from the tile and grout with a wet vacuum.

Ceramic Tiles with Carpet Adhesive Contamination During Cleaning Measham

We then scrub cleaned the floor with Tile Doctor Grout Clean-Up which is a strong acidic product. It was diluted at 1:20 with water and scrubbed into the floor to ensure any remaining contaminants were removed and the pH of the floor lowered so that no sticky residues remained.

The process went well and as you can see form the photographs the Ceramic tiles had stood up well to the adhesive and now look as though they were only just installed. The last step was to rinse the floor with fresh water which was then extracted with the wet vacuum and the floor force dried with air movers. After reinstalling the kickboards, they floor was finished much to the delight of the owner.

Ceramic Tiles with Carpet Adhesive Contamination After Cleaning Measham Ceramic Tiles with Carpet Adhesive Contamination After Cleaning Measham


Source: Ceramic Floor Cleaning and Renovation Service in Measham, Leicestershire

Thursday, September 20, 2018

Renovating a Riven Slate Kitchen Floor in Lancashire

We were asked to come and advise a customer regarding their stone floor which the customer was struggling to keep clean. The property was in High Bentham which lies on the River Wenning, just West of the Yorkshire Dales National Park.

Slate Floor Before Cleaning High Bentham

We often get customers who give up looking after their tiles after a while as some stone like this Black Riven Slate need quite a bit of upkeep to keep them looking good and a standard mop and bucket at times isn’t enough to keep them looking pristine. In this case the sealant had worn away in the high traffic areas and the floor had a slightly rough texture to the surface which meant it was holding onto dirt making it difficult to keep clean. We proposed the floor should be cleaned and resealed, discussed the cost and agreed a time for the work to be carried out.

Slate Floor Before Cleaning High Bentham


Cleaning a Black Riven Slate Tiled Floor

To get the tiles clean we burnished the stone floor with a coarse 200-Grit Diamond pad fitted to a weighted buffing machine using water for lubrication. The floor was then rinsed and then the process repeated using a series of different graded pads, namely the 400 and 800 grit burnishing pads which further cleaned and resurface the appearance of the stone.

The grout was cleaned using Tile Doctor Pro-Clean which was scrubbed into the grout lines by hand; Pro-Clean is a heavy-duty cleaner which gets to the really stubborn stains and it did a great job at getting the grout looking like it should. The cleaning process was then finished off by rinsing the floor with water and extracted the slurry with a wet vacuum. The floor was inspected and retreated to the same process where more work was required. We usually find leaving Pro-Clean on a stain for longer and assisting with a bit of steam helps to lift the dirt out of the pores of the stone.

Once cleaned thoroughly we rinsed the floor again and then extracted as much moisture from the floor as possible with a wet vacuum before leaving it to dry off fully overnight.


Sealing a Riven Black Slate Tiled Floor

We called back the following day to apply a sealer first checking the floor was dry using a moisture meter. All was well, so we started to apply the first of two coats of Tile Doctor Colour Grow, a third coat was attempted but the slate would not accept any more sealer, and this was removed with a cloth. It is important to know if you have reached FCS (Full Cure Sealability) if not then the pores of the tiles will still be open to accepting dirt and the job won’t last long. Over a very short period of time the tiles will diminish in stature and finish.

Slate Floor During Sealing High Bentham

The sealer really restored the black colour to the Slate and transformed the look of the floor. As always, we left the customer a free bottle of Tile Doctor Neutral Cleaner, using the correct cleaning product in future will ensure they get maximum life out of the sealer.

Slate Floor After Sealing High Bentham Slate Floor After Sealing High Bentham

The floor looked lovely when finished and the customer was very happy with the overall result.   


Source: Slate Tile Cleaning and Sealing Service in Lancashire

Friday, February 16, 2018

Renovating a Brazilian Slate Tiled Kitchen Floor in Lancashire

Rough Slate is notorious for homeowners to maintain as dirt can quickly become trapped in the rough surfaces. The example on this page is that of Brazilian Semi Riven Slate installed in the Kitchen of a house in the village of Hornby, which while naturally cleft from the rock loses none of its texture and style and yet has a much smother appearance than the typical rough Slates from China. Less processing means it’s not quite completely smooth but it is a lot less expensive to buy than say a honed or polished Slate which is more difficult to maintain due to various polishing techniques required to keep up the appearance. Brazilian Slate is in fact one of my favourite slates to clean and also one of the most rewarding of Slates to seal as the sealer really does bring out the colour and character of the stone.

Sealers provide a protective barrier on natural stone floors and without it dirt can penetrate into the pores of the stone making it more and more difficult to clean effectively. Unfortunately on this floor the new homeowners were unaware on what sort of Stone it was and had no idea how to look after it which resulted in the sealer wearing down prematurely and the floor becoming dull and un-inviting.

Semi-Riven Slate floor Before Cleaning Hornby Semi-Riven Slate floor Before Cleaning Hornby


Cleaning Black Semi-Riven Brazilian Slate Tiles

To restore the appearance of the Slate floor we started by taping up the edges of the new kitchen units to protect the wood from splashing. This was followed with an application of a strong dilution of Tile Doctor Pro-clean worked in with a black buffing pad fitted to a buffing machine running at slow speed (working at a slower speed results in less splashing). The pads can struggle to reach the edges and corners so these were cleaned by hand.

Once we had finished on the main floor area we then concentrated on the grout using a steam cleaner and more Pro-clean scrubbed in with a narrow stiff brush.

Last step of the cleaning was to rinse the floor with water to remove any trace of cleaning products from the Slate and then dried off the floor the best we could with our high wattage wet vacuum machine and left the floor to dry off naturally over night.


Sealing Black Semi-Riven Brazilian Slate Tiles

The next day we returned to seal the floor checking first that the floor had completely dried. The customer had requested a matt finish however we have worked on Brazilian Slate many times before and we knew how good they can look with this Satin finish sealer. Naturally its the customers decision so we offered to do a test piece and let them decide if they didn't like it we would strip off the test piece and apply a Matt finish sealer like Tile Doctor Colour Grow instead.

The floor was dry so a couple of coats of Tile Doctor Seal and Go were applied to one Tile so that they could appreciate how it would look. Luckily the customer agreed with us and so we set about sealing the whole floor with Seal and Go.

To speed up the drying process Air Blowers were installed as we worked and it wasn’t long before the sealer was dry and the customers were able to walk on the floor and inspect every area before we left. I’m please to report that they were over the moon with the floor and my recommendation of sealer.

Semi-Riven Slate floor After Cleaning Hornby Semi-Riven Slate floor After Cleaning Hornby

To maintain the slate tiles going forward we always give our customers a free bottle of Tile Doctor pH neutral tile cleaner, which is a little incentive for them to provide some feedback via our website. 


Source: Slate Tile Cleaning and Sealing Service in Lancashire

Thursday, March 30, 2017

Cleaning Tumbled Travertine Kitchen Tiles

This Tumbled Travertine kitchen floor in Twickenham, Middlesex was in need of a deep clean including stripping out the old sealer and re-sealing to ensure easy maintenance in the future. The floor had not been professionally cleaned and re-sealed for over 10 years and being in a high traffic Read more...

Saturday, March 25, 2017

Deep Cleaning Dirty Terracotta Tiles

This customer in North Chailey, near Haywards Heath and Uckfield, contacted me asking for her Terracotta tiled kitchen floor to be cleaned and sealed. To quote the customer she said the tiles were 'horrendous' and upon inspection it was hard to disagree. However I thought that most of the floor Read more...

Sunday, March 19, 2017

Kitchen Quarry Tiles Cleaned and Sealed in Cardiff

This Quarry Tiled Kitchen floor had been laid in 2000 which is relatively recent compared to some of the floors I'm asked to deal with, the tiles are 150 x 150 mm Quarry tiles with a mixture of colours. A customer in Cardiff said that the Quarry tiles has been sealed by the tiler however it wasn't long after it was completed that the before became very grubby looking. You can see this for yourself in the photograph below where you should be able to make out the ingrained dirt and discoloured Read more...

To read more on this topic click here

Thursday, March 16, 2017

Horrendous Terracotta Tiled Floor Restored in North Chailey

This customer in North Chailey, near Haywards Heath and Uckfield, contacted me asking for her Terracotta tiled kitchen floor to be cleaned and sealed. To quote the customer she said the tiles were 'horrendous' and upon inspection it was hard to disagree. However I thought that most of the floor could be greatly improved but several areas around the washing machine and dishwasher were particularly soiled. Once I spoke of my concerns the customer admitted that both the washing machine and Read more...

Saturday, November 28, 2015

Deep Cleaning Grubby Quarry tiles

This Quarry Tiled Kitchen floor had been laid in 2000 which is relatively recent compared to some of the floors I'm asked to deal with, the tiles are 150 x 150 mm Quarry tiles with a mixture of colours. A customer in Cardiff said that the Quarry tiles has been sealed by the tiler however it Read more...

Thursday, November 26, 2015

Horrendous Terracotta Tiled Floor Restored in North Chailey

This customer in North Chailey, near Haywards Heath and Uckfield, contacted me asking for her Terracotta tiled kitchen floor to be cleaned and sealed. To quote the customer she said the tiles were "horrendous" and upon inspection it was hard to disagree. However I thought that most of the floor could be greatly improved but several areas around the washing machine and dishwasher were particularly soiled. Once I spoke of my concerns the customer admitted that both the washing machine and Read more...

Cleaning Tumbled Travertine Kitchen Tiles

This Tumbled Travertine kitchen floor in Twickenham, Middlesex was in need of a deep clean including stripping out the old sealer and re-sealing to ensure easy maintenance in the future. The floor had not been professionally cleaned and re-sealed for over 10 years and being in a high traffic Read more...

Friday, November 20, 2015

Deep Cleaning Dirty Terracotta Tiles

This customer in North Chailey, near Haywards Heath and Uckfield, contacted me asking for her Terracotta tiled kitchen floor to be cleaned and sealed. To quote the customer she said the tiles were "horrendous" and upon inspection it was hard to disagree. However I thought that most of the floor Read more...

Kitchen Quarry Tiles Cleaned and Sealed in Cardiff

This Quarry Tiled Kitchen floor had been laid in 2000 which is relatively recent compared to some of the floors I'm asked to deal with, the tiles are 150 x 150 mm Quarry tiles with a mixture of colours. A customer in Cardiff said that the Quarry tiles has been sealed by the tiler however it wasn't long after it was completed that the before became very grubby looking. You can see this for yourself in the photograph below where you should be able to make out the ingrained dirt and discoloured Read more...

To read more on this topic click here

Wednesday, November 11, 2015

Tumbled Travertine Tiled Floor Maintained in Twickenham

This Tumbled Travertine kitchen floor in Twickenham, Middlesex was in need of a deep clean including stripping out the old sealer and re-sealing to ensure easy maintenance in the future. The floor had not been professionally cleaned and re-sealed for over 10 years and being in a high traffic area, the tiles had accumulated a high amount of soil over the years. There were also holes in the Travertine where the filler had broken out. Cleaning Tumbled Travertine Tiles The first job was to scrub Read more...

Saturday, November 7, 2015

Grout Colouring porcelain tiled kitchen floor in Leyland

A customer in Leyland near Preston reported a grouting issue with their porcelain tiled kitchen floor, the tiles were fine but the grout had become discoloured and grey, they were also finding it difficult to keep clean. This is not an unusual story for Porcelain or Ceramic tiled floors which are generally very low maintenance and you find the grout needs attention before the tiles do. Applying Grout Colourant On arrival I set up my equipment and cleaned the floor to make sure all the grout Read more...