Wednesday, August 28, 2024

Newport Tile Doctor Details the Restoration of Victorian Floor Tiling

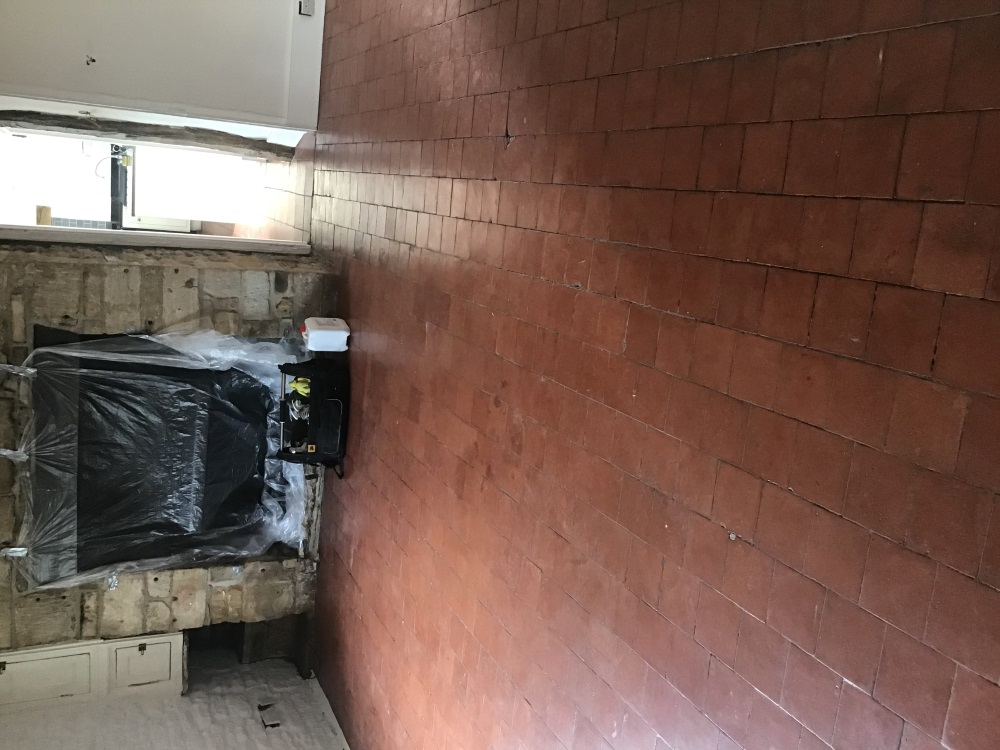
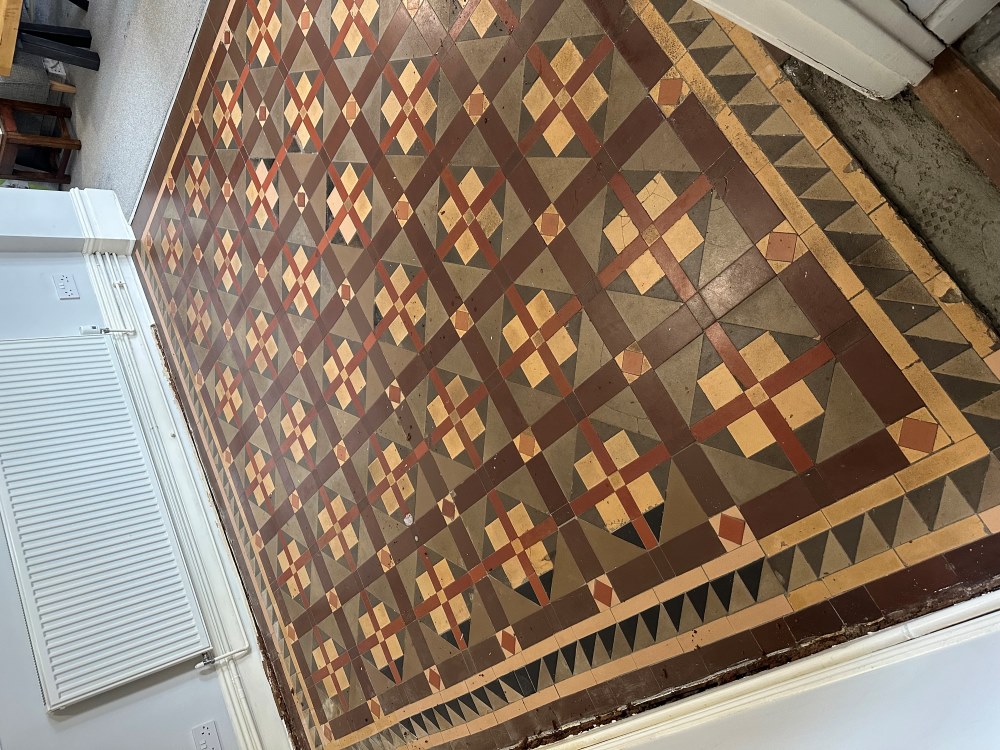
The client had lived at this property in Newport for a few years and decided that it was finally time to sort out the Victorian tiled floor in the dining room. Some repairs were needed in a few areas and the sealer was fading and due for replacement.

Victorian Tiled Dining Room Floor Before Renovation Newport

I went over to the property to survey the floor and advised that with repairs, cleaning and sealing the process would take two and a half days. Having worked on many many floors like these before I was very confident that we could repair the floor where needed and restore its appearance.

During the visit I noticed that at the door threshold leading into the kitchen, some of the tiles had been taken up for a gas pipe repair and back filled with cement, I suggested I could repair this section using matching tiles, so I included it in the quote. The quote to renovate and repair the floor was accepted and the job was booked in.
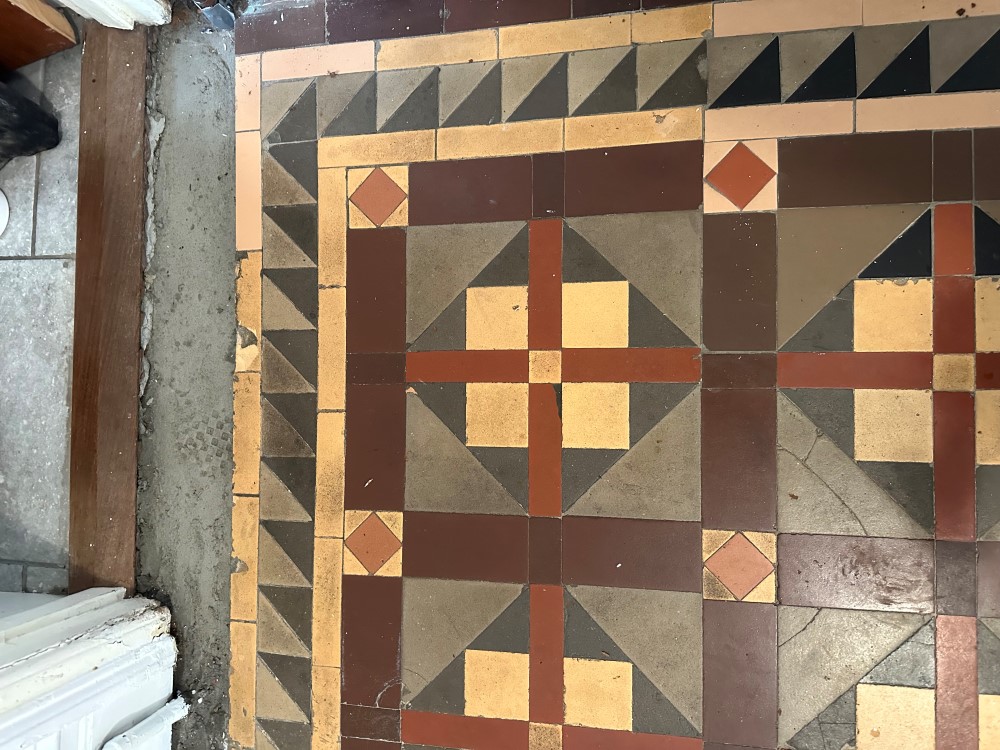
Victorian Tiled Dining Room Floor Before Renovation Newport


Cleaning and Repairing a Victorian Tiled Dining Room Floor

I began by addressing the tiling issues so my first course of action was to set matching tiles along the doorway border leading to the kitchen, as the previous tiles had already been removed by the gas company it was fairly straight forward job of carefully knocking out the cement. The tiles I had sourced were from a nearby reclamation yard and needed to be carefully cut to size to ensure a good fit with the original. After setting the tiles and grouting I left them to dry overnight.

The following day I began cleaning, using a combination of Tile Doctor Remove and Go and Pro-Clean, leaving the solution to dwell after being brushed into the floor. After around ten minutes the floor was scrubbed by hand with a stiff brush to release the dirt from the tiles. The resultant slurry was then vacuum away and with the floor cleaner I was able to get a better idea of which areas needed more attention.

I restored the perimeter of the floor with a 200-grit diamond block and this was followed up with a 200-grit diamond pad fitted to a rotary machine. These coarse pads cut into the tile surface removing years of grime and giving them a new lease of life. After another rinse and extraction with the wet vacuum the whole floor had a much brighter appearance. The process was then repeated with a 400-grit diamond pad to close the pores of the tiles.

The floor was then washed by hand with water and a sponge to make sure there wasn’t any areas missed, also to ensure there was no residue from the cleaning products left on the floor which could potentially disrupt the sealing process. The floor was then left to dry overnight ready for sealing the following day.


Sealing a Victorian Tiled Dining Room

To assist with drying I asked the client to leave a couple of air movers running during the evening and to put them back on in the morning. This worked well and by the next day I was able to confirm the floor was dry and ready for sealing with a moisture meter.

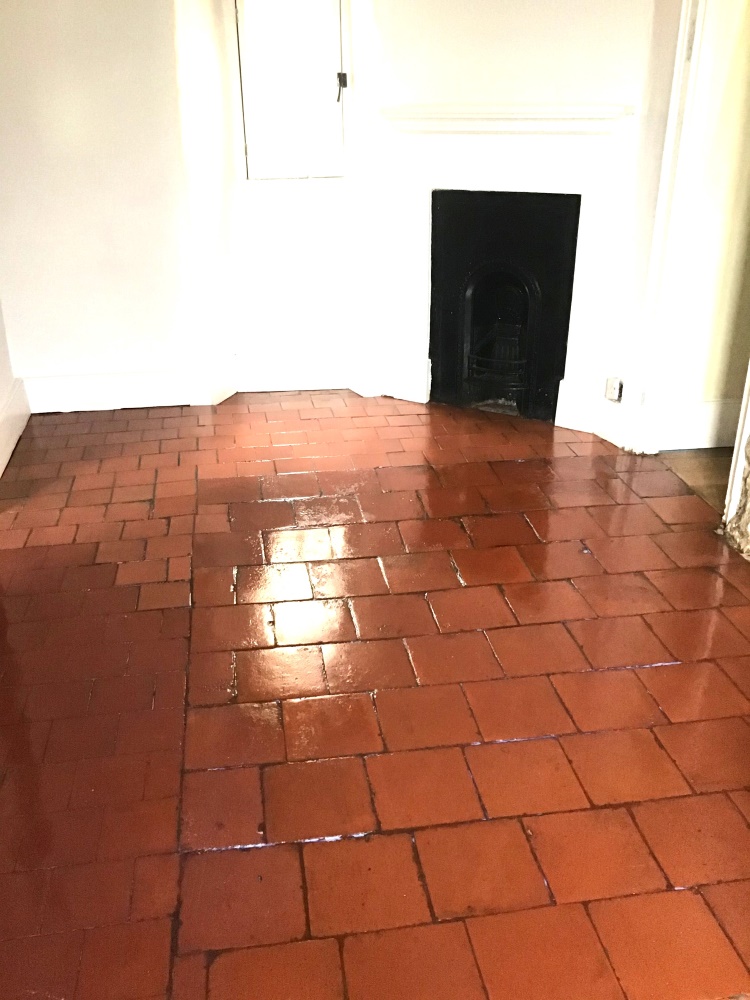
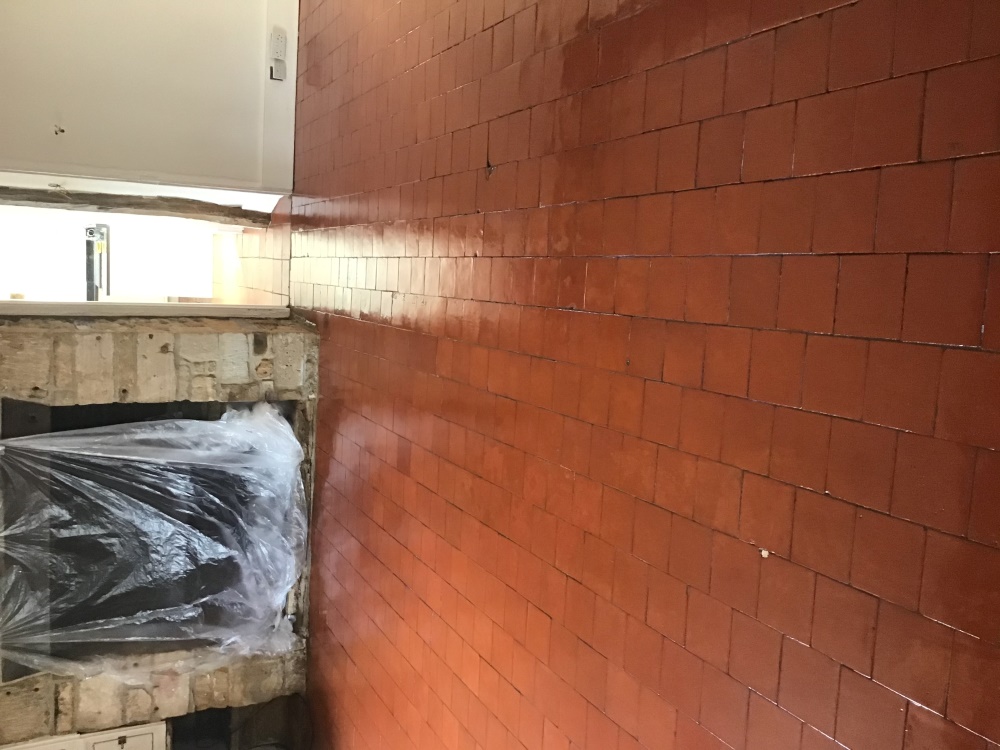
The client had requested a satin finish and so the sealer chosen was Tile Doctor Seal and Go, four coats were applied to the tiles a permanent wet look and gorgeous lustre. Another advantage of Seal and Go is that it’s a water-based sealer so it doesn’t give off a smell as it dries.
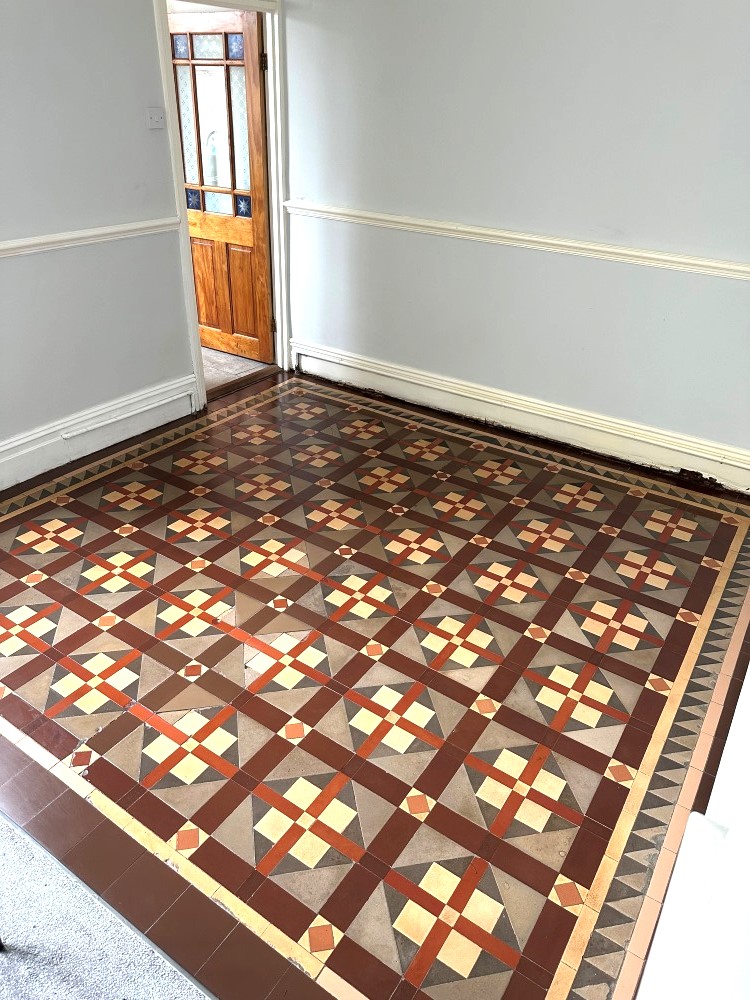
Victorian Tiled Dining Room Floor After Renovation Newport

For aftercare I left the client a bottle of Tile Doctor pH Neutral Tile Cleaner to help maintain the appearance of the floor. This is a gentle tile cleaning product that won’t harm the sealer, many of the products you find in supermarkets are simply too strong for a sealed floor.
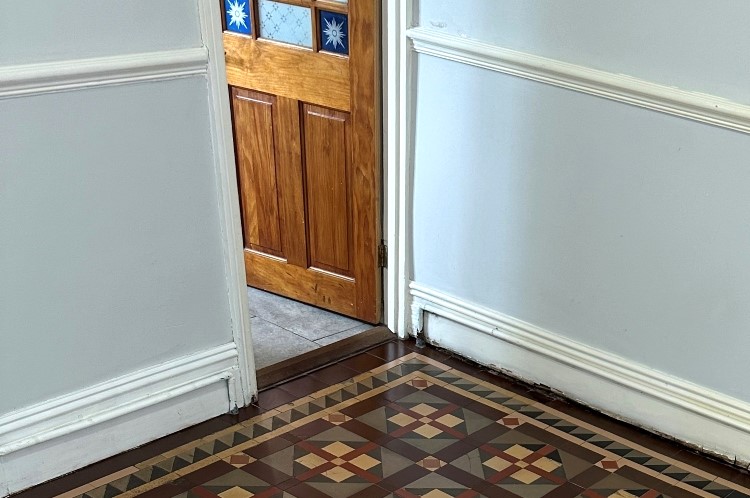
Victorian Tiled Dining Room Floor After Renovation Newport 


Tuesday, August 27, 2024

Refinishing Oak Hardwood Floors

 Oak hardwood floors are one of the things that can make a home seem extraordinary. It has the natural beauty which does not go out of fashion through time and you are adding to the value of your house if you have oak floors installed. However, although oak is known to be very durable, it can lose its shine over time. It needs to be refinished once the polyurethane covering on its surface starts to wear out.

What You'll Need:

  • 20 to 60 grit sandpaper
  •  Hand sander
  •  Putty knife
  •  Long-handled roller
  •  120 grit sandpaper
  •  Wood filler
  •  Rag

A refinishing job is also important to protect the wood itself from everyday wear and tear. You will only require a weekend to do the job yourself and if you do not possess some of the equipment needed, you can rent it out from your local hardware outlet. Although a bit challenging, the results of your effort will be well worth it. 

Step 1 - Prepare the Room

Remove all of the items from the room that has the floor for refinishing. Once the room is free from any obstacle, take out the moldings from the room edges and sweep the floor to make sure that there is no dust around.

Step 2 - Inspect the Floor

Inspect the entire flooring that you will be refinishing. If there are any staples or nails on it, make sure that you are able to remove all of them before doing the refinishing. Nail holes should be filled up with wood putty. Use the spatula to do it. Ensure that you fill out evenly to make the flooring as even as you can. There is no need to sand it since you will be sanding the entire area anyway to remove the old finish.

Step 3 - Prepare the Sander

Take out the instruction manual for the drum sander and assemble it as directed. If the flooring has been heavily worn down, choose 20 grit sandpaper. If the wear is moderate, you can use a 60 grit sandpaper.

Step 4 - Sand the Floor

Sanding should be started from a corner of the room. Move in the direction of the wood grain and allow the drum sander to work for you. Go about the task back and forth until you have the entire area covered. To ensure that everything has been sanded down, overlap each pass by 1 inch.

Step 5 - Sand the Room Edges

Room edges should be sanded down by hand since they cannot be reached by the drum sander. Use the same sandpaper grit that you used on the sander.

Step 6 - Fine Sanding the Room

After you are done with sanding the edges of the room, repeat the sanding process for the entire room, but this time, use a 120 grit sandpaper. This will be your preparation for the staining.


Friday, August 9, 2024

Stripping Wood Floors With Natural Products

Stripping wood floors with natural products is possible. While it can be more difficult to find these products, they are becoming more popular and accessible as time goes on and people become more passionate about the environment. While it may be difficult, here are a few materials that you need, as well as steps to help guide you.

What You'll Need:

  • Natural wood stripper
  •  Recycled rag
  •  Natural wood cleaner
  •  Outdoor area or ventilation
  •  Scraper
  •  Sander
  •  Paint brush
  •  Goggles
  •  Gloves

Find a Natural Stripper

Finding a natural stripper will be the hardest part of this job. While they are becoming more available in department and hardware stores, you can definitely find them on the internet. There are a few wood strippers with a citric stripper in them that are natural and great for the environment and worker, but also effective. Since you need to order it online though, make sure you do this long before you need the project to be finished.

Sand

Be sure to use safety goggles and gloves from here through the completion of this project. Sanding the wood is important to get any rough spots, stains, and dirt off. Use a rag and water to wipe down the area first and then allow it to dry completely. You can use a hand sander to keep electricity out of the mix if you wish. This may take longer, but it much more eco-friendly.

Strip Wood

You can apply a thick and even layer of stripper onto the wood using a paintbrush or rag. Check the label to see how long the stripper needs to sit there before being taken off. Typically it is anywhere from five minutes to 25. Natural strippers will often take longer to sit and work in because they do not have strong stripping chemicals in them. Be patient and keep in mind you may need to do this several times.

Scrape off Stripper

After you have allowed the stripper to sit for several minutes or the allotted time, take a scraper and begin to scrape the wood. You will want to start in one corner and just work your way to the other end. You can usually get a lot off in the first try. However, usually, you will need to repeat this twice or more. If that is the case, remove everything you can and then wipe it down with water again. Reapply a thick layer of stripper to the spots that need it and then allow to sit again. Use a scraper and repeat until finished.

Clean Area

Using a recycled rag and the natural cleaner, be sure to wipe down the wood completely to make sure you have gotten all of the stripper cleaned off.

Once you are finished, allow the wood to dry and sit for a few days before treating it.

Wednesday, July 31, 2024

Remove a Scratch from Mahogany Wood Flooring

Among household wood floors, a mahogany wood floor is regarded among the more aesthetic and durable options. Mahogany is a durable wood that is inherently resistant to scratches and staining. However, continued use and neglectful handling can take a toll on the most durable of hardwoods. Thus, people having mahogany wood floors should know how to remove the scratches from their floors. This is a simple process that can be done without professional assistance, using some basic household supplies.

Cleaning the Mahogany Wood Floor

You need to thoroughly clean the mahogany wood floor before treating the scratches. This ensures that the debris is not impacted by the scratches during the scratch-removal process. Ensure that you don’t use hard abrasive agents that can further scratch the surface. To clean the debris, repeatedly mop the floor.

Then clean the mahogany wood floor with a cleaning solution made of lukewarm water and dishwashing soap. You can use a sponge to lightly scrub the floor. Remember to rub the sponge in the direction of the wood grain. To remove hard stains around the scratched surface, use a solution made of tap water and white vinegar. Dry the floor before proceeding.

Buffing Mahogany Wood Floor Scratches

Buffing ensures that the outline of the scratches is reduced and they are camouflaged in the background of the mahogany wood grain. You can use a steel wool pad for this. Ensure that you limit your buffing to the scratches only. You can also use fine-grain sandpaper grits. Buff in direction of the wood grain. Don’t use sanding screens and scouring pads or buffing compounds containing harsh mineral spirits as these can harm the mahogany wood floor.

Waxing Mahogany Wood Floor Scratches

Using a dry mop, clean the debris created by buffing. You can also vacuum the floor. To fill up the scratches, you can use wax. Paste wax is recommended for this purpose as it easily attaches to finished wood surfaces. After applying the wax, re-buff the floor, in the same manner, explained above. Paste wax acts as a filler material for deep scratches.

Coloring Mahogany Wood Floor Scratches

To ensure that the scratches are comprehensively eradicated, you need to treat them with a matching color. This a bit of trial and error phase wherein you need to use various approaches to find out which one is most effective. Use mahogany-colored repair markers available at hardware stores. You can fill in the scratches with mahogany-colored wax sticks also. However, this requires repeated buffing since the wax needs to be sanded to be disguised.

Finishing Repaired Mahogany Wood Floor

It is vital to finish this repair project by applying a wood finish. This conceals the presence of repaired surfaces and contributes towards the overall durability of repaired, buffed surfaces. Apply a branded wood finishing compound using a paintbrush. However, using medium or low-gloss finishing compounds is recommended since they are better equipped to conceal the presence of deep scratches. You should use water-based finishing compounds that are easier to handle and can immediately bond with the mahogany wood floor.


Source: www.DoItYourself.com

Wednesday, July 10, 2024

Northants Tile Doctor Details the Renovation of a Quarry Tiled Floor in Wollaston

This client from the village of Wollaston contacted Tile Doctor about cleaning and sealing their Quarry tiled floor. They were refurbishing the house and wanted to keep the original floor tiles as part of the renovation.

The tiles were installed throughout the ground floor, including the kitchen, lounge and hallway. However, as I was to discover myself, they were covered in years of grime, and they were not sure if they could be restored.

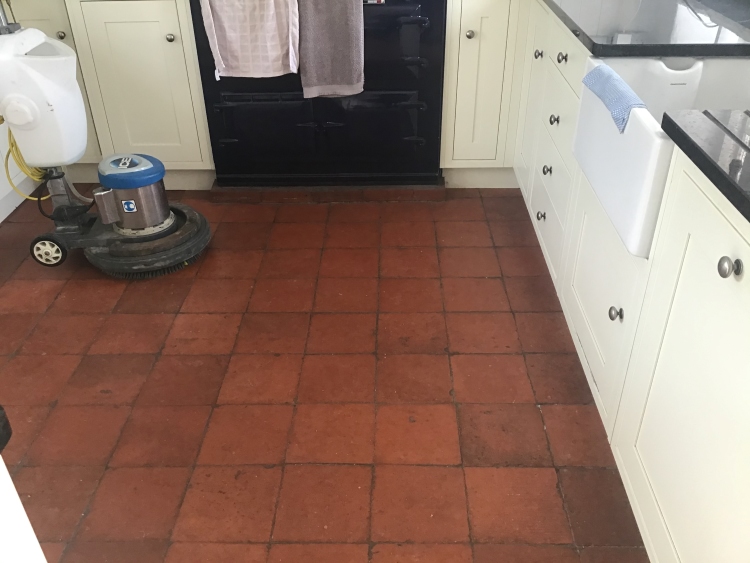
Quarry Tiled Kitchen Floor Before Renovation Wollaston

I went over to survey the floor and could see that any sealer that may have protected the tiles from ingrained dirt had long since worn off and as a result dirt had become ingrained into the pores of the quarry tiles. Once this happens its very difficult to keep clean.

 Quarry Tiled Kitchen Floor Before Renovation Wollaston

I had to agree the floor was overdue a deep clean and re-seal and so took some measurements in order to work out a quote for doing the work. The quote was accepted, and a date set for starting the work which would take two days, one to clean and one to seal.


Cleaning a Quarry Tiled Ground Floor

To deep clean the quarry tiles, a strong dilution of Tile Doctor Remove and Go was applied to the floor and left to dwell for a short while. The solution was then scrubbed into the tile using a black scrubbing pad fitted to a rotary machine.

The solution soon turned black with the dirt that was pulled out of the tiles and was rinsed away with water and extracted using a wet vacuum. I inspected the tiles afterwards and could see some paint splashes from years of decorating were still evident, so I re-applied the product and repeated the process to get rid of them.

The grout was then cleaned by hand using Tile Doctor Pro-Clean and a scrubbing brush, again extracting the waste once complete. I find this is the most effective way to clean grout as the pads struggle to reach into the recess of the grout line.

To complete the cleaning process, I then gave the floor an acid rinse with Tile Doctor Grout Clean-up, this was applied to remove old grout smears and further clean up the tiles. All soiling was rinsed off with water and extracted with a wet vacuum. The floor was left to dry off overnight.


Sealing a Quarry Tiled Ground Floor

Returning the following day, the first job was to test the floor with the damp meter to check it was dry. The tiles needed to be dry enough to accept the seal and applying sealer to damp tiles can result in a patchy appearance. This is always worthy checking when cleaning Quarry tiles as that are naturally quite porous so can take some time to dry.

Once satisfied the readings were within the correct range, I was ready to seal. I selected to use Tile Doctor Seal and Go Extra for this, it’s a breathable sealer which is useful for older floors such as this where there is no evidence of a damp proof membrane being installed. Breathable sealers allow for moisture to rise through the tile and evaporate at the surface, without this moisture can build-up under the floor causing it to reach out to the walls where it could cause rising damp.

I applied two coats of Seal and Go Extra waiting for the first to dry before applying the next. The sealer lifts the deep red colours in the Quarry tiles and adds a nice appealing shine. The sealer works by ensuring dirt remains on the surface where it can easily be cleaned away.

Quarry Tiled Kitchen Floor After Renovation Wollaston

My client was very happy with their now clean quarry tiled floor and left the following feedback for me:
"I was looking forward to the results before it was even booked in, and I was not disappointed. A professional approach and very helpful throughout."

Before leaving I took time to explain how to maintain the floor using Tile Doctor Neutral Tile Cleaner. Its important to use a product like this on a sealed floor as many tile cleaning products are simply too strong and will strip the sealer off the floor with regular use.

Quarry Tiled Kitchen Floor After Renovation Wollaston

Tuesday, June 25, 2024

How to Polish a Marble Floor by Cumbria Tile Doctor

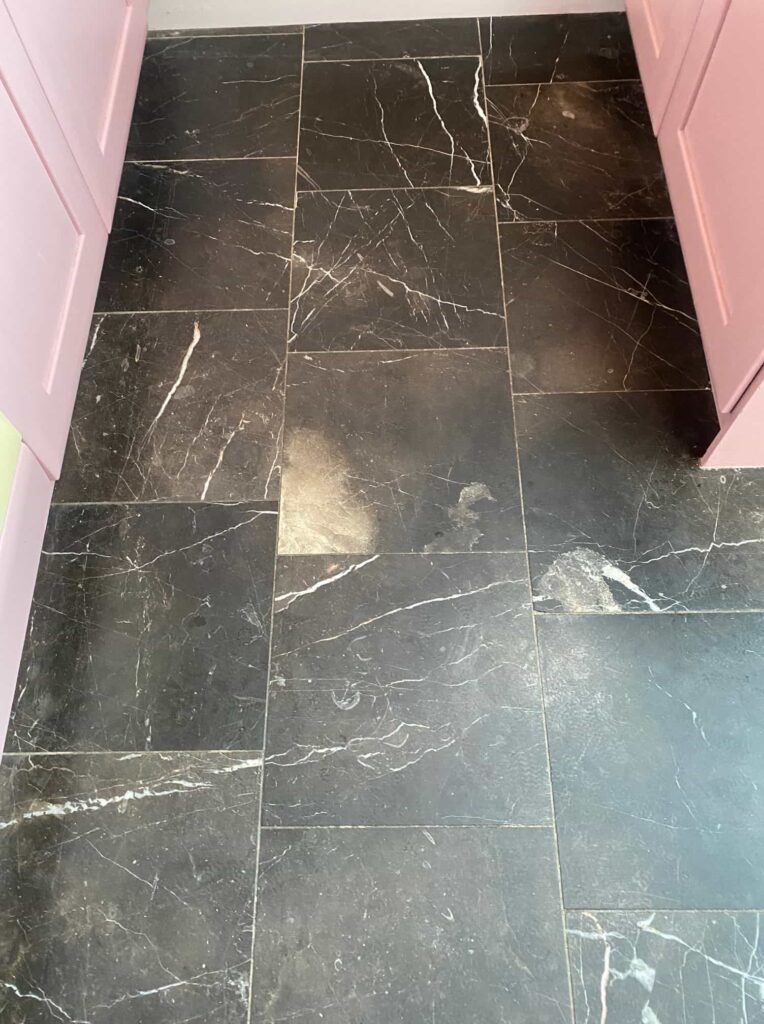
This client from Barrow in Furness contacted Tile Doctor about their polished black marble floor which had been installed 20 years ago. Its polished appearance had diminished with use over that time, and they had wasted money on different products sourced from DIY shops and the internet to rectify it.

Polished Black Marble Floor Before Cleaning Barrow in Furness

Many of these products were unsuitable for this type of tile and as such the top surface was quite tacky to walk on and had done nothing to improve its appearance. Happy I could resolve the problem they accepted my quote to re-polish the floor and a date was agreed to commence the work. 


Cleaning a Polished Black Marble Dining Room

My first task was to protect the woodwork by applying a bead of clear waterproof mastic between the wood and the floor, this prevents water being soaked into the wood through capillary action, this can cause water staining and worst-case blow MDF skirting and doors.

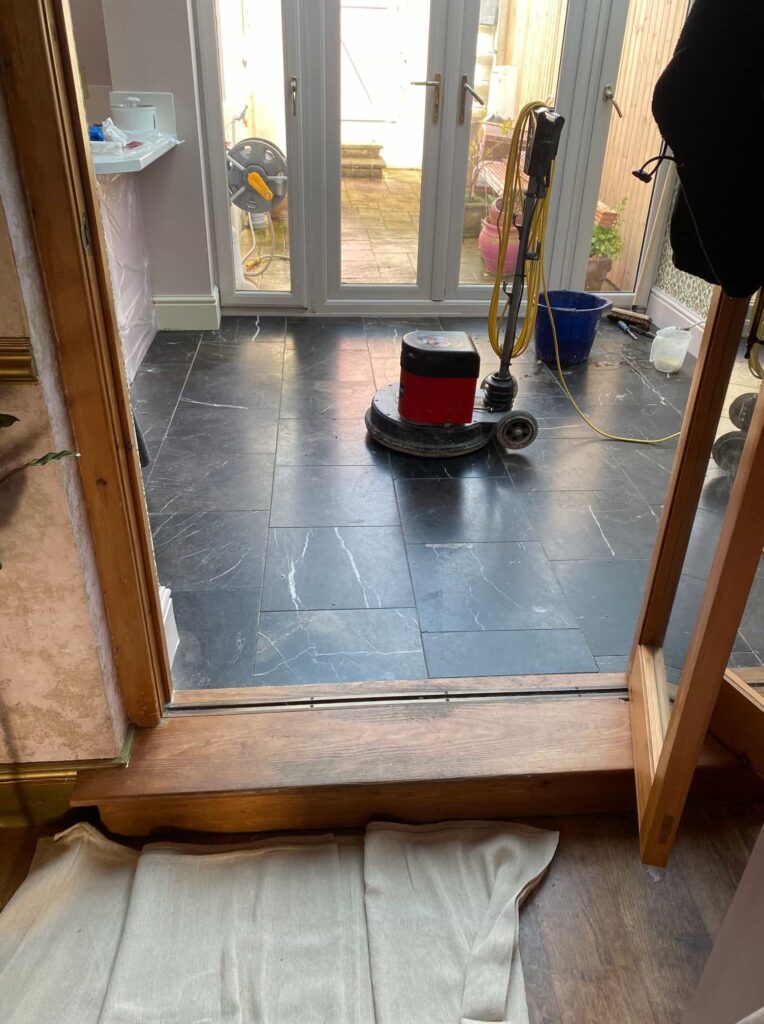
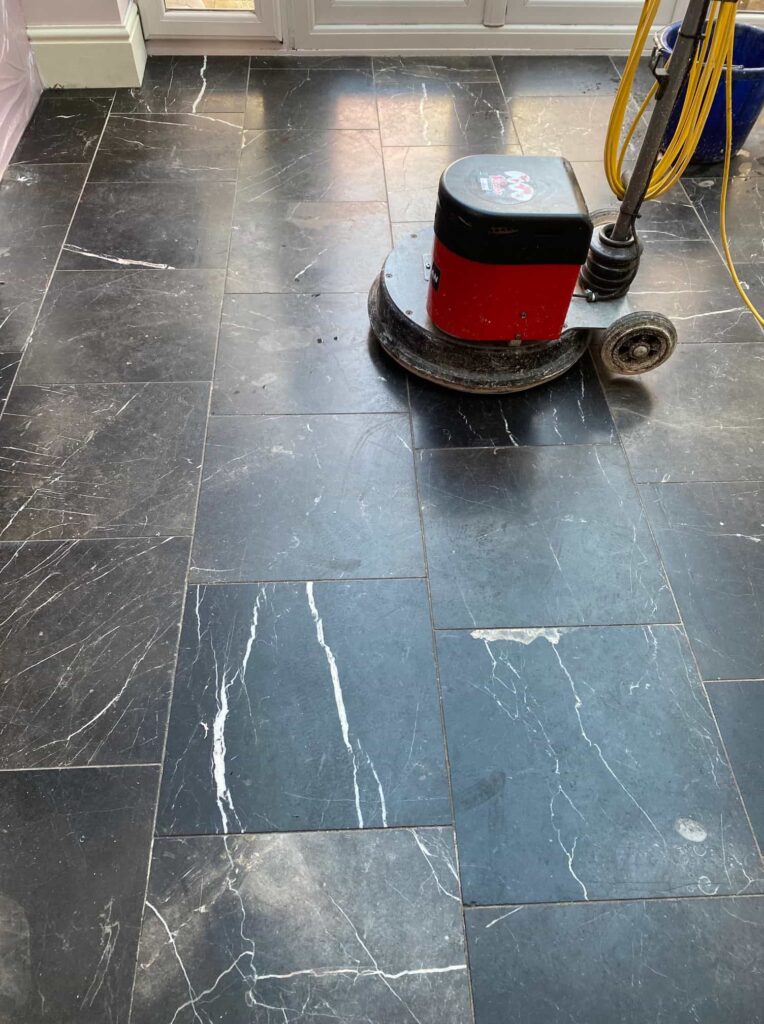
Once done work started on polishing the marble floor using a 200-grit 17-inch diamond pad fitted to a rotary floor machine. This pad removes encrusted sealers, old polish and other products that were upsetting the stone finish. Applied with water for lubrication this pad does a good job of cleaning up the stone but leaves it looking dull with a matt finish.

To bring back the finish, finer grit diamond Burnishing pads are applied in sequence starting with 400 then 800 and 1500-grit. These pads clean and rebuild the polish on the Marble slowly brings the stone back to life again. The floor is rinsed off with water after each pad and the soiling extracted with a wet vacuum. The edges were then completed with a small handheld machine using smaller pads of the same grits.

After this work, I started on the grout lines which were scrubbed by hand using Tile Doctor Pro-Clean which is an alkaline cleaner and will not upset the marble. I find it best to do this work by hand as the pads can struggle to reach into the recesses of the grout line.
   
Polished Black Marble Floor During Cleaning Barrow in Furness Polished Black Marble Floor During Cleaning Barrow in Furness

A final rinse with clean water which was then extracted with the wet vacuum and the floor left to dry off overnight.

I called back the next day and started work by checking the stone and grout was nice and dry and ready for a final polish using a 3000-grit diamond pad. This pad brings up the polish on the floor even further and is applied using a tiny amount of water from a spray bottle which aids in the final polish.


Sealing a Polished Black Marble Dining Room

Once the whole floor was polished including all the corners and edges it was time to start applying the sealer. With this being a Black Marble floor with more than a few marks on it from the wear and tear over the last twenty years, I opted to use a sealer normally designed for outside areas called Tile Doctor X-Tra Seal. This is an oil based breathable sealer that soaks into the pores of the stone protecting it from within and ensuring any dirt remains on the surface.

Polished Black Marble Floor During Sealing Barrow in Furness

We don’t normally recommend X-Tra Seal for polished surfaces as the oil takes a lot to cloth off, however in this case I felt the extra work would be justified as the oil works well on Black stone.

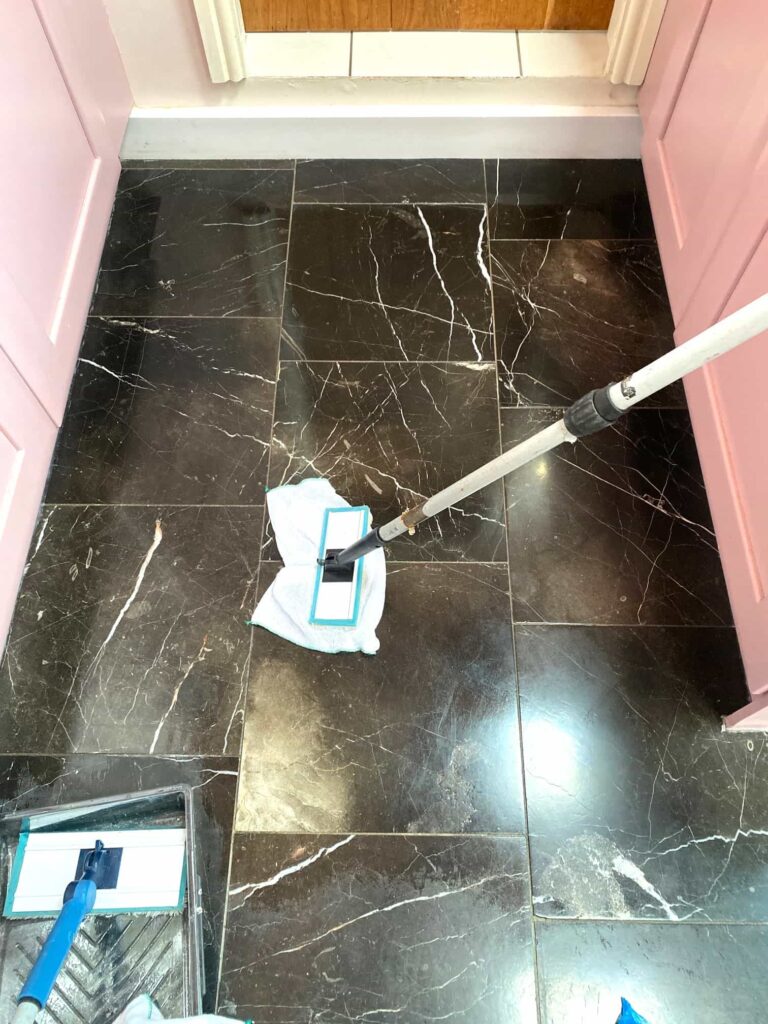
Polished Black Marble Floor After Cleaning Barrow in Furness

Once done the Marble tiles were transformed by the work much to the relief of the owner who had really struggled to maintain the floor. Before leaving I made sure to spend time discussing future cleaning and recommended, they use Tile Doctor Stone Soap going forward. This is a mild but effective cleaner which helps maintain the patina on the Marble.


Monday, June 24, 2024

How to Clean Berber Carpet

Many people aren't sure how to clean Berber carpet. Generally, you want to follow the cleaning and maintenance that you would for cleaning other carpet, but because Berber carpet refers to a type of weave pattern used to make the carpet, there are some difference in the cleaning process. Follow this article's suggestions to clean and maintain your carpet.


First Contact Your Manufacturer

Before beginning the cleaning process, contact the manufacturer or store where the carpet was purchased. The store personnel should be able to give you some advice on cleaning your particular carpet, in case the specific kind of Berber carpet requires a different process.

Also contact the manufacturer or read through the user manual for your vacuum cleaner and shampooer, as some models are not suited for Berber carpets. You will need to set your vacuum to “suction only,” as using the beater bar on Berber carpet will tear at the carpet’s loops and cause fuzzing and shedding.


Cleaning the Carpet

There are a couple different options for providing a deep cleaning to your Berber carpet, but whichever route you choose, you should plan on cleaning your carpet at least once per year.

One method is using a steam cleaner with cleaning chemicals. Because of the tight weave of Berber carpet, the moisture will take longer to dry than other kinds of carpet. If you plan on steam cleaning, be sure to plan for plenty of drying time and select a warm day to undertake the cleaning.

Another method that is particularly suited to wool and nylon Berber carpets is a low-moisture cleaning using dry foam. This will give your carpet a very clean finish and greatly reduce the drying time.


Perform Preventative Care

There are several things you can do to extend the life of your carpet and lessen the frequency of a need for shampooing. The main thing is to clean spills and stains as they happen (before they set) so that they are easier to remove.

Placing some rugs atop the Berber carpet on high traffic areas or near doors can also save on wear and tear. It is also recommended to wear socks or slippers on the carpet, as bare feet and outdoor shoes can also accelerate the deterioration of your carpet.

Determine a schedule to vacuum the carpet. Most people will find that if you pick up pebbles and other debris from the floor daily that you only need to vacuum once a week, or even less is it is a low traffic area.

Source: www.DoItYourself.com