Monday, January 15, 2024

The Only Carpet Installation Tools You'll Ever Need

Carpet installation tools are tools that allow people to install carpets on their own, without professional help. They include chalk, duct tape, gripper edge, hammer, knee-kicker, masonry nails, power stretcher, saw seaming iron, seaming tape, stair tool, staple gun, tackless strips, and a utility knife.

Preparing for Installation

Arrange tackless strips around the perimeter of the room, leaving about 1/2 inch between the strip and the wall. Use the saw to cut them to the proper length. Use a hammer and two nails to attach each strip to the floor and join the strips at the corners. Attach padding waffle side up using the staple gun, spacing the staples 6 inches apart. Use the utility knife to trim the excess padding. Once all padding is applied, cover the seams with duct tape.

Setting Carpet Dimensions

Measure the room and add six inches to the measurements. Use the chalk to set the measurements down on the carpet. Cut off the extra fabric. If you are using more than one piece of carpet, leave some extra space where they meet. That way you can cut away the excess pieces without creating gaps.

Applying the Carpet

After the carpet is cut, place the seaming tape, adhesive side up on the floor where different pieces of the carpet will meet. Use the seaming iron to melt the tape and press the carpet against it to attach. Use the knee kicker to attach the carpet to the tackless strips at each corner. Attach the rest using the carpet stretcher.

Final Steps

Once the carpet is secured, trim away the excess carpet. Smooth out the edges by tucking them into the space between the tackless strip and the way using the stair tool. Once that is done, put away the tools and enjoy your new carpet.

Source: www.DoItYourself.com

Monday, January 8, 2024

Maintaining a Historic 1850's Minton Tiled Floor in Cheshire

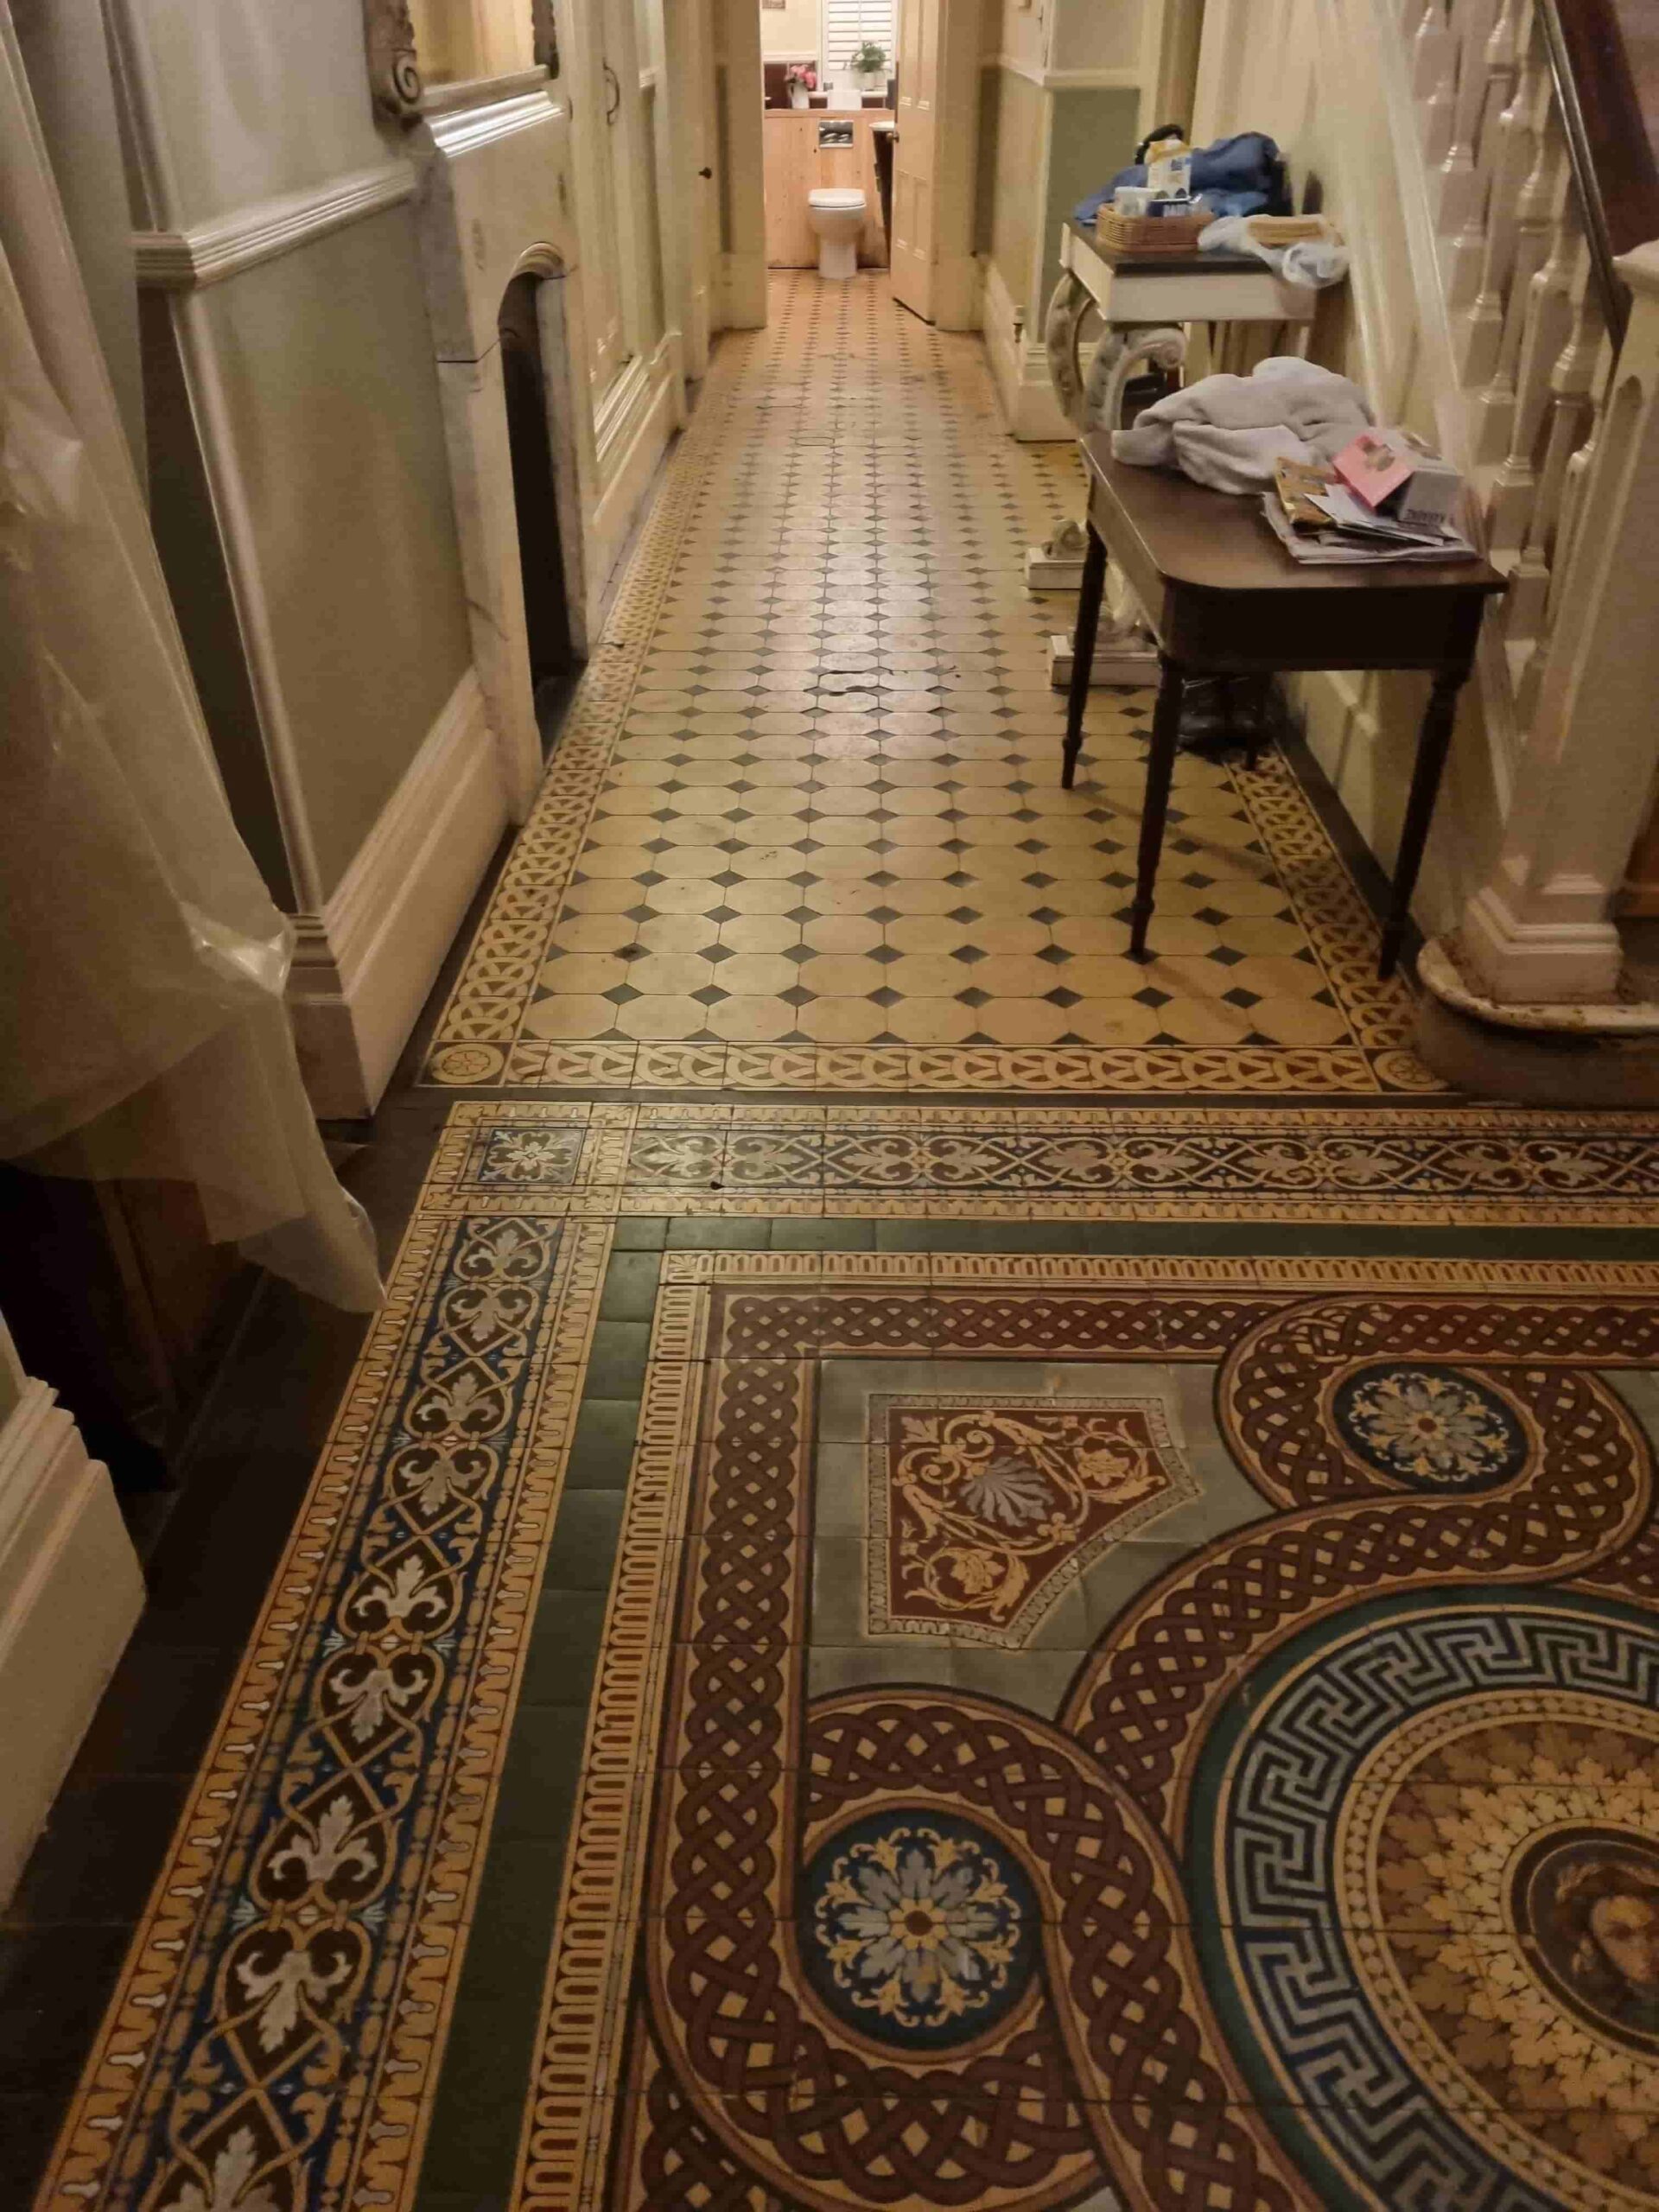
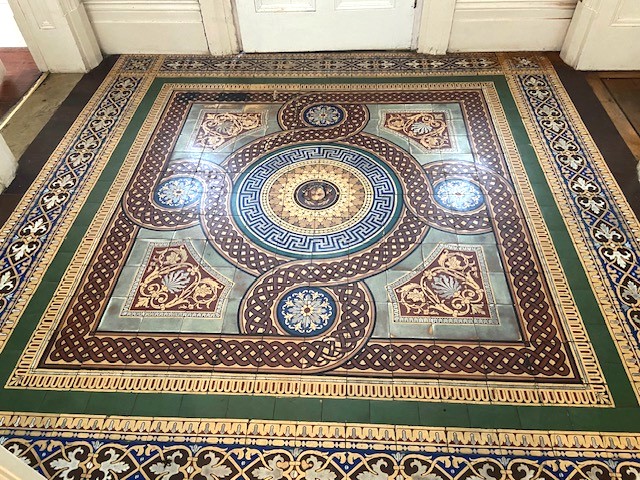
I was first asked to restore the large Victorian tiled hallway floor at this mansion type property in Handbridge, Cheshire two years ago. The floors had a lot of history and had been used as a template for the famous Minton Hollins encaustic tiled floor at St George’s Hall in Liverpool that was built in 1854. Unfortunately, however my work was put on hold as other restoration works including repairing dry rot took priority.

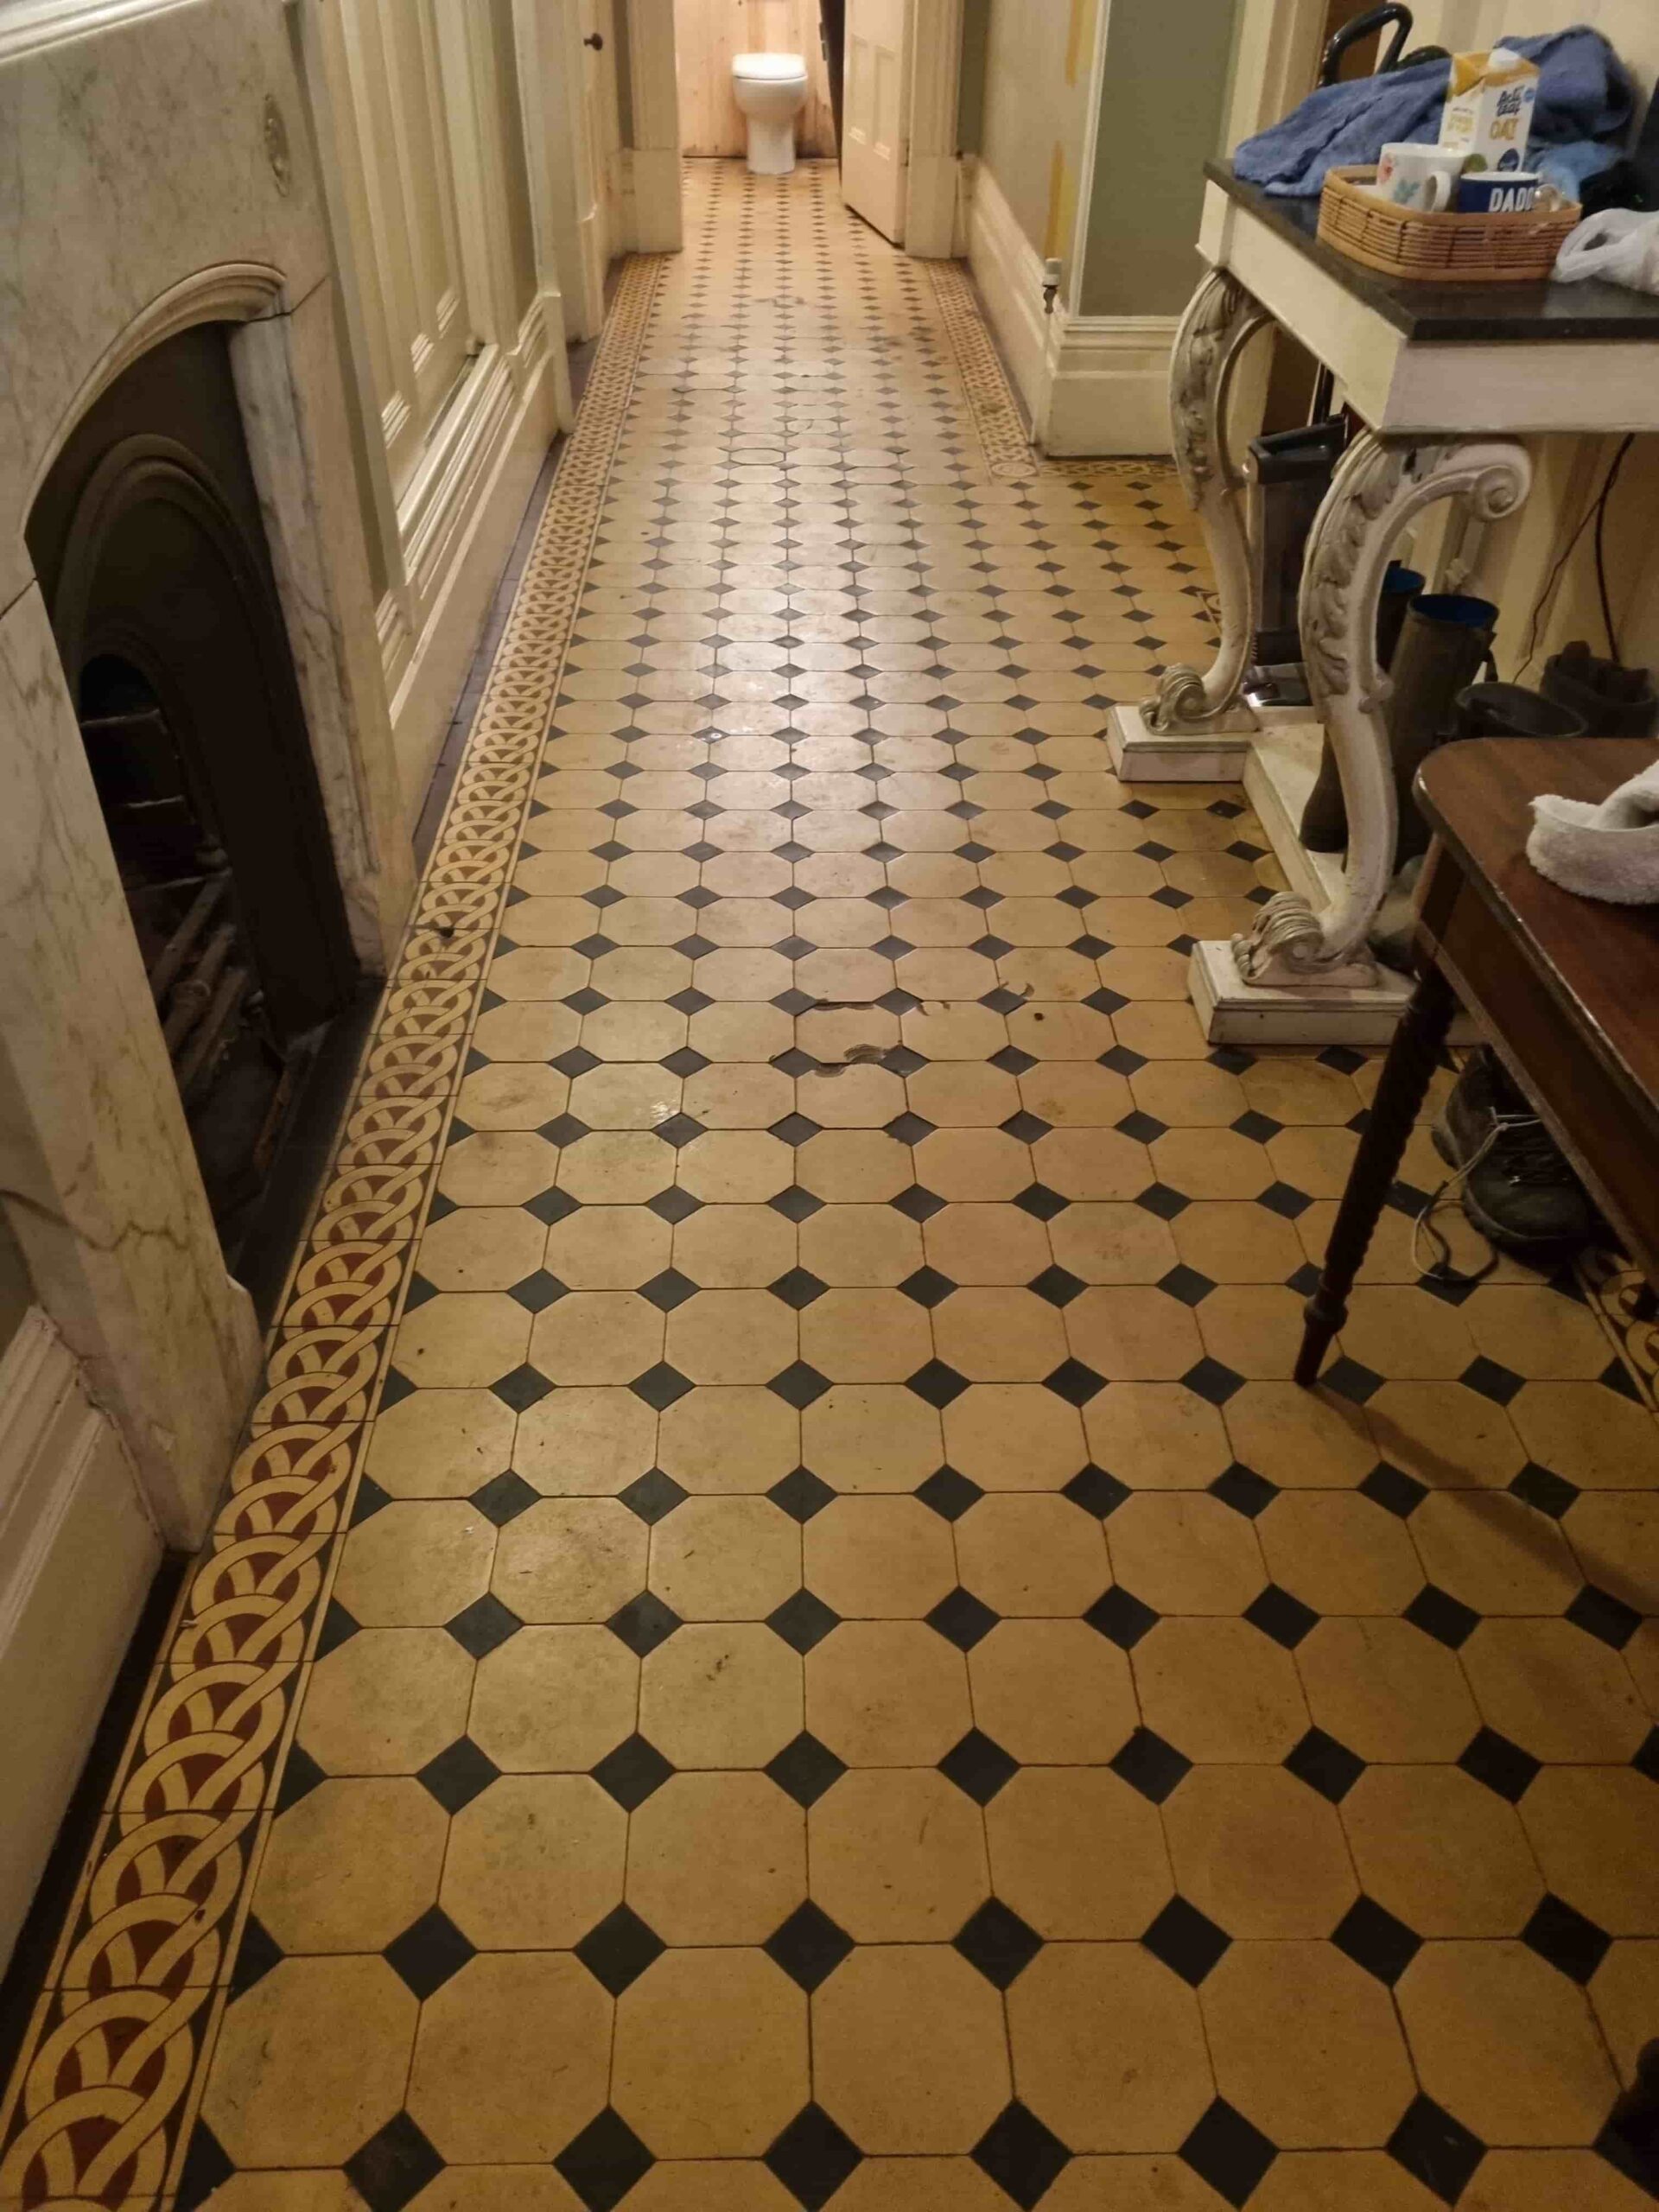
Victorian Tiled Floor Before Renovation Handbridge Cheshire

I kept in touch with the owners whilst the other works progressed and kept a look out for 22 beige Octagon shaped tiles that were needed to replace some of the damaged tiles in the floor. In fact, it wasn’t until later in 2023 that I was called back to start the renovation work to the floor, by which time I had managed to source all the replacement tiles needed.
     
Victorian Tiled Floor Before Renovation Handbridge Cheshire Victorian Tiled Floor Before Renovation Handbridge Cheshire
Handbridge is a district of Chester with a mixture of large Victorian mansion type properties on the South bank of the river Dee and workers cottages built to service the water powered factories that sprung up along the river.

Repairing and Cleaning a Victorian Hallway Tiles

Before starting the cleaning process my first task was to replace all the broken tiles. This needs to be done carefully so as not to dislodge any adjacent tiles and make more work for myself. Once removed the base is cleared of old cement and then the replacement tiles fitted using rapid set adhesive and cut to size where required.

Once the repairs were complete and the adhesive set, I began the cleaning process which is designed to remove and remaining protective sealer and flush out ingrained dirt from the pores of the tile. This is done by applying a strong dilution of Tile Doctor Pro-Clean with a mop and then leaving it to soak into the tile for ten minutes. The floor was then scrubbed using a buffing machine fitted with a black pad and lubricated with water. The cleaning alkaline cleaning solution soon turns black with the dirt and then floor is then rinsed with water and the residue extracted with a wet vacuum.

Attention then turned to the decorative historical piece of flooring at the entrance to the hallway. This only needed to be cleaned with Tile Doctor Neutral Tile Cleaner which is used for regular cleaning and maintenance of tiled floors. this was applied with a two-minute dwell time before cleaning by hand using soft scrubbing brush then wiped down with damp microfiber cloths then left to dry.

Sealing a Victorian Tiled Hallway Floor

The next day damp meter readings were taken from both floors to make sure they had dried and were ready to be sealed. The readings were within tolerance so work could begin on applying the first of what would be three coats of sealer.

Tile Doctor Colour Grow was chosen to seal the tiles, it’s an impregnating colour intensifier sealer which is fully breathable so it will allow for moisture to rise through tile, an important consideration for old floors that don’t have a damp proof membrane.

The sealer was applied using a paint pad and any excess is wiped off after five minutes with microfiber cloths before leaving it to dry for twenty minutes. I use air blowers around the floor to increase the drying speed.
   
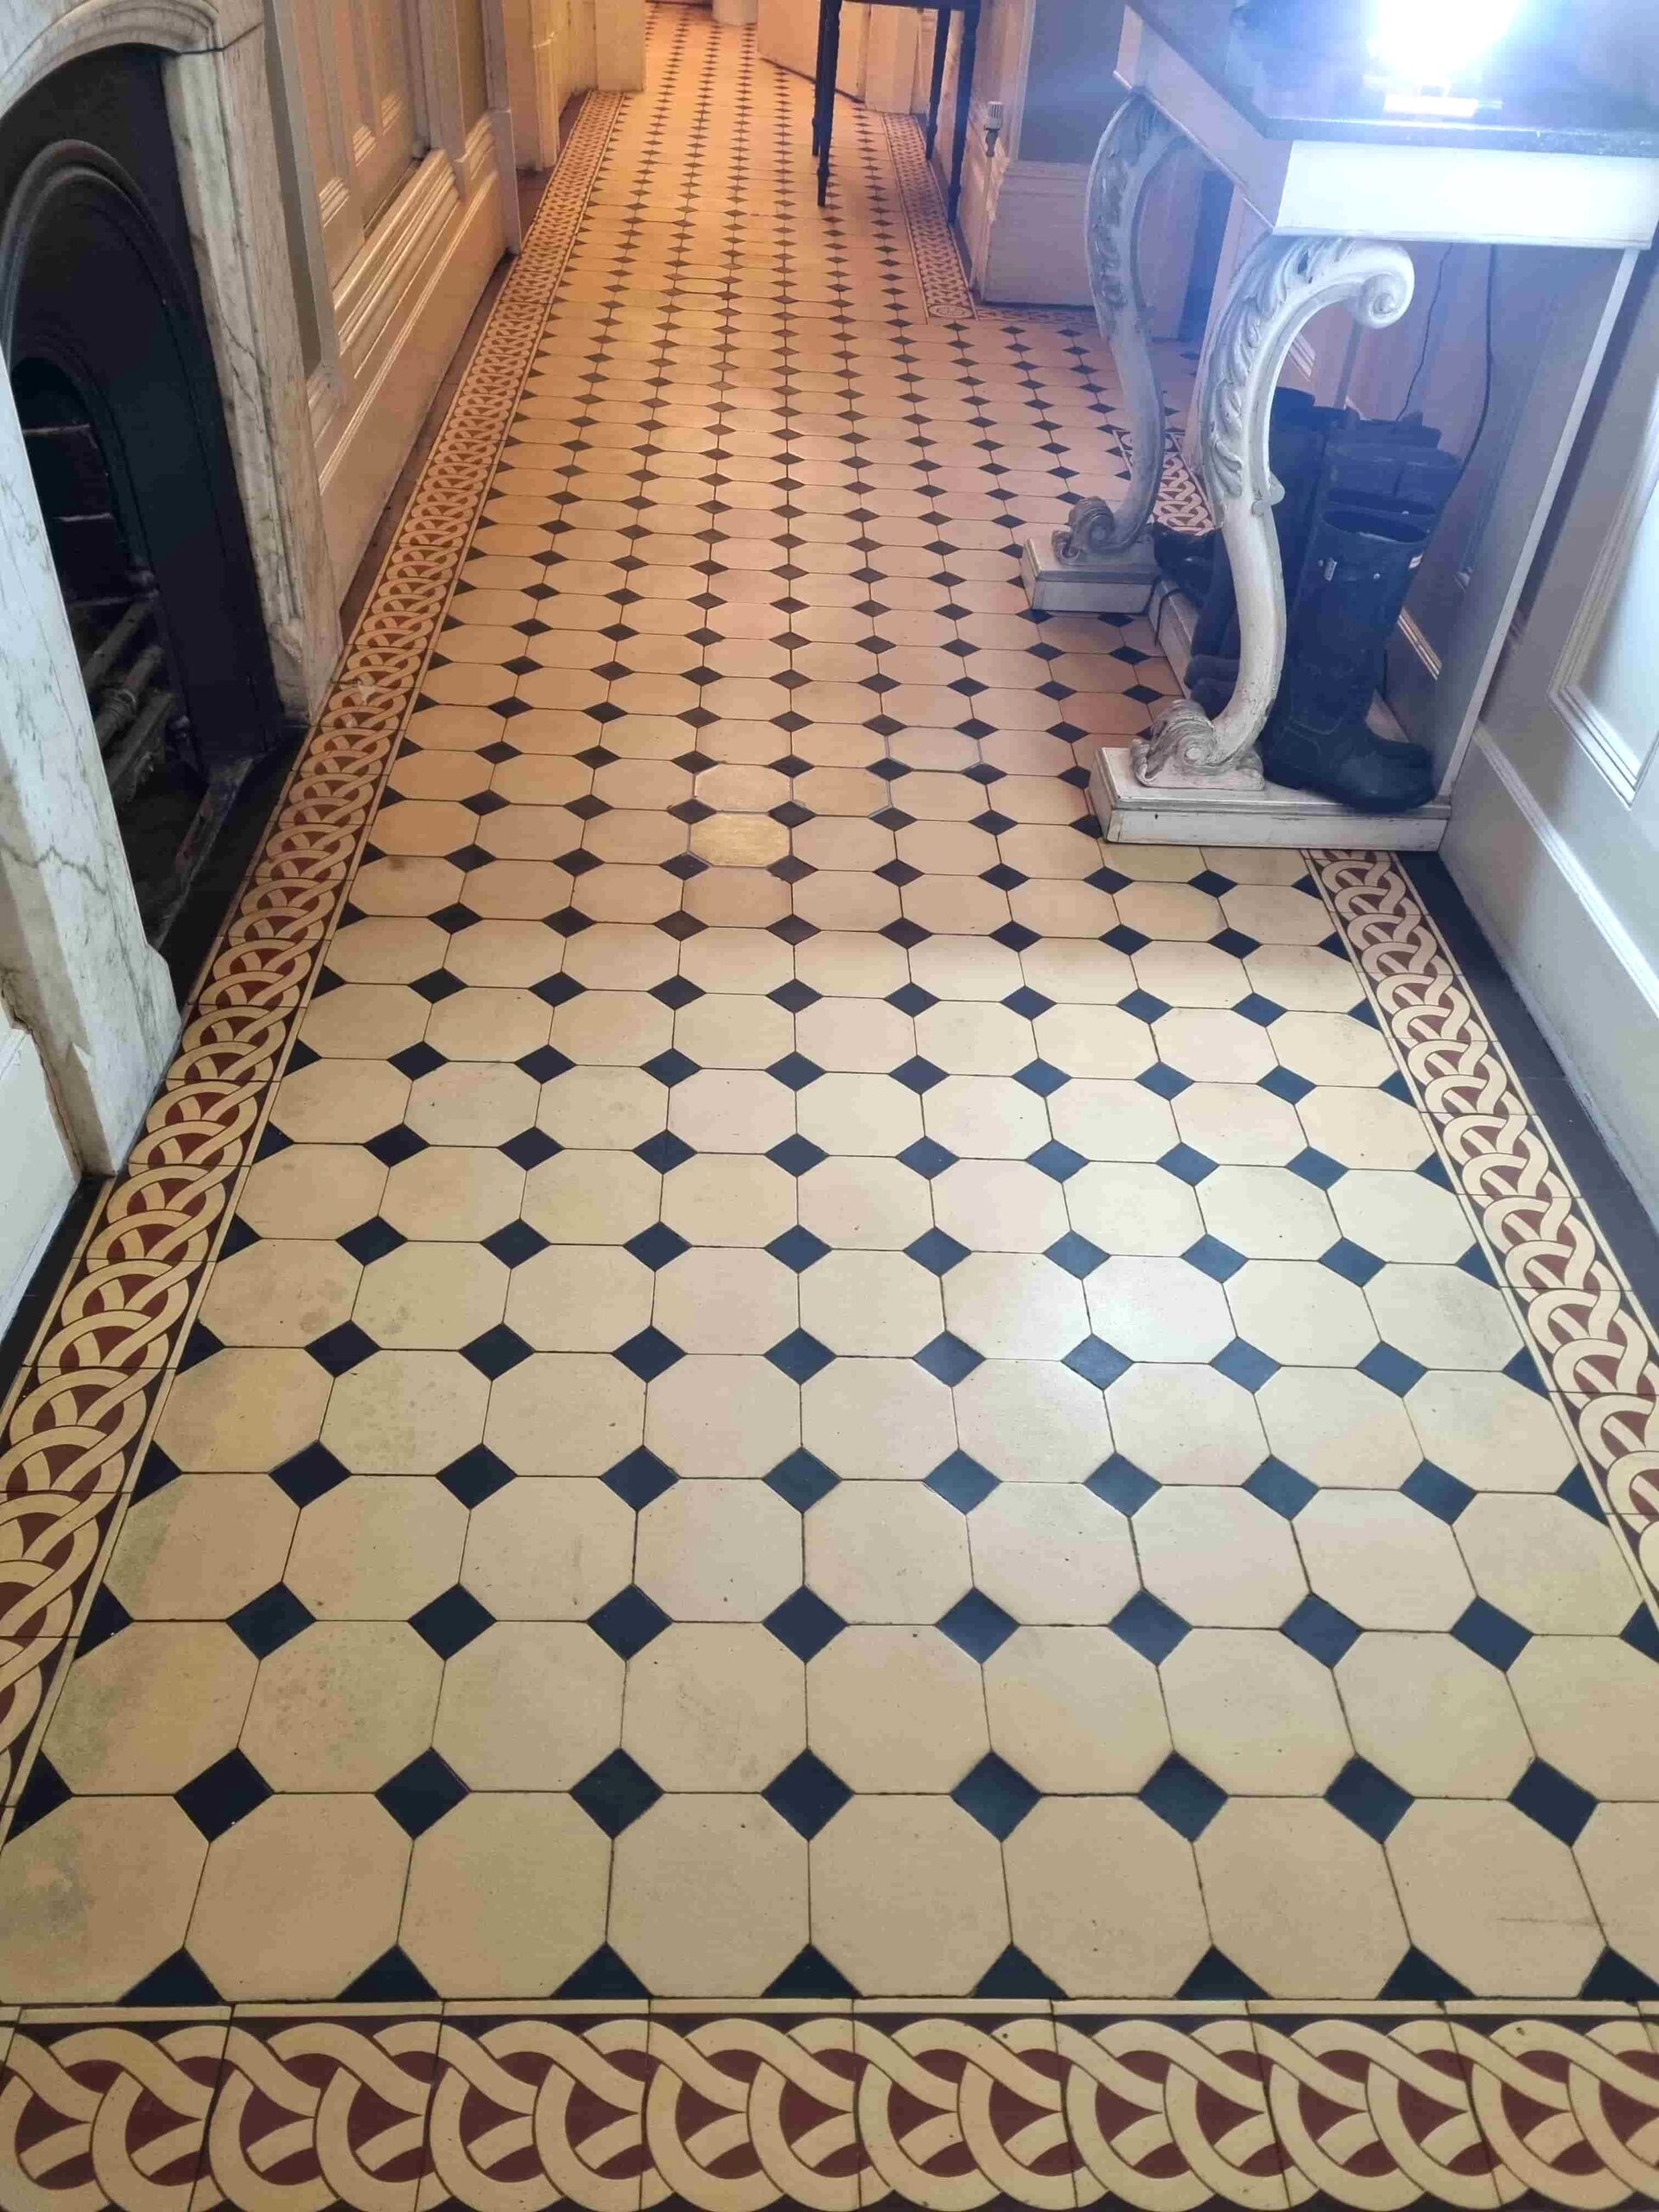
Victorian Tiled Floor After Renovation Handbridge Cheshire Victorian Tiled Floor After Renovation Handbridge Cheshire

The owner of the property was over the moon with the work and pleased that the work to restore the property to its former condition was nearing completion after what had been four years of restoration.
  Victorian Tiled Floor Before Renovation Handbridge Cheshire 

Wednesday, December 20, 2023

Dry Foam Carpet Cleaning: How it Works

Dry foam carpet cleaning is a good way to clean your carpets with minimal moisture. Many people are switching to this method because it is effective and dries quickly.

What You'll Need:

  • Dry foam carpet cleaner (rental)
  • Dry foam


Dry Foam Basics

In order to take advantage of dry foam carpet cleaners, you will need a carpet cleaning machine to lay down the foam. The machine is required because, in addition to the application of the foam, you use the bristles from the machine to agitate the carpet and break loose any dirt or stains.

Most machines are also designed to vacuum up the leftover residue, if any, directly after the application. If the machine does not have a vacuum built-in, simply wait until the carpet dries and go over it with a regular upright vacuum to remove any leftover residue.

Getting Started with Dry Foam

Before you start cleaning with dry foam, you need to first vacuum the whole area you will be cleaning. This is important because it eliminates any unnecessary waste of dry foam chemicals. This will also allow the entire dry foam application to get down deep into the carpet fibers and pull out the dirt. But when all dry cleaning attempts fail, steam cleaning is often still the last chance solution, with its really effective way to lift dirt and buildups from the carpet fibers including pet scents and mold

You can find dry foam carpet cleaning products online or at your local general merchandise store as well as specialty vacuum shops.

Wednesday, December 13, 2023

Install Hardwood Floor Medallions

Hardwood floor medallions are an elegant and distinctive way to add to the home décor. Medallions are purchased separately from other flooring and come in round, rectangular and oval shapes.

Before beginning with medallion installation, note that the medallion should be maintained in conditions that control the temperature and humidity for at least one full day (24 hours) before installation. Before and after the installation, use either a built-in or portable humidifier to maintain a humidity of 40 to 60 percent. Be especially vigilant in the winter, when dry air is common. Failing to control the humidity leads to warping, cracking, and gapping with medallions and wood floors.


Mark Area

In rooms with an existing hardwood floor: Decide on the location for your medallion. If you are installing a square or rectangle medallion, use a template to trace the outline onto the installed wood floor.

If the floor is not yet installed, mark the medallion shape on the subfloor.


Install Hardwood Flooring

If you are installing a medallion on an existing hardwood floor, skip this step.

Using the manufacturer’s instruction, install the wood floor around the medallion area. Overlap the medallion area by ½ to 1 inch all around so that you will create a tight cut and leave no gaps. Keep nails away from the medallion install area.


Replace the Template

Line up the template with the lines you have traced on the floor and temporarily tape it down with painter’s tape, double-sided tape, or small staples, and be sure that it completely covers existing flooring.


Cut Hole for Medallion

Using a piece of wood along the line as a guide, use a router in several passes, cutting about 3/16” each pass. Cut down to the subfloor. Repeat for the other sides.

For a round medallion, use a jig, pivoting around a center point that is ½ the diameter of the medallion circle to create a perfect circle, or use a wood template. Again, use several passes and cut to the subfloor.


Clean Area Thoroughly

Use a vacuum then a damp rag to thoroughly clean any wood dust from the area. Put a piece of tape under the medallion area, test fit it into the hole to be sure it is largely flush with the floor, then remove the medallion.


Glue Medallion

Using flooring adhesive of moisture cure urethane adhesive, cover the medallion area. Place medallion in the hole, and put heavyweight that is evenly distributed on the medallion. Bags of sand and concrete on top of an old blanket both work well.

Clean off excess glue immediately and allow the glue to cure according to suggestions by the manufacturer. There is normally a 24 hour curing period.


Sand and Finish

If your floor and medallion are pre-finished, your task is done! If not, sand the medallion and floor to ensure an even fit. Fill any gaps with wood putty, then finish the medallion in concert with the rest of your flooring.


Source: www.DoItYourself.com

Sunday, December 10, 2023

Installing Insulation Under The Floor

Installing floor insulation will save you money on heating and cooling costs. If you live in an older home and notice that the floors are usually cold, then that cold air is radiating into the room. Your heating costs will be much higher during the colder seasons. When you install floor insulation it will protect your floor from moisture, and keep the cold air from reaching the floor.

Installation of floor insulation is a very straightforward process. If the house is new construction, or you are adding an addition, it is easily done before the subfloor goes down. If you live in an older home, then the process is a little trickier, but still easy to do.


Measure The Floor

With your tape measure, determine how much floor insulation you will need. Measure the width and length of the room and multiply them together to give you the square footage of the room. Take this with you when you order the insulation. You will also want to determine the R-factor of the insulation. The R-factor is the amount of insulation your home has. The higher the number, the more efficient it is. Insulation is also sold in rolled batts. If you know how many square feet you need, then you can simply purchase the appropriate number of rolls.


Install Insulation - New Construction

There are two ways to install floor insulation. If you are in a new home that does not have any flooring down yet, you can lay the insulation in between the exposed joists. Starting at one end of the room, work your way to the other corner. Fold out the paper flaps along the side of the insulation and staple them to the joist. Staple the insulation every six inches or so. Lay down the water barrier over the insulation and staple it to the joists.


Install Insulation - Basement

In an older home, the process is basically the same, but you will have to insulate below the floor in the basement or crawl space. Again, start in the corner of the room and unroll the insulation. You will have to lift up the insulation in between the joists and staples. Place metal supports on the joists to help hold the insulation up. Continue until you have completed the entire floor.

If you are remodeling your room in the near future, it would be better to wait until you tear up the floor to add the floor insulation. Once you get to the subfloor, pry it up to expose the joists and lay the insulation as you would in the first example. Reinstall the subfloor over the vapor barrier and finish with your floor remodel. Now when you walk out onto the floor in the dead of winter your feet will be warmer because of the floor insulation.

Source: www.DoItYourself.com

Sunday, December 3, 2023

Installing Brazilian Teak Flooring

Brazilian teak wood is one of the most beautiful woods for adding flooring to your home. Hardwood floors not only add beauty to your home but also add real dollars to your resale value as well. Wood floors are also very easy to clean and require only minimal maintenance. Prefinished lumber is already stained and cuts quite a bit of time from the installation process.

Unless you are going to try and match existing hardwood, prefinished lumber is the way to go. Though not the job for everyone, you can install a Brazilian wood floor with a few purchases from your local home improvement store.


Prepare the Room

You have already determined which type of lumber you want but you have to make sure that you buy the correct amount. Measure the room and account for the square footage. Add 10-15% extra for the occurrence of incorrect cuts and odd-sized pieces.

Make sure to check the subfloor before you lay down any lumber. Your subfloor should be at least ¾” thick. If not, it is best to pull up the subfloor and lay another one. If you notice any squeaky places, take a drywall nail and drive it through the subfloor into the joist. This will eliminate the squeaking. Remove the shoe molding and thoroughly clean the floor.


Put Down Tar Paper

Lay down 15-pound tar paper. This is very inexpensive. Make sure to allow for a 4” overlap on all sides. Mark the wall at every point where there are joists. This will act as a guide.


Install the Boards

Start on the longest wall and begin with a long piece of wood. Remove the shoe molding and snap a chalk line on the wall 3/8” inches from the baseboard. This allows for the wood to expand and contract when the humidity and climate changes. Aligned with the chalk line, place the first piece of wood. When you lay the first row makes sure to nail at each point that there is a joist. Use a nail punch to push the nails below the surface. Continue to put the boards in by hand until you are far enough from the wall to use the pneumatic nail gun. This will make the process easier and faster. Once you get back to close quarters you will have to nail the pieces by hand again.


Finish the Floor

You will have to make some special cuts along the baseboards and threshold. The boards along the baseboard will have to be installed by hand and depending on the opening, those at the threshold may have to be manually installed as well.

Assess the floor and determine if you need to fill any gaps. You probably will. Fill the nail holes with matching wood putty. Fill the hole with putty and wipe off the extra. That’s it. You have an exotic wood floor and you did it yourself. Congrats!


 Source: www.DoItYourself.com

Sunday, November 26, 2023

Answers to 7 Common Bamboo Flooring Questions

One thing that makes bamboo flooring stand out for homeowners is its environmentally-friendly properties. Even still though, questions have arisen as to just how “green” it is and whether bamboo flooring is the best choice for your home or not.

As with any investment, there are many factors that affect the decision to make the switch. We checked out some common questions about the product to help you make an executive decision that’s right for you, your family, and your home.


1. How Do I Decide if Bamboo Flooring Is the Right Choice for Me?

Bamboo is an attractive, resilient, and cost-effective flooring style that’s booming in popularity for renovations and new homes. Compared to other hardwoods bamboo is much denser, making it an ideal option for homeowners - but the real decision depends on choosing a product you’ll love to live on in years to come.

Initially, people are drawn to the natural warmth of the bamboo material, which tends to inject a comfortable feeling into a home, and the color consistency it boasts compared to timber floors. Combined with its style variety and flooring options, easy-care maintenance, climate sustainability, and cost-effectiveness, bamboo flooring tends to be an easy choice for homeowners.


2. Where Can I Install Bamboo Flooring and How is it Installed?

Bamboo flooring is extremely versatile and can be installed in any room of your home either as a floating floor, fixed floor, or glued directly onto the subfloor. Like any hardwood flooring, bamboo can be damaged if excessive water is left to puddle for an extended period of time, so wet rooms such as bathrooms and laundries are best tiled instead.

Whilst bamboo flooring can be installed over existing tiles, timber, or concrete, it’s ideal to check for potential issues and if they’re covered in the installation warranty. In most cases, bamboo flooring combined with your current flooring style will work fine if the right glue is used to bond the two together. Tiles will require cleaning and sanding to help with this process.

Just consider how the combined height of your existing flooring in addition to the bamboo boards will impact areas such as full-length windows, door frames, and kitchen benches.


3. Are There any Bad Fumes During the Installation Process?

The type of bamboo flooring you purchase will determine the installation process and whether or not you will have to leave the home. Bamboo flooring can be purchased either as pre-finished panels or raw panels which will be sanded and polished on site.

Pre-finished bamboo requires no sanding or polishing in your home so there is no need to leave or be concerned about bad fumes. Whilst there can be a faint smell of the bonding glue for the first day, it’s not harmful and will stop once the floors dry. Sanding and polishing the floors on-site is the dustier alternative but still, depending on the installation company, it’s relatively clean and quick and the faint smell of glue will disappear after the first day or two.


4. Have the Bamboo Boards and Glue Used Been Tested for Health Risks?

Throughout Europe and Australia, strict guidelines are in place to ensure the glues used are manufactured to a safe level. Manufacturing companies that are reputable will always abide by these guidelines and test their products before distributing them.


The health and safety of you and your family are important so it pays to ask how your floor is impacted by any nasty chemicals. Whilst bamboo is an eco-friendly flooring solution, like a finished floor the glues and products used can emit toxins into your home. Formaldehyde is an organic compound commonly found in these products and is associated with health risks - but the amount of chemicals emitted will vary depending on how the planks are manufactured.

Reputable bamboo flooring companies will only use a very small amount of glue that has been safely tested during the manufacturing process. It’s not uncommon for overseas manufacturers to take shortcuts with the process so when it comes to your health, it’s best to ask how much is used and if the products meet the standards.


5. What Are the Environmental Benefits of Bamboo Flooring and How Sustainable is it?

The environmental impact of bamboo flooring is huge and offers green-conscious homeowners many benefits. As we are becoming more concerned about the sustainability of products we use around the home, bamboo flooring is like a breath of fresh air. In comparison to other woods, bamboo replenishes itself much quicker than grass – making it a highly renewable source.

Bamboo is not threatened by forestry, like hardwood, because cutting the stalks actually promotes faster growth. Thus it’s one of the more sustainable flooring solutions. Most flooring is made from Moso species, different from what pandas and other animals eat – enabling the food sources for wildlife to be protected.


6. How Durable Is Bamboo Flooring?

The durability of bamboo flooring depends on three factors, stalk construction (for example, woven strand bamboo flooring), materials added (adhesives), and the overall quality of the bamboo.

Homeowners often find it hard to comprehend just how durable bamboo flooring is compared to other hardwoods because it’s not actually wood itself. Its durability tends to come from the compression used when manufacturing and producing bamboo. The most hardwearing form of bamboo goes under 2000 tonnes (the equivalent of two jumbo jets) of pressure to make for an incredibly dent-resistant surface.


7. How Will My Bamboo Flooring React to Humidity?

Bamboo flooring can be prone to cupping and warping when exposed to humidity. In an environment that is very dry, the bamboo floors can shrink and expand, causing the bamboo to crack.

How your bamboo flooring reacts to humidity and exposure to moisture depends on its durability and board design. Despite excessive moisture having the ability to ruin any wood floor, bamboo is more advantageous in humid climates because it doesn’t swell and contract as much.


Source: www.DoItYourself.com