Showing posts with label Victorian Hallway Restoration. Show all posts

Monday, January 8, 2024

Maintaining a Historic 1850's Minton Tiled Floor in Cheshire

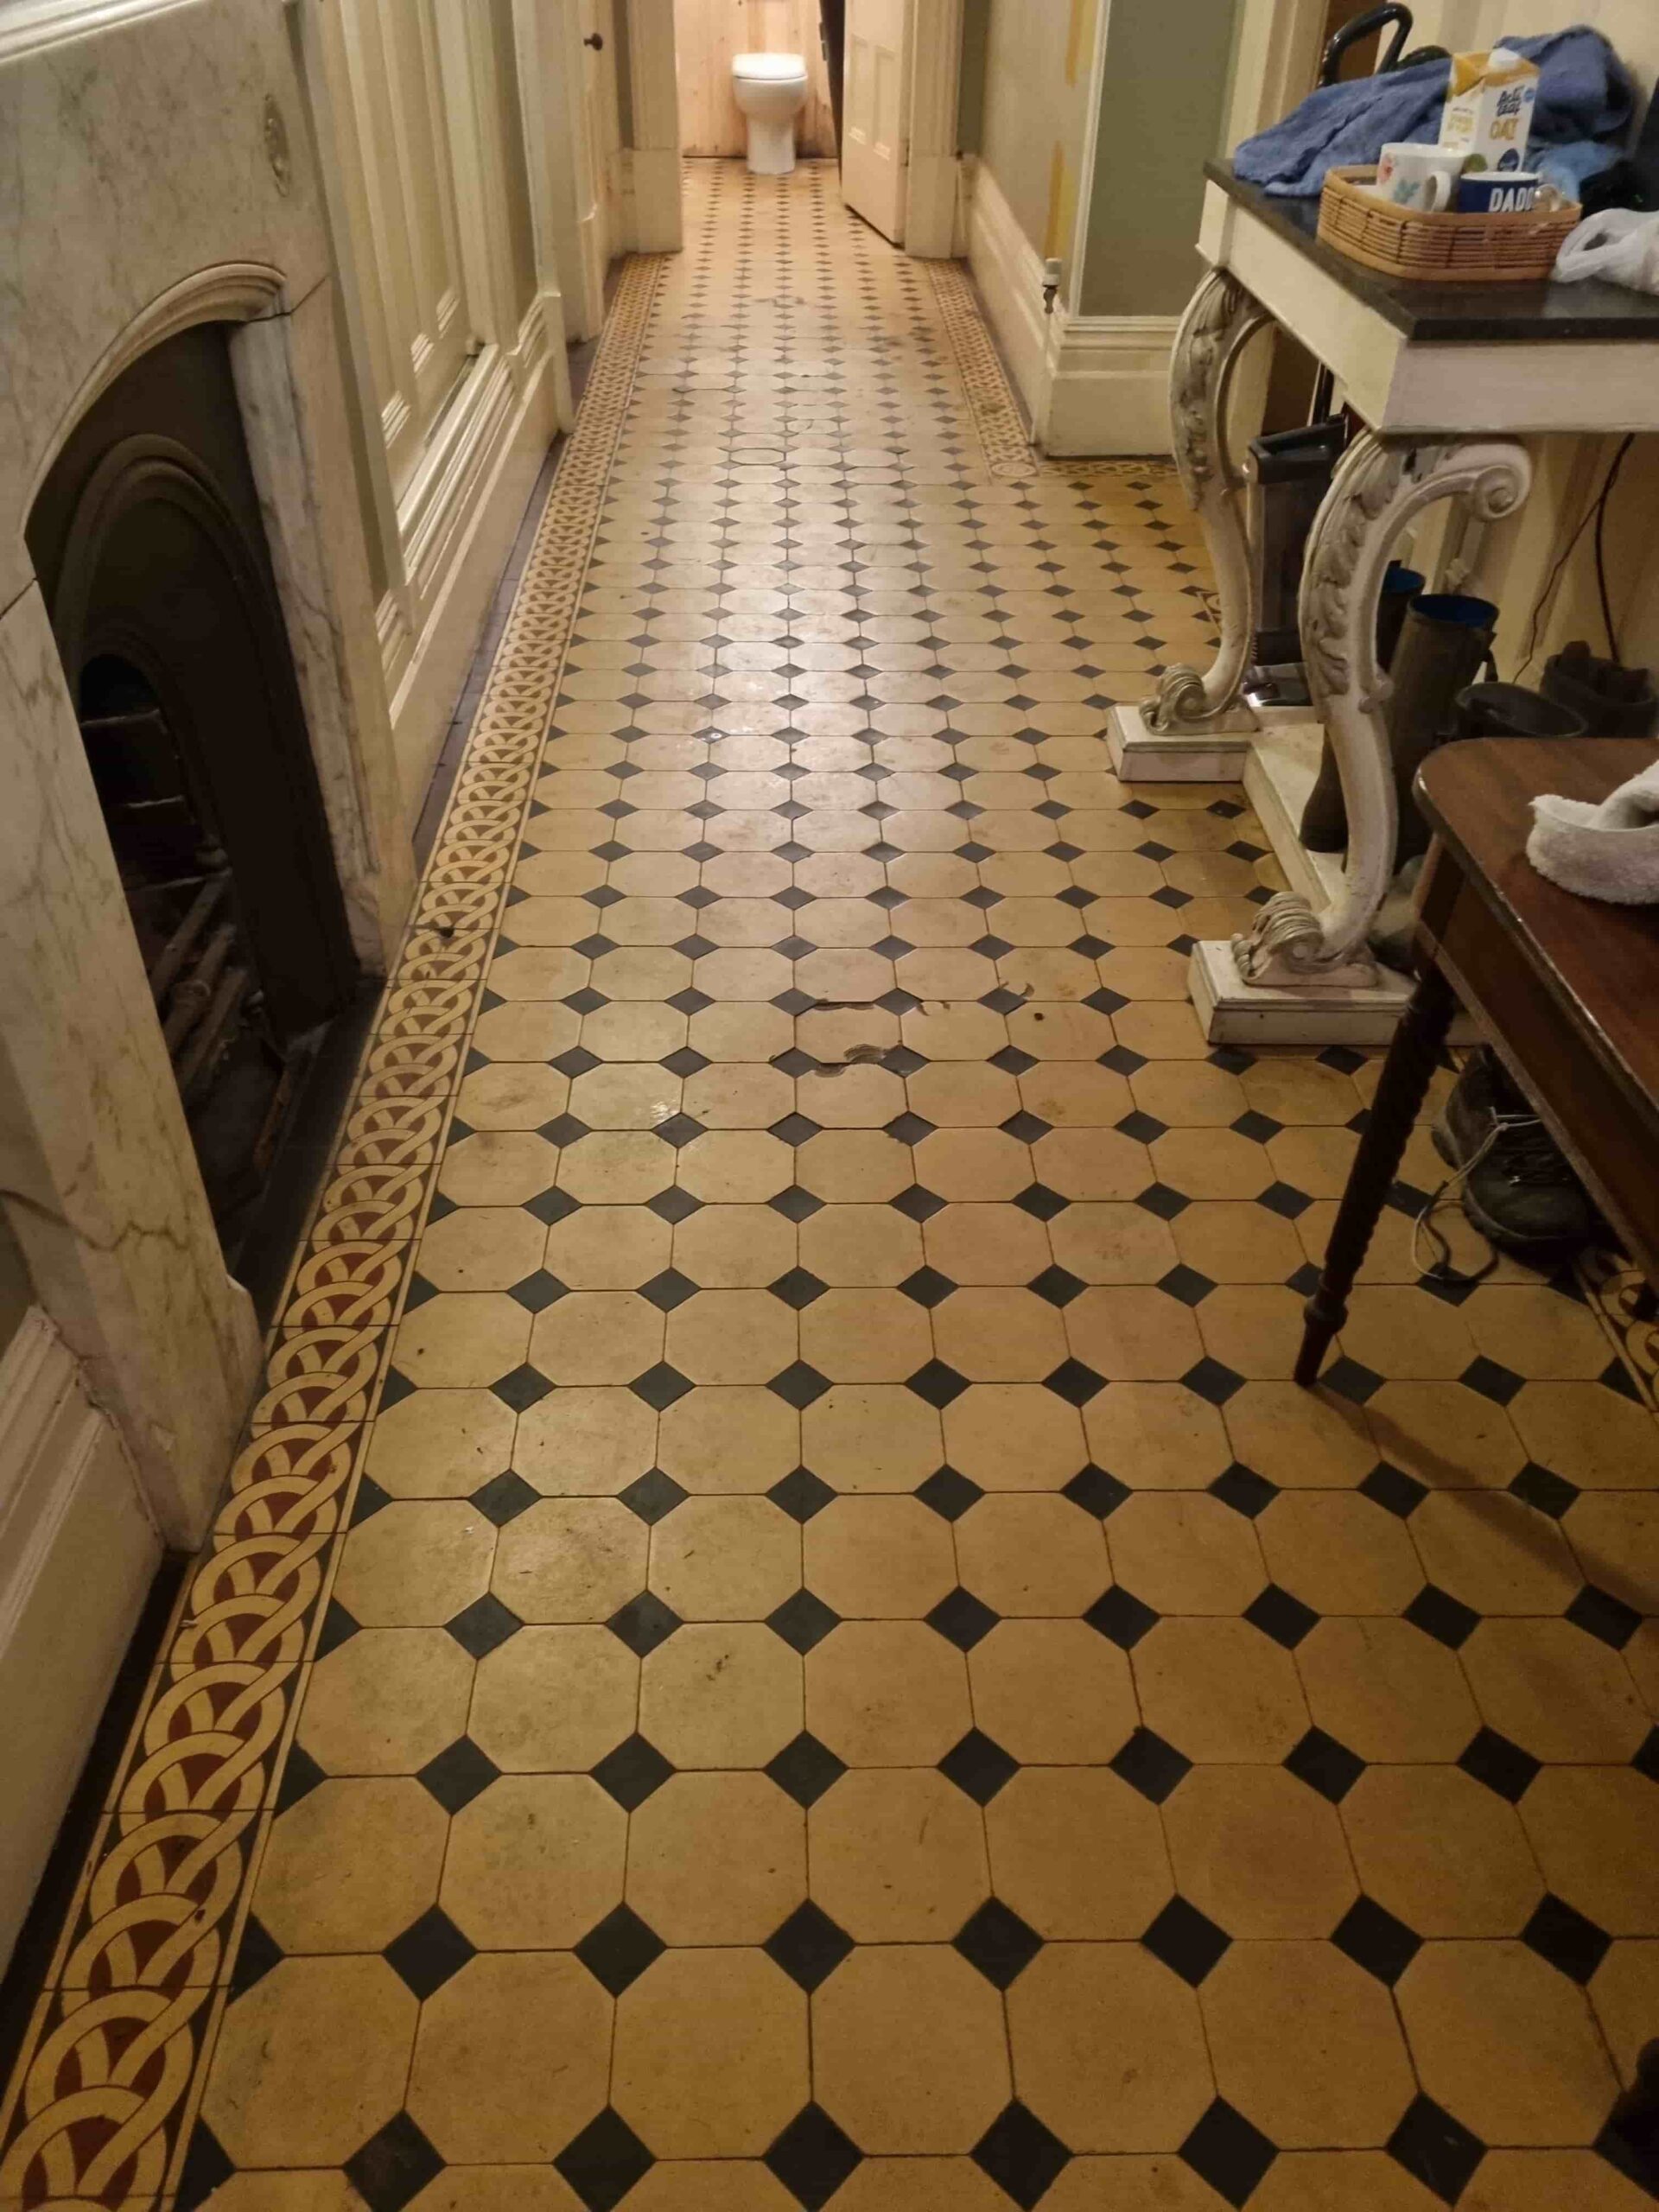
I was first asked to restore the large Victorian tiled hallway floor at this mansion type property in Handbridge, Cheshire two years ago. The floors had a lot of history and had been used as a template for the famous Minton Hollins encaustic tiled floor at St George’s Hall in Liverpool that was built in 1854. Unfortunately, however my work was put on hold as other restoration works including repairing dry rot took priority.

Victorian Tiled Floor Before Renovation Handbridge Cheshire

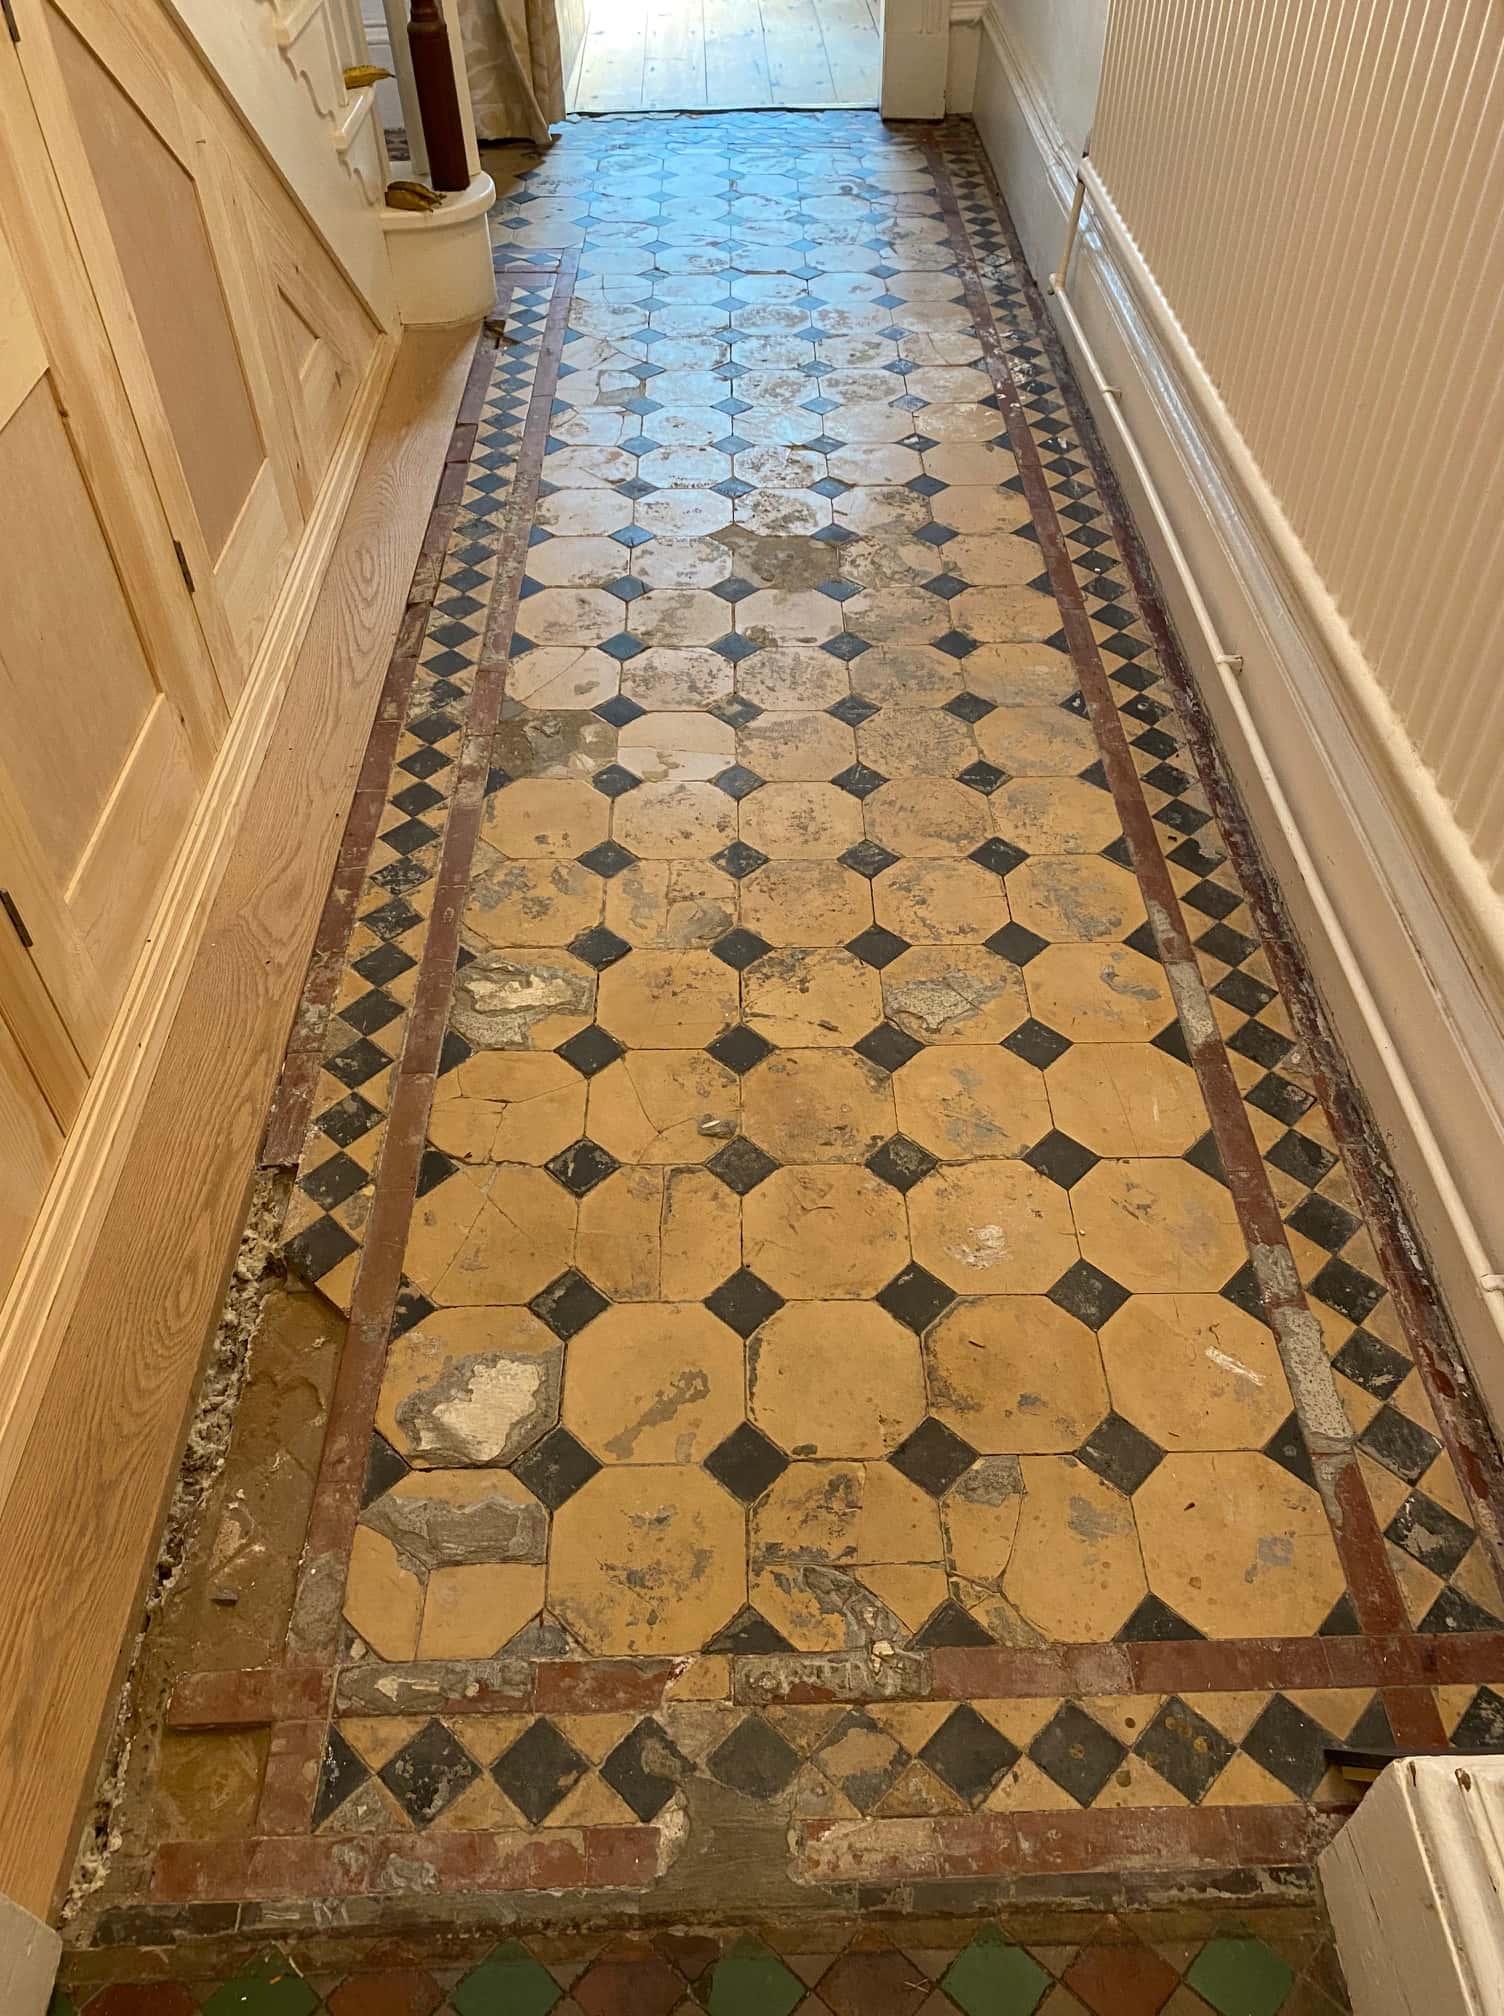
I kept in touch with the owners whilst the other works progressed and kept a look out for 22 beige Octagon shaped tiles that were needed to replace some of the damaged tiles in the floor. In fact, it wasn’t until later in 2023 that I was called back to start the renovation work to the floor, by which time I had managed to source all the replacement tiles needed.
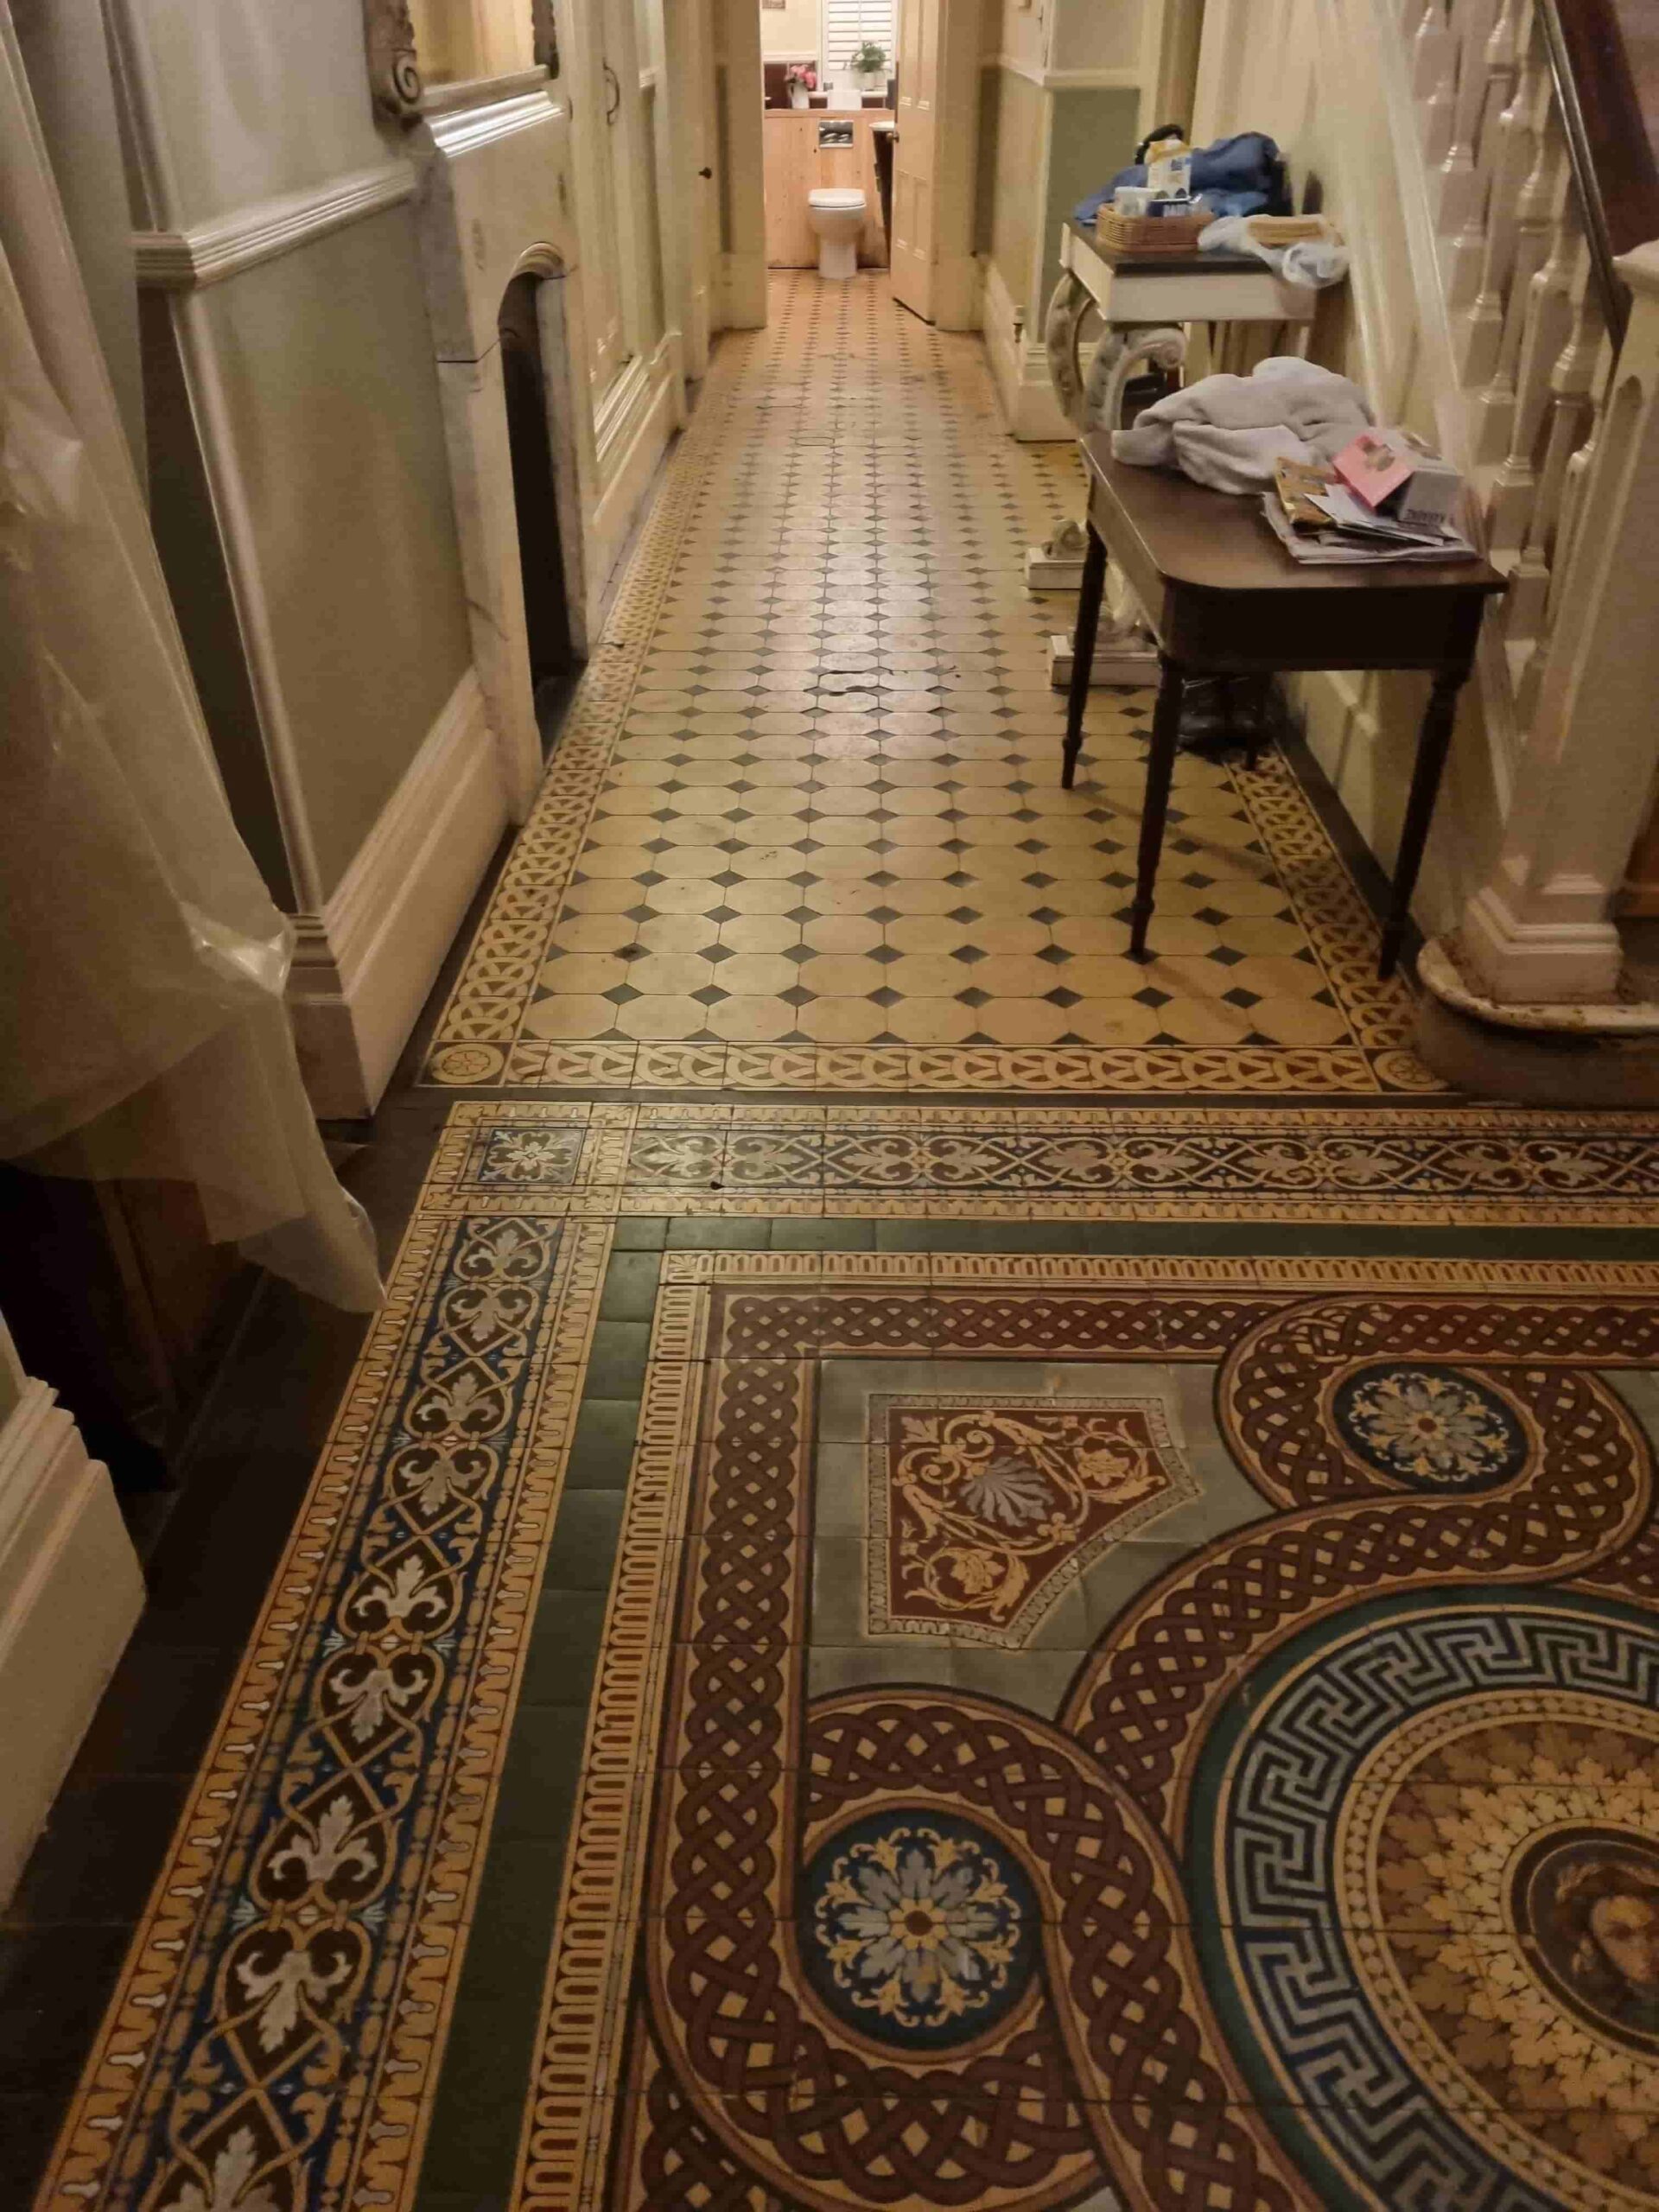
     
Victorian Tiled Floor Before Renovation Handbridge Cheshire Victorian Tiled Floor Before Renovation Handbridge Cheshire
Handbridge is a district of Chester with a mixture of large Victorian mansion type properties on the South bank of the river Dee and workers cottages built to service the water powered factories that sprung up along the river.

Repairing and Cleaning a Victorian Hallway Tiles

Before starting the cleaning process my first task was to replace all the broken tiles. This needs to be done carefully so as not to dislodge any adjacent tiles and make more work for myself. Once removed the base is cleared of old cement and then the replacement tiles fitted using rapid set adhesive and cut to size where required.

Once the repairs were complete and the adhesive set, I began the cleaning process which is designed to remove and remaining protective sealer and flush out ingrained dirt from the pores of the tile. This is done by applying a strong dilution of Tile Doctor Pro-Clean with a mop and then leaving it to soak into the tile for ten minutes. The floor was then scrubbed using a buffing machine fitted with a black pad and lubricated with water. The cleaning alkaline cleaning solution soon turns black with the dirt and then floor is then rinsed with water and the residue extracted with a wet vacuum.

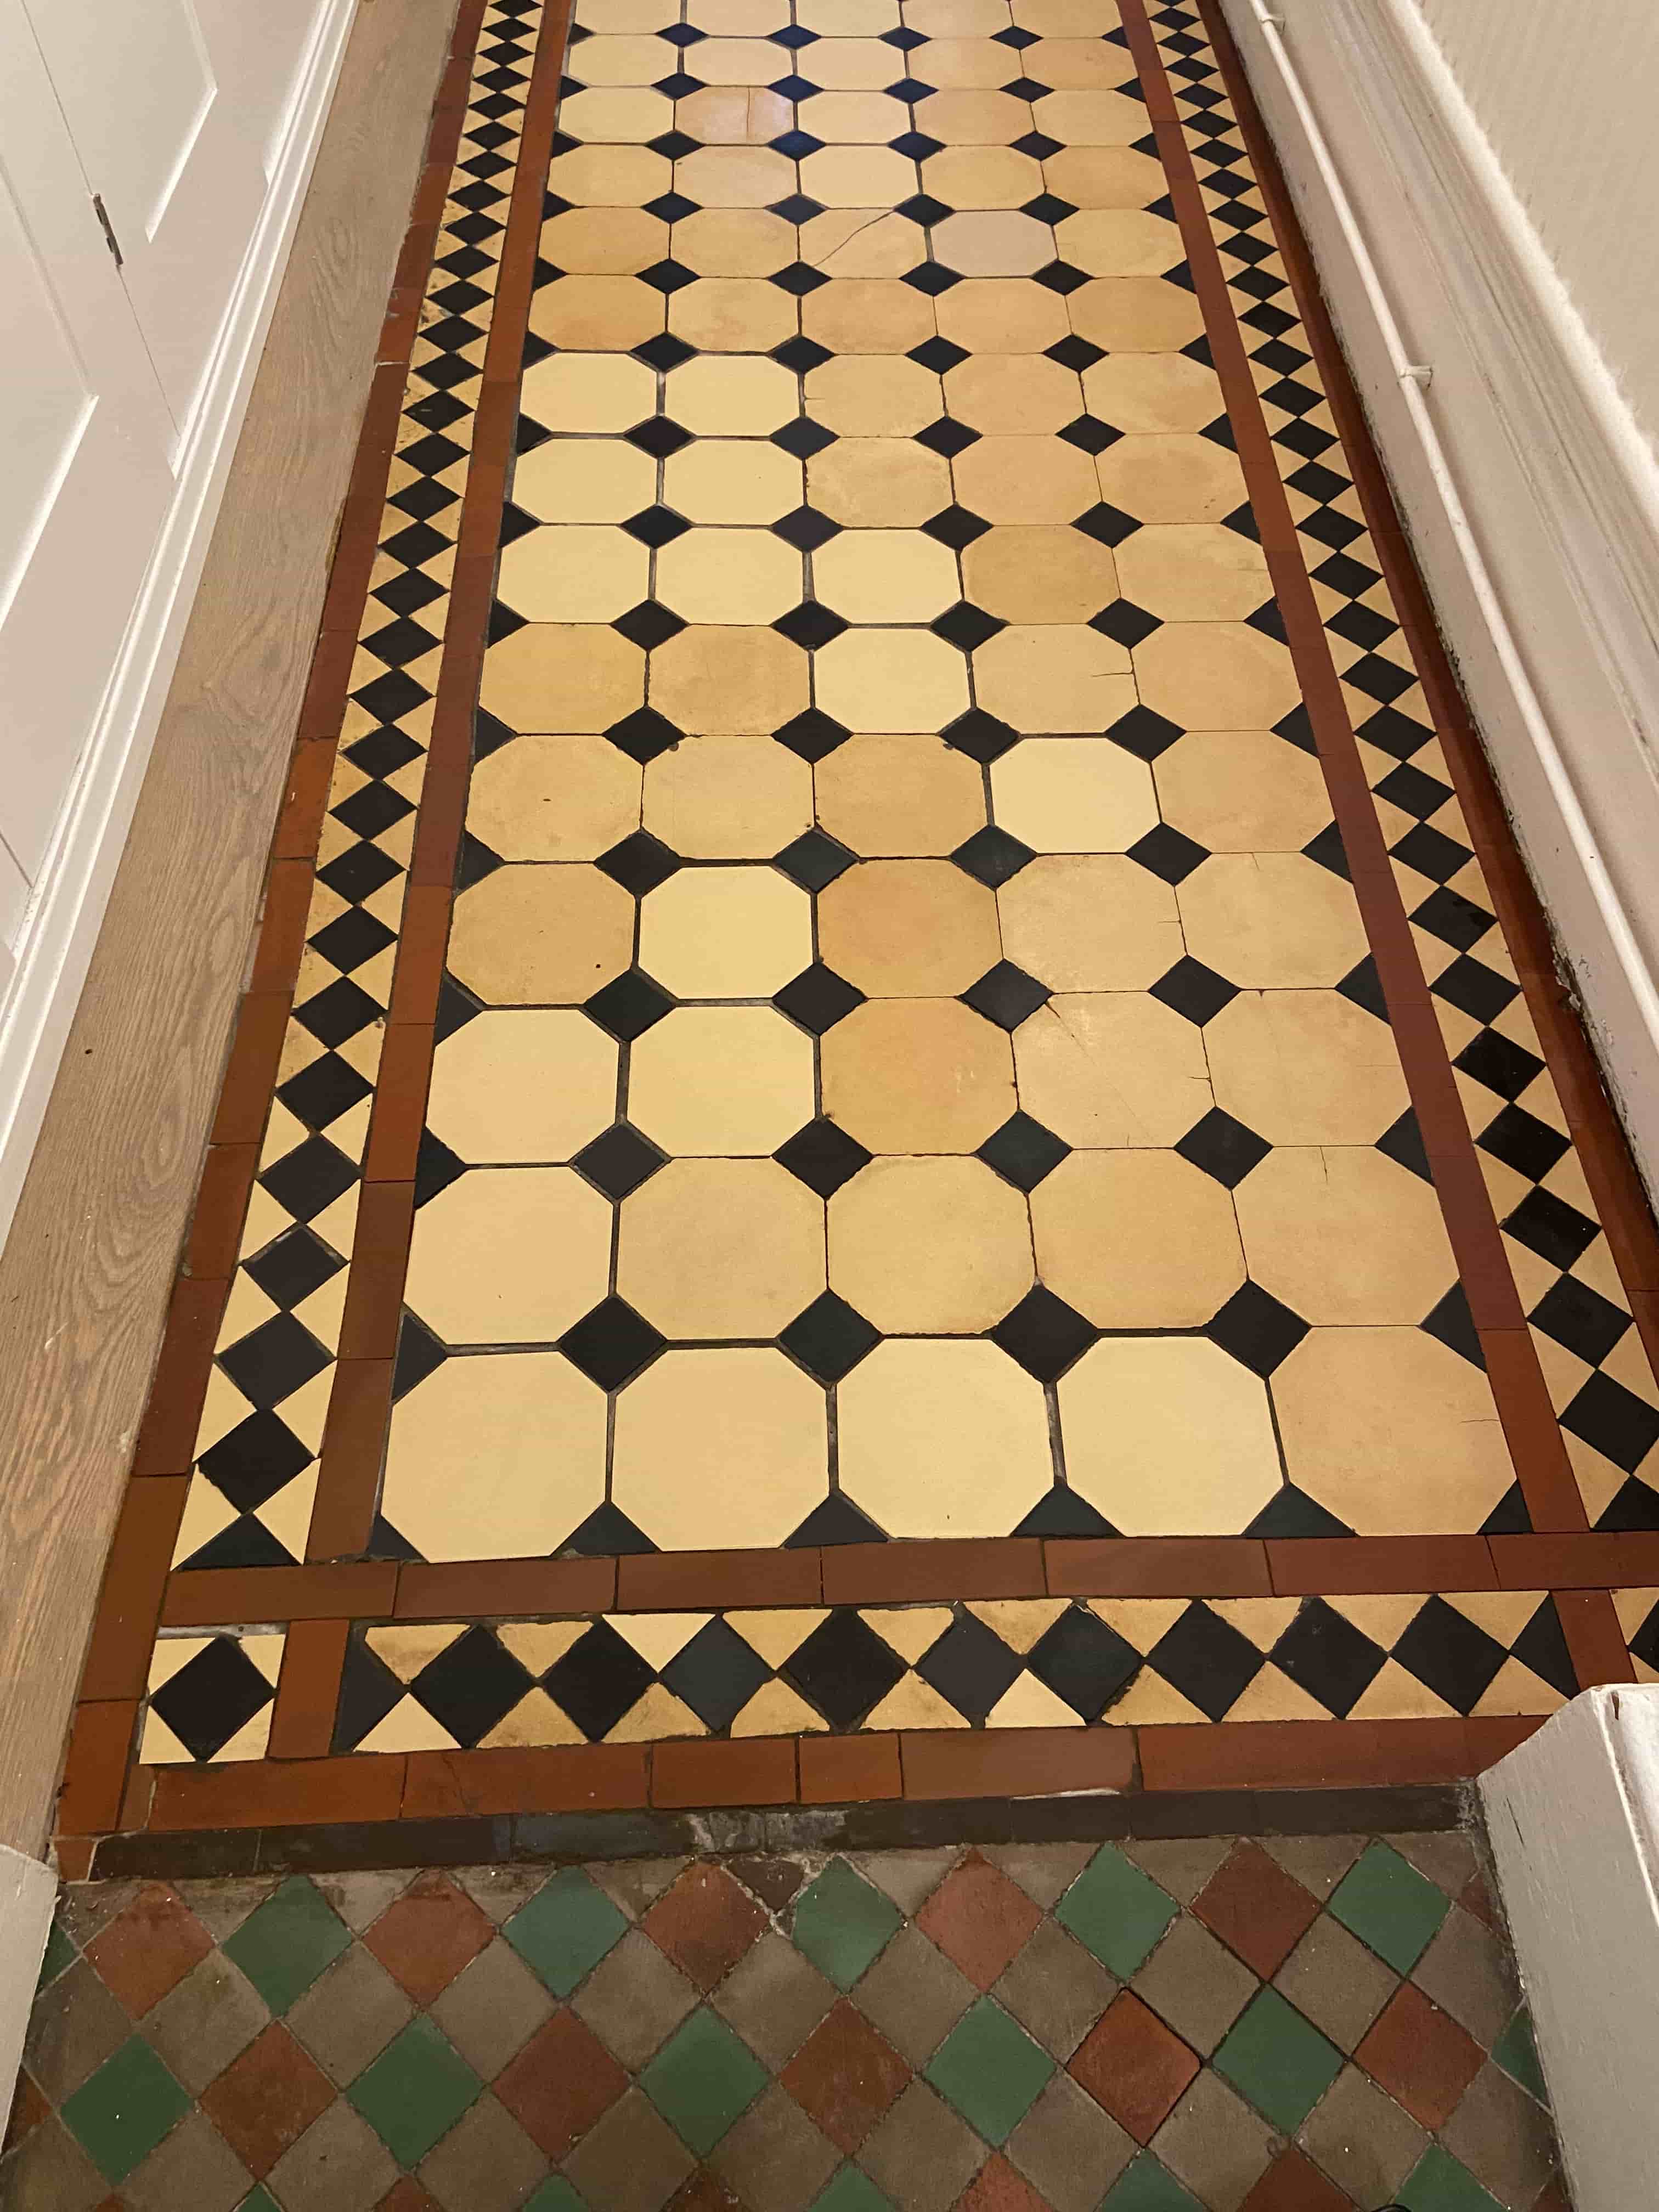
Attention then turned to the decorative historical piece of flooring at the entrance to the hallway. This only needed to be cleaned with Tile Doctor Neutral Tile Cleaner which is used for regular cleaning and maintenance of tiled floors. this was applied with a two-minute dwell time before cleaning by hand using soft scrubbing brush then wiped down with damp microfiber cloths then left to dry.

Sealing a Victorian Tiled Hallway Floor

The next day damp meter readings were taken from both floors to make sure they had dried and were ready to be sealed. The readings were within tolerance so work could begin on applying the first of what would be three coats of sealer.

Tile Doctor Colour Grow was chosen to seal the tiles, it’s an impregnating colour intensifier sealer which is fully breathable so it will allow for moisture to rise through tile, an important consideration for old floors that don’t have a damp proof membrane.

The sealer was applied using a paint pad and any excess is wiped off after five minutes with microfiber cloths before leaving it to dry for twenty minutes. I use air blowers around the floor to increase the drying speed.
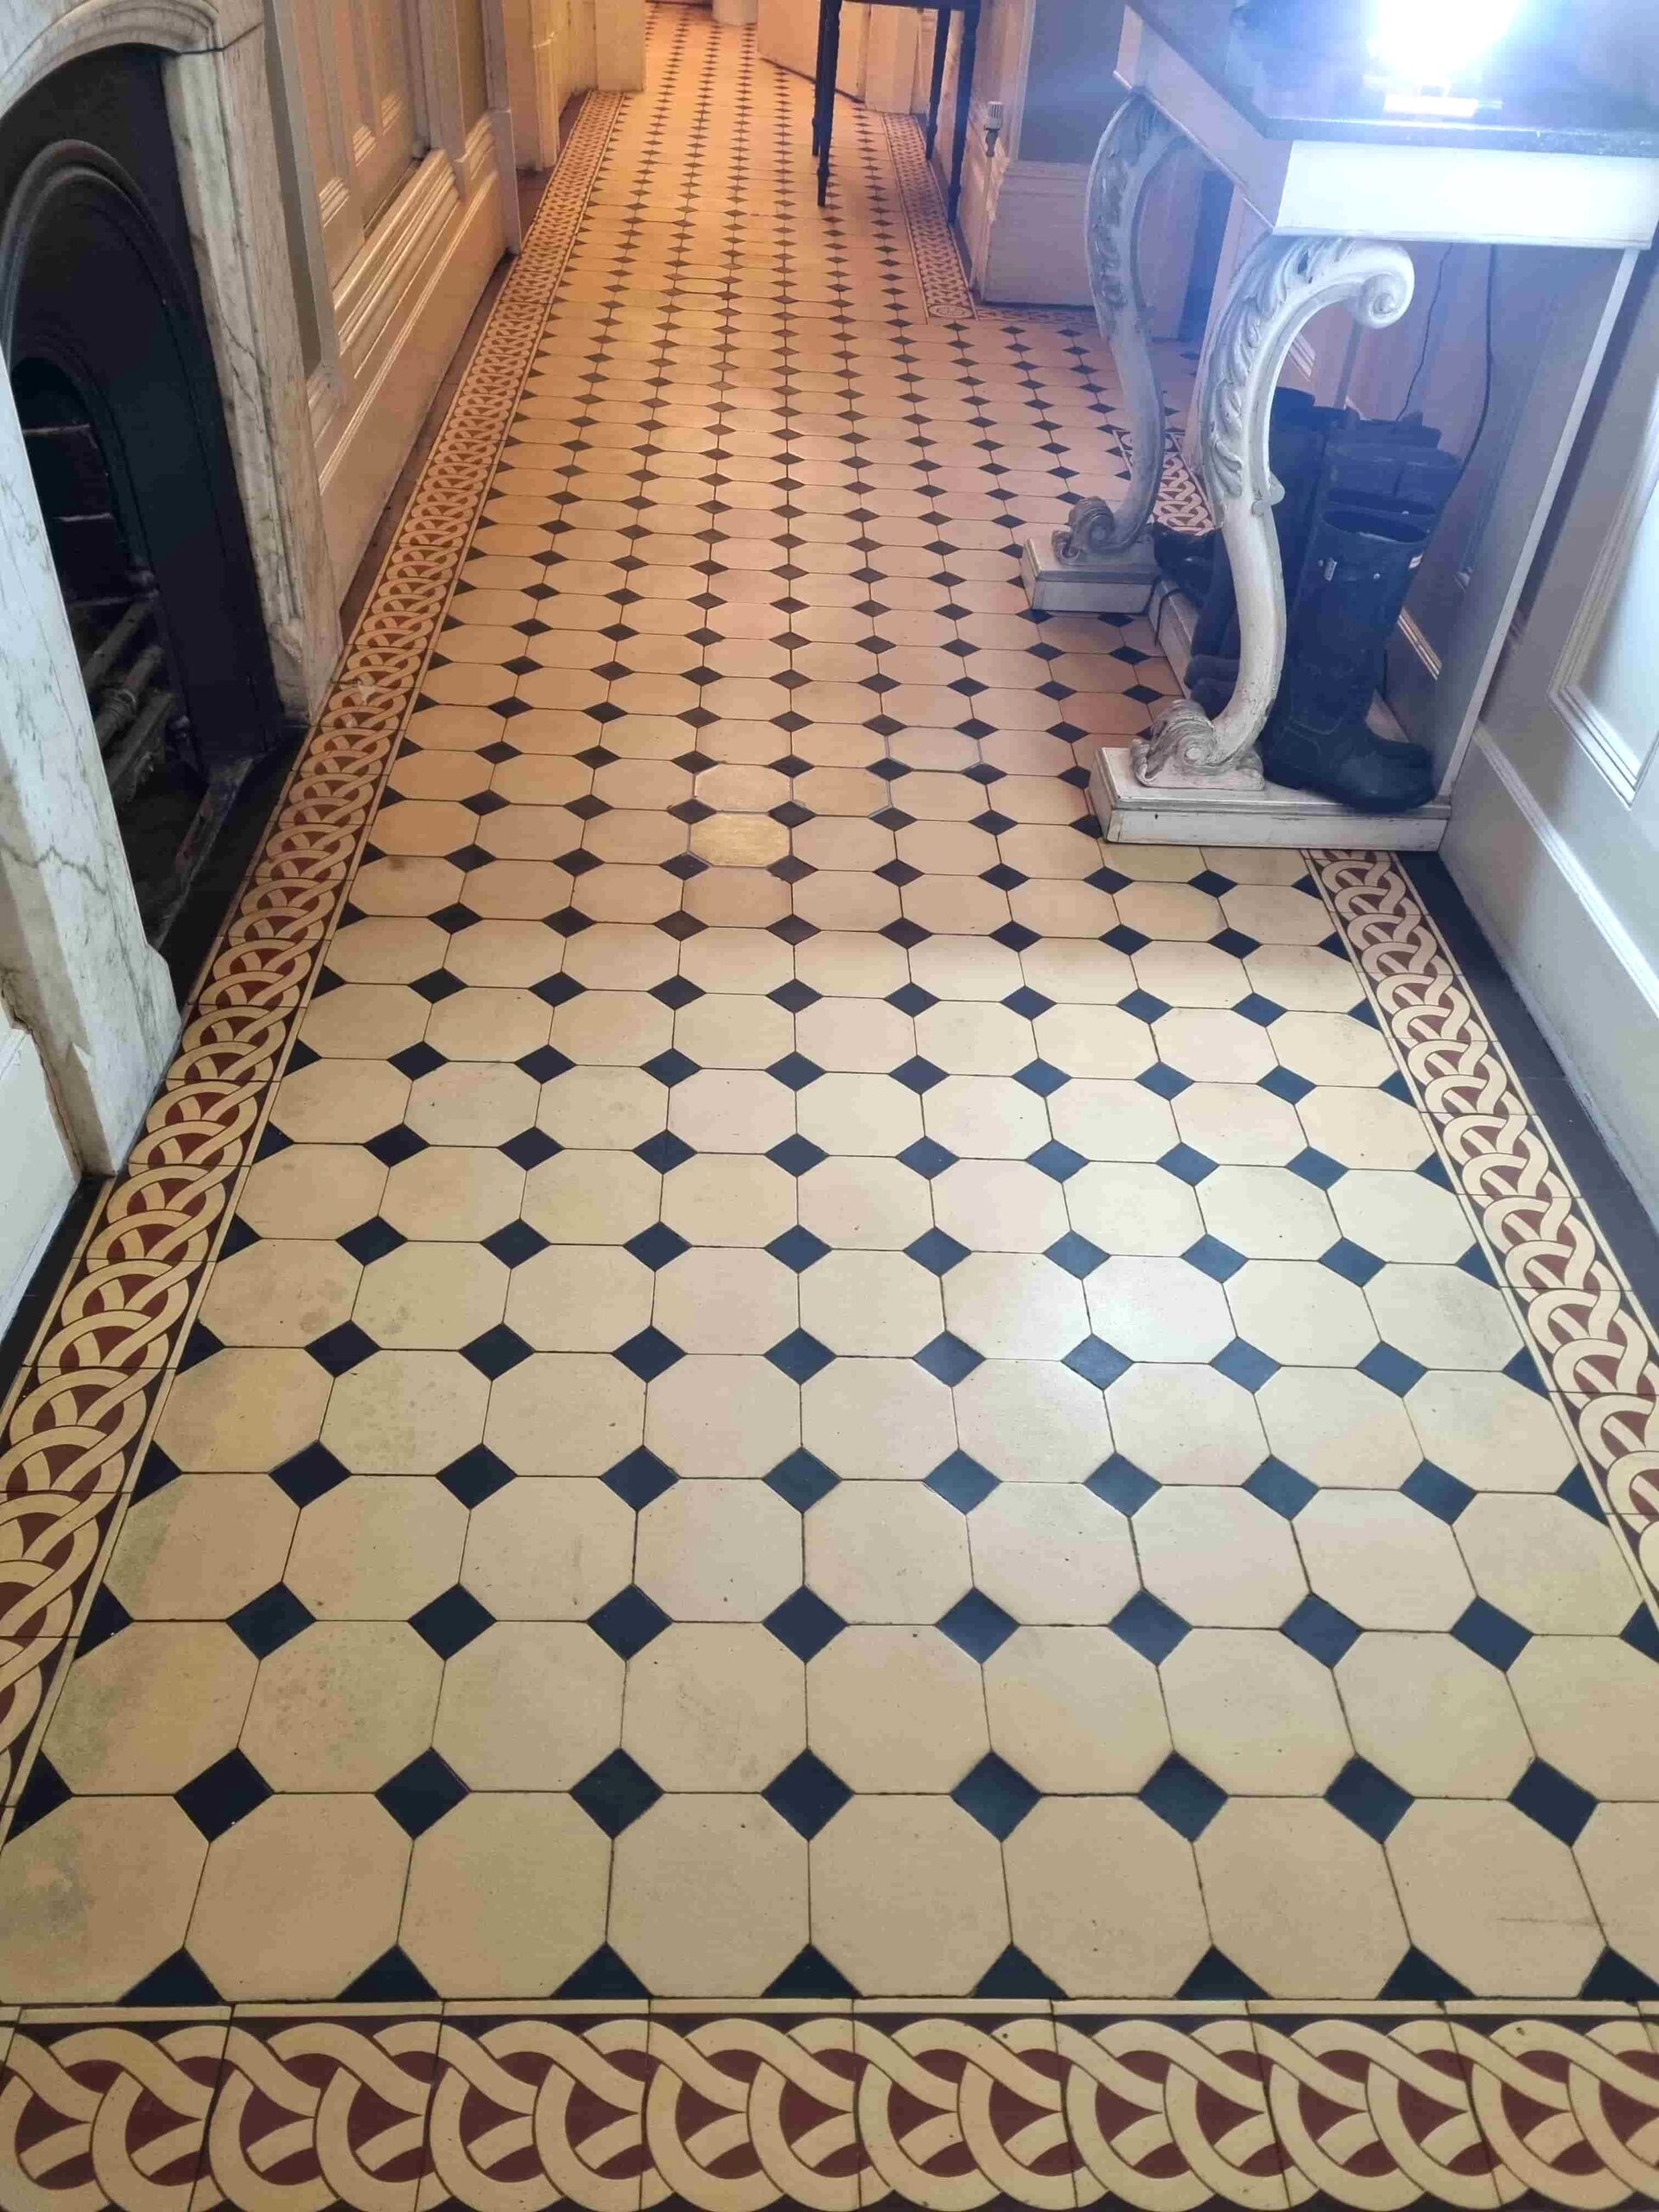
   
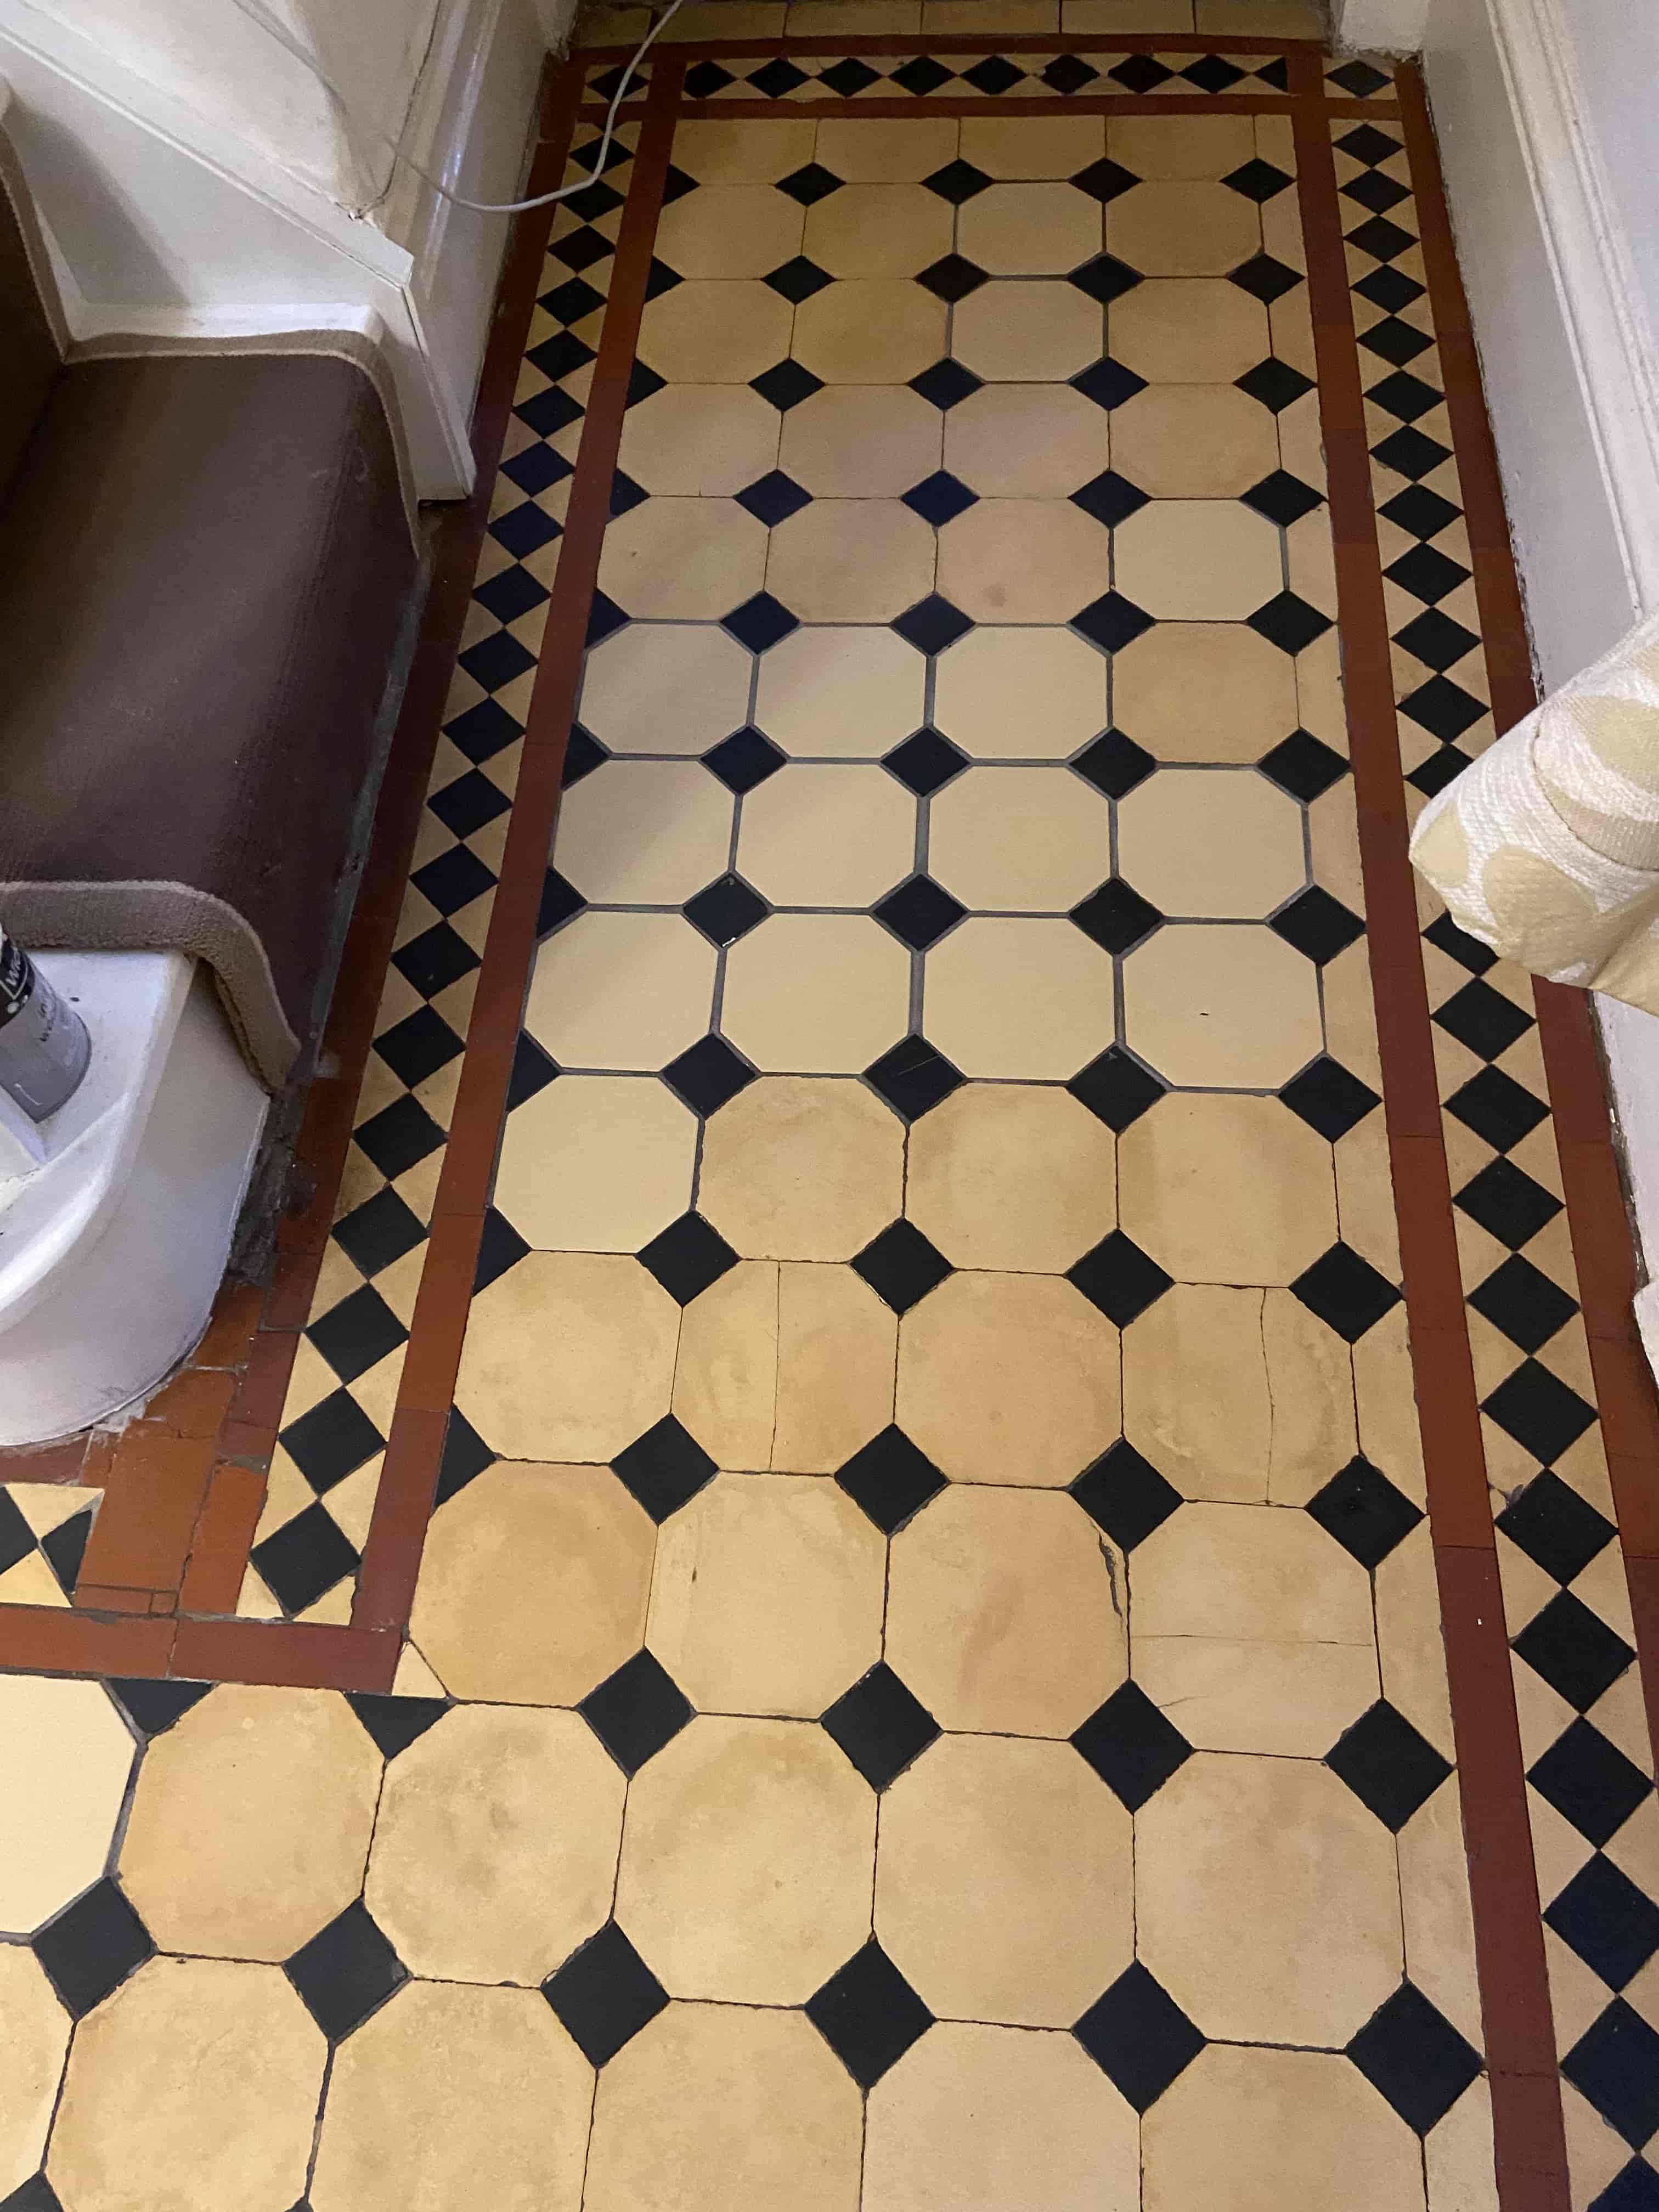
Victorian Tiled Floor After Renovation Handbridge Cheshire Victorian Tiled Floor After Renovation Handbridge Cheshire

The owner of the property was over the moon with the work and pleased that the work to restore the property to its former condition was nearing completion after what had been four years of restoration.
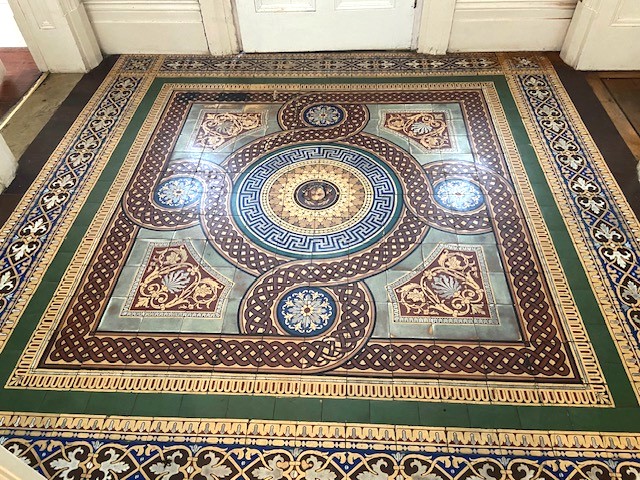
  Victorian Tiled Floor Before Renovation Handbridge Cheshire 

Monday, June 20, 2022

New Low Moisture Cleaning Technique used on the Restoration of Vintage Victorian Flooring in Carlisle Cumbria

This is probably one of the oldest Victorian floors we have worked on, the house dates back to 1853 and is the second one we have covered on the same road in the leafy city of Carlisle . The whole street was owned by the council for several decades and the houses including floors have experienced all sorts of damage to them over the years. More recently the houses have been released to a private developer who called us in to handle the restoration and resurrect the hallway tiles which you will see on the pictures.
 
Period 1853 Victorian Hallway Floor Before Restoration Carlisle Period 1853 Victorian Hallway Floor Before Restoration Carlisle


Cleaning and Repairing a Victorian Tiled Hallway Floor

The first job for us was the tile repair, and this meant preparing the surface for the new tiles, which involved carefully knocking up all the loose and cracked tiles and then re setting them using matching replacements where necessary.
  Period 1853 Victorian Hallway Floor During Restoration Carlisle 
To do this I like to use a multi tool to score the grout and then break out the cracked tiles with a hammer and chisel or a power drill. The replacement tiles had to be re-sized to fit, oddly enough most of the damage was along the edge of the floor where air ducts used to be in place and then these had been concreted in. The main part of the floor though was still in good order even though it was 170 years old.
 
Period 1853 Victorian Hallway Floor During Restoration Carlisle Period 1853 Victorian Hallway Floor During Restoration Carlisle
Once the replacement tiles were set, a low moisture cleaning technique was used to get the whole floor clean. This involves covering the tiles in Tile Doctor Oxy-Gel and leaving it to soak into the tile for ten minutes. Being a gel cleaner, it is easier to control and there is less water involved. The gel is then scrubbed in with a buffing machine fitted with a 100-grit milling pad. A little bit of water is added to help lubricate and scrub off the dirt and soiling. A wet vacuum is then used to remove the soil which is an essential piece of kit for this line of work.

After the initial clean the floor was given an acid rinse using Tile Doctor Acid Gel which was applied neat and as before scrubbed in using a pad, this time using a finer 200-grit milling pad. Again, a little water was used to aid in the clean up being careful not to flood the floor.

The reason for the low moisture clean is that there was a basement underneath the hallway and the client had nowhere else to put certain fabrics, furniture etc so with a low moisture clean we can minimise the chance of any water finding its way into the space below. The wet vacuum was deployed again to remove the cleaning products and water and the floor was left to dry.


Sealing a Victorian Tiled Hallway Floor

Once clean and dry the floor was sealed using two coats of Tile Doctor X-Tra seal which as the name suggests is a little bit extra as it's a very robust sealer, although mainly designed for outside areas it’s an oil-based formula that works really on Victorian tiles.

 
Period 1853 Victorian Hallway Floor After Renovation Carlisle Period 1853 Victorian Hallway Floor After Renovation Carlisle
One done the floor looked great, and the developer was very happy with the result.

Sunday, December 19, 2021

Damaged Classic Tiled Hallway Floor Fully Restored in Lancashire

Cleaning and Repairing a Victorian Tiled Hallway Floor

Detailed below is the restoration of a Victorian tiled hallway floor that we started back in June in Preston. Although we started in June there was so much damage to the subfloor and the tiles it took some time to complete, additionally, the client did not like the colour samples of the replacement tiles we had brought along and so decided to source their own which took some time.

 
Damaged Victorian Tiled Hallway Floor Before Restoration Preston


Deep Cleaning a Victorian Tiled Hallway

Three months later with replacement tiles now sourced we were given the go ahead to start the restoration. The first day’s focus was cleaning the original floor using very coarse 100-grit and 200-grit Diamond pads fitted to a rotary buffer machine and applied to the floor using a strong dilution of Tile Doctor Remove and Go to add extra cleaning power. Tile edges were given special attention using a flex machine fitted with small diamond grit pads.

 
Damaged Victorian Tiled Hallway Floor Before Restoration Preston

The floor was rinsed with water to remove the soil generated and this was followed up with an acid rinse using a 1:3 dilution of Tile Doctor Grout Clean Up. This last step in the cleaning process is especially recommend for old floors like this which don’t have a damp proof membrane and can suffer from efflorescence issues.


Replacing Damaged Victorian Tiles

The next stage focused on repairing the floor and started by carefully knocking out all the broken and chipped tiles. We had previously estimated over 30 tiles needed replacing and so the client had bought two boxes, meaning I had plenty of spares to work with.

Before tiling however, the subfloor had suffered over the years and needed attention first. To deal with this the damaged areas were raked out, cleaned up and then back filled with rapid setting self-levelling screed from Mapie adhesives. Once the sub-base was fixed then we put the new tiles back in, they were not an exact match, about 5mm too short and lighter in tone, but the colour was pretty close.

Tiling an old Victorian floor like this can be a bit like dominoes as you move one out of place 2 decent ones come loose and then they also need refixing. Some of the tiles had hair line cracks in them and once they were loose, they just cracked in half. As such the 20 spare tiles that I thought were spare came into good use and I actually ended up using all of them. I could have done with a few more so it was decided to reset the last four broken tiles and grout them in. Luckily for me the client was very understanding about the nature of tile restoration and had accepted that there would be some imperfections and they were not expecting a new floor.

The Tiles were fixed down using Ultralite Rapid Flex (another product from Mapie) and then grouted using the same adhesive (not a grout, as they did not have grout back in the day, just cement and screed).

The floor was left this to cure overnight, and we came back the next day to finish the clean using a 200-grit diamond pad fitted to a buffing machine and lubricated with water, then one last acid rinse to get the tiles as clean as possible and remove any lingering grout haze. This last clean helps to blend the new tiles in with the original.


Sealing a Victorian Tiled Hallway Floor

Before applying a protective sealer, the floor was left to dry for a couple of days, the tiles need to be thoroughly dry before sealing or you can end up with a patchy appearance.

For this floor with no damp proof membrane, it was important to use a fully breathable sealer that will allow moisture to rise through the tile and evaporate at the surface, so Tile Doctor Colour Grow was chosen. This is a good choice for old floors like this as its fully breathable, head wearing, and it contains a colour enhancer that improves the overall appearance of the tile.

 
Damaged Victorian Tiled Hallway Floor After Restoration Preston

Three coats of Tile Doctor Colour Grow which is a fully breathable, colour enhancing sealer hat works by soaking into the pores of the tile protecting it from within. It has a matt finish, and it works really well with all clay tiles and is ideal for these types of floors.

 
Damaged Victorian Tiled Hallway Floor After Restoration Preston

You can probably spot the lighter coloured tiles in the after photos on this page, however it’s a very subtle difference and I think they have blended in quite well with the original. Certainly, my client was very pleased with the newly restored floor, its completely transformed from when we first visited the client, and the floor has now gained character and history. For aftercare we recommend Tile Doctor Neutral Cleaner, its an effective pH neutral product that is compatible with the new sealer.