Tuesday, November 21, 2023

How to Replace a Cracked or Chipped Ceramic Floor Tile

 With patience and the right tools, you can learn how to replace a cracked or chipped ceramic floor tile. The idea of tile flooring need not be abandoned if one or a few of the tiles should happen to break. If you're considering installing a ceramic tile floor, it's always a good idea to get extra tiles. If there's a problem with breakage, the tile can be matched correctly. It's also easier to match the tile if a broken piece can be taken to the home improvement center or hardware store.

Safety glasses and work gloves are very important. Shards of ceramic tile and grout can be sharp enough to cut skin or cause eye damage. Pets and children should also be kept away from the work area, tools, and materials.

Remove the Broken Tile

Using the awl and hammer, gently chip away the grout surrounding the piece of tile, being careful not to chip the surrounding tiles. Use the chisel and the hammer to pry the tile up from the floor until the entire piece has been removed.

Prepare the Exposed Flooring

Use the hammer and chisel to chip away as much of the adhesive from the subfloor as possible. The new tile piece will stay in place much better if the subfloor is smooth before installation.

Install the New Piece of Tile

Apply the tile adhesive to the back of the tile using the notched trowel or a putty knife. This is referred to as "buttering" the tile. Place the new piece of tile onto the prepared floor, using even pressure to be sure that the new piece is level with the existing floor. Follow the directions on the adhesive itself to know how long to wait before applying the grout.

Apply the Grout

Using the putty knife, apply the grout around the new tile piece. Refer to the directions to know how long to wait before removing the excess grout, usually about fifteen minutes.

Remove the Excess Grout

Use a damp sponge or rag to gently wipe off the excess grout. The sponge or rag should not be too wet, otherwise, the water will displace the grout. Moving in a diagonal direction across the tile is the easiest way to remove excess grout from the surface, without dislodging too much.

Apply Grout Sealer

If desired, a grout sealer can be applied over the new grout to protect it from stains and mildew. Refer to the directions on the sealer to know how long to allow the grout to dry before application.

As simple as that, the floor is repaired and looking its best. This isn't a speedy process, but one that is worth taking the time and patience to complete as thoroughly as possible.

Source: www.DoItYourself.com

Wednesday, November 8, 2023

Tile and Stone Cleaning in Beziers South of France

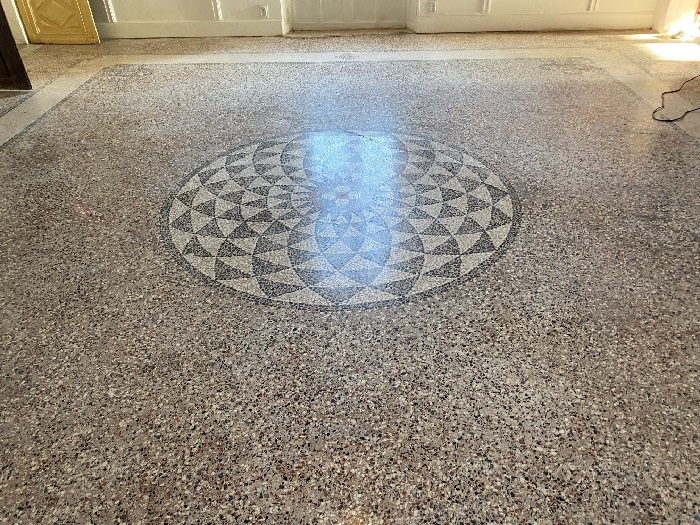
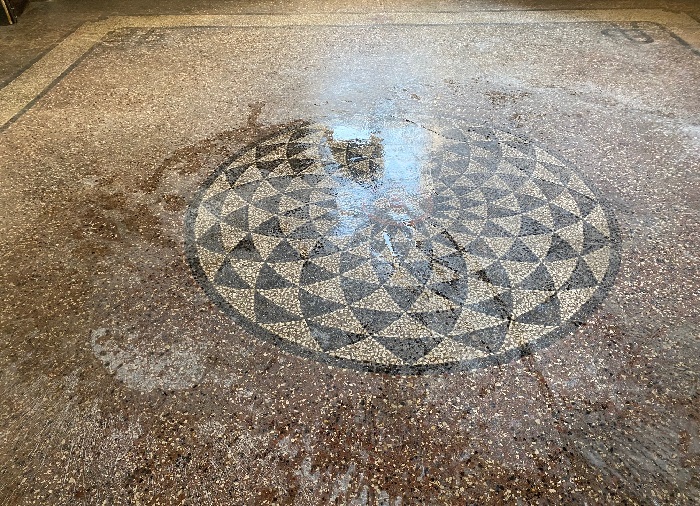
The English owner of a French Chateau contacted Tile Doctor about the hard floors at their property in Béziers in the South of France. There were several floors at the property including Terrazzo, Limestone and Black and White Encaustic tiles all around a hundred years old and in a bad state of repair. There was a lot to cover so for this post we will focus on the Terrazzo flooring.

Terrazzo Floor Before Renovation Beziers France 

We have been known to carry out tile renovation work in other counties so we were more than happy to consider a visit to the South of France and help bring the floors back to life. Previous overseas projects have included a hotel restaurant in Addis Ababa, holiday cottages in Ireland and a villa in France. 

Luckily for us the customer had invested in some machinery that he had found on eBay but he didn’t have the technical knowledge to do the work and so had decided to seek help. Having discussed each of the floors in detail over the phone and with photographs sent via email I worked out a restoration plan for each floor.

We supplied the products he needed and we were flown down from Manchester to Béziers Cap d'Agde Airport where we were picked up by the client, (very Hollywood). If you have never been to Béziers before it’s well worth a visit, it's a beautiful area, well laid out, with parks and rivers, an old 12th Century Monastery and the property had great views all around.

Tile Doctor Floor Renovation Bezier


Deep Cleaning and Filling Terrazzo Flooring in Béziers France

On arrival at the property work started with setting up the machinery and conducting some preliminary cleaning tests to work out the best approach. After that however our host insisted on showing us round Béziers, it was a Saturday afternoon and we were in the South of France so why not, they certainly know how to live properly down there.
   
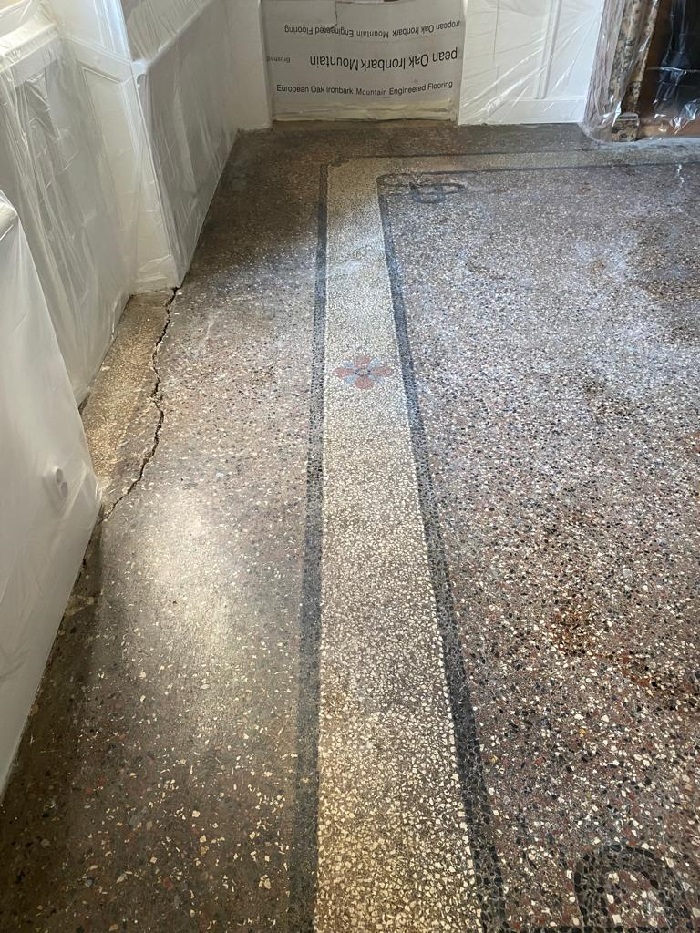
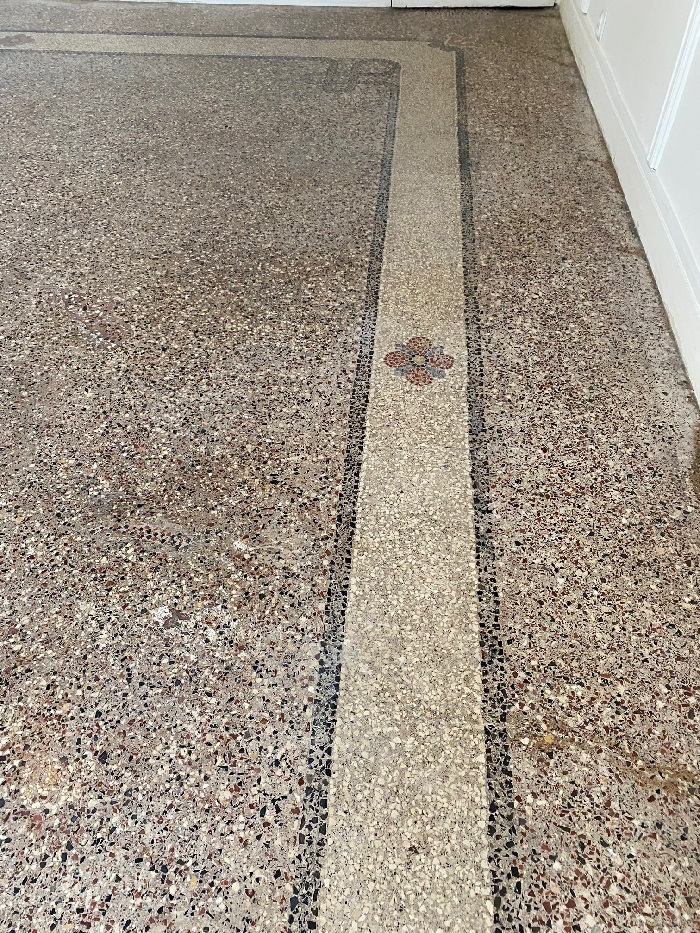
Terrazzo Floor Before Renovation Beziers France Terrazzo Floor Before Renovation Beziers France

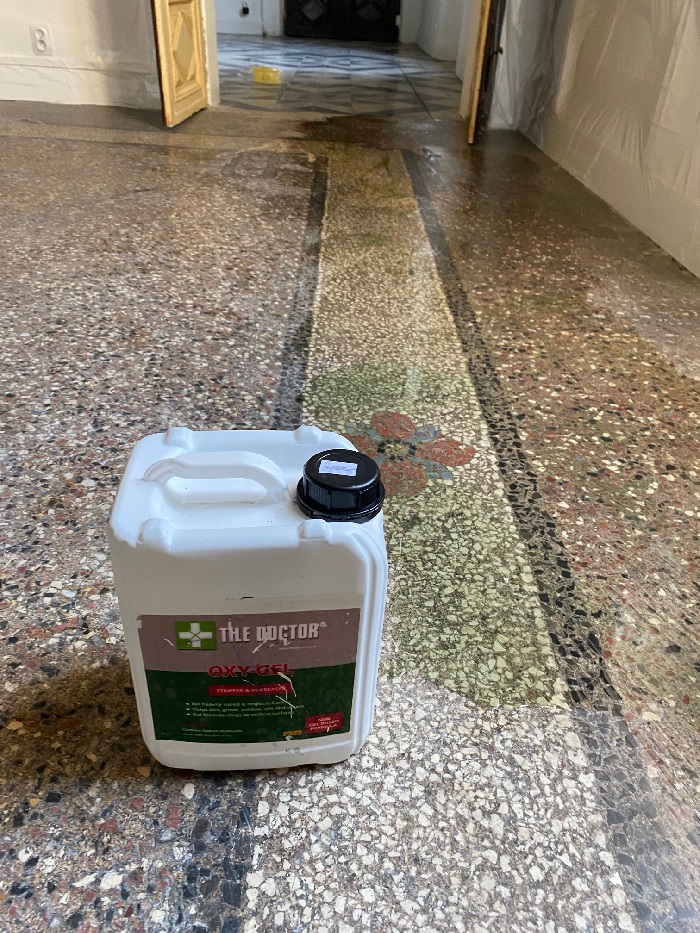
So, work started on the Sunday with the application of a 200-grit Milling pad and Oxy-Gel cleaning solution. I was concerned (due to some hairline cracks in the Terrazzo) that water would seep through into the rooms below (this was a big old townhouse set on four levels) so by using a gel-based product it would be easier to control and the moisture would be kept to a minimum.

Terrazzo Floor During Cleaning Oxy-Gel Beziers France 

The resultant soiling was then extracted with a wet vacuum and attention moved to filling the cracks in the Terrazzo with a resin filler. Once the resin had cured the floor was cleaned again, this time with a 200-grit DRB Milling pad which contains diamond segments. The process was lubricated with water and progress was checked underneath several times to ensure the pad was working as expected.

Terrazzo Floor During Renovation Beziers France


Polishing a Terrazzo Floor in Béziers France

This work continued with increasingly finer diamond encrusted burnishing pads starting with a 400-grit Diamond burnishing pad and moving up to an 800-grit and finishing with a 1500-grit pad. Only water was used for lubrication and the soiling was extracted with a wet vacuum after each pad was applied. This method slowly improves the surface of the Terrazzo adding a long-lasting polished appearance. 

The floor was left to dry overnight and the following day treated to a spray burnish using a very fine 3000 grit burnishing pad; the pad is applied dry to the floor with only a little amount of water which is sprayed onto the surface.


Sealing Terrazzo Flooring in Béziers France

This final 3000-grit pad leaves the floor dry and allows the floor to be sealed shortly afterwards. The sealer chosen for the Terrazzo was Tile Doctor Colour Grow which is a colour enhancing impregnator which works by soaking into the pores preventing dirt from residing there. Sealing the floors keeps the dirt and other contaminates on the surface where it can be easily removed.

Two coats of Colour Grow were applied and this brought out the lovely pink tones in the Terrazzo which together with the polished appearance really transformed the appearance of the floor.

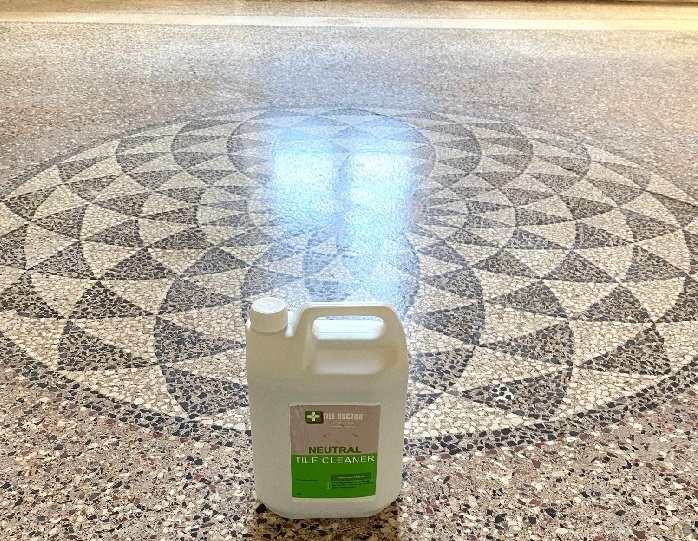
Terrazzo Floor After Cleaning Beziers France 

For aftercare cleaning I got the customer to purchase a five-litre bottle of Tile Doctor Neutral Cleaner along with the other products. You must be careful what you clean sealed floors with as many products contain bleach and are simply too strong resulting in the premature degradation of the sealer.

We spent the whole week at the property and as well as working on the other floors did find time to do some more sightseeing before flying back the following weekend.


Thursday, November 2, 2023

Buckinghamshire Tiling Expert Reveals How to Remove Stains from Encaustic Floor Tiles

The pictures below were taken at a property in the old town of Marlow which had modern Encaustic tiles installed in the downstairs WC. Although they may appear on first appearance to be perfectly fine the owner had called us in to deal with the staining around sink area around toilet.

The tiles had only been installed six months earlier and after surveying the floor it was clear to me that the tiler hadn’t applied enough protective sealant following installation. I quoted for deep cleaning the floor with diamond burnishing pads and then re-sealing with a stronger sealer which given the small size of the floor should be completed in a day.
  Modern Encaustic WC Floor Tiles Before Renovation Marlow

Deep Cleaning an Encaustic Tiled WC Floor

To remove the original sealer and deep clean the encaustic tiles I started with a 200-grit burnishing pad lubricated with water. The floor was too small for a buffer machine so I used 6-inch pads fitted to a hand buffer. This action cuts back the tiles removing the stains in the process.

After rinsing and extracting the soiling that was generated, I checked the floor to confirm the staining was gone. I could see that the 200-grit pad had done the job and there was no need to apply a coarser 100-grit so I followed up with finer 400 and 800 grit pads. Again, water was used to lubricate the process and the floor was rinsed and extracted after each pad. I went over the floor slowly to ensure each tile had a deep clean and to avoid creating any swirl marks.

Once the 400 & 800 grit pads had been applied, I buffed the tiles with a White rag to remove any excess water and get it ready for the next pad which would enhance the deep blue colours in the floor. Once the floor was dry a very fine 1500-grit pad was applied to compete the burnishing and add a slight shine to the tiles, this also leaves the floor nice and dry and ready for sealing.

Sealing an Encaustic Tiled WC Floor

To seal the floor, I used an oil-based sealer called Tile Doctor X-Tra Seal, which is rated for internal and external use. I allowed it to soak into the encaustic tiles which would allow the colours to really darken after the use of the burnishing pads.

After about thirty minutes I rubbed off the excess with a White cloth and then proceeded to apply a 3000-grit buffing pad to leave a smooth surface and an even shine all over the floor. I finished off with a further coat of X-Tra Seal and left for 30 minutes and repeated the same process giving a deep colour finish and leaving the floor well protected.
  Modern Encaustic WC Floor Tiles After Renovation Marlow 
The customer where very happy with the result and recommended us to friends of theirs who had the same tiled floor. Before leaving I spent a few minutes to discuss aftercare cleaning, which for this floor I recommend Neutral Tile Cleaner.

Tuesday, October 24, 2023

How to Use Floor Sealant on Tile

 Using floor sealant on a tile floor can present you with several benefits. Although tile is a very hard floor, it is porous. The grout surrounding the tile is also very porous and can stain easily. Therefore, sealing it all up properly will help you avoid any problems with staining in the future. It will keep your tile look new longer and be easier to clean. Here are the basics of how to seal your tile floor properly.

What You'll Need:

  • Tape measure
  •  Broom
  •  Dust pan
  •  Mop
  •  Bucket
  •  Fans

Step 1 - Determine How Much To Buy

Tile sealant comes in a variety of different sizes. Depending on how big your tile area is, you will need a certain amount of sealant to get the job done. Therefore, you should take your tape measure and get the dimensions of the room first. This will tell you how many square feet you have and help you determine how big of a container to buy.

Step 2 - Buy the Proper Sealant

There are many different kinds of tile out there and as a result, there are different types of sealer. They make grout sealer, ceramic sealer, natural stone sealer, and others. Therefore, you will want to make sure that you buy the proper sealant for the job. If you are unsure, consult someone at a local tile store before you make a purchase. They should be able to direct you to the proper type of sealant for your tile.

Step 3 - Clean the Floor

Before you seal the floor, you should thoroughly clean the tile floor. If there is any dirt or debris on the floor when it is sealed, it will remain under the sealer and look permanently dirty. You will not be able to clean it without stripping off the sealer. You should start out by taking a dustpan and broom and removing the dirt. Any loose dust that is floating around will be removed in this manner. Then you can mop the floor in your usual manner. Allow the water on the floor to dry sufficiently before moving forward.

Step 4 - Apply the Sealant

Applying the sealant to the tile is a very simple process. If you bought a large amount of sealant, you should be able to dump it into a bucket and then mop it onto the floor. Stick your mop into the bucket and allow it to soak up the sealant. Then mop the floor with the sealant until the entire floor is wet with it. Make sure that you distribute the sealant evenly over the surface of the tile.

Step 5 - Allow it to Dry

Once the sealant has been applied to the tile, you need to allow it to dry before anyone steps on it. Set up some fans to blow over the tile and it will help speed up the drying process.

Step 6 - Apply Again

After the first coat is dry, you are free to apply a second coat to the floor. If the tile and grout soaked up the first coat, you might need a second coat to make sure that everything is sealed up.


Wednesday, October 18, 2023

How to Add a Deep Durable Shine to Marble Tiled Flooring

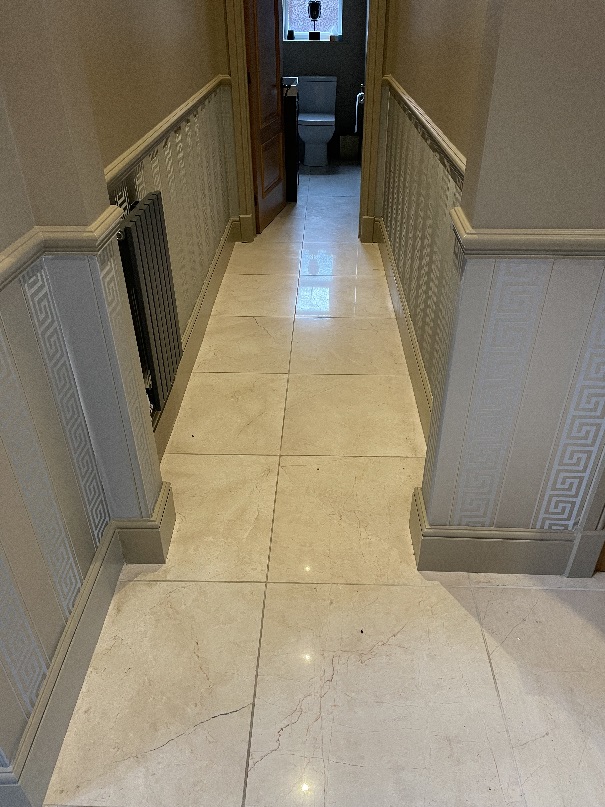
The pictures below are of a Marble tiled floor installed in the hallway of a property at Crakemarsh Hall, near Uttoxeter. The Marble had lost its shine due to several years of wear and was now looking quite flat and uninteresting. This happens with highly polished floors which need to be re-polished every six to 12 months if you want to keep them looking fabulous.

     Marble Floor Before Polishing Crakemarsh Hall Uttoxeter 

Naturally my client had become unhappy with the dull appearance of the stone and I was asked to call round and put the shine back. I viewed the floor and talked them through the polishing process. I left them with a quote which they were happy to accept.
 
Marble Floor Before Polishing Crakemarsh Hall Uttoxeter Marble Floor Before Polishing Crakemarsh Hall Uttoxeter


Cleaning a Marble Tiled Hallway Floor and Grout

The first job was to clean the floor using a rotary floor machine fitted with a Black pad to scrub in Tile Doctor Pro-Clean which is an effective alkaline tile and grout cleaner. I used a medium dilution of Pro-Clean sprayed onto the tiles and left to soak in for ten minutes before scrubbing.

These pads can struggle to get right into the grout so I used a hand-held scrubbing brush along the grout lines to tackle any stubborn grout stains and dirt hiding in the recesses. The soiling was then rinsed off the floor with water and extracted with a wet vacuum.


Polishing a Marble Tiled Hallway Floor

Work then commenced on polishing the Marble for which I used several grades of diamond burnishing pads starting with a coarse 400-grit. Only water is needed to help lubricate the process and once the pad has been run over each tile at least three times the soiling is rinsed off and extracted with the wet vacuum as before. This process is then repeated with the 800 and 1500-grit pad until you reach the 3000-grit pad which is applied with only a little water sprayed onto the tiles.


Sealing Marble Floor Tiles

To add a deep durable polish to the Marble I then applied Tile Doctor Polishing Powder which is spread over the floor ground into the marble using a White polishing pad. I also went around the edges with a handheld buffing machine fitted with smaller 6" pads.
 
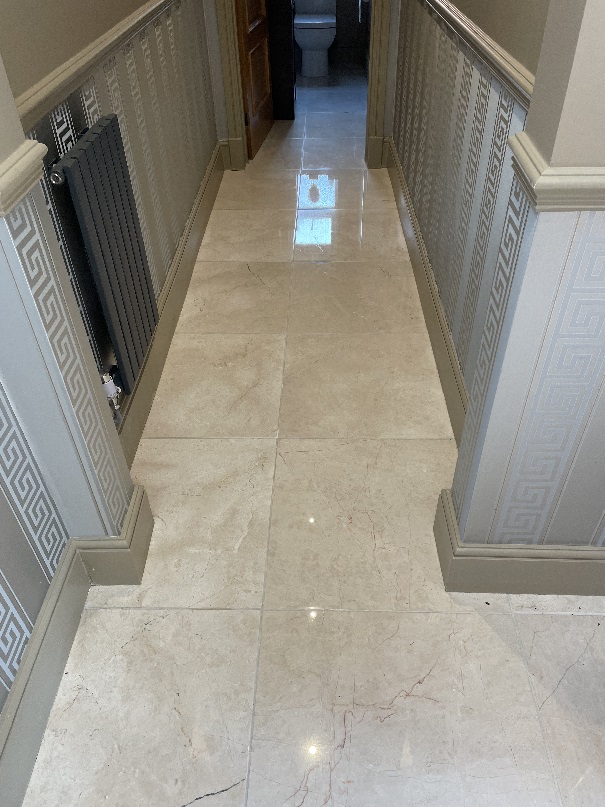
Marble Floor After Polishing Crakemarsh Hall Uttoxeter Marble Floor After Polishing Crakemarsh Hall Uttoxeter

I finished the floor by using a super high speed burnishing machine fitted with a White polishing pad to remove any marks left on the floor. My client was so happy that they have booked in for an annual Maintenance clean for next year to keep the floor in top condition.

  Marble Floor After Polishing Crakemarsh Hall Uttoxeter

Before leaving I also encouraged then to clean the floor using Tile Doctor Stone Soap which is a mild but effective cleaning solution that helps maintain the patina on polished stone. Many of the floor cleaning products you find in supermarkets are simply too strong for use on a sealed floor.


Friday, October 13, 2023

Non-Slip Floor Covering

Installing non-slip floor covering can provide you with a much safer flooring surface to walk on. This is essential for many elderly people that are in danger of falling on a slick floor. Here are a few options that you have for non-slip floor covering.

Carpet

Carpet is one of the most basic forms of non-slip floor covering available. You can get in a variety of different styles and colors and it is one of the least expensive options. There is even outdoor carpet that you can use if you are worried about falling in an outdoor space.

Tile

Another great option that you have for non-slip floor covering is to use tile. Many ceramic and porcelain tiles have very rough finishes that would be ideal for a non-slip flooring surface. Some tiles are even made with tiny ridges with this in mind. This is going to be more expensive than carpet.

Rubber Flooring

Another great option for a non-slip flooring surface is rubber flooring. Rubber flooring provide you with great traction and durability. Many people use this in garages and workout rooms. Rubber flooring is very heavy and will be a little more difficult to install than some of your other options that are available.


Source: www.DoItYourself.com 
Monday, October 9, 2023

4 Supplies You Need to Tile

 If you plan on doing it yourself, you will need several supplies to tile a floor. Here are a few of the most commonly used supplies for a tile installation.

1. Wet Saw

One of the most important tools for you to have is a wet saw. A wet saw is a type of saw that is specifically designed to cut tile. It shoots a stream of water onto the tile while you are putting it so it will not chip or break.

2. Trowel

A trowel is another tool that you are going to need for this job. A trowel will be necessary to spread out the tile adhesive on the floor. You can also use a trowel to apply the grout after you are done installing the tile.

3. Adhesive

In order to install tile, you are going to need some adhesive. You could potentially use thinset or mastic depending on your preference. Mastic comes pre-mixed in buckets and most thinset comes in large bags that you have to mix with water. In most cases, thinset is going to be less expensive.

4. Tile Spacers

Tile spacers are something else that you are going to need in order to lay tile. These are used to ensure the proper spacing between the tiles.


Source: www.DoItYourself.com