Monday, January 15, 2024

The Only Carpet Installation Tools You'll Ever Need

Carpet installation tools are tools that allow people to install carpets on their own, without professional help. They include chalk, duct tape, gripper edge, hammer, knee-kicker, masonry nails, power stretcher, saw seaming iron, seaming tape, stair tool, staple gun, tackless strips, and a utility knife.

Preparing for Installation

Arrange tackless strips around the perimeter of the room, leaving about 1/2 inch between the strip and the wall. Use the saw to cut them to the proper length. Use a hammer and two nails to attach each strip to the floor and join the strips at the corners. Attach padding waffle side up using the staple gun, spacing the staples 6 inches apart. Use the utility knife to trim the excess padding. Once all padding is applied, cover the seams with duct tape.

Setting Carpet Dimensions

Measure the room and add six inches to the measurements. Use the chalk to set the measurements down on the carpet. Cut off the extra fabric. If you are using more than one piece of carpet, leave some extra space where they meet. That way you can cut away the excess pieces without creating gaps.

Applying the Carpet

After the carpet is cut, place the seaming tape, adhesive side up on the floor where different pieces of the carpet will meet. Use the seaming iron to melt the tape and press the carpet against it to attach. Use the knee kicker to attach the carpet to the tackless strips at each corner. Attach the rest using the carpet stretcher.

Final Steps

Once the carpet is secured, trim away the excess carpet. Smooth out the edges by tucking them into the space between the tackless strip and the way using the stair tool. Once that is done, put away the tools and enjoy your new carpet.

Source: www.DoItYourself.com

Monday, January 8, 2024

Maintaining a Historic 1850's Minton Tiled Floor in Cheshire

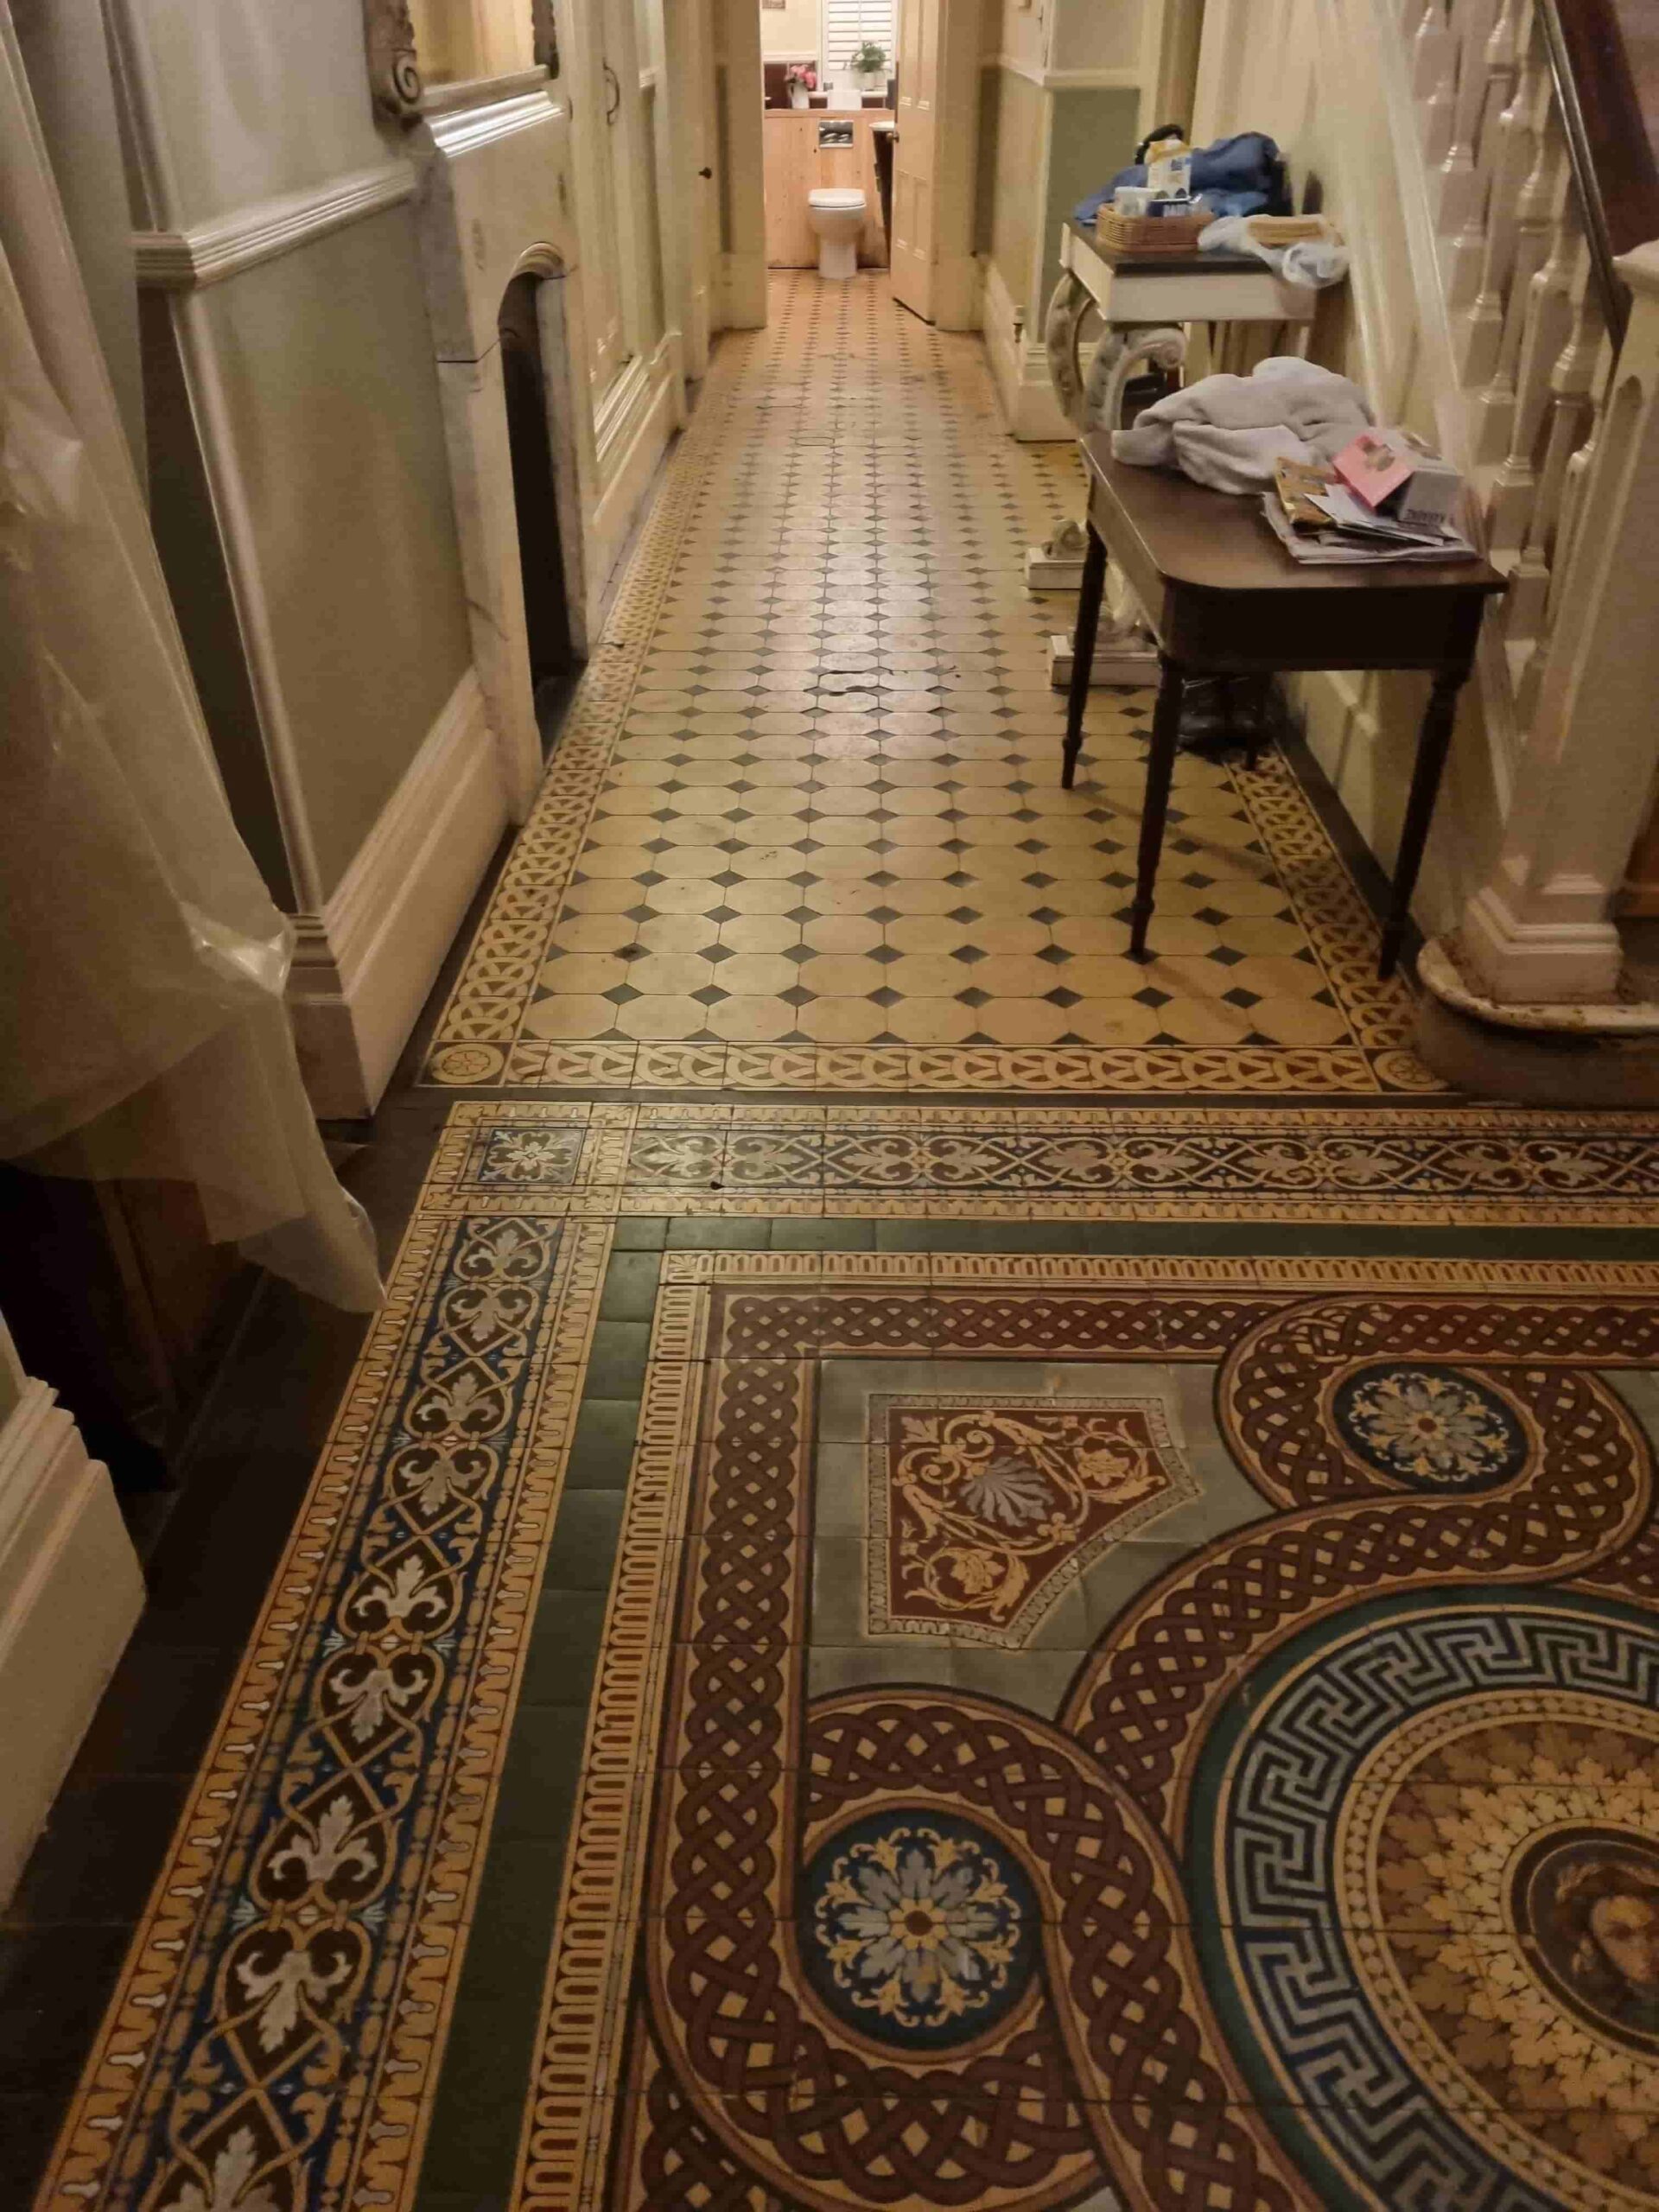
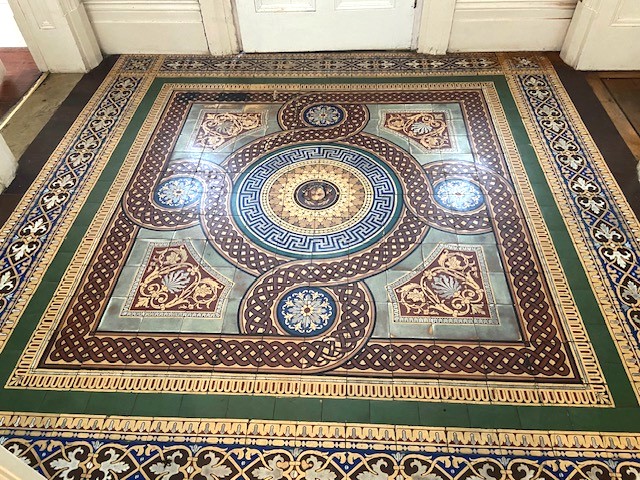
I was first asked to restore the large Victorian tiled hallway floor at this mansion type property in Handbridge, Cheshire two years ago. The floors had a lot of history and had been used as a template for the famous Minton Hollins encaustic tiled floor at St George’s Hall in Liverpool that was built in 1854. Unfortunately, however my work was put on hold as other restoration works including repairing dry rot took priority.

Victorian Tiled Floor Before Renovation Handbridge Cheshire

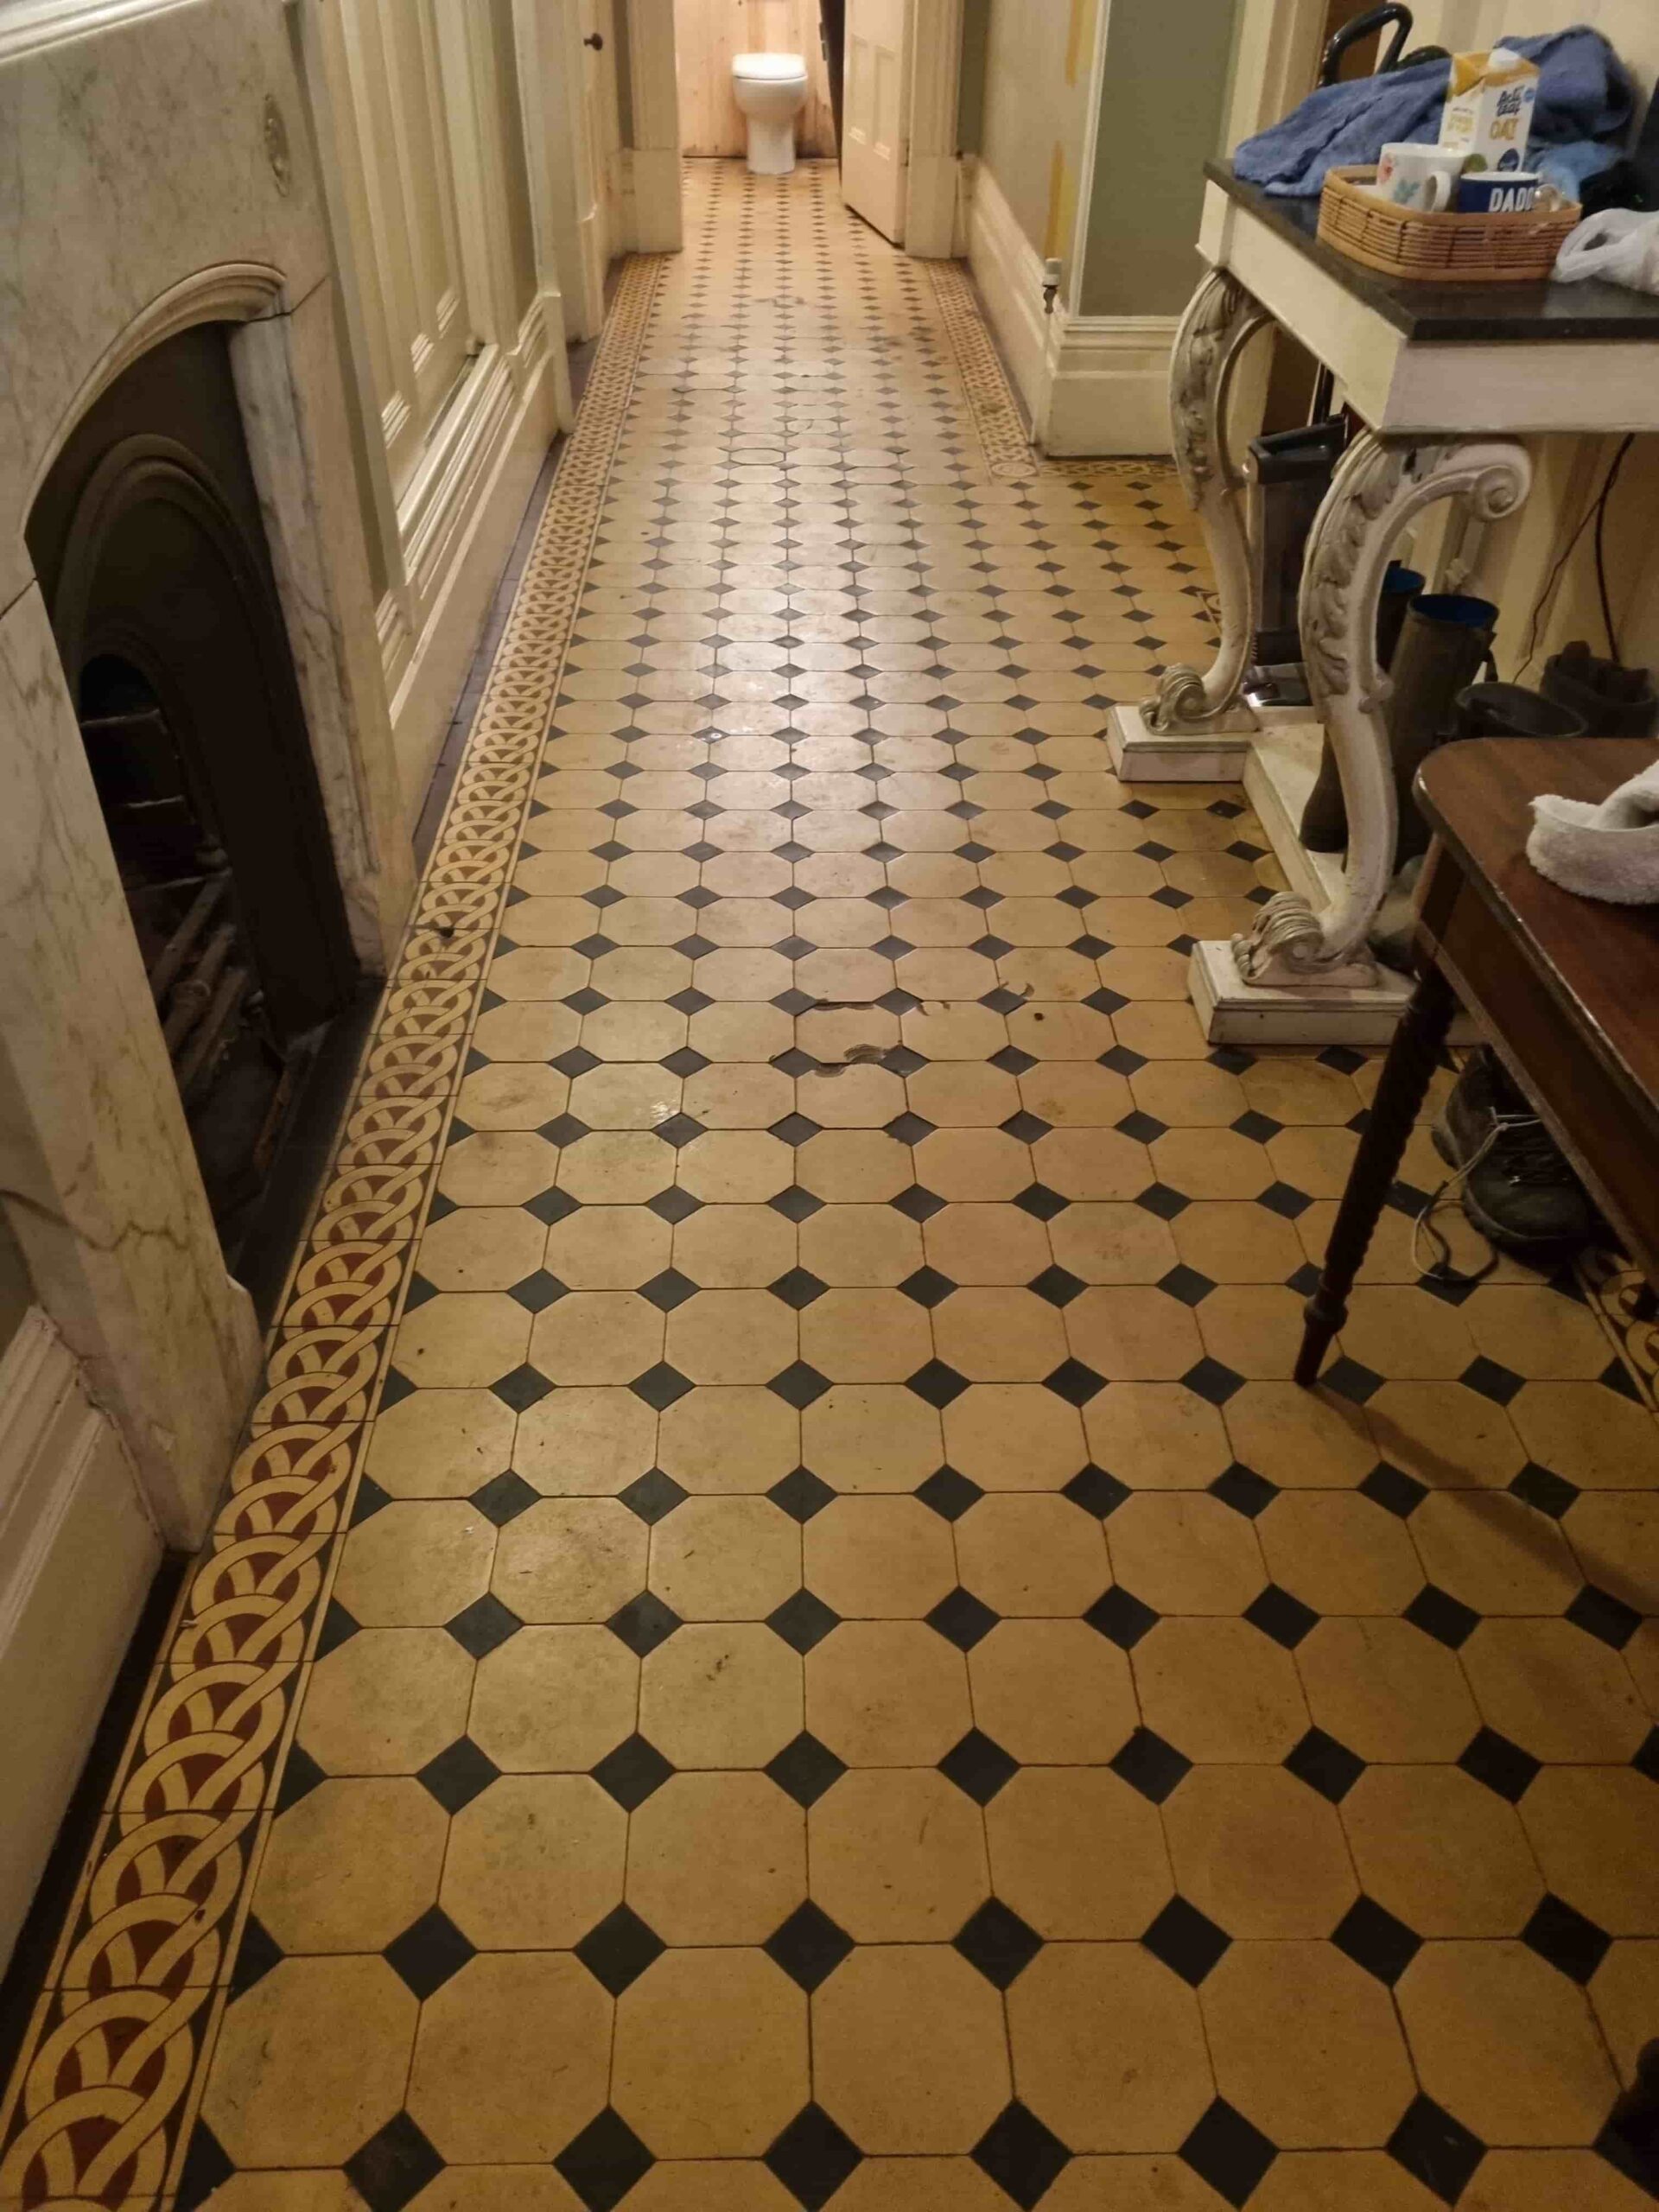
I kept in touch with the owners whilst the other works progressed and kept a look out for 22 beige Octagon shaped tiles that were needed to replace some of the damaged tiles in the floor. In fact, it wasn’t until later in 2023 that I was called back to start the renovation work to the floor, by which time I had managed to source all the replacement tiles needed.
     
Victorian Tiled Floor Before Renovation Handbridge Cheshire Victorian Tiled Floor Before Renovation Handbridge Cheshire
Handbridge is a district of Chester with a mixture of large Victorian mansion type properties on the South bank of the river Dee and workers cottages built to service the water powered factories that sprung up along the river.

Repairing and Cleaning a Victorian Hallway Tiles

Before starting the cleaning process my first task was to replace all the broken tiles. This needs to be done carefully so as not to dislodge any adjacent tiles and make more work for myself. Once removed the base is cleared of old cement and then the replacement tiles fitted using rapid set adhesive and cut to size where required.

Once the repairs were complete and the adhesive set, I began the cleaning process which is designed to remove and remaining protective sealer and flush out ingrained dirt from the pores of the tile. This is done by applying a strong dilution of Tile Doctor Pro-Clean with a mop and then leaving it to soak into the tile for ten minutes. The floor was then scrubbed using a buffing machine fitted with a black pad and lubricated with water. The cleaning alkaline cleaning solution soon turns black with the dirt and then floor is then rinsed with water and the residue extracted with a wet vacuum.

Attention then turned to the decorative historical piece of flooring at the entrance to the hallway. This only needed to be cleaned with Tile Doctor Neutral Tile Cleaner which is used for regular cleaning and maintenance of tiled floors. this was applied with a two-minute dwell time before cleaning by hand using soft scrubbing brush then wiped down with damp microfiber cloths then left to dry.

Sealing a Victorian Tiled Hallway Floor

The next day damp meter readings were taken from both floors to make sure they had dried and were ready to be sealed. The readings were within tolerance so work could begin on applying the first of what would be three coats of sealer.

Tile Doctor Colour Grow was chosen to seal the tiles, it’s an impregnating colour intensifier sealer which is fully breathable so it will allow for moisture to rise through tile, an important consideration for old floors that don’t have a damp proof membrane.

The sealer was applied using a paint pad and any excess is wiped off after five minutes with microfiber cloths before leaving it to dry for twenty minutes. I use air blowers around the floor to increase the drying speed.
   
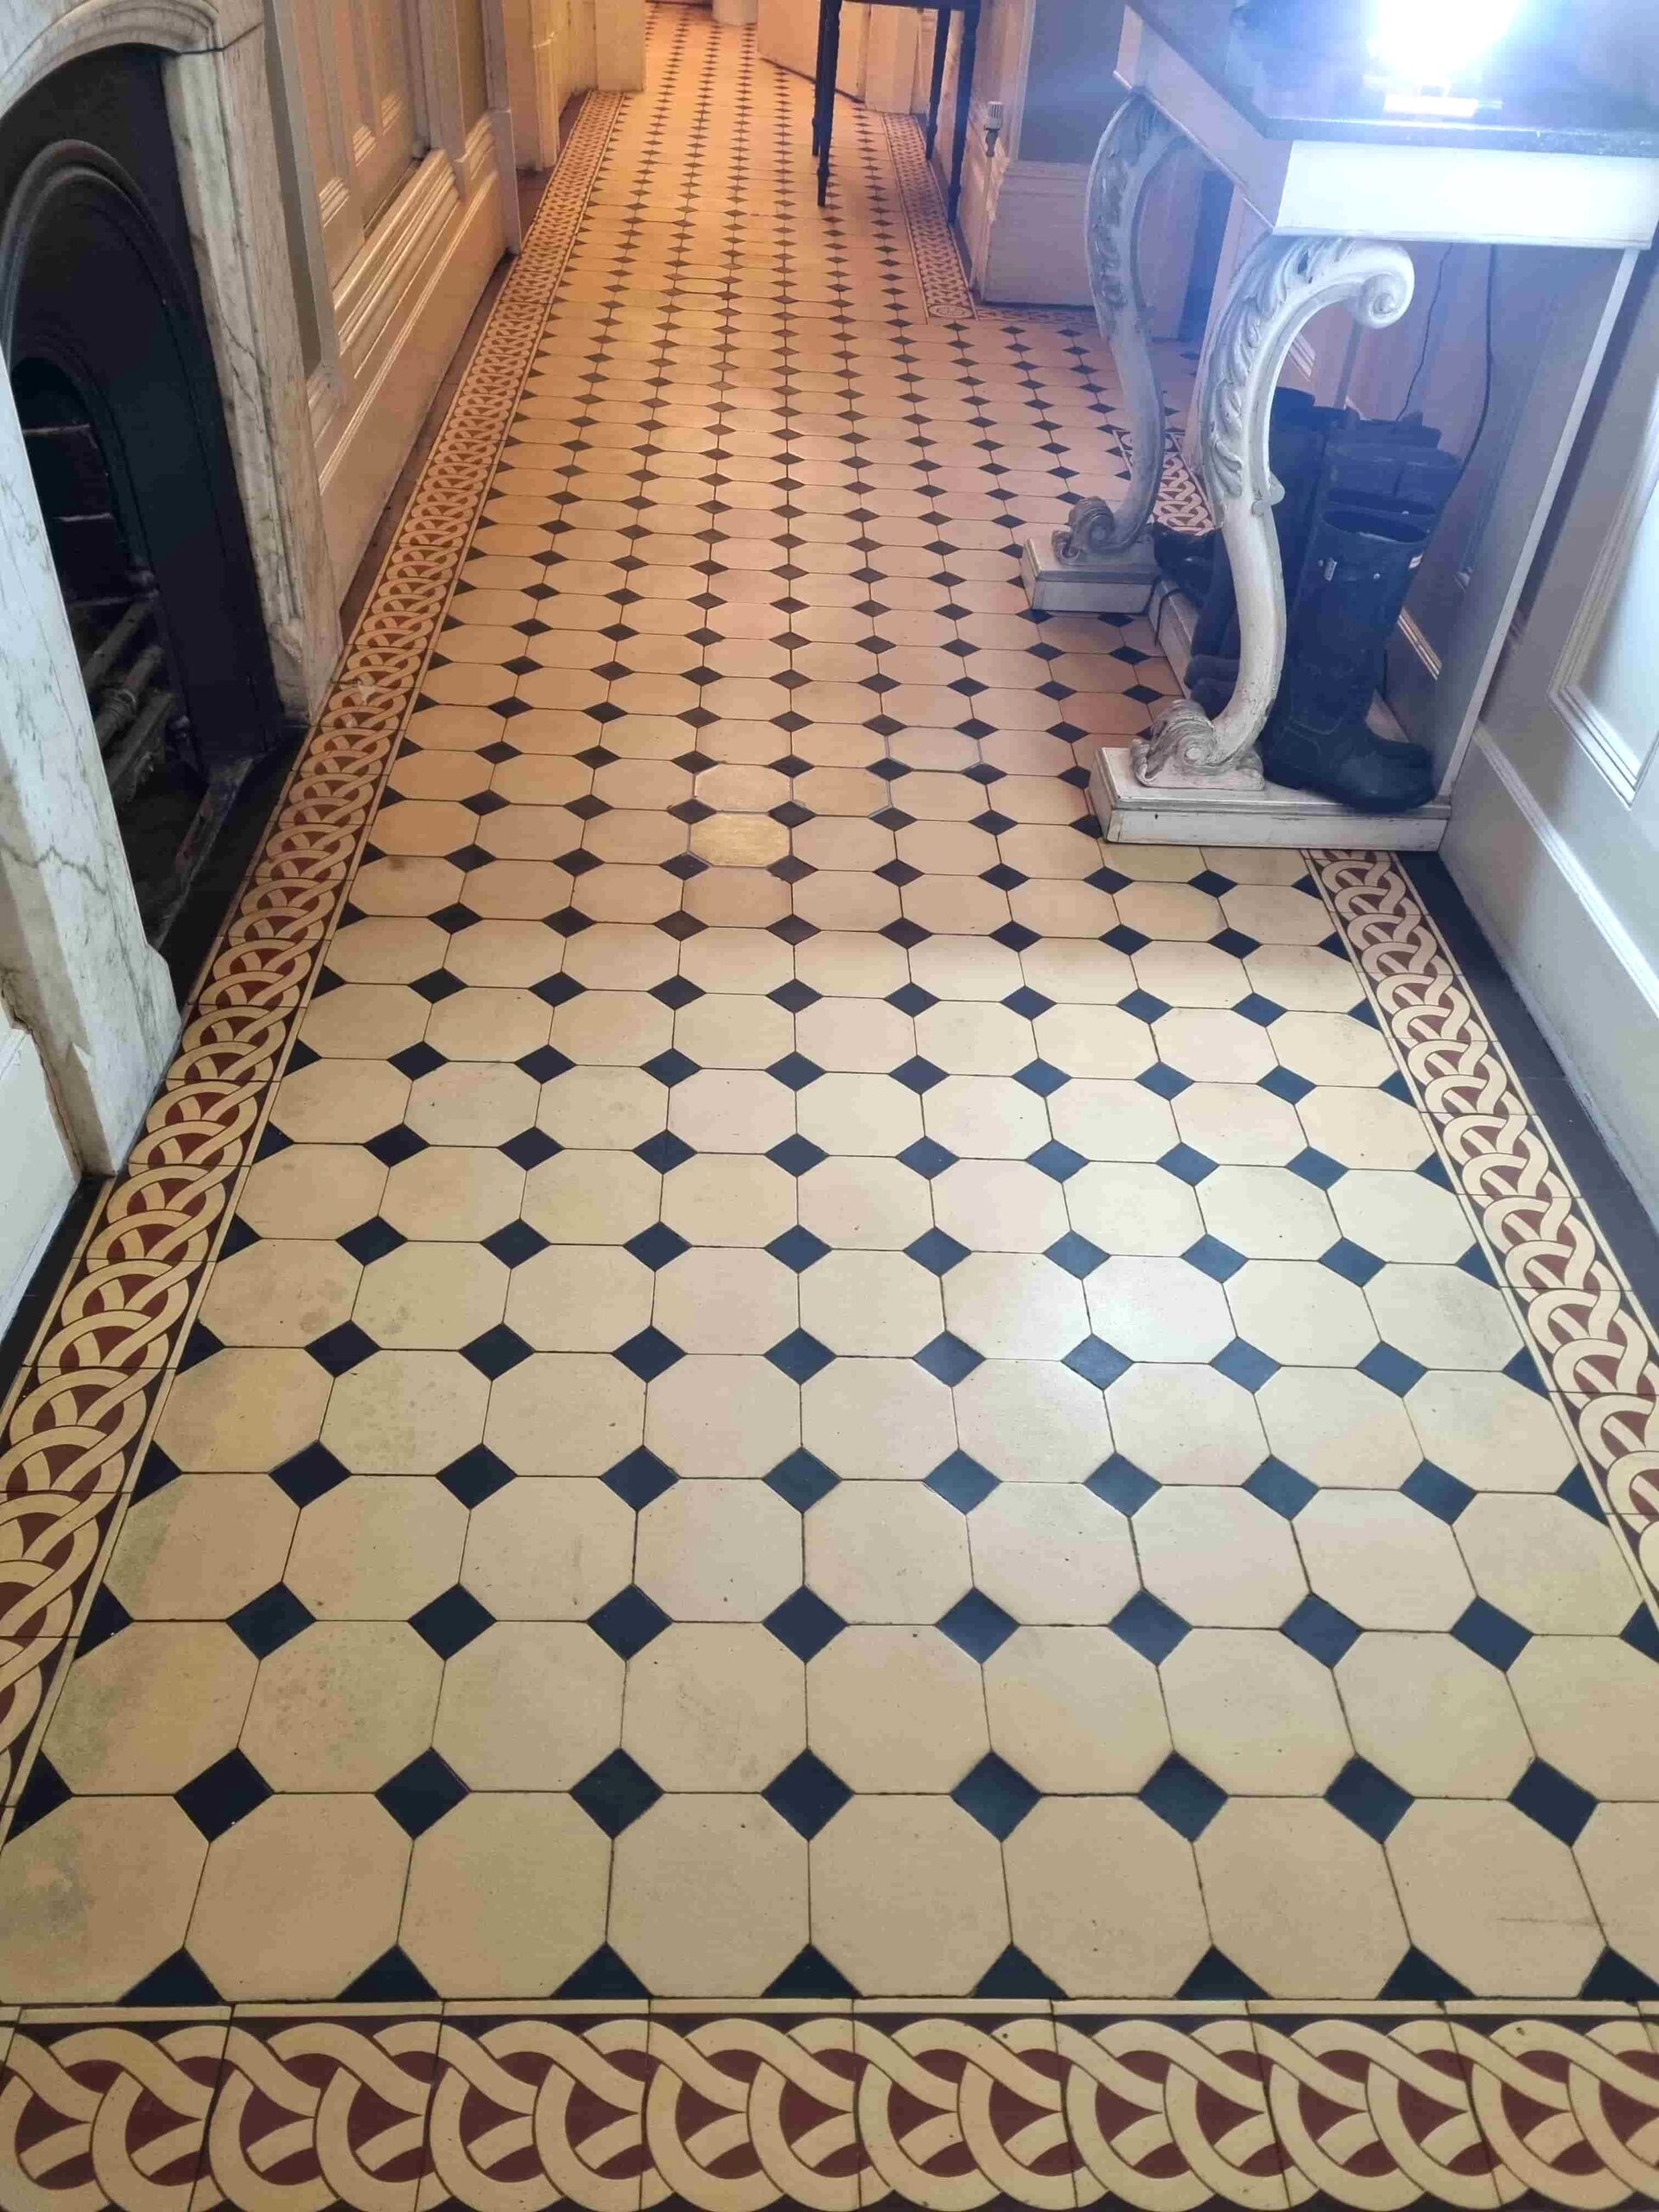
Victorian Tiled Floor After Renovation Handbridge Cheshire Victorian Tiled Floor After Renovation Handbridge Cheshire

The owner of the property was over the moon with the work and pleased that the work to restore the property to its former condition was nearing completion after what had been four years of restoration.
  Victorian Tiled Floor Before Renovation Handbridge Cheshire