Showing posts with label Replacement Tiles. Show all posts

Sunday, March 14, 2021

Tile Restoration Expert Details Floor Restoration Project in London

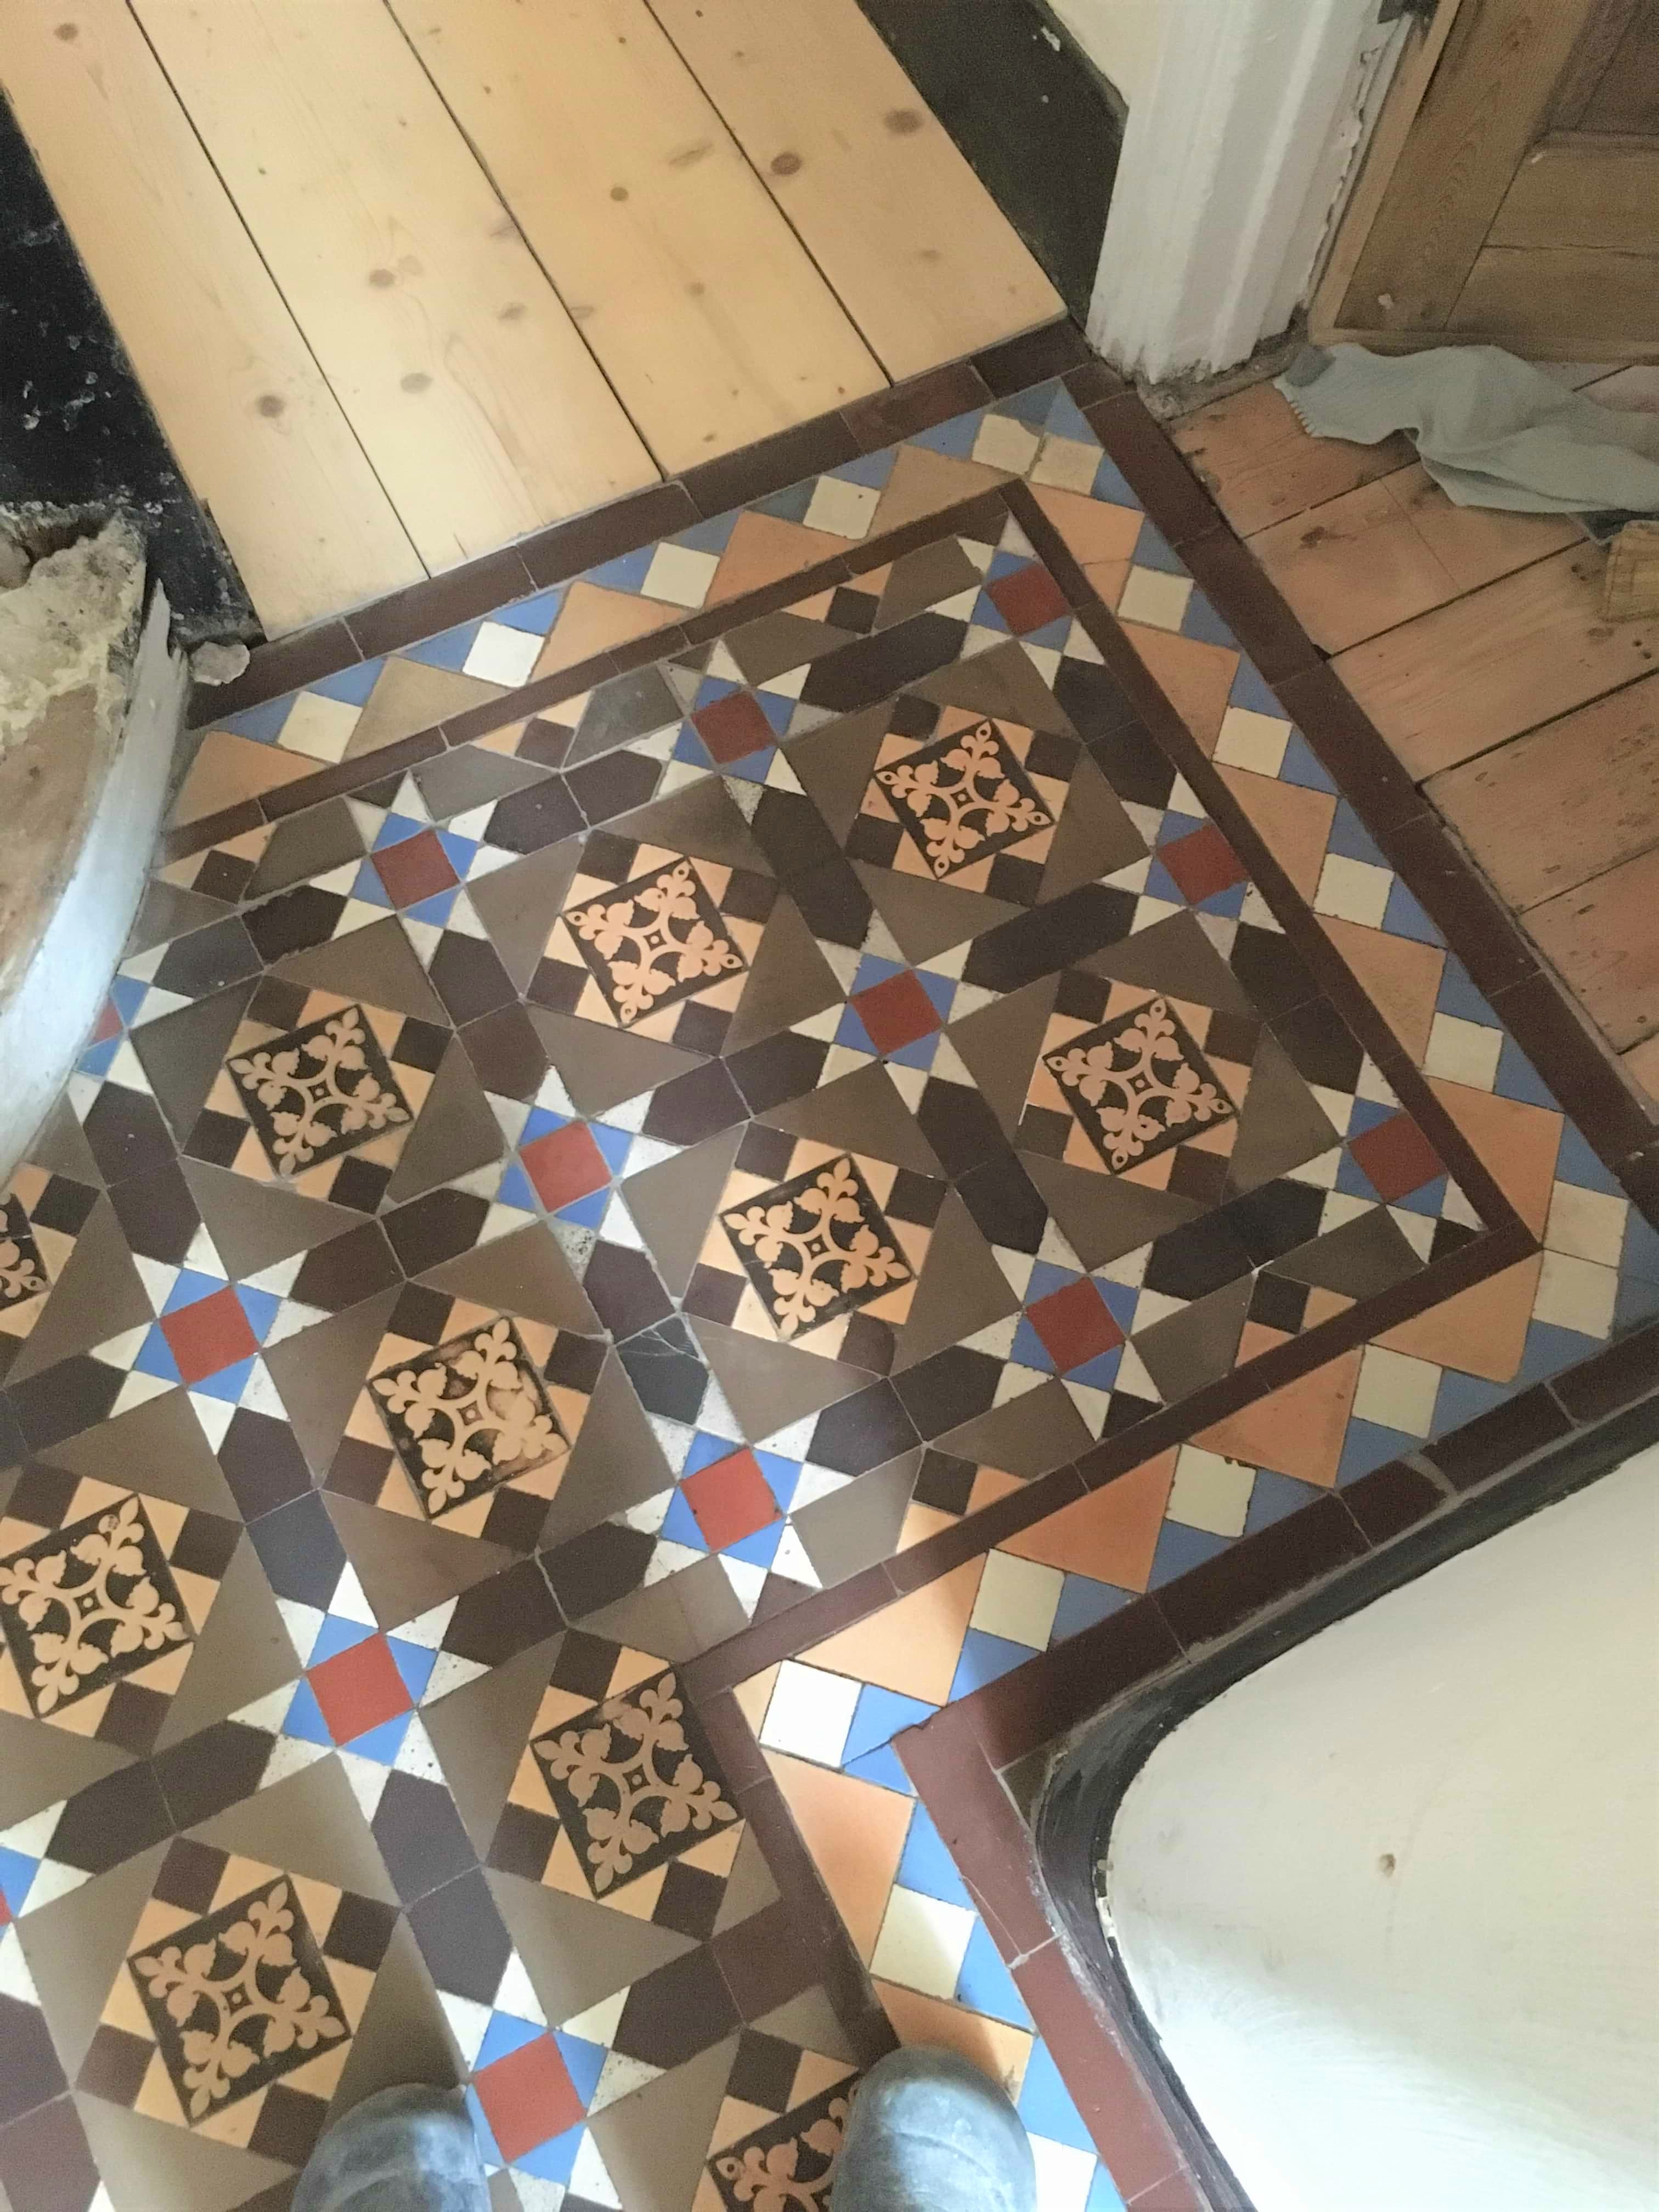
This client owned a property in Haringey, North London, which had a classic Victorian tiled floor laid in the hallway. Unfortunately, the floor was in a bad state, the tiles were dull and dirty and there was a missing section by the bottom of the stairs that had been back filled with cement. Fortunately for him however his neighbour decided to remove their front path which was made with matching tiles and so he was able acquire replacements from him. He then contacted us to see if we could use those tiles to fill in the missing ones and revive the whole floor with a clean and seal at the same time.

 
Victorian Tiled Floor Before Restoration Haringey

Before quoting for the restoration work, I paid a visit to the property to survey the floor. I can give quotes from photographs, but much prefer to visit and conduct a test clean, and in this case, I was able to check the spare tiles he had acquired. From that I emailed a quote which the client was happy with, so we arranged a date to return and do the work.

 
Victorian Tiled Floor Before Restoration Haringey

Cleaning and Reviving a Victorian Tiled Hallway Floor

This was a large job, so I teamed up with Jackson Davis the Central London Tile Doctor and whilst Jackson started on cleaning the floor, I took the reclaimed tiles outside and carefully grinded off the excess cement and adhesive from them and cleaned them by hand. We managed to do this by about 3pm. Jackson and I work on a lot of jobs together so it made sense to work as a bubble from the beginning of Covid so we could continue to work together, with two of us on the job it also means we can get the job done quicker.

Cleaning the floor involved applying a 200-grit diamond burnishing pad to the tile lubricated with a strong dilution of Tile Doctor Remove and Go, the slurry was then rinsed off the floor with more water and then extracted with an industrial vacuum. The process was repeated on stubborn areas until we were satisfied the tiles were really clean.

We then moved onto carefully removing the cement from the floor at the bottom of the stairs and cleaning up the base. Once done the newly renovated replacement tiles were laid in place using a rapid setting adhesive which meant they could be grouted later that day before heading home. The floor was then left overnight to dry off.


Sealing a Victorian Tiled Hallway Floor

We then returned the following day and took some moisture readings with the damp meter. The readings were within the expected range, so we were good to go ahead and apply the sealer. If the floor is not dry the seal will not cure properly, and this can lead to a patchy finish.

 
Victorian Tiled Floor After Restoration Haringey

Three coats of Tile Doctor Colour Grow were applied to seal the tiles. This is a colour intensifying impregnating sealer that works from with and will gives the Victorian tiles durable protection, ideal for a high traffic area such as the hallway. In addition, Colour Grow is a fully breathable sealer so it will allow for moisture to rise through the tile and evaporate, this is critical for floors of this age that will not have the benefit of a damp proof membrane installed under the floor.

 
Victorian Tiled Floor After Restoration Haringey

The hallway is now looking transformed by the work we did, we certainly thought so, but more importantly our client was very happy with the result and now has the floor he hoped for.


Friday, July 20, 2018

Victorian Hallway Tiles Renovated in Warwickshire

I was very pleased to be contacted by this client, they lived on a lovely residential road near the centre of Rugby in Warwickshire and the house featured a beautiful Victorian tiled hallway floor. As you will see from the pictures the patterns are stunning.

Victorian Hallway Floor Before Restoration Rugby

Over the years it had been badly damaged along the edges and a few tiles were cracked. It's difficult to know the cause of the damage but we normally find problems like these can be caused by settlement in the floor and if heavy objects are dropped on the tiles. High traffic areas such as the hallway do get a lot of general wear and tear which takes its toll on the floor. The owner of the house felt embarrassed with the condition of the floor and had decided it was time to have it restored.

Victorian Hallway Floor Before Restoration Rugby


Cleaning and Restoring a Victorian Tiled Hallway Floor

I identified the colours used in the floor, so I could source replacements and went through the floor with the client to mark the tiles that needed changing. We left a few tiles with minor damage so that the new tiles did not stand out and kept the floor authentic.

I managed to source some replacement tiles and started the job by removing and replacing all the damaged and loose tiles. Many of the replacements had to be hand cut to size, especially in the corners. It took some time but eventually, all the damaged tiles were removed and replaced, and the loose tiles refitted. The floor was then left for a few days to set.

On my return, I started by giving the floor a deep clean by spraying the tiles with a strong dilution of Tile Doctor Remove and Go. This was left on the tiles to soak in and break up the bonding agent in the old coatings. After ten minutes I worked the solution into the tiles with a black scrubbing pad fitted to a rotary floor buffer and then rinsed the resulting soil off the floor with water and extracted it using a wet vacuum.

Victorian Hallway Floor During Cleaning Rugby

The next step was to give the floor an acid wash using Tile Doctor Acid Gel, we don’t normally use acidic products on tile or stone however they are particularly good at dealing with alkaline mineral salts and removing grout smears. Old floors like these are particularly vulnerable to a natural process called efflorescence which results in white mineral salt deposits being left on the surface of the tile as the floor fully dries out and can interfere with the sealer. To counter this, the floor was given an Acid Wash with Tile Doctor Acid Gel which being in Gel form makes it particularly easy to control. The acid in the gel works by neutralising the alkalinity in the floor. The solution was scrubbed into the floor using a coarse diamond encrusted burnishing pad to improve the finish of the tiles and then thoroughly rinsed with water and extracted with a wet vacuum to remove any trace of cleaning product.


Sealing a Victorian Tiled Hallway Floor

After leaving the floor to thoroughly dry out over a few days I returned to complete the sealing process. On my return, the floor was sealed with few coats of Tile Doctor Seal and Go Extra which leaves a nice satin finish and being a fully breathable sealer is ideal for old floors that have no damp proof membrane and needs moisture to rise through the tile, so it can evaporate.

Victorian Hallway Floor After Restoration Rugby

The vibrant colours of the tiles were brought back to life and the floor was transformed. The client was delighted and wondered why they had not called upon us sooner!

Victorian Hallway Floor After Restoration Rugby


Source: Victorian Tile Cleaning and Renovation Service in Warwickshire

Tuesday, June 5, 2018

Quarry Tiled Kitchen Floor Renovation in Warwickshire

I took the photographs below at an old 1920’s house in Nuneaton where the owner was interested in restoring the original Quarry tiled floor in their Kitchen. Interestingly Nuneaton has a rich manufacturing history that included brick and tile making so it’s entirely possible these tiles were made locally at the Haunchwood Brick and Tile company.

Tastes change over the years and at some point in the past the Quarry tiles had been covered with a levelling compound so that linoleum could be installed on top. This meant that the first part of the job would be to remove the screed before I could clean up the tiles. On top of that It was clear as well that many of the tiles were damaged and would need replacing.

Quarry Tiled Floor Before Restoration Nuneaton

I worked out a quote which was agreed by the customer and started looking around for matching replacement tiles, fortunately I was able to track some down at Warwick Reclamation who stock thousands of quarry tiles in many of the common period sizes.


Restoring an Original Quarry Tiled Kitchen Floor

On day one I set about carefully removing the screed with a hammer and chisel and also the damaged tiles, so they could be replaced. With the tiles removed we it was clear some parts of the subfloor were cracked and needed to be rebuild with fresh cement.

Quarry Tiled Floor During Restoration Nuneaton Quarry Tiled Floor During Restoration Nuneaton

Once the floor was ready the replacement Quarry tiles were fixed in place and once the adhesive was dry they were grouted in.

To remove the remaining screed and salt damage from the surface of the tiles I used a set of coarse milling pads which are applied with water for lubrication. The process generates a lot of soil, so the floor needs to be rinsed with water and the soil extracted with a wet vacuum after each pad.

The next step was to pre-treat the tiles with Tile Doctor Remove and Go in order to remove old contaminants such as old oils and then treat the floor to a deep clean with Tile Doctor Pro-Clean which was scrubbed in with black scrubbing pad.

Old floors like these don’t have a damp proof membrane so the last step in the restoration process was to counter any inherent salt issues in the floor that might reappear later as white efflorescence salt deposits. This is done by giving the floor an acid rinse using Tile Doctor Grout Clean-up which is scrubbed into the tiles, neutralising the salts, this product also removes old mineral deposits and grout smears.

The floor was given a final rinse with water to remove any traces of products used and then as much water and moisture as possible was extracted using a wet vacuum. The floor was then left to dry out for a few days.

Sealing a Quarry tiled floor

When I returned my first job was to take multiple readings around the floor using a damp meter to verify the floor was dry and ready for sealing. The extra drying time had done the trick and I was able to seal the floor using multiple coats of Tile Doctor Seal and Go Extra which is a fully breathable sealer that can cope with any potential moisture problems, it also leaves a nice sheen finish that brings the best out of Quarry tiles.
Quarry Tiled Floor During Restoration Nuneaton Quarry Tiled Floor During Restoration Nuneaton
In total the restoration took 4 days to complete and had completely restored the Quarry tiled floor close to what they must have looked like back when they were installed nearly a hundred years ago. Source: Quarry Tile Cleaning and Restoration Service in Warwickshire