Wednesday, November 30, 2016

Restoring old Red Sandstone Steps

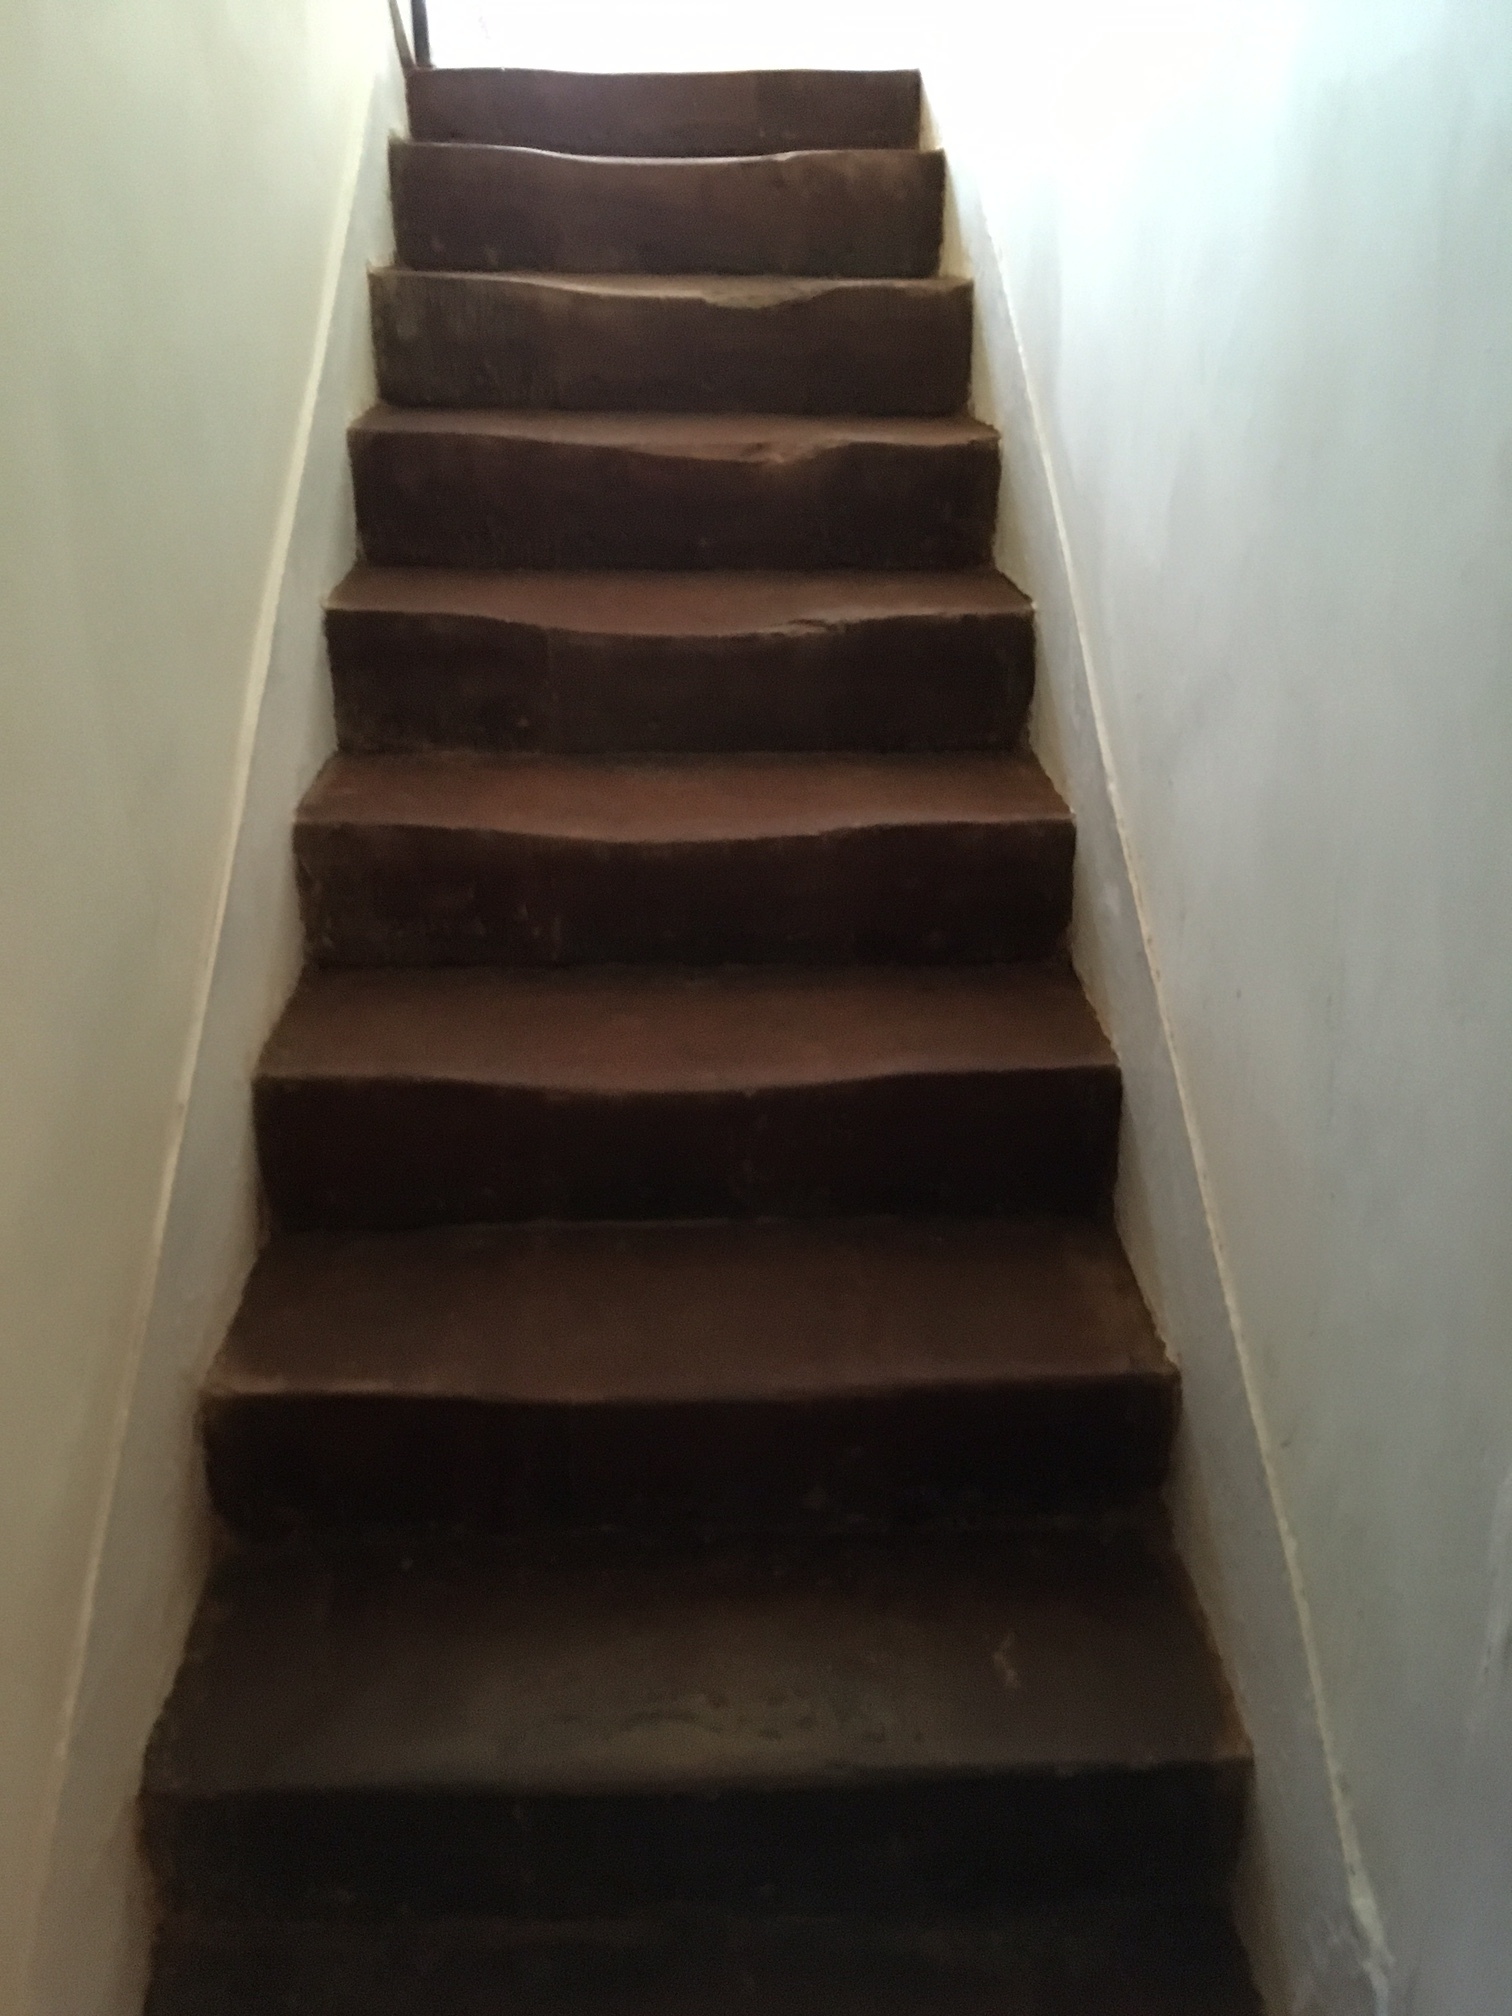
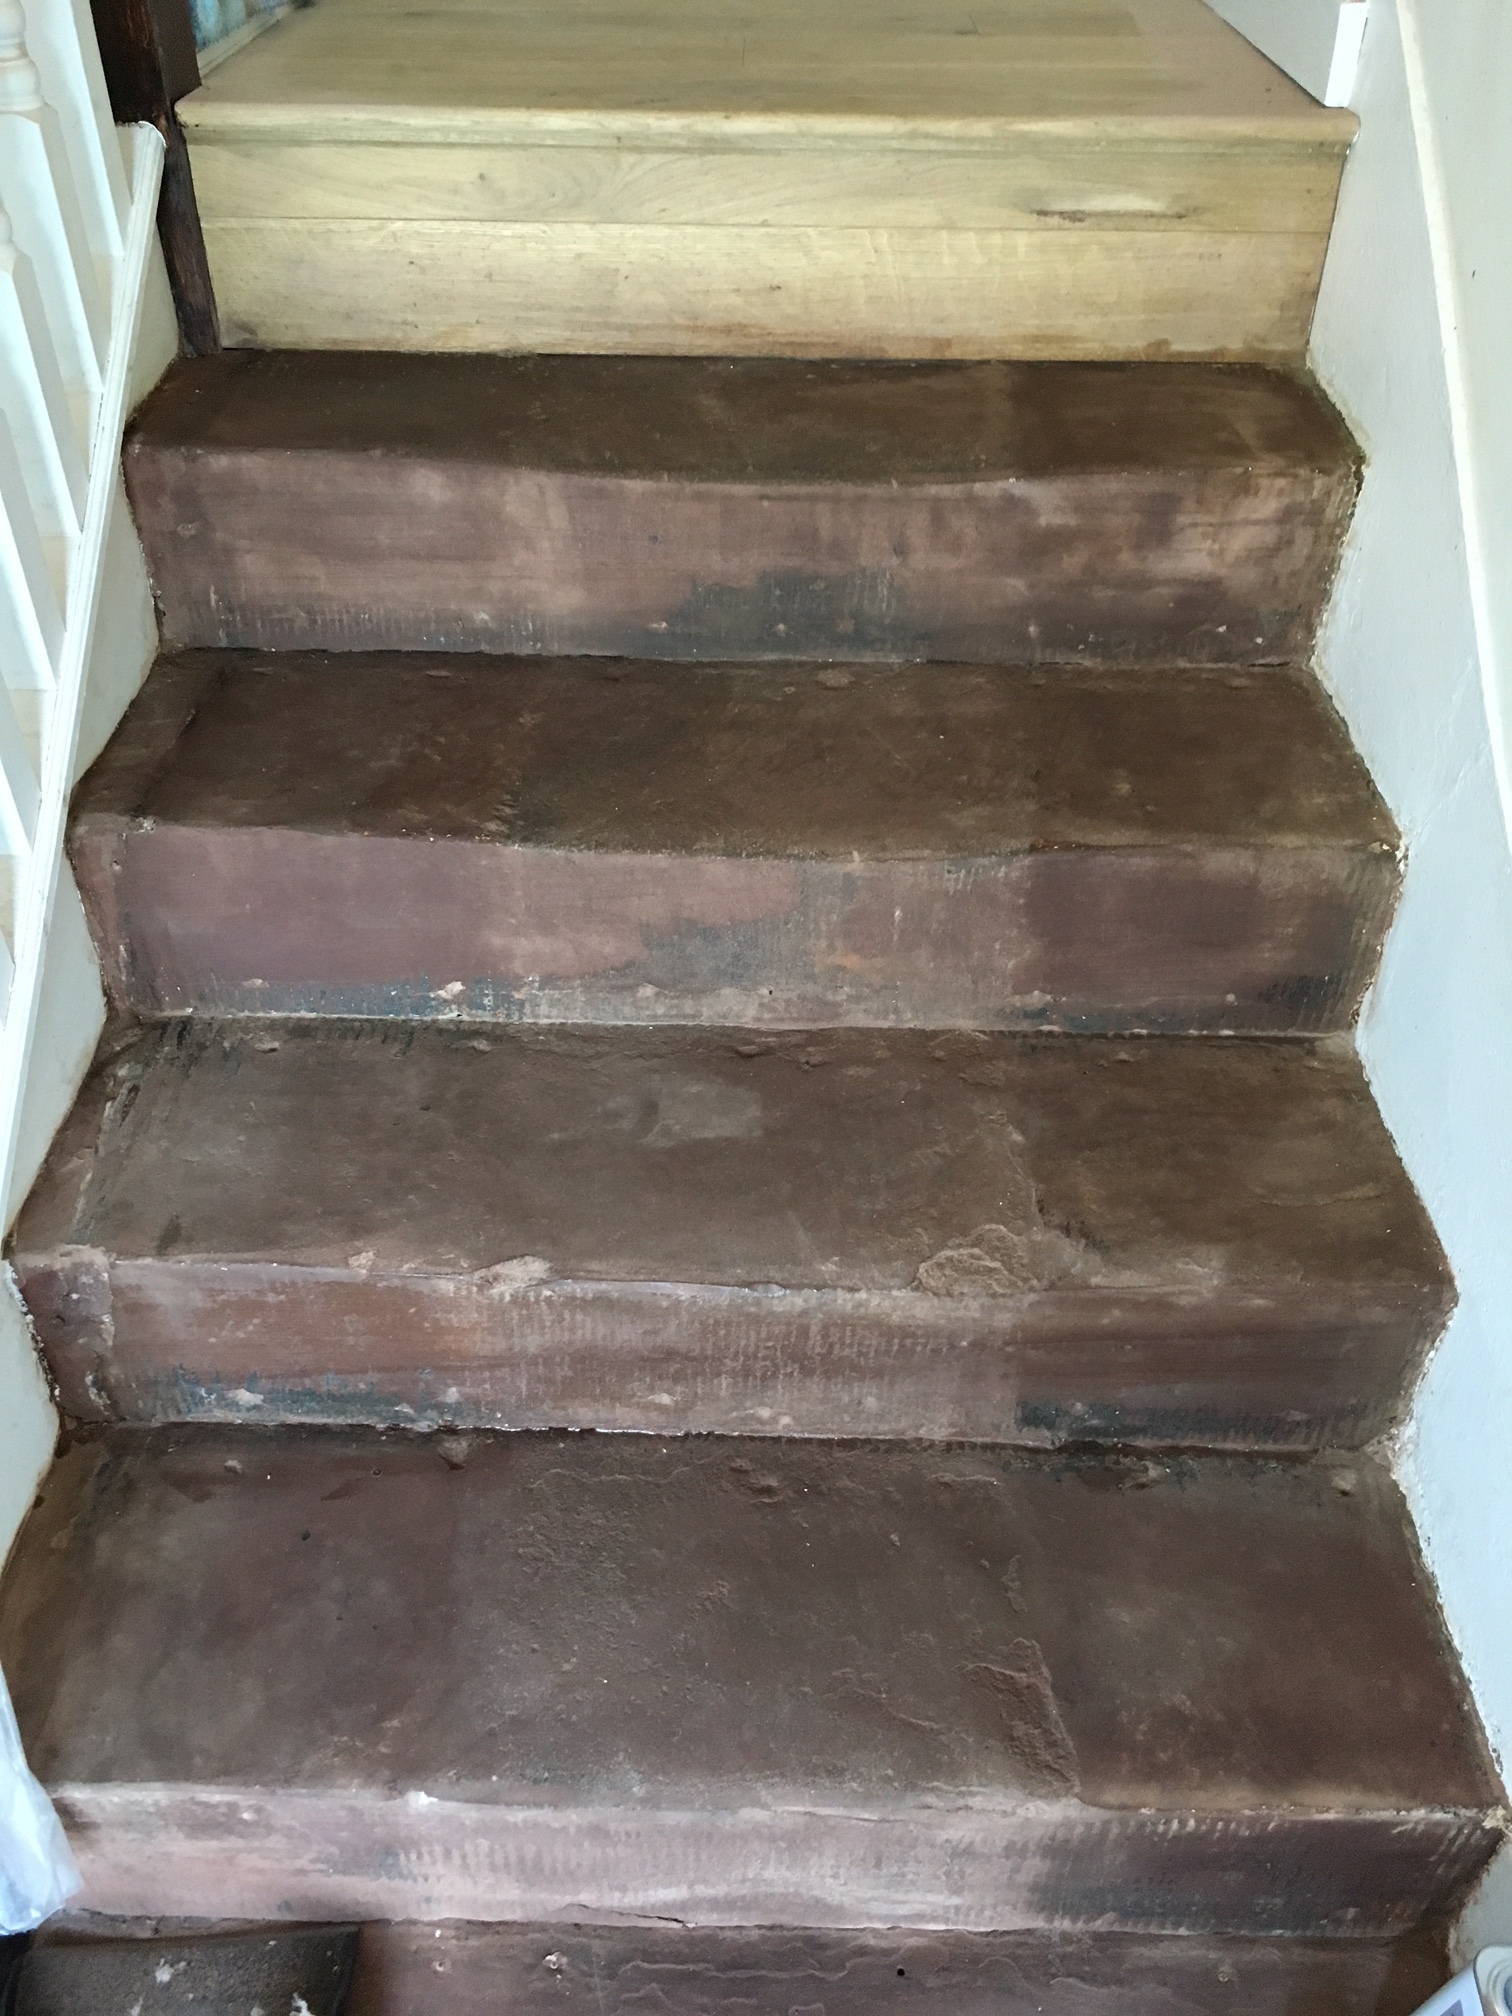
We often get called out when other trades with less experience in stone cleaning fail to make a difference which was the case with these Red Jurassic Sandstone Stone steps at a house in Preston which had been stained with paint splashes and years of grime. The customer had tried several solutions to restore these steps including having a go themselves buy applying some Chemicals from a local Tile Shop, however again this didn't achieve the results the customer wanted so they called us after we were recommended to them.
Red jurassic sandstone steps before Red jurassic sandstone landing before cleaning

Burnishing Red Jurassic Sandstone

I took a look at the Sandstone and tested a few methods before deciding to go with a process called Burnishing which involves the application of diamond encrusted burnishing pads. The pads come in a set of four and are applied in sequence from Coarse, through medium, fine and super fine; you need to use a little water to lubricate as you go and also rinse with water between the application of each pad. Naturally due to the tight space I couldn’t use a set of full size pads, only he smaller 6 inch pads which fit a small hand buffer.
Red jurassic sandstone steps after burnishing

Sealing an Indian Sandstone Tiled Floor

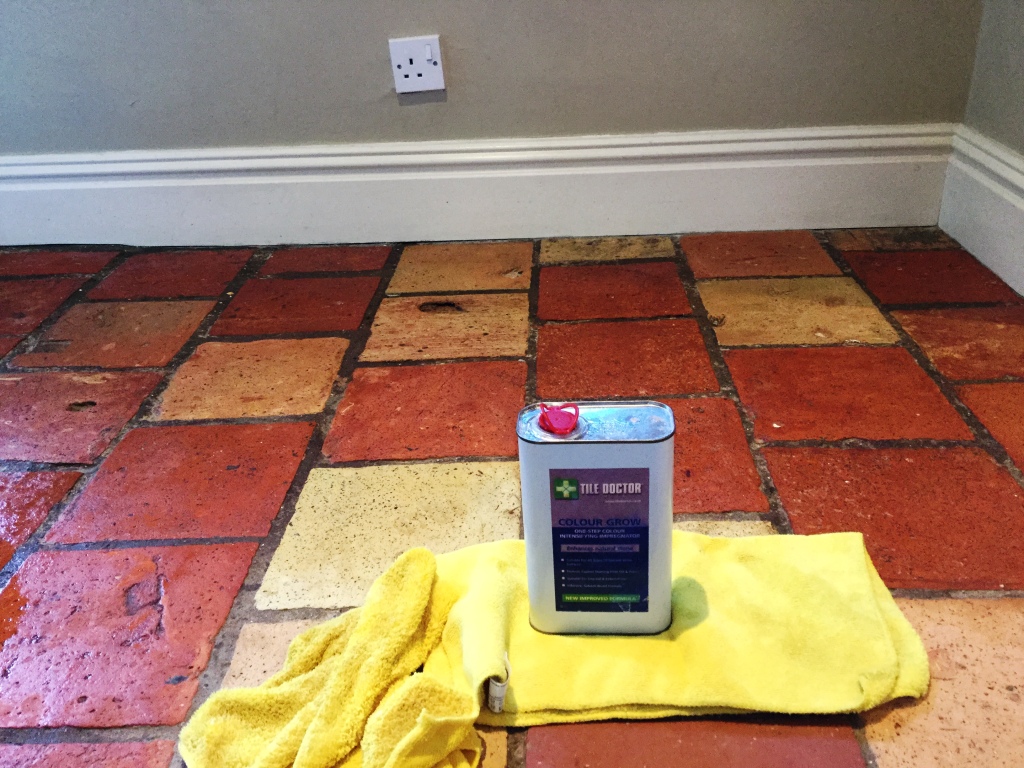
The floor was left to dry off overnight and then I returned the next day to seal the whole floor with two coats of our impregnating sealer Tile Doctor Colour Grow. The sealer fills the pores of the stone to prevent ingrained dirt and stains, while also emphasising the natural colours in the stone.
Red jurassic sandstone steps after sealing Red jurassic sandstone landing after sealing
The full process successfully restored the red colour in the Sandstone and have come up quite well considering they are over 300 years old.     Source: Sandstone Cleaning and Restoration Service in Lancashire

Tuesday, November 29, 2016

Safety Precautions to Take When Using a Cement Floor Sealer

When you decide to use a cement floor sealer, make sure that you pay a lot of attention and take all the necessary precautions for your health and safety. This is because cement floor sealers are very dangerous and you must protect yourself against its hazards.

1 – Wearing Protective Clothing

Remember to wear protective clothing whenever you are going to handle or apply a cement floor sealer. The fumes and vapors produced by a cement floor sealers can be very dangerous and if you inhale them, they may cause nausea, fatigue, headache and dizziness.

You also need to wear protective eyewear because cement floor sealers can cause irritation to your eyes. You should never use cement floor sealers with bare hands because it tends to cause cracks, rashes or dryness to your skin.

2 – Ventilating the Environment

Due to the high toxicity of the fumes produced when utilizing a cement floor sealer, it is highly important that the place where the sealer is being applied should be ventilated properly to reduce the danger caused by the poisonous fumes. If a worker inhales or swallows cement floor sealer, it may cause great pulmonary damage, vomiting or severe pneumonia.

3 – Keeping Cement Floor Sealer Away from Open Flames

Cement floor sealers are highly flammable and can cause explosions or fires very easily. For this reason, you are advised to keep cement floor sealer at a distance from fire and heat. You are also advised to store cement floor sealer in its own container and its storage place should be specific for flammable liquid substances.

4 – Preventing Water Pollution


Apart from causing damage to human health, cement floor sealers can also pollute lakes, rivers, seas and oceans in a terribly disastrous way. It can poison the water and consequently kill fish and other living organisms that live there. Cement floor sealers should be kept away from any bodies of water in order to prevent water pollution.

5 – Smoking Strictly Forbidden

Workers should not smoke when they are using cement floor sealer. When their work is over, they should wash thoroughly before going to smoke, drink, eat or use the toilet. If your clothing has been contaminated by the cement floor sealer, take it off immediately.

6 – First Aid Procedures

If your hands come in contact with cement floor sealer, apply a suitable hand cream or lotion to protect the skin of your hands against cracking and dryness. From a general perspective, a person needs to breathe fresh air and take some rest in case of exposure. If the person falls unconscious, you must never give him or her a drink.

In case a person inhales the toxic fumes of a cement floor sealer, make sure that he or she is breathing well and if the person still has difficulty to breathe, provide him or her with oxygen or artificial respiration. On the other hand, if the person is poisoned by cement floor sealer through swallowing, tell him or her to wash the mouth thoroughly and drink lots of milk or water. Do not induce the person to vomit. If he or she vomits, keep the head at a low position and take the person to hospital for medical attention as soon as possible.


Wednesday, November 23, 2016

Tiling a damaged Victorian hallway in North London

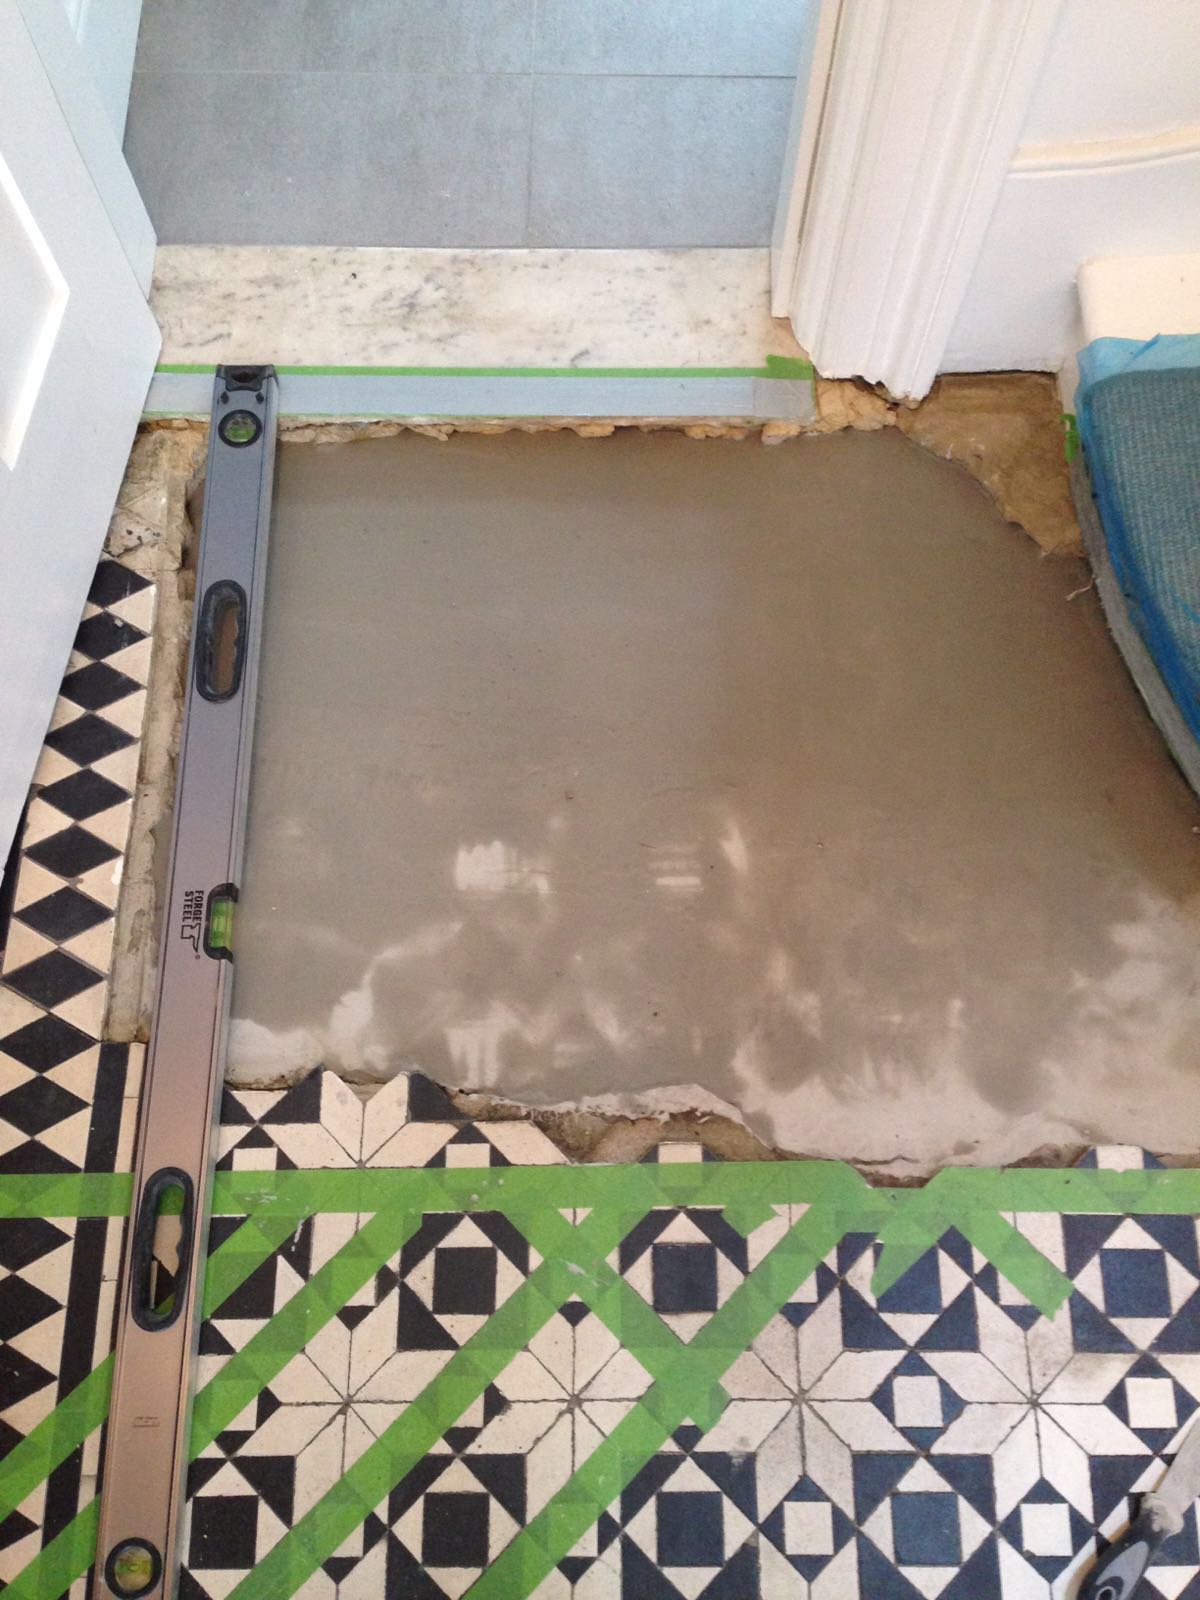
A customer in Islington had part of their Victorian tiled floor damaged due to building work and contacted us to ask if it was possible to restore it back to life as they didn’t want to lose such an original feature from their house. Victorian tiled floors are quite popular in the UK and we regularly complete restoration projects of this type so we were confident it could be restored.

Victorian tiled floor before repair Islington Victorian tiled floor before repair Islington

Laying Victorian Floor Tiles

Finding replacement tiles was the key to restoring this floor however over the years we have built-up a list of UK suppliers who specialise in Victorian tiles so fortunately we were able to source a matching set and completely rebuild the area at the bottom of the stairs with replacement tiles.

Cleaning Victorian Tiles

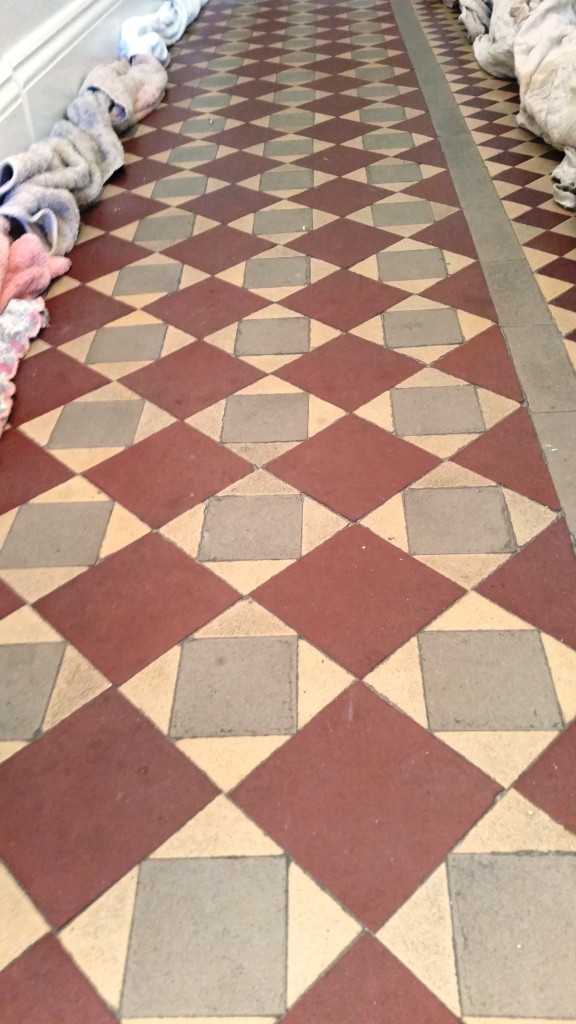
The next task was to set about cleaning the tiles using Tile Doctor Pro-Clean worked in with black scrubbing pads fitted to a rotary buffer machine. The soiled solution was then extracted using a wet vacuum and the floor rinsed with water. Final step of the cleaning process was to give the tiles an acid wash using Tile Doctor Acid Gel which removed old traces of grout and other mineral deposits such as efflorescence from the floor. Once happy that is had done its job is was extracted from the floor and then the tiles were given a thorough rinse and left to dry off overnight.

Sealing Victorian Tiles

Next day we sealed the floor using Tile Doctor Colour Grow which is a breathable solvent based sealer, and is also very good at lifting the colours out of the clay tiles as providing a seal that will help protect the tiles from stains going forward.

Victorian tiled floor before repair Islington Victorian tiled floor before repair Islington

Another fantastic restoration completed and well worth the time that went into it, it’s great to see such a lovely feature in a house of this age which I’m sure adds value to the property.


Source: Victorian Tile Cleaning and Restoration Service in North London

Tuesday, November 22, 2016

How to Prevent Heat Loss Through Your Basement Cement Floor

Insulating a basement cement floor is the simple way to prevent heat leaking through the cement.

What You'll Need
  • 1 inch XPS rigid foam insulation
  • Plywood
  • Screws
  • Mastic
  • Mesh tape

Step 1 - Foam

Begin by cleaning the basement cement floor thoroughly to remove all dirt and possible mold. Once you’ve done this, cover the floor with 1 inch XPS rigid foam insulation, packing the sheets together as tightly as possible. To prevent heat loss, secure in place with mastic and use mesh tape over all the joins.

Step 2 - Plywood

Lay 1/2 inch plywood over the top on the insulation and screw in place, with screw going down into the basement cement floor. This will keep the floor steady, and the insulation will also provide some cushioning for the feet. Top this with another layer of ½ inch plywood. Screw this into the layer of plywood beneath it.

Step 3 - Flooring

At this stage you have the choice of either leaving the plywood as it is or putting down flooring. The latter is the better option. Without it, the plywood will soon turn dirty as people walk across it. If putting down carpet or a floating wood floor, be certain to add an extra underlay, which will give more insulation.


Source: www.DoItYourself.com

Monday, November 21, 2016

Renovating a Victorian Tiled Hallway

These photographs are from a dirty Victorian tiled hallway floor at a house on Mersea Island which is south of Colchester in the Colne Estuary. The tiles were in good physical condition but the sealer had worn down and dirt had become lodged in the pores of the tile causing them to look dull and faded.

Dirty victorian floor before cleaning Mersea Island

Deep Cleaning Victorian Floor Tiles

To strip off any remaining old sealer and to give the tiles a good deep clean I applied a strong 1:3 dilution of Tile Doctor Pro-Clean with water and worked it into the floor using a rotary buffing machine fitted with a black scrubbing pad. The now soiled cleaning solution was rinsed off and extracted using a wet vacuum and I could see there were some stubborn stains that would need extra work. To tackle these I used a solution of Nanotech HBU cleaner which was applied and left to dwell for fifteen minutes before being scrubbed in using the black scrubbing pad as before. The dirty solution was then removed using a wet vacuum and the floor was rinsed thoroughly with water to ensure all trace of cleaning products was removed.

Sealing Victorian Floor Tiles

The Victorian tiles were left to dry out for a few days before we returned to seal the floor using numerous coats of Tile Doctor Seal and Go which is our recommended sealer for Victorian tiles as it gives a nice low sheen effect that enhances their appearance as well as protecting them from future staining.

Dirty victorian floor after cleaning Mersea Island


Source: Victorian Cleaning and Renovation Service in Essex

Sunday, November 20, 2016

How to Fill Holes in Concrete Basement Floors

The holes in concrete basement floors can be filled, but you have to repair the concrete first. This step will make the patched hole a more permanent solution.

What You'll Need
  • A hammer
  • A chisel
  • A vacuum
  • A bucket
  • Water
  • A sponge
  • Concrete adhesive
  • Concrete patch material
  • A 2x4 post
  • A trowel

Step 1 – Removing the Broken Concrete Pieces

Use a hammer and chisel to break all of the loose concrete pieces free from the flooring.

Step 2 – Removing Small Loose Particles

Use the vacuum to remove all of the loose concrete particles. Fill a bucket with warm water. Immerse the sponge in the bucket. Squeeze out any excess water. Use the sponge to clean the hole in the concrete floor. Allow the area time to dry.

Step 3 – Applying the Concrete Adhesive

Read the instructions provided with the concrete adhesive. Apply the concrete adhesive to the inside of the hole.

Step 4 – Mixing the Concrete Patch Solution

Read the instructions to the concrete patch material. Mix the material according to the directions.

Step 5 – Applying the Concrete Patch Mixture

Fill the hole in the concrete with the patch mixture. Be sure the mixture fills all of the crevices. Drag the 2x4 post across the patch mixture to level it. Use the trowel to smooth the surface of the mixture.

Step 6 – Curing the New Concrete

Allow the concrete patch mixture at least twenty-four hours to cure.


Tuesday, November 15, 2016

Renovating a Dirty Quarry Tiled Hallway

What causes a tiled floor to become dull and discoloured? Typically, it's a combination of heavy soil build-up and an ineffective approach to cleaning and maintenance. Such was the case with this heavily soiled Quarry tiled hallway floor in Bedford. A further problem was that the tiles were very pitted and at some point, in the past they had been filled with grout, additionally, when I took a closer inspection of tiles, I established that there was a wax sealer present on the floor that has bend topped up from time to time - without the tiles being deep cleaned. This has caused an accumulation of soil trapped between multiple layers of wax. The result? Extremely dull and unattractive Quarry tiles that the customer was desperate to get back to looking their best.

Quarry tiles before cleaning Bedford

Cleaning a Very Dull and Dirty Quarry Tiled Hallway

My first course of action was to vacuum the floor thoroughly to remove any small quantities of grit or loose debris. I then masked up the carpet and radiator to protect them before mixing up a strong dilution of Tile Doctor Pro Clean mixed with hot water. This was then applied to the surface of the floor in small areas of three square metres each. The high alkaline cleaning product was left to dwell for a short period before I agitated the tiles with a black stripping pad to remove the heavy soil. The resulting cleaning slurry was extracted with a wet vax machine. This cleaning process was repeated throughout the entire area. Inaccessible places, such as under the radiator and stairs, were manually cleaned using hand brushes. I then dried the floor with a fan for 30 minutes, before mopping on a solution of the acid-based Tile Doctor Grout Clean Up to neutralise the Pro Clean and removing the dirt on the grout lines with the hand brushes.

Sealing a Quarry Tiled Hallway

The area was allowed to dry completely overnight. I returned the following day and applied two different types of sealer in two separate test areas so the customer could get a better idea of the final effect that would be achieved. The customer could've opted for Tile Doctor Seal and Go, which is a topical sealer that provides a high quality, durable low-sheen finish. However, after further discussion, it was decided that the best product would be Tile Doctor Colour Grow, which is an impregnating sealer that penetrates the tiles and provides a more natural finish, emphasising the colours in the stone.

Quarry tiles after cleaning and sealing Bedford

As you can see from the photos above, a deep clean and fresh seal truly worked wonders for these Quarry tiles. Both myself and the customer were very happy with the outcome of the work.


Source: Quarry Tile Cleaning and Renovation Service in Bedfordshire

Thursday, November 10, 2016

Renovating Dull and Tired Slate Floor Tiles

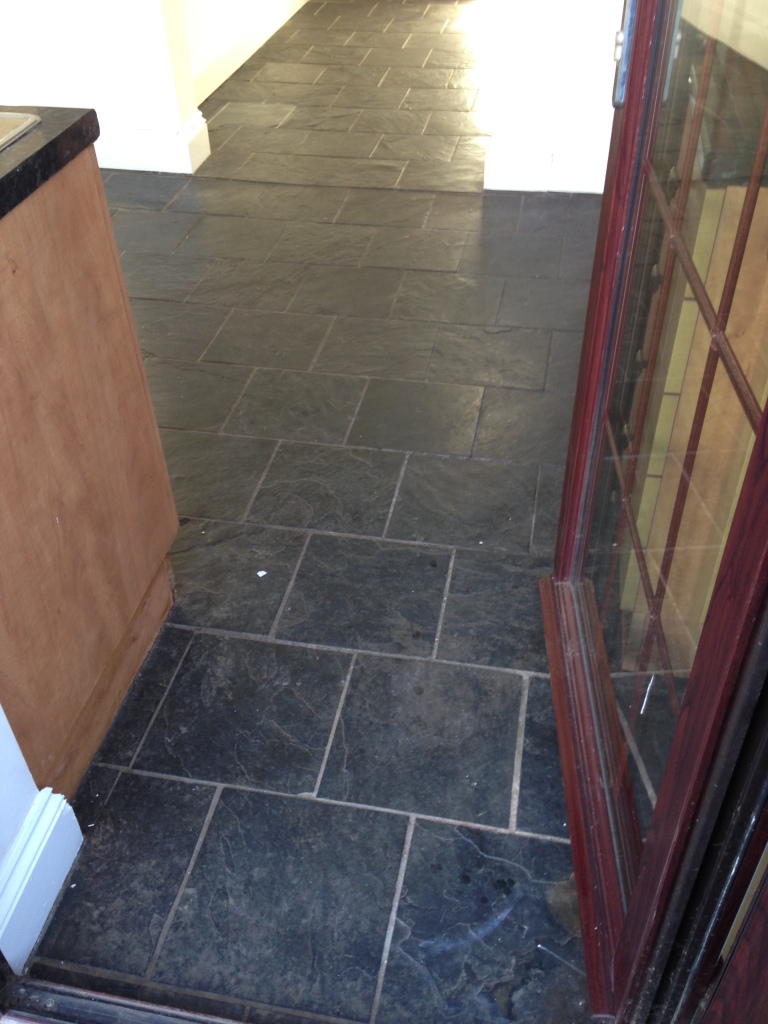
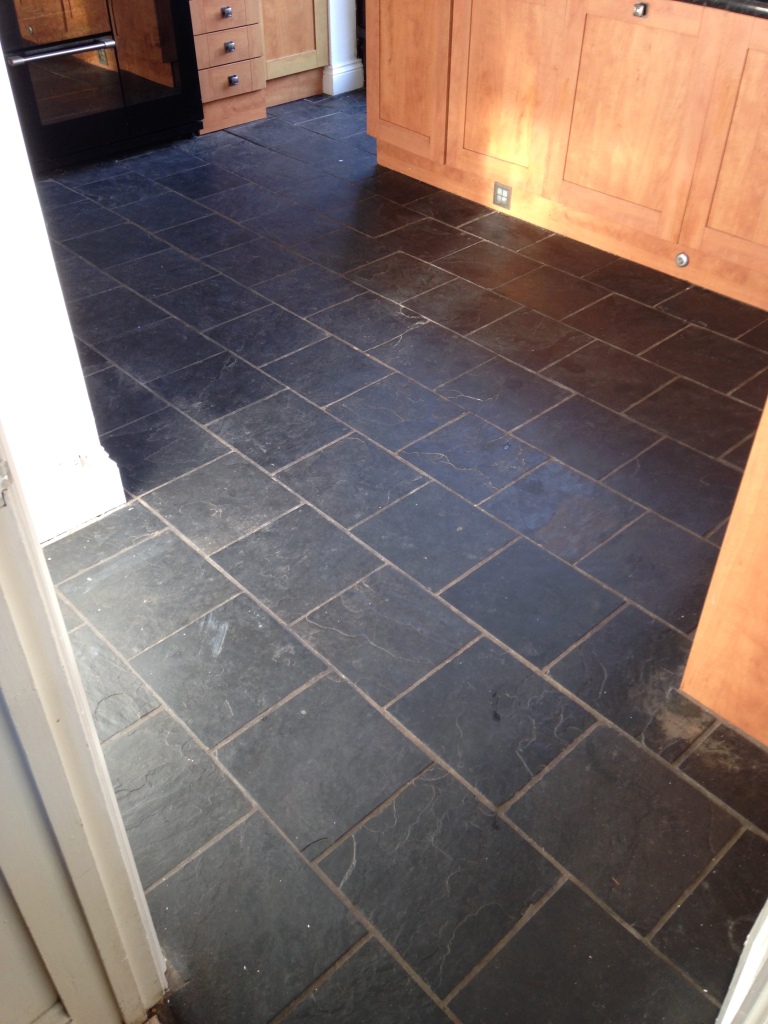
This Slate tiled floor at this house in the Pontypool was laid over ten years ago in the kitchen/dining room. The floor had ground in dirt into the tiles and grout which the client wanted brought back to life.

Slate floor before cleaning Pontypool Slate floor before cleaning Pontypool

Repairing and Cleaning Dirty Slate Tiles

I could see the tiles would need to be deep cleaned so I started the cleaning process with a strong combination of Tile Doctor Remove and Go to strip away the old sealer and Tile Doctor Pro-Clean to get the tiles as clean as possible. The solution was scrubbed into the tile and grout using a rotary machine fitted with a black 17” scrubbing pad. The floor was then rinsed with water and the soiled residue was extracted with a wet vacuum. This process was repeated until I was satisfied all the sealer and dirt had been removed from the tile and then I concentrated my attention on the grout lines using more Pro-Clean and a stiff wire brush to get them as clean as possible. With the tile and grout as clean as it was possible to get it, I gave the whole floor a final rinse to neutralise the cleaning products and then extracted as much moisture as possible from the floor with a wet vacuum and left the floor to dry overnight.
Sealing Slate Tiles

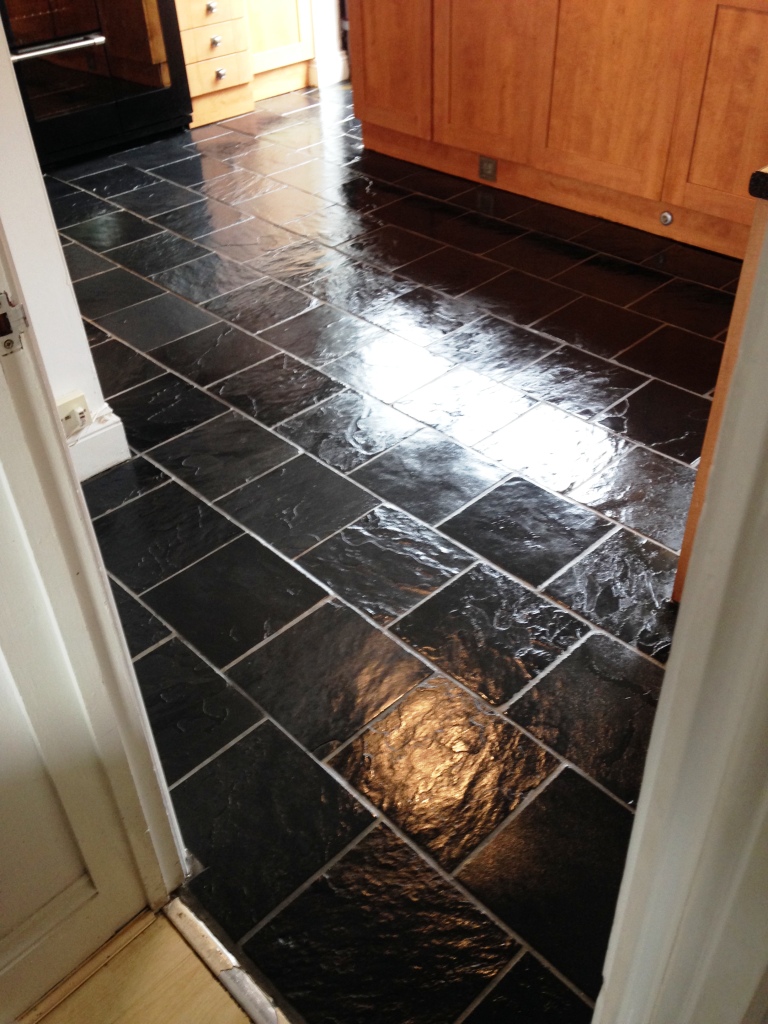
When I returned to the property I made sure the floor had dried by checking for any dampness with a damp meter. If you neglect to remove all excess moisture from the surface of the tiles before sealing it will impact the effectiveness of the sealer. Once satisfied that the floor was completely dry, I proceeded to seal the tiles using Tile Doctor Seal and Go which will protect the floor from staining in the future and adds a nice sheen to the surface. The Slate was quite porous so I found eight coats of sealer were needed to fully seal the floor.

Slate floor after cleaning Pontypool Slate floor after cleaning Pontypool

I think you will agree the floor now looks amazing!


Source: Slate Tile Cleaning and Renovation Service in Monmouthshire

Wednesday, November 9, 2016

Renovating Damaged Stone Shower Tiles

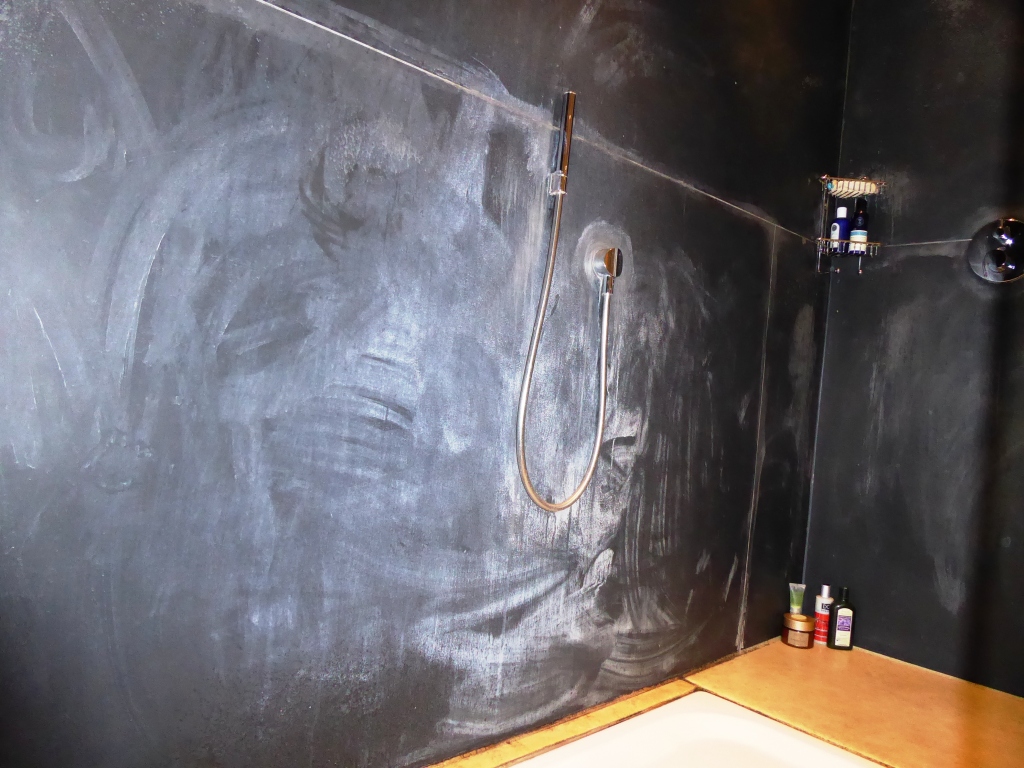
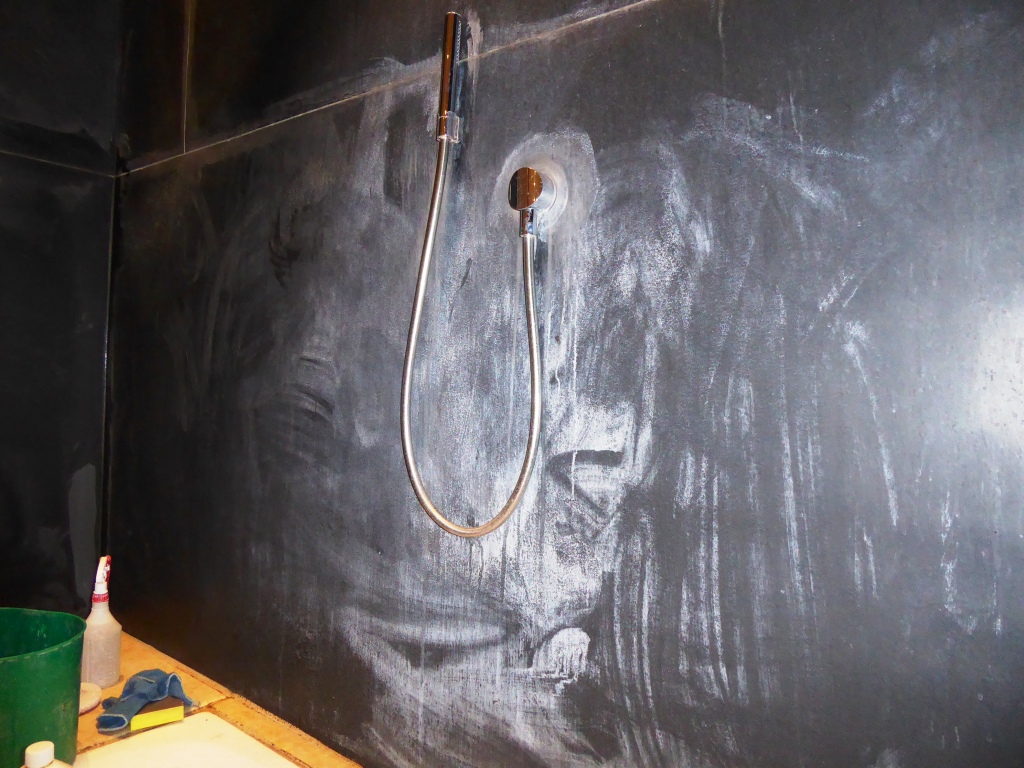
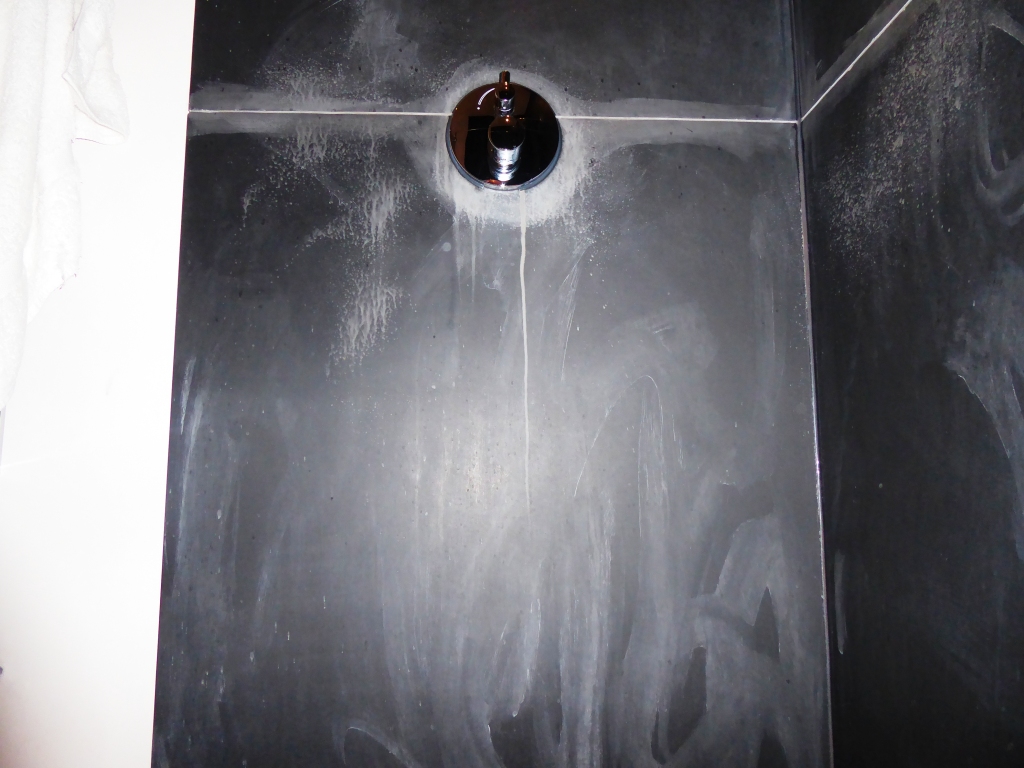
One problem we encounter a lot at Tile Doctor is damaged caused to natural stone tiles by unsuitable household cleaning products. This customer, who lives in the small West Surrey village of Churt, had done this by attempting to use Cilit Bang, which is an acidic product, to remove limescale from his fantastic Slate tiled shower cubicle. While the product may indeed remove Limescale, it does say on the label that it should not be used on natural stone.

Slate shower before cleaning Churt Slate shower before cleaning Churt

Putting these types of products in contact with acid-sensitive stone typically results in some sort of etching, however, I had never before seen the type of damage that had occurred on these Slate tiles. At first, I thought the damage - which appeared as a sort of white staining - might simply be damage to the sealer. But when I did a test clean to remove the sealer, it became clear that the stone had suffered from very deep staining and the only way to remove it would be to use a process we call burnishing.

Slate shower before cleaning Churt

Burnishing an Acid-Damaged Slate Tiled Shower Cubicle

The burnishing process is a type of polishing which involves the application of diamond burnishing pads in sequence. Each pad has a different level of grit, allowing for dirt and stains to be broken down before the stone is gradually polished. We typically use burnishing on Limestone, Marble, and Travertine, but it can be used on all manner of stone in the right circumstances. This being a vertical surface, I had to complete the process using smaller six-inch pads fitted to a handheld buffer. I started by applying the 400 grit (Coarse) pad, and followed on through to the 800 grit (Medium) and 1500 grit (Fine) pads, using a small amount of water as lubrication. I then left the tiles to dry until the next day. When I arrived back at the property, the customer remarked that the tiles looked massively improved. Nonetheless, I found I hadn't removed all the staining possible, so decided to repeat the burnishing process once - but this time used the pads without any lubrication. Once I was satisfied with the results, it was time to seal the tiles.

Sealing a Slate Tiled Shower Cubicle

My choice of sealer was Tile Doctor Colour Grow, which impregnates the stone to block ingrained dirt and staining. As the name of the product suggests, it also enhances the dark natural shades in the Slate, giving the shower cubicle a bold, healthy and rich appearance.

Slate shower after burnishing Churt Slate shower after burnishing Churt

The customer was really pleased with the end result, which can be seen in the photographs above and below. So pleased was the customer, in fact, that he asked me to quote for the restoration of his Limestone tiled patio.

Slate shower after burnishing Churt


Source: Slate Tile Cleaning and Renovation Service in Surrey

Concrete Floor Restoration Options in Older Houses

Sometimes older houses need concrete floor restoration in order to make the floor look like new again. Restoring concrete floors require repairing damaged concrete and hiding the repairs using various strategies, such as stenciling, staining, or painting.

Concrete Patching

Small cracks on the floors of old houses can be fixed by patching it with a special mortar mix designed for concrete repairs. Before applying the patch, remove any loose debris on the damages and clean them thoroughly with a wire brush. Use a vacuum to remove any remaining dust or residue. Purchase a concrete patch mix. Pour the powder in a container and add water until a good consistency is achieved. Make sure that the patch is level with the concrete floor surface. Allow it to dry completely.

Concrete Injections

Cracks and joints may also be repaired using an injectable concrete repair product, such as hydraulic mortar or epoxy. Once the product is injected into the cracks, it fills in the gaps and creates a strong bond that will protect the concrete from further damage. If the holes on the cracks are too small, new holes can be drilled into them to allow the injecting device to access the inner gaps in the crack. Before applying the product, make sure to clean and remove any loose debris inside the cracks first.

Concrete Recasting

If the floor has a large extent of damage, the entire damaged area has to be demolished first. When the damaged area is removed from the floor, the damaged steel bar supports have to be replaced as well. Afterwards, the damaged area has to be cemented again with a better grade of concrete.

Staining

Staining is a great way to cover up the repaired concrete. Concrete patches and re-casted areas may be very noticeable after repair and need to be hidden. Staining is one of the best ways to restore the concrete floor and hide the repairs from public view. This method requires the use of an acid solution that will easily get absorbed in the concrete floor. When using this method, make sure to cover all surfaces connected to the floor with painter’s tape, especially the walls and the door. 

Painting and Stenciling

Painting the floor with epoxy-based paints is a good way to hide repaired areas on the floor. Use paints specifically designed for concrete floors. Stencils are ready-made patterns that can be placed on top of the floor to create elaborate designs when painting the floor. Use stencils only after staining or painting the concrete.

Sealing

After repairing, staining or painting the floor, it also needs to be sealed to ensure that it stays protected. A concrete sealer can be applied using a paint roller or a specialized sealer spray. Make sure that the floor is completely dry when doing this. Any trapped moisture can lead to further concrete damage. The sealer should also be reapplied after two years.

Tuesday, November 8, 2016

The Pros and Cons of Terrazzo Floors

Terrazzo floors date back to the Renaissance.  Invented by the Venetians, they used terrazzo floors in cathedrals and other places of meaning. Even Michelangelo had terrazzo floors installed when he was working on St Peter’s Basilica. They have been installed in high rise office buildings, upscale doctor's offices and million dollar homes. Terrazzo floors are often known as Venetian mosaic, due to their appearance. They are made from chips of granite and marble that is placed in resin or concrete. Once the concrete or resin sets, you are left with a durable floor that resembles a mosaic. The following article goes over both the pros and the cons of having terrazzo floors installed in your home, office or place of business.

Cost

Terrazzo floors are probably the most expensive flooring you can ever have installed. They are more expensive than marble and granite. You are not only using a combination of two of the most expensive materials, but also using concrete or resin to set it. The process of installing terrazzo floors adds to the expense because it needs to be professionally installed, unlike marble, granite or concrete.

Beauty and Style

If what you want is a way to convey style, beauty and opulence, then nothing compares to terrazzo floors. You will wind up with a floor that is not only beautiful but unique. Terrazzo floors give you a look that no other floor can give you. Since manufacturers use small pieces of marble, granite and glass when making terrazzo floors, you can get a floor that is customized to your tastes and space.

Durability

Terrazzo floors, like other floors made from stone, can chip, but you really need to work at damaging terrazzo floors. They are one of the most durable floors you can have installed. The pieces of granite and marble are set in strong concrete or resin and when set, terrazzo floors will last for a long time while still looking as if it was installed the day before. You cannot compare terrazzo floors in durability to carpet, wood or even marble.

Cleaning Terrazzo Floors

Many feel that cleaning these floors is a difficult job because cleaning marble can be a chore. This is not the case with terrazzo floors. They are very difficult to stain, due to their texture. If you spill something on the floor, you can clean it up by using a mop dipped in plain water. There is no need to use cleaners that contain astringents or chemicals. There is also no need to scrub the floor.

Installation

You can install terrazzo floors yourself if you are installing tiles, but true terrazzo floors have to be installed by a professional. This makes terrazzo floors a specialized installation. Concrete or resin is first poured on the floor. On top of this sandy concrete is poured. On top of this layer the chips are placed by hand in intricate patterns. Once this is complete they are sanded down, cleaned and a sealer is applied to finish the floor. The terrazzo floor is then polished.

How to Repair a Hole in a Natural Stone Floor

natural stone floor provides a very pleasant look, but it does require some special care and attention which might, at times, be quite costly when compared with other flooring. This is especially the case if you opt to hire a professional repairer or restorer rather than attempting to do the work yourself. Here, we shall be discussing the basic steps you should follow in order to try to repair any holes that might develop in the natural stone floor.

What You'll Need

  • Sandpaper
  • Broom
  • Scraper
  • Water
  • Bucket
  • Rags
  • Paintbrush
  • Grout
  • Sealer
  • Soft cloth

Step 1: Examine The Floor

First of all, examine the floor well to check for any holes and other defects. If you notice any, try to ascertain the reason behind their development in order to be able to treat them accordingly, while making sure to prevent any new holes from developing.

Step 2: Sand the Hole

It is best that you hand-sand the hole to prepare it for the subsequent processes. Use some water to wet it while sanding for better results. Holes or small scratches will, in the vast majority of cases, be rough and have some loose small stones at the edges. Hence, if not sanded well, you will find problems filling it adequately, causing small holes to remain. This will ultimately end up ruining your work because if the hole is not filled in a solid manner, it will develop again over time.

Step 4: Clean the Hole

The next step is to clean the hole of any dust or other residues that might have accumulated around the hole’s edges and nearby areas. It is also recommended that you clean the area with some suitable cleaner diluted with some water. Before proceeding to the next step, make sure that you have allowed the hole to dry completely.

Step 5: Apply the Grout

Once you are done, start to apply some grout inside the hole. Make sure you use a good quality brand and one which is suitable for your stone. Use sparingly in order to fill the hole well. Any excess will then have to be cleaned off before drying up. Make sure you do not leave any open parts, as even if they are small, they are porous and will end up ruining the work and requiring you to repeat the whole process after a short period of time. Also, make sure to follow the particular instructions for the brand of grouting you use when applying it.

Step 6: Apply Sealer

At this point, you need to apply some sealer. You can apply it either by means of a brush or by using the tip of a soft cloth or small towel. If you are aware that your natural stone floor is very porous, it is best that you apply more than one coating of sealer for better final results.
By following these steps carefully, you will manage to repair any holes in your natural stone floors yourself.

Renovating Old Quarry Floor Tiles

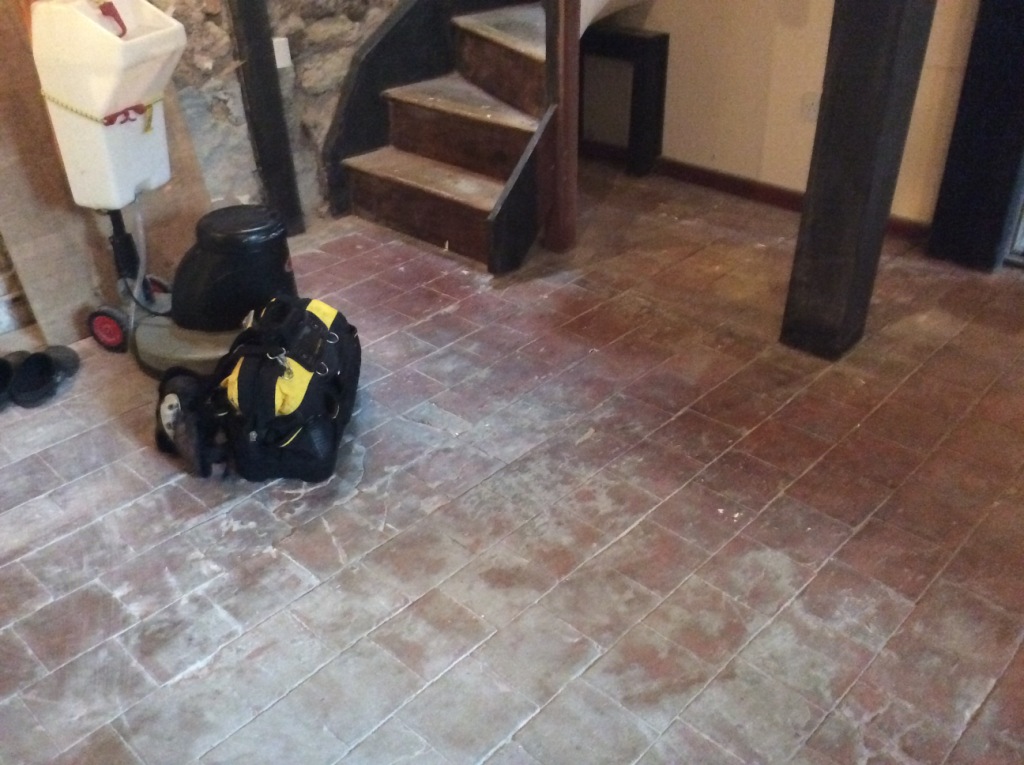
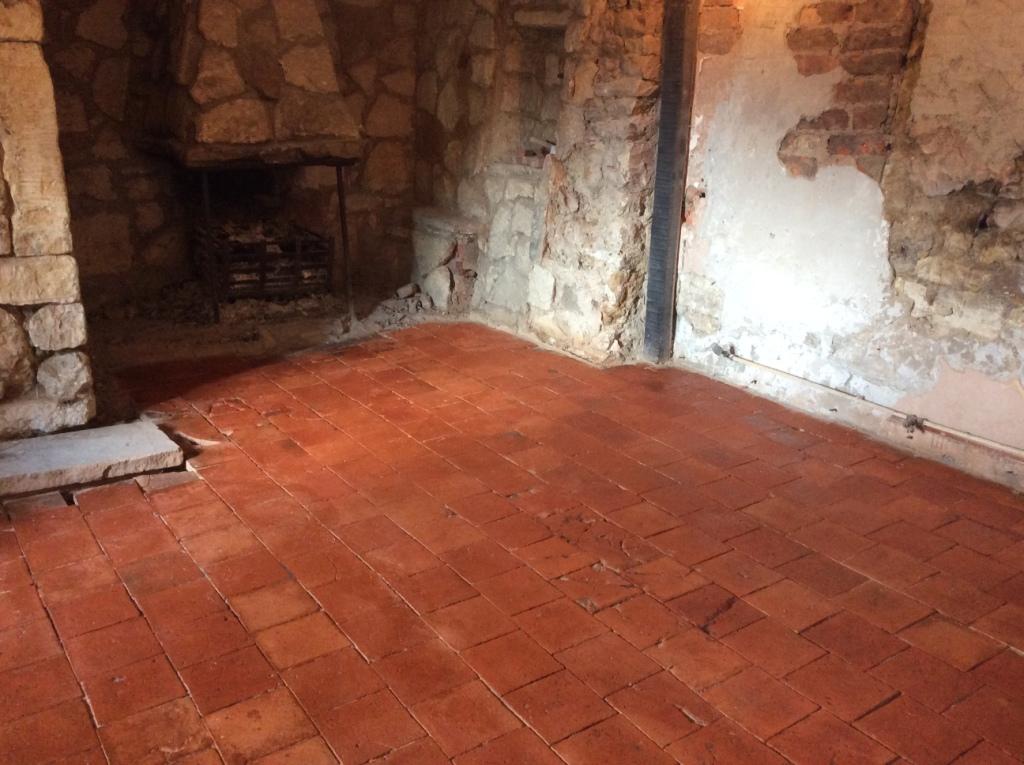
It's not every day that I get to work on a 350-year old property, however, not too long I was contacted by a client who was in the process of renovating one in the village of Ringstead, complete with an original Quarry tiled floor.

Quarry tiles before cleaning Ringstead

After removing the old flooring in the property, the client had discovered a broken-up screed of concrete covering the original tiles, the remnants of which can be seen in the photos below. He proceeded to manually scrape the screed off over the course of several days - successfully removing about 60 per cent of it - but found there to be many stubborn areas and instances where the tiles were badly cracked and would need replacing. As a passionate renovator, the client treats restoring old properties as a labour of love, and only recruits professional help when he really needs it, so it was a real compliment to be consulted to see if the floor was salvageable. I’ve worked on floors in an equally bad state before so I was confident it could be restored, I provided a quote which was accepted and a date was agreed to start the work.

Cleaning 350-Year Old Quarry Tiles

Upon arriving at the property, my first course of action was to run my rotary machine, fitted with a dry concrete cleaning brush, over the entire area to remove dust and etch the area to allow the cleaning products to permeate the surface of the screed. I then vacuumed the area thoroughly before applying Tile Doctor Acid Gel across the entire area.

Quarry tiles before cleaning Ringstead

Acid Gel is a blend of phosphoric and hydrochloric acids in gel form which helps to remove inherent grout haze, efflorescence and other stubborn staining. The product was left to dwell for 20 minutes, before I repeated the action with the concrete cleaning brush to work the product into the tiles. Acid Gel was left on for a further 10 minutes and agitated with handheld brushes to clean the stone. Following this, the resulting cleaning slurry was removed with a wet-vac machine. To complete the cleaning process, I used a long handled scraper to score along the top of the remaining concrete and break it down by applying Tile Doctor Grout Clean Up, which is essentially the liquid version of Acid Gel. I carried out this action twice to ensure the removal of all the concrete.

Quarry tiles after cleaning Ringstead

Sealing 350-Year Old Quarry Tiles

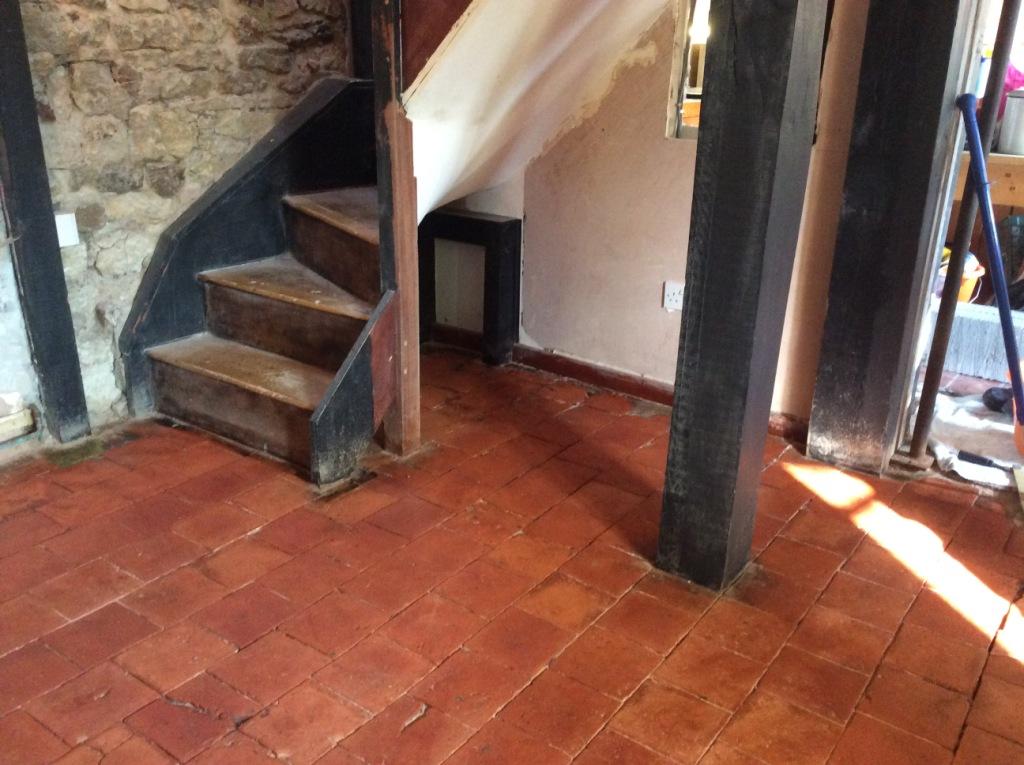
The floor was then allowed to dry for 4 days; properties of this age have no damp proof membrane to the this provided time to allow excess moisture to evaporate following the cleaning. Returning to the property, I ran some quick deal tests to check that the Quarry tiles were ready to sealed. Once I was satisfied with the condition of the floor I proceeded to apply two coats of Tile Doctor Colour Grow, our impregnating, breathable sealant which offers provides robust protection and enhances the natural reddish shades in the Quarry.

Quarry tiles after sealing Ringstead

The client was very pleased with the results. Our work has helped him massively along the way to the complete renovation of this great property. His long-term plan is to keep the Quarry tiled floor as it is, however when he encloses the area under the stairs he will use the tiles from that area to replace cracked and damaged tiles that are in the centre of the room. If more tiles he intends to source them from a reclamation yard.

Quarry tiles after sealing Ringstead


Source: Quarry Tile Cleaning and Renovation Service in Northamptonshire

Tuesday, November 1, 2016

How to Seal Tumbled Marble Tiles

If you're looking for an great way to protect your tumbled marble tiles from falling victim to excess moisture, you should consider sealing them. Well-sealed tumbled marble tiles will be considerably more resistant to mold, mildew and other tile-based filth than unsealed tiles.

What You'll Need
  • Marble sealer
  • All-natural stone cleaner
  • Small paintbrush
  • Nonabrasive washcloth
  • Breathing mask
  • Broom and dustpan
  • Vacuum cleaner

Step 1 - Clean Your Tumbled Marble Tiles

Make sure to remove any dust deposits from your tiles before proceeding to seal them. Using a broom and dustpan, thoroughly sweep the tiled area until it is completely dust-free. Alternatively, this step can be performed with a vacuum cleaner that features brush attachments. Next, remove any dirt from the tiles with the aid of an all-natural stone cleaner and a nonabrasive washcloth. It's important that your stone cleaner be all-natural, as a standard stone cleaner may have a potentially dangerous chemical reaction when combined with your sealer.

Step 2 - Apply Your Sealer

With your tiles clean, it's time to apply your sealer. If you selected a spray-on sealer, spray it across the tiled area, then smooth it out with a nonabrasive washcloth or small paintbrush. If the sealer you purchased needs to be manually applied, use a small paintbrush to spread it evenly across the tiled area. Make sure to perform this step in a well-ventilated area, and, if you feel weak from the sealer fumes, wear a breathing mask. Lastly, allow the sealer to dry for the amount of time listed on its box.

Cleaning Tumbled Marble Flooring: Mistakes to Avoid

Cleaning tumbled marble flooring yourself can be tricky. There are many common but easily avoidable mistakes that can ruin your floor.

Avoid Generic Solutions

Tumbled marble does resemble many other types of stone in a superficial way. However, you should avoid using cleaning techniques designed for most stone floors unless you have specific information saying they will work. Tumbled marble is easy to accidentally damage, particularly if you do not seal your floor, use acidic cleaners, or scrub using abrasive materials.

Use the Right Cleaners

Using a generic cleaning product, even one designed for stone, is a mistake when dealing with tumbled marble flooring. You should be able to purchase a specially designed product for your tumbled marble floor. Be sure to follow this product's instructions carefully, taking extra care to follow  the section on dilution. More concentrated cleaners will require more dilution than others. Dilution will also effect how much rinsing you need to do before you can consider yourself done.

Use the Right Tools

Use a mop and a bucket to dilute and apply the cleaner to your marble floor. You can use an old toothbrush to clean the grout, but do not scrub your floor with an abrasive tool, as that will scratch the seal.