Thursday, July 30, 2015

Repair Broken or Chipped Linoleum Tiles

Linoleum tiles are an attractive choice of flooring for home use. The tiles are made from organic materials, which include linseed oil, limestone and sawdust. Pigments are also added to the mixture, which gives the tiles a uniform color throughout. The tiles are a good choice if you prefer natural products for your floor. You also have the opportunity to mix and match tiles to create your own unique style. A properly installed and well maintained linoleum tiled floor can last for several years in good condition. However, damages are still possible, which may leave you with broken or chipped tiles. Below is a useful guide to help you fix the damage.
What You'll Need
  • Grease pencil
  • Matching linoleum tile
  • Soft-bristled brush
  • Box cutter
  • Chisel
  • Hammer
  • Pencil
  • Ruler
  • Thin cardboard
  • Scissors
  • Masking tape
  • Wood glue
  • Popsicle stick
  • Damp sponge
  • Large brick
  • Acrylic floor sealer
  • Paint roller

Step 1 – Inspect Floor

Carefully examine your tiles to identify those that are broken or chipped. Mark the damaged tiles with a grease pencil. It is easier to undertake repairs all at once. If the damage on the broken or chipped tiles isn’t extensive, proceed to Step 2. In cases where the breakage exceeds 2 inches or the tile is severely chipped, it is best to replace the entire tile.

Step 2 – Obtain Loose Tiles

Check whether you have any tiles that remained from the original installation. If unavailable, purchase a few tiles that match yours from a flooring vendor or hardware store. This allows you to create as close to a uniform appearance as you can.

Step 3 – Remove Damaged Portion

Draw a line around the area of tile you wish to remove. Use a box cutter to cut out the damaged tile. Detach the tile from the subfloor with the help of a chisel and hammer.

Step 4 – Clean the Subfloor

Clear out dust and fine debris from the subfloor with a brush. This leaves you with a clean surface, which facilitates effective attachment.

Step 5 – Cut out Replacement Tile

Create a stencil out of thin cardboard with the help of a pencil, ruler and pair of scissors. Attach the stencil onto a replacement tile with some masking tape. Use a box cutter to cut out the replacement portion.

Step 6 – Install New Piece

Spread a light coat of wood glue with the help of a popsicle stick onto the back of the replacement piece. Apply some glue along the sides of the piece as well. Fit the piece onto the subfloor. Press the tile firmly down so that it attaches well. If any glue oozes onto the surface, wipe away with a damp sponge.

Step 7 – Place a Weight

Place a large brick or weight on the tile. This facilitates proper adherence of the replacement piece onto the subfloor. Leave the brick in place for 24 hours.

Step 8 – Apply Floor Sealer

Remove the brick. Clear away fine debris with your brush. Use a paint roller to apply an acrylic floor sealer over the repaired tile. 

Wednesday, July 29, 2015

Victorian Floor Restoration

You can see from the photographs that the floor had been covered first old plastic vinyl which had been glued down with a strong adhesive and then later with a carpet.

The client had tried removing the vinyl themselves to reveal the real floor but gave up after eight hours and called in Tile Doctor.

Removing the Vinyl was hard work and care was required not to damage the floor underneath. Naturally we managed and then had to contend with the rubber matting that the vinyl was stuck to and this proved to be even harder to lift.


To get rid of the rubber matting and adhesive the whole floor had to be covered with a special product that breaks down the glue.  Once the rubber had been removed we got down to cleaning the floor and removed any remaining stubborn marks.

The revealed floor looked dull so we then sealed it using Tile Doctor Seal and Go which really brought out the color.

As you can see from the comment below the customer was ecstatic with the result.

"Just got the second e-mail with the photos - they are great and really show how much hard work went into the job.  As I said we did get several "Tile Experts" in to look at the job and they wouldn't touch the lino, so well done and many thanks again - would definitely recommend you to prospective customers.  Regards John."

Riven Slate Floor Cleaning in Lincoln

Riven Slate Floor Cleaning in Lincoln

Slate floors especially riven slate can be a nightmare to keep clean as the uneven surface of a riven tile traps dirt and makes it hard to clean. Our customer in Lincoln had this issue, but as you see from the images below we managed to get it looking like new again.

Slate Floor Cleaning

The Slate Floor Cleaning process involved a good cleaning with Tile Doctor Pro-Clean Tile and Grout cleaner, it’s an alkaline rather than acidic product that doesn’t harm the surface of the stone but is very effective at cleaning. We left the product to seep in for a while before giving the tile a good scrub to lift the soil and grime trapped into the pores of the riven slate floor tile. Once the slate tile and grout were looking clean we gave the floor a thorough wash down to remove any remaining chemical and neutralize the floor.


Sealing the cleaned Slate Floor

We left the floor to dry overnight and came back the following day to seal it using Tile Doctor Pro-Seal which is gives the floor a natural look and really lifts and reveals the colors in the slate. You can see from the pictures the difference and how amazing the colors are.

The client was so pleased he has booked us in to return and do some more work for him.

Monday, July 27, 2015

Slate Tile Cleaning And Sealing

Slate Tile Cleaning and Sealing at the Triumph Working men's club

It’s often difficult for a set of photographs to capture the difference what cleaning and sealing a stone floor can make, however I think you will agree the photographs below which were taken at the Standard Triumph working men’s club in Coventry present an amazing outcome.

The slate floor had one coat of sealer applied by a tiler some ten years ago and due to the nature of the environment it had been covered in drink spills and the resulting cleaning products, overtime this had made floor sticky and dull.


Slate Tile Cleaning Process

The initial step in the Slate Tile Cleaning process was to get it completely clean and free of any residual chemicals, we did this with the application of Tile Doctor Pro-Clean (a strong 1/2 mix with water) which we left to dwell for 15 to 20 minutes allowing it to chemically soak into pores of the slate tile. We then scrubbed the floor with a heavy weight floor buffer permitting the scrubbing action to break the soil down, we worked the soil and grout lines four square metres at a time, removing the soiled water with a wet and dry vacuum. The slate floor was then rinsed down with cold water applied at a pressure or 1200 psi with a special Spinner Tool. The whole cleaning process took around 8 hours to complete.

An inspection of the cleaned slate floor revealed ten years of wear and tear had resulted in a few holes which we repaired before leaving the floor to fully dry overnight.

Sealing the Slate Tile

The next day we sealed the surface with 5 coats of a Tile Doctor Seal and Go which is a water based sealer best for Slate floors that provides stain resistance and a durable low-sheen finish. Sealers do break down over time and given the high foot traffic over this floor we have agreed to go back once a year to provide a tile cleaning and sealer top up.

Quarry Tile Floor Restoration

Quarry Tile Floor in Weldon, Northants

I sure you will be impressed with these images from a Quarry Tile floor we did in Weldon recently. This quarry tiles were laid in the kitchen all the way to the dining room, hallway and down stairs cloakroom, at total of around 40sq metres

The tiles were recently installed and the customer called us in because they were not contented with the final result. This can be a common problem with Tilers who do a great job of leveling, tiling and grouting the floor but not knowledgeable enough about sealers. They were hoping for a high gloss finish but were left with a very dull and patchy floor.


Quarry Tile Floor Cleaning

We clean the entire floor first using Tile Doctor Pro-Clean agitated by a rotary machine fitted with a black pad. This strips most of the sealer, however, we encountered more problems with grout haze which had been trapped underneath the sealer and had not been cleaned off properly to begin with. Also there were still patches of the original sealer which had been applied over a damp floor. The grout haze was removed by hand with wire bushes and more Pro-Clean and then the entire area was blanket stripped. This is an interesting technique unique to Tile Doctor which involves applying Remove and Go mixed with Nanotech Ultra-Clean to tiles and then covering in plastic sheeting and left for several hours to allow to soak into tiles. We then used a steam stripper and a wet vacuum to pick up to remove and rinse off the products. The area was then left to dry for 2 days assisted by dehumidifiers.

Quarry Tile Floor Sealing

After this time we returned to the site to take damp metre readings and once we were happy that all areas were dry, we then applied 5 coats of Tile Doctor Seal and Go to safeguard the floor and provide a high gloss finish that the customer requested.

Refreshing A Natural Slate Paving

We were asked to survey a natural slate paving leading up to the entrance of a charming old residence in North London. The slate path had only been recently installed, grouted and sealed and the owner was not contented with the results and a request was made to resolve the situation and return the slate back to its natural colour and appearance.

We did a series of tests to ensure we could remove both the sealer and grout haze from the surface of the tile. It’s not a good practice to apply a different sealer on top of an existing product as the end results will be inconsistent and the products may be incompatible. We cleaned up the tile, sealed it and left it to weather for a few days to demonstrate to the customer the durability of the finish.

Cleaning Natural Slate Paving

All was well with the test and we got the approval to do the whole slate path. We began by cleaning the path with Tile Doctor Pro-Clean which was then washed off and allowed to dry. We then applied Tile Doctor Remove and Go mixed 50/50 with Tile Doctor NanoTech Ultra Clean; this is really a powerful combination which we left to dwell on the tile for an hour in order to soften up the present sealer and ingrained dirt. The solution was then removed and the slate tile washed down with more water.


With the sealer removed we removed the Grout Haze by using Grout Clean Up and a fair amount of elbow grease with stainless steel and polypropylene detail brushes.

Final step before sealing was to neutralise the floor with another rinse down, this time washing the tile with Tile Doctor Neutral Cleaner, it’s important that any remaining chemical is removed from the surface otherwise it may upset the sealer.

Sealing Natural Slate Paving

Finally once the slate had dried, we applied 3 coats of Tile Doctor Colour Grow and buffed off the last coat with a buffing pad to bring out the deep colour from within the Slate; the sealer was fully dry and path ready for normal use 12 hours. For maintenance we recommend using Tile Doctor Neutral Cleaner, diluted 1 to 30 with water applied with a microfibre flat mop, rinse with water and dry with second microfibre mop. The customer was very happy with the results and left the following message:

Robert’s communication was excellent and he always kept us informed on what to expect and the timescales involved. He was very reliable and punctual and the quality of his work was to a very high standard. We were very pleased with his work and overall service.
Mr. M. Vaughan, Alexandra Park, London

Restoration of Limestone Floor Tiles At A House In London

We were summoned during some major house repairs to restore the Limestone Floor tiles installed in the kitchen and utility room. This involved a good deep clean, burnishing and then sealing to restore the natural colour and appearance of the stone.

The floor was pre-cleaned with a dilution of Tile Doctor Pro-Clean and NanoTech Ultra-Clean follwed by a slow speed machine fitted with polypropylene brush, the remaining solution was sucked with a wet vacuum then rinsed with water and dried.

Some of the floor tiles in the hallway were broken so the next job was to replace them; this involves chopping out the tile and cleaning up the exposed area so new tiles can be installed and grouted.


The Limestone Tiled floor was then Burnished using the four stage Twister Burnishing pad set which strips topical sealers, ingrained dirt before finally polishing the floor into a high shine.

Once the final finish had been achieved the floor was sealed with two coats of Tile Doctor Colour Grow sealer which brings out the colour of the tile and provides a protective impregnating seal. The last step was to run a buffing machine over the floor to get that final finish.

Before parting, we advised the client to clean the floor using a neutral frequent use cleaning product such as Tile Doctor Neutral Cleaner, other products can be acidic and can actually dissolve holes in the tile over time. The customer was very pleased with the work we did and left the following comment:

Very professional, high quality job. Rob and his team were a pleasure to deal with and worked hard to meet our time constraints. The floor is unrecognisable from what it was before!
Mr. B. Chapman, London, NW8

Simply Install Marmoleum Flooring

Marmoleum flooring is the newest ‘green’ floor choice among many home owners today. The materials that go into this type of floor are natural which do not emit toxics, and thus, makes it an environmental-friendly floor choice. It is durable, soft and comfortable to walk on which does not require much maintenance as it does not attract dust. It is also resistant to spills and stains, very easy to clean, and is anti-bacterial. Installing marmoleum flooring is environmental-friendly as solvent-free adhesives can be used. Follow the step-by-step guide below to install marmoleum flooring.

Tools and Materials Needed:

  • Speed square
  • Solvent-free adhesives
  • Sealer
  • Cement
  • Water
  • Marmoleum flooring
  • Utility knife
  • Square-notched trowel (1/16 by 1/16 inches)
  • Chalk line
  • Steel hand roller
  • Putty knife
  • Hammer
  • 100lb roller
  • Scribing tool
  • Hook knife
  • Screwdriver
  • Gloves
  • Scrapper
  • Mudding knife
  • Sandpaper
  • Hairspray
  • Under-scribe tool
  • Acrylic sealer


Step 1 – Remove Any Obstacles

Wear gloves for protection from cuts. Scan and remove any obstacles, such as screws, nails and staples, from the floor. If there are any nails sticking up, use a hammer to pound them down. Use a screwdriver to screw down any screws that are raised. Pull out any staples found. Briefly scan and run over the floor using a scrapper to be sure that all obstacles are being removed.

Step 2 – Fill Seams

Mix the cement with water until it is sticky. Then, spread a layer of the cement mixture over low spots and all seams with a mudding knife. Spread it smoothly so that lesser sanding is required later on. Allow the cement to air dry.

Step 3 – Smooth Floor

After the cement is dry, scrape the excess hardened cement off using a putty knife. Sanding with a sandpaper may be required to make it smooth.

Step 4 – Mark Border Layout

After the seams are smoothed out, mark an indication of the layout of the border with a chalk line. To prevent the chalk line from smudging, spray a little bit of hairspray.

Step 5 – Installing Border Pieces

Pre-cut and dry fit the border pieces before gluing down permanently. Use a speed square to cut a 45 degree angle with a utility knife, where the border pieces meet. This is to have the joint mitered. Take the borders up. Using the square notched trowel, spread the solvent-free adhesive. Then, lay down the border pieces immediately into their correct places. Use a steel hand roller to run over the border pieces to make sure that all the edges are glued down. Do a cut at the bottom of the mitered joint so that it overlaps the piece on the top. Mark the top piece with a scribing tool and utility knife. Then, use a hook knife to finish and get the perfect cut.

Step 6 – Installing Main Floor

Lay the marmoleum flooring loosely. Roughly cut it with extra 1 inch at the borders. Fold the main flooring in half and spread the adhesive on the exposed half. Then, unfold the flooring back onto the floor and have it glued down immediately. Use the 100lb roller to run over the flooring to ensure that it is glued down properly and remove any air bubbles.

Step 7 – Trim and Finish the Floor

After the entire flooring is glued down, trim each edge with an under-scribe tool. Be sure that there is adhesive underneath the edges. Use the 100lb roller to re-roll the whole flooring again. Then, apply a few coats of acrylic sealer to finish the floor.

Sunday, July 26, 2015

Cleaning Terracotta Tiles Marked With Dirty Boot Prints

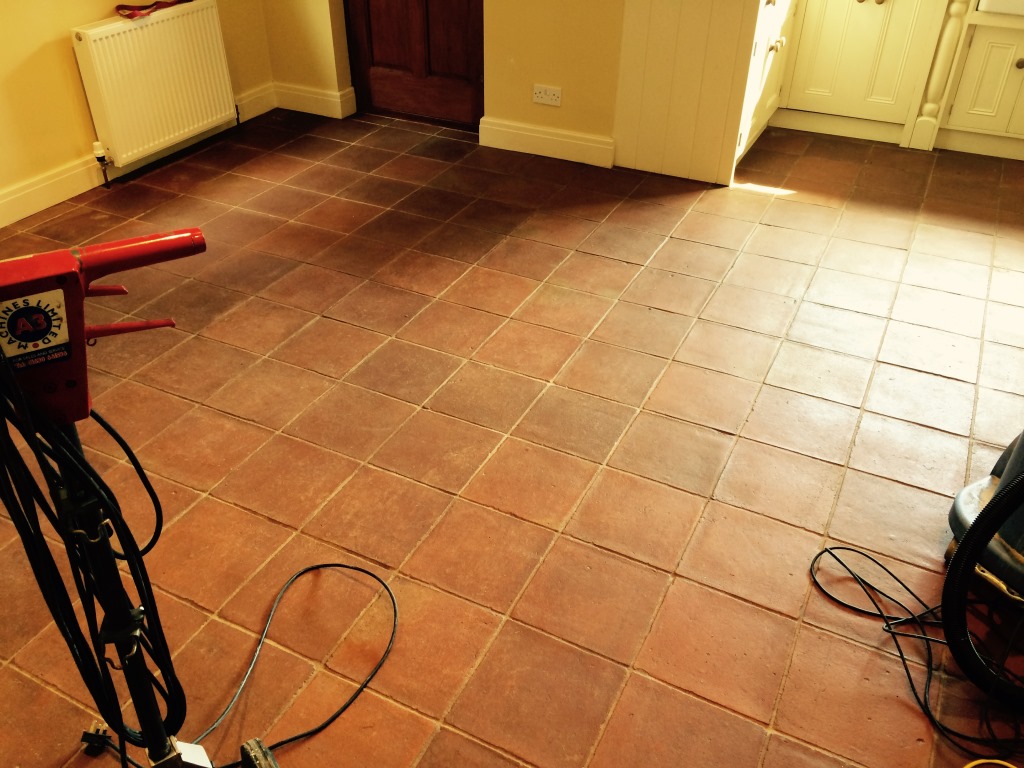
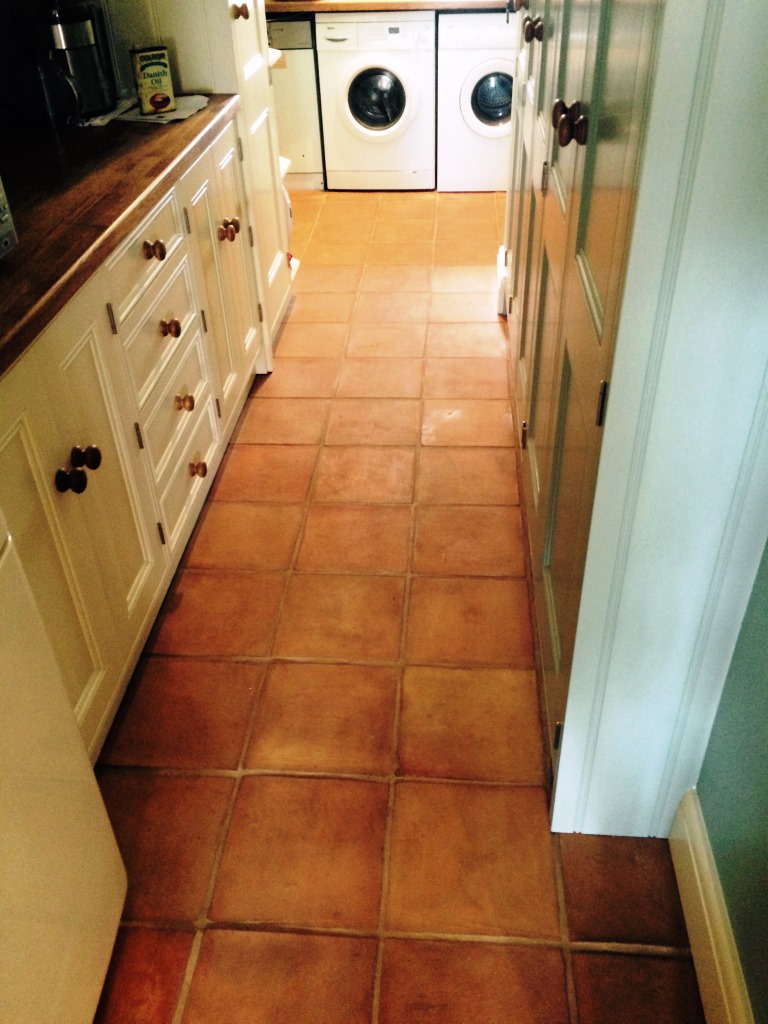
I had a rather long conversation with this worried terracotta flooring customer in Weymouth. This was a new installation of around 30 m2 of terracotta tiles. The tiler had laid the tiles and was in the process of sealing with a rather nasty rubber based yellow colored sealer when his assistant walked through from outside with dirty boots. Being a very absorbent tile the dirty prints penetrated into the tiles within the sealer leaving lovely dirty chevrons all over the new floor.

To rectify this, the tiler tried first of all with Nitromors and then with Gripex paint and glue strippers. Using these on any tile is not a good idea but on terracotta due to porosity all it was sink in and remain there along with the foot print. So at this point the tiler decided to try angle grinding one of the tiles which eventually he did manage to take out one of the prints although damaging the integrity of the tile. After visiting a tillers forum he was wrongly advised to sand the tiles with an industrial sander so he hired a sander for a day and set about sanding the tile back. After spending a fortune on sandpaper that just got combined with the rubber sealer and a day of labor he had managed to sand around 5sqm and cover the whole house with orange dust...


This was when he said ‘ok enough is enough just don’t pay me for the tiling’ and walked off the job!

I spent two days stripping the sealer out with Tile Doctor Remove and Go and cleaning with Tile Doctor Pro-Clean assisted with a rotary machine fitted with a scrubbing pad in order to remove both the sealer and the dirty foot prints. After a hot pressure wash to clear the pores and eradicate any remaining chemical from the floor we left it to dry for a week.

Sealing Terracotta Tiles

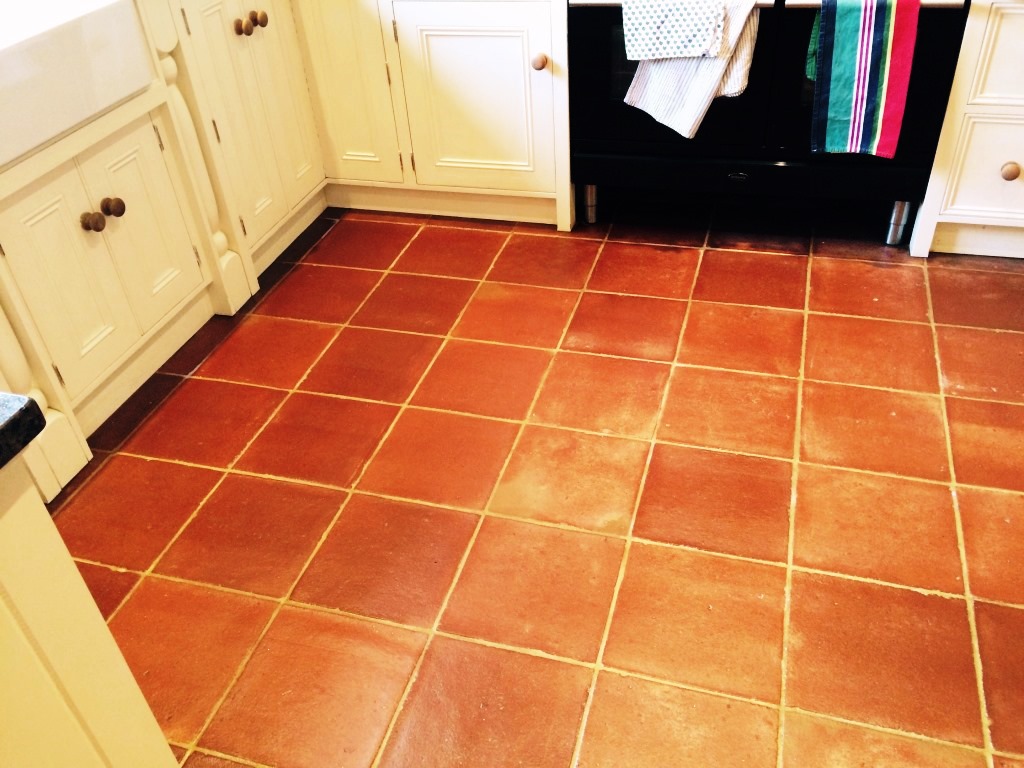
We sealed the Terracotta Tiles with Tile Doctor Seal and Go which is a low sheen water based sealer recommended for Terracotta floors. Terracotta is quite porous and in this case the tiles required a lot of sealer where tops had been sanded off and in the end it took 12 coats before it was fully sealed.

The results were outstanding, you wouldn’t know that there had been any damage at all and the customer was very happy, not only that the job cost less than what was due to the tiler.

Victorian Quarry Tiled Floor Restoration

This original Victorian quarry tiled floor was set up in the hallway of an old 1897 cottage dating back to build in the Norwich village of Great Melton. The owner was able to show me pictures from the early 1900s showing the then owner and the floor. It had been covered by carpet for several years and was covered in paint and other debris from the renovation work being carried out.

Cleaning the Victorian Quarry Tiled Floor

You can see from the imagery above that the floor was in quite a state and it took a day to whole day to clean. The floor area was only around 6m2 but consumed two liters of Tile Doctor Remove & Go which is a very strong tiled floor stripper that will just about shift anything and a further 2 liters of Tile Doctor Pro-Clean getting it clean. Once that was done we watered it down to neutralize the floor and left it to dry so it could be sealed the next day.


Sealing the Victorian Quarry Tiled Floor

We returned the following day to seal the floor, for this we used four coats of Tile Doctor Seal and Go which gives a nice low sheen finish and is recommended for these types of floor, one liter of sealer was enough to do the job. You can see a huge development from the pictured which clearly show a stunning transformation.

Slate Tile Flooring Cleaning In Northampton

The video below is from a rough slate tile flooring installed in the Kitchen and Toilet of a house in Northampton. The home owner had called us in to give the slate floor a clean and seal.

Cleaning the Slate Tile Flooring

We cleansed the slate tiled floor with a strong dilution of Tile Doctor Pro-Clean in order to strip any remaining sealer together with a buffing machine fitted with a black scrubbing pad. The buffing machine doesn’t get into the grout lines so well so we had to use hand brushes for that. The floor was scrubbed down with clean water and then left to dry overnight.


Sealing Slate Tiled Flooring

We came back the following day to seal the floor using five coats Tile Doctor Seal and Go which provides stain resistance as well as adding a low sheen to the floor.

The home owner was very happy with work we did and left the comment below.

“Effective and efficient service, would highly recommend Phil Vissian and the service provided.”
Amanda, Northampton

Dull and Stained Semi Riven Black Slate Floor Tiles in Kettering

A client left a wonderful testimonial for us who used to describe her floor as “bleak drab grey dull slate with heavily stained brown looking grout”. The slate tiles are Semi Riven Black Slate laid on the floor of a Kitchen in a house in Kettering.

Cleaning the Slate Floor Tiles

We used a solution of Tile Doctor Pro-Clean and mixed with warm water scrubbed into the floor to release the dirt. A stronger dilution of Pro-Clean was required in some areas with stubborn stains. The slate floor tiles were then washed with water using a wet vacuum to soak up the excess; we then rinsed and vacuumed the floor a second time to make sure there was no Pro-Clean residue left behind. The floor was then veiled with a dust sheet and left to dry overnight.


Sealing the Slate Floor Tiles

The following day, I used a damp tester it to make sure the slate floor was completely dry and then proceeded to apply several coats of Tile Doctor High Shine sealer which gives a nice deep shine as well as providing stain protection. I mentioned to the customer about the free bottle of Ph Neutral Tile and Stone Cleaner that Tile Doctor send out upon completion of a customer feedback to ensure she had the right product to clean her newly sealed slate tiles going forward. A lot of people don’t realize that many products available for tile cleaning in supermarkets are really designed for ceramic floors and that they can erode the sealers due to their high ph content.

My customer Ms Hayes was very grateful with the results and left the following testimonial.

“Phil did a tremendous professional stunning job on my floor. My kitchen floor was a bleak drab grey dull slate with heavily stained brown looking grout that was supposed to be cream! My floor had never been sealed in the 7 years since it had been laid. No matter how much I washed it- it always looked grim. I found out about The Tile Doctor and immediately searched for one in my area. He got back to me the next day and came to see my floor. I told him I don't care if it's perfect- I just want it 'better'. Well today I can put my hand on my heart and say- it is perfect! I am thrilled. Better yet, my husband who did not think we needed a Tile Doctor at all, agrees that our floor is amazing! The grey slate is now is shiny and beautifully cleaned and coated - the grout is cream once again! The whole floor shimmers! I took photographs all the way through the process because the procedure was so thorough and the stages of the cleaning and sealing were fascinating to me. I am so happy now, that not only will I tell others about The Tile Doctor, but I have posted my impressive before and after photos on Facebook and people from all over the world are amazed and want to have their floors done by The Tile Doctor too! I wish you could see the photos- you would be impressed too! Thank you Phil, so much!” - Mrs Hayes

Saturday, July 25, 2015

Deep Cleaning Terracotta Kitchen Tiles

This customer in Henfield was contemplating digging up her Terracotta kitchen floor and replacing it, the tiles were ingrained with dirt which had proved impossible to remove and as a consequence were left looking flat, dull and very un-appealing. Additionally she had an elderly dog that had been ill several times in the corner area and she really struggled to make it look decent again. Following a quick test I was able to persuade her to try a clean and re-seal first.

Terracotta Kitchen Tiles Before Cleaning in Henfield

Terracotta Tile Cleaning

The first step was to deep clean the floor to remove the ingrained dirt and any previous sealers. As well as the dog I had two rugby playing sons to deal with so to make it easier for the family I split the floor up into areas and worked on one area at a time.

Terracotta Kitchen Tiles Before Cleaning in Henfield Terracotta Kitchen Tiles Before Cleaning in Henfield
The tiles were first soaked in a strong solution of Tile Doctor Pro-Clean before scrubbing it into the tile and grout with a black pad fitted to a buffing machine. The tiles were rinsed, the now dirty cleaning solution extracted and the process repeated until I was happy that the Pro-Clean had done its trick and the floor was as clean as it could be. The Terracotta tiles now looked clean but completely washed out so I assured the customer that once the tiles had been sealed the colour would return and more. Unsealed Terracotta marks easily so given I left the customer dust sheets to walk on.

Terracotta Tile Sealing

I returned after two days to ensure any moisture had left the tile and proceeded to seal with six coats of Tile Doctor Pro-Seal which is highly recommended for use in food preparation areas and gives a high gloss finish whilst providing maximum stain protection. As each coat takes 40 minutes to dry I took the opportunity to clean her slate front door step as well.

Terracotta Kitchen Tiles After Cleaning and sealing in Henfield

The customer was very happy with the finished floor and I’m glad to report she has decided to keep the floor.

Terracotta Kitchen Tiles After Cleaning and sealing in Henfield


Source: Professional Tile, Stone and Grout maintenance service in East Sussex

Friday, July 24, 2015

Black Honed Slate Tiled Floor in Ambleside Pub Toilet

I guess it was unavoidable that I would be asked to clean the floor in a public toilet at some point; luckily for me this one in a pub in Ambleside Cumbria was in a reasonably pleasant condition. The floor was Black Honed Slate Tiles but the sealer had been badly etched by Uric Acid (aka urine) around the cubicles, and a foul odor was building up from the reaction with various sealers and coatings that had been applied previously which were unsuitable for a stone floor. Ambleside of course is in the center of the English Lake District which is famous for its walking and so naturally these floors tend to get a lot of muddy boots trampling over them from the thousands of tourists that visit this area every year.


Cleaning the Black Honed Slate Tiles

I manage to strip the products from the floor using Tile Doctor Remove and Go combined 50/50 with Nano-Tech Ultra-Clean followed by the use of a Steam Cleaner which neutralized the remaining odors as well as helping to remove any remaining cleaning products. Finally the floor was rinsed with water all of which was removed using a wet Vacuum and then left to dry before sealing.

Sealing Black Honed Slate Tiles

We have a number of sealing products for Slate tiles, each one has a different effect; in this case we opted for two coats of Tile Doctor Color Grow which enhances the colors in the natural stone and provides stain protection combined with a nice matte finish, which was very realistic for this situation. Nevertheless, the customer wanted a higher sheen effect so we added two coats of Tile Doctor Seal and Go to the surface as well. It isn’t always possible to do this with sealers as there can be compatibility issues.

Before leaving I left the client with a bottle of Tile Doctor Neutral Cleaner which is a PH neutral product specially designed for cleaning sealed stone floors.

Removing Tar from Quarry Tiles in Rugby

This Quarry Tiled floor was in a house in the village of Clifton-upon-Dunsmore which is close to Rugby; the tiles had been wrapped in an ugly damp proof tar membrane and then hidden under carpet for many years and the owner wanted the floor refurbishing.

Quarry Tile Tar Removal

To take off the tar membrane the Quarry Tiled floor was coated with Tile Doctor Remove and Go mixed 50/50 with NanoTech Ultra-Clean and left to dwell for 30 minutes to an hour. We then scrubbed the floor using a rotary machine fitted with a black scrubbing pad, the combined effect of the chemicals and scrubbing action broke down the tar and loosened it from the surface of the tile and was then washed down with water and a wet Vacuum. It took a whole day to complete the floor as it was necessary to remove the tar in 2 meter square sections.


The next day the floor was washed down with Tile Doctor Grout Clean-Up which is an Acid based product ideal for removing the salt in the floor, all the edges were done by hand with a tar remover solvent and steel wire wool then washed down again 4 times with cold water before being rinsed with a high pressure spinner tool.

The final step was to use a warm air dryer to speed dry the floor before it was sealed. For this we used two coats of Tile Doctor Color Grow which is a breathable sealer that will provide durable stain protection as well as allowing vapor transmission a necessary feature for old floors with no damp proof course.

Thursday, July 23, 2015

How to Paint Linoleum Kitchen Flooring

If your linoleum kitchen flooring is looking old or worn out, or if you're simply interested in changing the appearance of your kitchen without making significant renovations or repairs, painting the flooring can be a great option. By painting the linoleum flooring, you can change the color and design of the floor. This can have a major impact on the overall aesthetic of the room. Painting linoleum kitchen flooring is an easy project that can be done at home and without any prior experience. Read on for a brief guide on how to paint linoleum kitchen flooring.

What You'll Need
  • Medium grit sandpaper
  • Mop, bucket, and ammonia
  • Oil-based primer
  • Masking or painting tape
  • Oil-based paint
  • Brushes and rollers
  • Optional decorations (stencils, patterns, etc.)
  • Face mask
  • Oil-based polyurethane

Step 1 - Prepare the Kitchen Linoleum

The first thing that you'll need to do is to sand down the surface of the linoleum. You're not trying to remove the linoleum by doing this, but simply to remove the protected outer layer of the surface of your kitchen floor. This will allow you to more easily paint the floor. Make sure that you sand down the floor evenly.
Open a window or a door to ensure ventilation in the space, then mix equal parts ammonia and warm water in a bucket. You can also wear a face mask while you work, if ventilation isn't possible. Continue by thoroughly mopping the floor with this mixture. Continue until there are no traces of dirt or grime on the floor.

Step 2 - Apply Primer

Apply an oil-based primer to the surface of the floor. Lay the primer on evenly using a paintbrush. Make sure that the layer of primer is thin and completely free of holes or blemishes. The primer must also be oil-based so that it properly repels water and prevents the area underneath the linoleum paint from becoming damaged when spills occur. Allow the primer to dry completely before you continue.

Step 3 - Prepare to Paint

Before you paint, it's a good idea to set up masking or painting tape in strips along edges of the linoleum. This can help to ensure that you don't accidentally paint the wall or surrounding carpet or floor fixtures. This is also a good time to set up any stencils or patterns that you'll use to give the linoleum a unique appearance.

Step 4 - Paint the Floor

Using rollers when appropriate and brushes for more detailed work, paint the floor with an even layer of the oil-based paint. Allow the entire floor to dry completely before you apply a second coat. In most cases, 2 coats will be sufficient to cover the surface of your linoleum flooring appropriately.

Step 5 - Apply Polyurethane

Using a paint brush, apply a layer of polyurethane over the dried paint on the linoleum floor. This will further help to protect the floor from water and other types of damages and will extend the length of the paint life considerably.

Sunday, July 19, 2015

How to Seam Sheet Linoleum Flooring

Sheet linoleum flooring is inexpensive and easy to install. If you take care of the sheet linoleum flooring it will last for years. It can even outlast stone or wood. Sheet linoleum flooring is made from vinyl and produced in 12-foot wide rolls. You can cut (or have someone else do it) the vinyl to fit the size that you need. If the space to cover is wider than the width of the roll of sheet linoleum flooring then you will to piece 2 pieces together. When you do this, there will be a seam, and it is this seam that typically comes up off of the floor first. When laying down sheet linoleum flooring, you will want the seams to be as hidden as possible. Most people will use a carpet or table to hide the seam. The article below will show you to seam sheet linoleum flooring so you do not have to worry about it being too noticeable.

What You'll Need
  • Straightedge
  • Painters tape
  • Trowel
  • Sheet linoleum floor adhesive
  • Utility knife
  • Seam roller
  • Assistant
  • Dough roller

Step 1 – First Piece

Always use as much of a full piece of sheet linoleum flooring as possible. The more you use the less chance you have of having an unbearable seam. Apply the adhesive to the back of the sheet linoleum flooring. Carefully turn it over and place it on top of the floor and flush against the wall. Use the straightedge to press the back end of the linoleum down. Use the dough roller by rolling it over the linoleum. This will distribute the adhesive as well as press it down fully.

Step 2 – Place the Second Piece

The space from the end of this sheet to the wall is where the seam of the sheet linoleum flooring should be. Do not cut the linoleum just to create a seam that is centered because that will make them more noticeable. Choosing a doorway threshold is also a great place for the seam. Place the new piece of linoleum on top of the first piece. Move it down until the edge of the new sheet is overlapping the first sheet by an inch. Look closely at the design on the installed sheet linoleum flooring and adjust the new sheet until the pattern matches. Tape it down with painter’s tape.

Step 3 – Trim the Sheet Linoleum Flooring

Put the straightedge on the sheet linoleum flooring where you would like to cut it. It needs to be within that 1-inch overlap where you placed the tape. Use a utility knife by placing the blade beside the straightedge. Cut through both sheets of linoleum. Move the straight edge along the width and then cut with the utility knife. Do this until the entire length is cut.

Step 4 – Affix the New Sheet

Apply the adhesive to the back of the new sheet of linoleum and then flip it over and line up the edges. Use the straightedge to press the linoleum down along the wall. Use the seam roller and dough roller together to remove pockets of air and to press it down.

Friday, July 17, 2015

New Osprey Deep Clean ProVap Evo Vac Steam Vacuum

Every Tile Doctor has a wide range of tools and equipment they can bring to a job. Here at Warwickshire Tile Doctor we recently invested in a new ProVap Evo Vac Steam Vacuum machine from Osprey, a leading supplier of efficient industrial steam cleaning equipment in the UK.


Steam cleaning is an environmental cleansing solution and excellent for general cleaning, sanitation and degreasing, it’s also a powerful tool for handling stains that are proving particularly tricky to shift. The ProVap Evo Vac runs on domestic 230v electricity so it’s ideal for tackling domestic and commercial jobs, it also pumps out 9 bars of steam pressure so as you can image it’s ideally suited to Health and Residential care environments and clean rooms where the fight against MRSA and other “Superbugs” are a big concern.

Victorian Tiled Floor Reclamation in Lewisham

I’m not sure if Tile Doctor is the reason for this but there seems to have been a marked increase in the restoring of floors that have been found hidden under carpet; this particular floor were Victorian Tiles and the lady who owned the house had discovered it after lifting the carpet that had been down for 15 years and wanted to make a feature of it. The carpet had done a reasonable job of protecting it but it was dull and there were what appeared to be white paint spots on the surface.


Cleaning a Victorian Tiled Floor

I started the cleaning process using a solution of Tile Doctor Nanotech Ultra-Clean which is an abrasive tile and stone cleaner mixed 50/50 with Tile Doctor Remove and Go which is a multi-purpose tile friendly stripper that can remove sealers and other coatings. The working space was quite tight so this was applied to half of the floor and left to seep in for an hour while setting up equipment. After an hour I scrubbed the floor using a rotary machine fitted with a black scrubbing pad and plain water. The dirty solution was then expelled using a wet vacuum before repeating the process on the other half of the floor. The tiled floor was then rinsed twice thoroughly before using a steamer to clean deep into the pores of the Victorian Tile.

Sealing Victorian Tiles

The next step was to Seal the Floor but it needs to be dry first, fortunately I have an industrial airmover fan that speeds this along nicely. The floor was sealed using 5 coats of Tile Doctor Seal and Go which provides stain protection along with a low sheen finish that really brings out the beauty in Victorian Floor tiles. The transformation was quite obvious and the owner has very happy with the result and left the following testimonial.

“Fab Service, Great result, will recommend.”

Cleaning Limestone Tiled Floor in Fulham

This Limestone tiled floor hadn’t been cleaned properly for 5 years and we were tasked to clean and reseal, hopefully you can appreciate the improvement in the photographs.

Cleaning Limestone Floor Tiles

The first part was to scrub the Limestone tiles with a rotary machine fitted with a black scrubbing pad and a solution of Tile Doctor Pro-Clean which is a strong multi-purpose alkaline cleaning product designed for use on stone. A strong dilution of Pro-Clean can remove sealer but it was apparent some sealer was still present on parts of the floor so Tile Doctor Remove and Go which is dedicated to remove coatings was applied to remove the remaining seal.


The floor was then washed properly with clean water to expel any cleaning products and we then used the Twister Burnishing Pad system with a rotary machine to complete the cleaning process and polish the floor. The pads come in four different colors and you work your way through them one by one until the floor is thoroughly cleaned and polished.

Sealing Limestone Floor Tiles

Once the floor was dry we set about sealing it using two coats of Tile Doctor Ultra Seal which is a no-sheen natural look penetrating sealer designed to provide maximum stain protection on natural stone floors including Limestone, Granite and Marble. The final step was to buff the floor to a nice shine with a rotary machine fitted with a white pad.

The client was extremely happy with the result and has since recommended us to others.

Renovation of Ebony Slate Tiled Floor

The video below are of an obsidian slate tiled floor in the kitchen and utility room of a house in Knatts Valley, Sevenoaks Kent, it was laid around six years ago when the kitchen was set up. The owner was now having the whole kitchen refurbished and was considering laying a new floor as the current slate looked so tired and was difficult to clean.

Cleaning Black Slate Tiled Floor

On a normal occasion, I would use a strong solution of Tile Doctor Pro-Clean solution mixed with Tile Doctor Nanotech Ultra-Clean and a floor buffing machine, but due to the damaged nature of the slate, the floor would have to be scrubbed manually. The floor had been sealed originally and although old and broken there was still a lot of sealer on the floor which all had to be taken off. I decided to use the blanket system, which involves a mixture of Tile Doctor Remove & Go mixed with Nanotech Ultra-Clean 70:30 mix. This mixture was applied to floor, and covered in plastic to prevent the solution from drying out. This was left on the floor for two hours, and then scrubbed off, you can just use a natural bristled scrubbing brush, but I find them cumbersome with the solution, so I opt for oversized pan scrubbers, which are pliable for getting into deep riven tiles. As the solution was scrubbed it was rinsed with water and removed with a wet vacuum. When everything was removed for from the floor and vacuumed up, I rinsed the floor again with water and vacuumed up to ensure all the solution had gone, the floor was then left for 48 hours to ensure it had fully dried out.


Sealing Black Slated Tiles

The slate floor was sealed using five coats of Tile Doctor Seal & Go, which despite being a low sheen finish, it really enhanced the color of the black slate giving it more depth. The tiled floor was ready for light foot traffic in a few hours, achieving a full cure in 24 hours. The beauty of using a topical sealer such as Seal & Go on a destroyed stone is that the feel of the stone is smoother and therefore easier to mop. For everyday cleaning purposes we recommend Tile Doctor Neutral Cleaner, diluted 1:30 with water.
The client was very pleased with the result and was also glad not having to replace the floor.

Wednesday, July 15, 2015

Quarry Tiled Floor Cleaning and Removal of Grout Haze

A Quarry Tiled floor in a kitchen and family room of a cottage in Kemsing, Kent. The cottage was undergoing a full renovation and extension, and the quarry tiled floor was recently installed, however it was not sealed prior to grouting, and a grey grout haze was now sitting across the whole floor. Quarry tiles are highly porous and if not sealed before grouting the grout sitting on the tile soaks in leaving the colour of the grout as a haze over the tile.

Cleaning Quarry Tiles

There had been a number of tradesmen working constantly on the premises so it was difficult to tell what was grout haze and what was builders mess so I the first job was to give the floor a good clean. For this I used a strong mixture of Tile Doctor Pro-Clean diluted with water in a 3:1 ratio. I also added a squirt of Tile Doctor NanoTech Ultra-Clean” which is a nasty cleaner and processed it to apply the solution to the floor. I left the solution to seep in the floor for a short while and then scrubbed the floor using my weighted floor scrubbing machine fitted with a black 17inch scrubbing pad. The cleaning scum was removed using a wet vacuum and we could now see all the grout haze quite clearly.


Removing Grout Haze from Quarry Tiles

In removing the grout haze, one part Tile Doctor “Grout Clean-up” was mixed with three parts water and poured into a spray bottle; Grout Clean-up is a product specifically designed for removing grout haze. This was then sprayed onto the floor, covering an area of around 1m2 and spread so it covered the grout haze evenly. This was allowed to seep in the tile for three to four minutes before I agitated the solution by hand with a pan scrubber and water. This was then vacuumed up before I took a scrubbing brush and clean water from another bucket and scrubbed the area, before again vacuuming up. This ensured that all the formula had been cleansed from the floor; this process was repeated across the whole floor, working on 1m2 at a time and then left to dry ready for sealing.

Sealing Quarry Tiles

The floor was now ready for sealing; Quarry tile floors can accept two types of sealer, a topical sealer or an impregnated sealer. I usually recommend Tile Doctor “Seal & Go” for Quarry tiled floors which is a Topical sealer as it is easier to maintain. On this occasion however the client wanted to wait until they had completed decorating and was happy to seal the floor themselves, so I gave them tips on what sealers to use and how best to use them and left them to it.

Renovating a 150 Year Old Quarry Tile

150 year old quarry tile rehabilitation at a School near Peterborough in Northamptonshire. The school had a lot of issues with this floor over the years and had called in another cleaning company several months prior but found that within weeks the sealant they had applied had started to bubble and peel off. The floor was suffering from ongoing dampness problems in some areas, which wasn't unusual for a floor in an old building as damp proofing is a relatively modern concept. Tile Doctor was called in to try to rectify the issues.

Cleaning Quarry Tiles

The work was booked to be carried out before Christmas and we spent hours stripping the tiles with Tile Doctor Pro-Clean flustered with a buffing machine fitted with a black scrubbing pad with little affect. To resolve the problem we resorted to getting down on hands and knees with a steamer and scrapper and spend the next 3 days taking off several coats of sealant and wax stripping quarry tile floor. The floors were then allowed to dry for ten days over Christmas.


Sealing Quarry Tiles

We returned during the New Year and took damp meter readings from the floor to ensure it was dry before sealing. The choice of sealer was vital given the floor was 150 years old and it was essential we chose one that was breathable to ensure any dampness could permeate up through the floor and not get trapped causing a problem. We settled for Tile Doctor Color Grow which is breathable and offers good stain protection as well as enhancing the color in the tile, two coats were sufficient to ensure to seal the floor. The final step was to buff the floor with a rotary machine fitted with a white pad to bring out the shine.

Quarry Tile Maintenance

The school had faced problems maintaining this floor in the past so I returned to site the following week to explain the best method for cleaning the floor going forward; this essentially involves using two buckets, once containing cleaning solution and another to rinse out the mop, I also gave them a complimentary bottle of Tile Doctor Neutral cleaner and a white buffing pad to point them in the right direction. Neutral Cleaner is a PH Neutral formula which unlike most acid products will not degrade the sealer over time.

Restoration of a 16th Century Quarry Tile

We were contacted by a client who was keen in our no obligation home survey who wanted a quotation for restoring their Quarry Tiled floor. It was an interesting property which would probably be best described as a quirky old cottage dating back to the 16th century; it was probably built to house workers from the neighboring farm and the owner had decided to renovate the original quarry floor tiles which were in a bad way and effected by damp due to a lack of damp proof course and the tiles being laid straight onto a bed of peat. It's quite amazing when you think that these tiles had been laid over 400 years ago and were still serviceable.

Cleaning Antique Quarry Tiles

We started by steaming off all the old Sealers, Soil and Waxes that had been applied over the years, we then applied neat Tile Doctor Pro-Clean mixed 50/50 with Nano-Tech Ultra-Clean and left it seep in the floor for 20 minutes, the two products combined create a powerful cleaning agent which is still safe to use on tile and stone. The tiles were then scrubbed using a rotary machine fitted with a black pad to work the solution into the floor and then it was left to dwell for a further twenty minutes. The grimy solution was then removed using a wet vacuum which I can highly recommend for removing liquids from floors.


The next part was to use our Tile Spinneret tool which is fed from a heavy machine fitted into our Van. Often referred to as a truck mount system the tile spinner power rinses the floor with a high pressure warm water jet wash and at the same time sucks the soiled water back to a recovery tank in our van ready for disposal.

The client had to make a visit abroad at this time so we left the newly cleaned floor for six weeks to allow it to fully dry out before we came back to seal it.

Sealing Antique Quarry Tiles

After six weeks, we found a couple of areas were still showing a slight damp problem and so we dried the tiles concerned with heat guns to make sure it was bone dry. Now that the grime had been removed from the tiles we could also see that they had lost most of their color and so it was necessary to apply a specially formulated red tile coloring product over the whole floor which we left for an hour to seep in before using a polishing machine to make sure it was well ground in and evenly distributed across the surface of the quarry tiles. The next step was to seal the tiles to and for this we choose a product called Tile Doctor Seal and Go which I can highly recommended for sealing quarry tiles and it gives a nice low sheen effect. Six coats of sealer where needed in total which took some time to apply as you have to let the sealer dry before applying the next coat. Finally, it was time to buff the tiles to a nice shine using our polishing machine fitted with a Buffing Pad.

This restoration was a tough assignment and certainly took some time, but I think you will agree our efforts have made a significant improvement to the floor.

Cleaned and Sealed Italian Riven Slate Tiled Floor

This Italian Riven Slate tiled floor set up in the dining room of a house in Boston, Lincolnshire was in dire need of a good clean and re-seal. This clip allows you to see large areas where the surface has faded and become soiled which was probably due to the sealer wearing off allowing dirt to settle in the riven surface of the slate.

Cleansing Italian Riven Slate floor tiles

We set about scrubbing the floor with a rotary machine fitted with a black scrubbing pad along with a dilution of Tile Doctor Pro-Clean which is an effective Tile and Grout cleaner especially recommend for stone floors due to its alkaline formula. It's also quite good at stripping sealers from floors but it wasn't too much of a problem on this floor.


The next process was to get into the grout lines with stiff brushes in order to give the grout a good scrub, this step has to be done by hand as the scrubbing pads can struggle to reach the grout. The next step was to remove the soiled cleaning solution with a wet vacuum and wash the floor down with clean water to remove any remaining cleaning product and neutralize the floor before the next step of sealing.

Sealing Italian Riven Slate floor tiles

Once the floor was dry we came back to seal it using two coats of Tile Doctor Color Grow which really does help to bring out the natural colors in the slate and will protect the tile and grout from stains going forward.

The job took two days in total and the client was absolutely delighted with the improvement in the floor.

Tuesday, July 14, 2015

Dealing with tricky flooring problems

This Concrete floor at a house in the market town of Bridport had been coated in bitumen which the owner wanted removed. The property had only recently changed hands and the bitumen had been used as an adhesive to hold down the previous flooring which the new owner had removed during renovation. Removing the Bitumen however was a different matter and hence we got the call.

Concrete Floor Bridport Covered in Bitumen before cleaning

Removing Bitumen from Concrete

Tile Doctor has a product for most things in its range and I’m happy to say I was able to clean up the floor using Tile Doctor Remove and Go which was left to soak into the bitumen to soften up before attacking it with a black pad fitted to a Numatic buffing machine which was weighted down to improve traction. Some areas were stubborn to remove as you can imagine so to soften it further I used an Earlex Steamer and finally a Tile Doctor Diamond encrusted burnishing pad to cut into the concrete very slightly and remove most of the bitumen that had sunk below the surface.

Concrete Floor Bridport Covered in Bitumen after cleaning

The results were as good as they could be and the customer was very pleased as she said it made the whole room look much lighter.


Source: Floor Cleaning advice for hard floors

Sunday, July 12, 2015

2 Types of Tile Saw Blades

If you are looking for blades that will cut tile, marble, granite, or any other type of stone, then you are looking for what are calledtile saw blades. The type you use really depends on the type of project you are doing, and the amount of time you have. The two main types of blades are wet and dry. This usually refers to some sort of diamond blade. For instance, one type of wet tile blade you can use is a continuous rim, diamond blade, and it uses water for cooling. An example of a type of dry blade is a turbo diamond blade. A wet blade will allow you to do most jobs as well as the dry blade. This is because of the two different types of tile saws they are used with. Below are the two main types of blades, the types of saw they are used with, and what makes them useful.

1. Wet Tile Saw Blades

Used with wet table saws, they can be used for just about any stone cutting project. Wet ceramic blades have to be used with water. Take this into consideration, because you will need a source of water. You cannot, and should not use a wet tile saw blade without water. Wet blades have a longer life because water is used to keep them cool when in use. They are safer to use since continuous rim saw blades won’t cut through skin quiet as fast as some other blades. The water helps make a smoother cutting course. They are great for large projects. If you use a cheaper style and quality of wet-tile blade, you will most likely get wet, so be sure to pick a good quality blade. A Diamond Premium Wet tile blade will cut through tile, stone and porcelain. Multi-purpose Diamond wet saw blades are good for fiberglass, cutting tile and stone.

2. Dry Tile Saw Blades

Used with dry tile saws. These will not be used for every stone cutting project, because dry tile saws are hand-held. Due to this, you won’t consistently have control over the quality of the cuts you make. It may be difficult to make your edges smooth and even with a dry saw blade for certain projects. You may like to use dry saw blades because dry tile saws are easier to set up. All you have to do is plug it in. Dry saw blades are great for removing old tile that needs to be replaced. When using a dry blade for cutting there may be ceramic tile dust and debris, which means you will have a mess. Diamond MK-304CR 157770 7" Dry Cutting Blades are good for cutting hard ceramic tile, and is good for most tile jobs. The Diamond Masonry Blade can be used to cut concrete, masonry, or stone. It can actually even be used on a wet tile saw. Make sure that whatever type tile saw blade you use, that you have all the necessary safety equipment, such as protective goggles.


Saturday, July 11, 2015

Quarry Floor Refurbished in Borwick, Lancashire

This Quarry tiled floor was set up in a house that was built circa 1920, well before the invention of damp proof course. Although there was no evidence of damp there was quite a bit of old plaster, trapped dirt and paint splashes on the quarry tiles, the video above gives you a good idea of the state it was in.


Cleaning Quarry flagged flooring

We cleaned the Quarry tiles first with a strong solution of Tile Doctor Pro-clean which enhanced the floor but had a hard time to shift the stubborn areas. Something stronger was required to we applied Tile Doctor Grout Clean-Up on the Plaster and Grout followed by a small amount of Tile Doctor Remove and Go to get rid of the Paint Splashes. The floor was then washed down with clean water which was then vacuumed off the floor using a wet vacuum and left it to dry overnight.

Sealing Quarry floor tile

The following morning, we used a damp meter to verify the floor had dried sufficiently for sealing, it's always possible to hurry this along with an industrial fan or heat gun for small areas. In this case the floor was fine and we proceeded to seal it using four coats of Tile Doctor Seal and Go which results in a nice low sheen finish as well as providing lasting stain protection, four coats of Seal and Go were needed to seal the Quarry Tiles.

I think you will agree the floor looks transformed.

Victorian Tiled Hallway Washing in Richmond

This particular hallway floor was at a property in the London borough of Richmond which had just been sold and the new owner wanted the Victorian tiled floor cleaning before she moved in.


Cleasing a Victorian Floor

To clean the floor I applied a 50/50 mix of Tile Doctor Pro-Clean and NanoTech Ultra Clean diluted with water. Pro-Clean is a strong alkaline cleaner so it won't damage the tile like some acidic cleaners and NanoTech Ultra Clean adds tiny abrasive particles to the solution that can help penetrate into the tile to lift out the dirt. This was left to dwell and soak into the floor for a while before being agitated using a rotary machine fitted with a black scrubbing pad. This worked to clean the floor and strip any remaining sealer from the tile; the grimy solution was eliminated from the floor using a wet vacuum and then thoroughly rinsed to remove any cleaning products before sealing and neutralize the floor.

Sealing a Victorian Floor Sealing

The floor was dried using an floor blower, which is a like an industrial hair dryer, before being sealed with five coats of Tile Doctor Seal and Go which is an ideal sealer for Victorian tiled floors as it leaves a low sheen finish whilst providing excellent stain protection. You have to wait for each coat to dry before moving on to the next so it was a long day, luckily the house was empty which made the job easier.

Terracotta Tiled Floor Sealing

Although we are officially the East Surrey Tile Doctor, we often get requests further afield through customer recommendations, this particular Terracotta Tiled floor was in Brixton, South London. You can see from the video above that the floor was not looking its best and had been splashed with paint.

Terracotta Tile Cleaning

To get the tiles cleaned we applied a strong dilution of Tile Doctor Pro-Clean mixed 50/50 with NanoTech Ultra Clean which combines well to produce a heavy duty alkaline cleaner/coatings stripper with an cleaner containing tiny nano sized abrasive particles that work deep into the floor. This mixture is ideal for dealing difficult floors, its best to let it seep on the floor for 10 to 20 minutes before working it into the tiles with a rotary machine fitted with a black scrubbing pad.


Once that was done the dirty solution was removed from the floor using a wet vacuum and we were then able to see a few spots where old wax remained on the floor. To deal with the wax Tile Doctor Remove and Go, which is a powerful coatings remover, was applied to the floor and left to seep in for a while before rinsing thoroughly with clean water and then treated with a steam cleaning machine to ensure the floor had been neutralized of all chemicals. It is important not to leave a trace of chemical on the floor as they could react with the sealer.

The floor was still quite wet at this stage with small puddles of water forming in the dips of the uneven floor; the wet vacuum took care of most of this but the floor was still too damp for sealing so I left a couple of air blowers to assist with the drying of the floor and returned after two days to start the sealing.

Terracotta Tile Sealing

Once we returned, the floor was mainly dry but there were a couple of damp spots which I took care of with a heat gun. Tile Doctor Seal and Go was used to seal the floor; Terracotta can be very spongy so eight coats were required to completely seal the floor so it was some time before it was finished.


When I was done, I gave the customer instructions on how to maintain the floor. He was over the moon with the result and said that it had far exceeded his expectations.

Another happy customer.

Latex Glue Taken Out from Factory Floor in Croydon

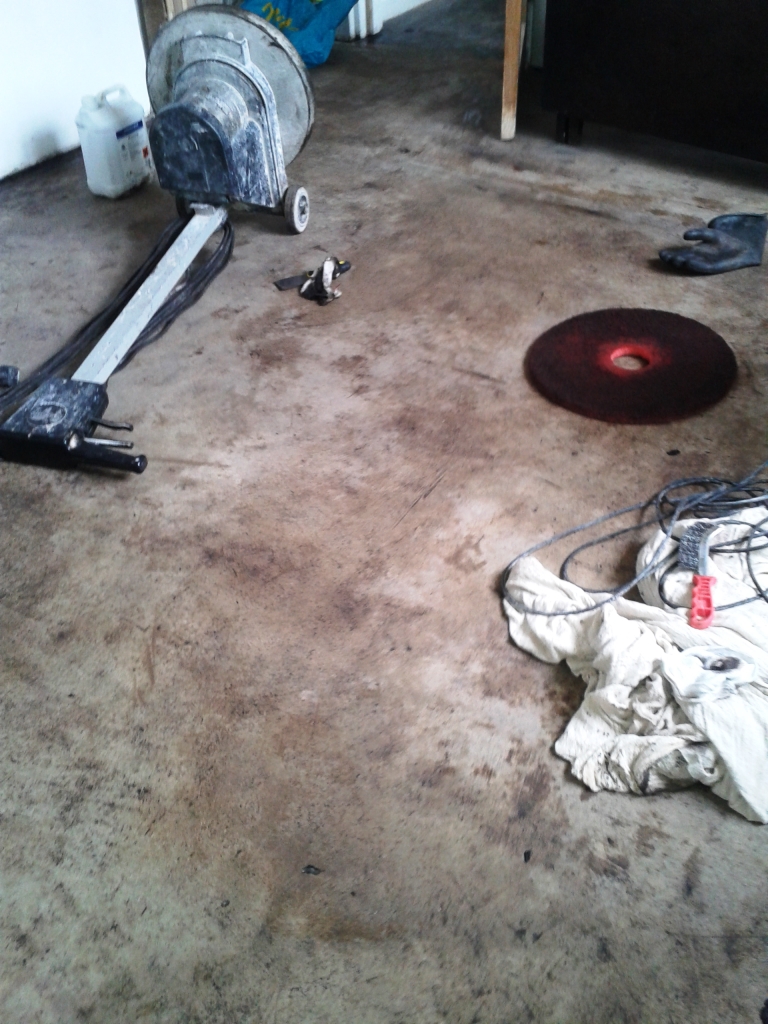
We recently carried out a clean for a printing company in the London Borough of Croydon, who had eliminated some machinery and had found that the exposed floor had large amounts of latex glue left on the floor. In fact the floor was in such a bad state due to the amount of dirt, oil and glue no one could determine what type of floor we were dealing with.

Factory Floor Cleaning

My first task was to scrub the dirt away using a strong dilution of Tile Doctor Pro-Clean followed by a good rinse, Pro-Clean is a strong alkaline cleaner so it is safe to use on all kinds of floors and won't eat into the surface like an acidic cleaners. Once the dirt was extracted we discovered the floor was in fact resin based.


Latex Glue Removal

The next we did was remove the glue for the floor which was really hard to do due to the thick build-up. We first started with steamers to heat the glue and then used large floor scrapers to lift as much as we could, finally we soaked the area with Tile Doctor Remove and Go and left the solution to dwell for an hour after which we were able to scrape the remaining glue off.

Last but not the least we gave the floor one more scrub with a weak dilution of Pro-Clean and a final rinse.

Friday, July 10, 2015

4 Tips for Planning a Tile Layout

Tile layout is an easy DIY project, which many homeowners opt for when remodeling their home. Replacing old flooring with tiles is a task that can add value and beauty to a house. If you are planning to undertake this task, consider some tips for planning your tile layout, in order to achieve a professional result. Proper tile layout will give you the chance to complete the task fast, in a hassle-free way.

1. Measuring

The first thing you need to do is measure the floor or the walls you are tiling. It's important is to measure properly, calculating for the shelves, windows or anything that is in the way. Proper measurement is the cornerstone of a successful task without sloppy work. When measuring, always include a few inches for the grout. If you do not include the grout in your initial plan, the entire task might fail.

2. Installing the Tiles on a Flat Surface

Whether you are installing floor tiles or wall tiles, you need to ensure a flat surface. You will most likely find edges and cuts, so plan ahead and consider the tile layout based on the surface and the obstacles you will have.

3. Starting at the Middle

Contrary to what most people believe, when installing tiles, you should never start from the wall corners. Tile layout should start from the middle of the space, and continue following a square pattern. That will save you from possible alignment mistakes. You should always tile the wall borders last, because in some cases, walls might not be straight and completely parallel to each other.

4. Draw the Layout

Most people do not actually design the layout on the floor or walls, but that is something that will help you tremendously. Take chalk and draw the tile design on the floor or wall to give you a complete idea of how your project will look when you are done. Moreover, drawing the layout will give you the chance to fix any possible mistakes you made while measuring. Draw the design of the tiles and count them so that you know how many you need. Of course you will need to buy a few more just in case, but you will avoid costly mistakes.

5. Cut Carefully

One of the most common mistakes people make is that they cut the tiles too early. You need to cut the tiles only when you are ready to install them. You can check the initial layout and see how you want the corner cuts to be. Or, you can decide to increase or decrease the grout size so that you can finagle the measurements.

6. Plan According to the Space

One of the best things you can do is plan the tile layout according to the room you are tiling. If the layout is correct, you can make even a really small room appear larger. Use smaller tiles in a tiny space, and large tiles in a spacious room, to add to the optical impression with your tile layout.

Thursday, July 9, 2015

Reconditioning Terracotta Tiles in Wilmslow

This Terracotta tiled floor set up in a house in Wilmslow had become black and discolored in areas due to the customer being badly advised on what sealer to use themselves; this resulted in the sealer staying tacky and turning black over time

Cleaning Discolored Terracotta Tiles

To get rid of any remaining sealer and deep clean the Terracotta tile we used a strong dilution of Tile Doctor Pro-Clean worked into the floor with a buffing machine fitted with a black scrubbing pad. Pro-Clean is an ideal cleaner for natural floors due to its alkaline formula which doesn't eat away at the tile like an acidic cleaner, it's also very good for cleaning up grout however I find that's best tackled manually using a stiff brush.


Last step in the process was to remove the soiled cleaning solution with a wet vacuum and then wash the whole floor down with clean water in order to neutralize it before sealing, we then left the floor so it could dry overnight.

Sealing and Coloring Terracotta Tiles

The laste step was to seal the Terracotta floor and for this we applied Tile Doctor Seal and Go which is a water based sealer recommended for Terracotta floors, it provides stain protection and a low sheen that lifts the look of the floor. Seven coats were required due to the porosity of the Terracotta tile.

Refurbishing a Victorian Tiled Hallway in Kenilworth

We were asked to take a look at this Victorian tiled hallway floor at a house in Kenilworth, the owner was interested to restore it back to its original condition and there were a number of missing tiles that need replacing and there were traces of paint and adhesive along the edges indicating it had been previously covered over, probably by linoleum.

Restoring Victorian Tiles

The first thing to do was to replace the missing tiles, fortunately replacements are still available so it was just a question of making the rest of the floor look as new as the replacements. We set about cleaning off adhesive from the edges of the floor which had to be done by hand using Tile Doctor Remove and Go combined 50/50 with NanoTech Ultra-Clean which creates a powerful stripper and cleaner. The resultant mixture was applied with a brush and left to dwell for fifteen minutes in order to break down the glue and old paint; this was an arduous task involving scrapers, wire wool and a lot of elbow grease, in total it took around five hours to get the edges completely clean.


The next step was to give the rest of the Victorian Tiles a deep clean for which we used a mop to apply Tile Doctor Pro-Clean diluted 1 to 5 with water and left to dwell on the floor for ten minutes. NanoTech Ultra-Clean was then applied over the top of the Pro-Clean and worked in with a buffing machine fitted with a black scrubbing pad

The dirty water was picked up with a wet and dry vacuum, and then mopped with Tile Doctor Grout Clean-Up which is an acid based product usually used for removing grout from the tile surface but also good for removing salt deposits which can happen on old floors with no damp proof course. The product was left for five minutes and then given a thorough rinse with fresh water to remove any leftover chemical and then left to dry overnight

Sealing Victorian Tiles

We came back the following day and started work by replacing the tiles I mentioned earlier. To seal it we applied four coats of Tile Doctor Color Grow which provides durable stain protection whilst enhancing color it also helped to improve the match between the old and new tile.